

Oh, banana pudding! Just saying the name brings back such warm fuzzy feelings, doesn’t it? It’s pure comfort, like a hug in a bowl. For me, it’s tied to lazy summer days and family gatherings. I used to struggle so much with getting the texture just right – sometimes it was soupy, other times the wafers turned to mush! But finding this classic recipe, which really strikes that perfect balance between that no-cook instant pudding creaminess and a rich, homemade custard flavor, has been a game-changer. It’s surprisingly easy, too, even though it looks super impressive. Catherine’s whole approach on Unfold Recipes is about making those elegant desserts totally doable for us home cooks, and this banana pudding is a shining example of that. Trust me, this is the banana pudding you’ll want to make again and again!
- Why You'll Love This Classic Banana Pudding
- Classic Banana Pudding vs. Magnolia-Style: What's the Difference?
- Ingredients for Perfect Banana Pudding
- How to Make Banana Pudding: Step-by-Step
- Tips for the Best Banana Pudding
- Make-Ahead Banana Pudding and Storage
- Banana Pudding Calories Per Cup: A Nutritional Snapshot
- Frequently Asked Questions About Banana Pudding
- Share Your Banana Pudding Creations!
Why You’ll Love This Classic Banana Pudding
Seriously, who doesn’t adore a good banana pudding? This recipe is a winner for so many reasons:
- So Easy, So Impressive: Even if you’re new to making puddings from scratch, you’ll find this recipe totally manageable. It looks elegant enough for company but is simple enough for a Tuesday!
- Crowd-Pleaser Guaranteed: This pudding has that universally loved flavor combo—creamy vanilla, sweet bananas, and soft, chewy wafers. It’s a hit at every potluck, picnic, or family dinner.
- Perfect Texture Every Time: We nail that ideal balance where the creamy pudding meets the softened vanilla wafers, with just-right slices of banana. No soggy surprises here!
- Make-Ahead Magic: You can whip this up the day before, freeing you up to actually enjoy your guests or your precious downtime.
Classic Banana Pudding vs. Magnolia-Style: What’s the Difference?
Okay, so when you talk banana pudding, there are basically two camps, right? You’ve got your classic, made-from-scratch custard kind, and then you have the super-popular, no-cook Magnolia-style version with instant pudding and condensed milk. They both get you to that delicious banana-wafer combo, but they’re definitely different beasts!
The scratch custard usually means cooking eggs, milk, and sugar together, which gives it this unbelievably rich, smooth, and deeply flavored base. It feels a bit more grown-up and decadent, if you ask me. The Magnolia-style, on the other hand, uses instant pudding mixed with condensed milk and often whipped cream or cream cheese. This makes it incredibly quick and easy, giving you that light, fluffy, super-sweet vanilla flavor that’s also totally addictive. Think of the scratch version as the elegant ballgown and the instant pudding as the chic, comfy sweater – both fabulous, just different vibes!
Ingredients for Perfect Banana Pudding
Alright, let’s talk about what goes into making this dream of a banana pudding! The magic really happens with just a few key players. You’ll want:
- 1 (14 ounce) can sweetened condensed milk – this is our secret weapon for that rich, luscious sweetness.
- 2 cups cold water – to get everything perfectly blended.
- 1 (3.4 ounce) package instant vanilla pudding mix – the shortcut that still gives amazing flavor!
- 3 cups cold milk – make sure it’s nice and cold for the best pudding base.
- 8 ounces cream cheese, softened – this is key for that super creamy, slightly tangy texture we love. Let it sit out for a bit!
- 1 teaspoon vanilla extract – because you can never have too much vanilla, right?
- 1 (12 ounce) container frozen whipped topping, thawed – for that airy, fluffy finish that just melts in your mouth.
- 1 pound ripe bananas, sliced – and this is important! You want them ripe, but not *too* mushy. A few brown spots are good for sweetness, but you don’t want them falling apart when you slice them. Slice them right before you assemble!
- 1 (11 ounce) package vanilla wafers – the classic choice, find one with good flavor that holds up just enough before softening beautifully.
Gathering these ingredients is like getting ready for a cozy hug in dessert form. You can check out even more tips for getting the perfect pudding over on Catherine’s Easy Banana Pudding post!
How to Make Banana Pudding: Step-by-Step
Alright, let’s get down to business and assemble this glorious banana pudding! It’s really just a few simple steps, and soon you’ll be digging into pure bliss. The key is patience with the chilling, but trust me, it’s worth every second.
Preparing the Creamy Pudding Base
First things first, we need to get that luscious pudding base ready. In a big ol’ bowl, whisk together the sweetened condensed milk and the cold water until it’s all smooth. Then, gradually whisk in that instant vanilla pudding mix. You want it totally lump-free, nice and creamy. Now, grab another bowl – this is where the magic really happens. Beat the 3 cups of cold milk, the softened cream cheese (make sure it’s *really* softened, it makes all the difference!), and that splash of vanilla extract until everything is super smooth and glorious. Finally, gently fold the pudding mixture into the cream cheese mixture. Just keep folding it in slowly until it’s all combined and looks beautifully smooth and creamy. Don’t overmix, we want it just right!
Layering Your Banana Pudding
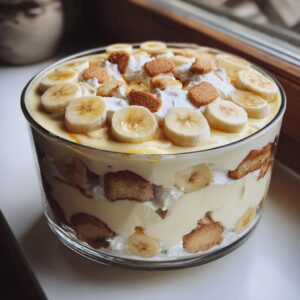
Now for the fun part – building those beautiful layers! Grab your favorite 9×13 inch baking dish or, if you’re feeling fancy, a beautiful trifle bowl.
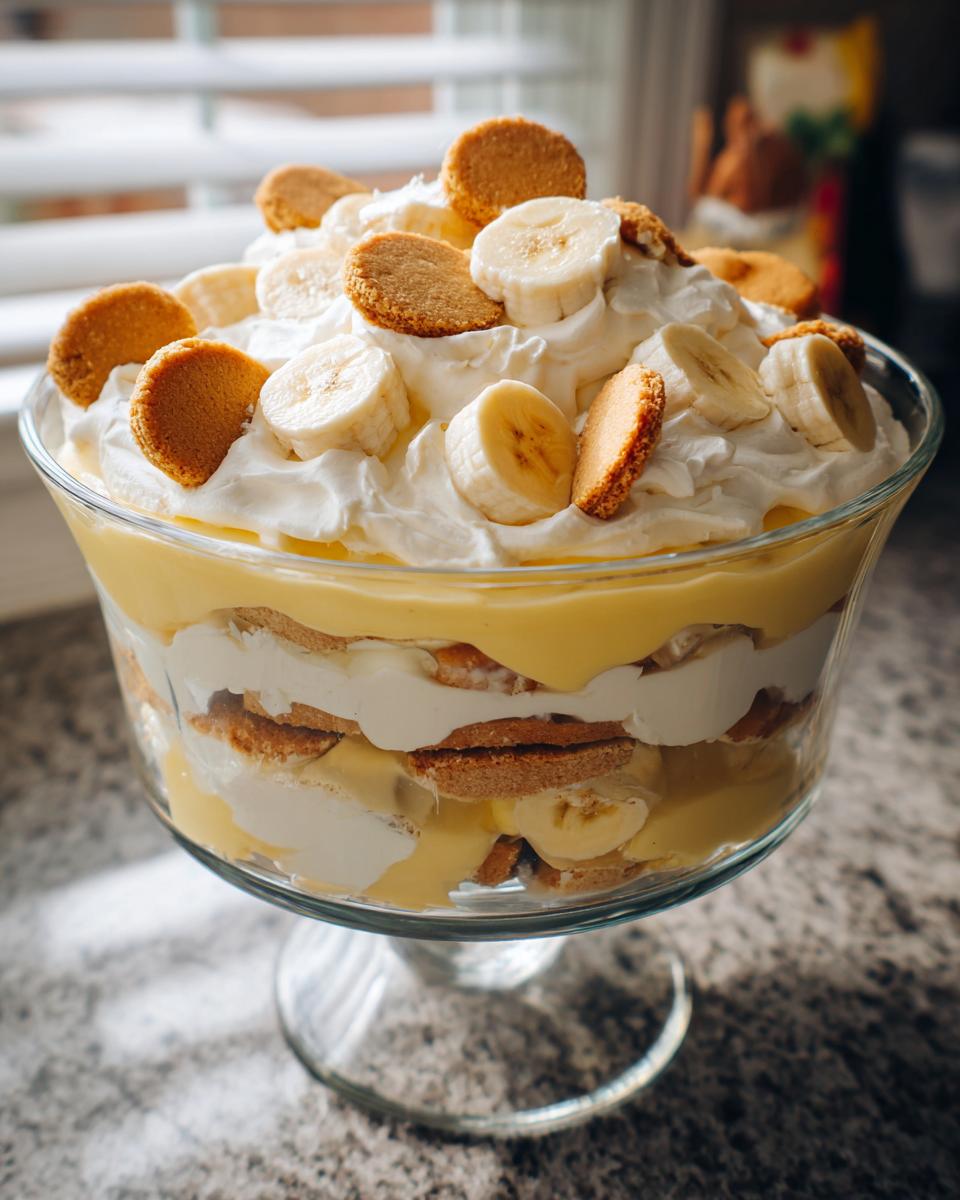
Start with a nice, even layer of vanilla wafers on the bottom. Don’t be shy, give it good coverage! Next, arrange a layer of your sliced bananas right on top of the wafers.
Try to get them in a single layer so you get banana in every bite. Then, spread about one-third of that creamy pudding mixture over the bananas. Repeat these layers: wafers, then bananas, then pudding. You’ll do this about three times, ending with that gorgeous pudding on top.
If you’re using a trifle bowl, you’ll see those layers stacking up so prettily – it’s like edible art! It really makes for a stunning presentation, almost too pretty to eat… almost!
Want to see how it all comes together visually? Check out this amazing Strawberry Pretzel Salad Dessert for layering inspiration, or grab some easy ideas from these No-Bake S’mores Bars!
Tips for the Best Banana Pudding
Making a truly amazing banana pudding is all about a few little tricks, you know? It’s what separates a good pudding from a *spectacular* one. We want that perfect balance – creamy pudding, soft, luscious bananas, and just-tender vanilla wafers. Forget those soggy wafer surprises or the dreaded brown bananas; we’re aiming for pure bliss in every single bite of this banana pudding. It’s all in the details!
How to Keep Bananas from Browning in Pudding
Okay, this is a big one! Seeing those beautiful banana slices turn brownish-gray is such a bummer. The absolute best way to stop this is to slice your bananas right before you assemble the pudding. Seriously, don’t slice them hours ahead! Then, make sure every single banana slice is completely covered by the pudding mixture. The pudding acts like a nice little shield, keeping the air off the bananas and preventing them from oxidizing. It’s simple, but it makes a world of difference!
How Long to Chill Banana Pudding for Optimal Texture
This is where patience really pays off! You absolutely *have* to chill this banana pudding. Why? Because that chilling time is what lets the magic happen. It gives the vanilla wafers time to soften up beautifully, soaking in all that creamy pudding goodness without turning into mush. It also lets all those yummy flavors meld together perfectly. I always aim for at least 4 hours, but honestly, letting it chill overnight is truly the sweet spot. It makes a world of difference in texture, giving you that signature soft-yet-creamy pudding experience. You can find more tips on making desserts ahead of time over on Catherine’s Homemade Caesar Dressing post!
Make-Ahead Banana Pudding and Storage
You know, one of the best things about this banana pudding recipe is that you can totally make it ahead of time! It’s honestly even better when it’s had a chance to chill overnight. This is a lifesaver when you’re hosting or bringing something to a potluck. Just assemble the whole thing – wafers, bananas, pudding, the works – and cover it really tightly with plastic wrap. Make sure that plastic wrap touches the surface of the pudding as much as possible to help prevent a skin from forming and keep those bananas happy. It’ll keep beautifully in the fridge for up to 24 hours. Honestly, the flavors really meld together and the wafers get that perfect soft texture, so it’s a win-win! It’s one of my favorite make-ahead secrets, just like these cute Mummy Dogs!
Banana Pudding Calories Per Cup: A Nutritional Snapshot
When you’re spooning up this glorious banana pudding, you might be curious about the nutritional side of things. Based on the ingredients and serving size of this recipe, you’re looking at about 350 calories per cup. Keep in mind that’s just an estimate, and the exact numbers can totally change depending on the brands you use and precisely how big your servings are. It’s a sweet treat, for sure!
Frequently Asked Questions About Banana Pudding
Got questions about whipping up this classic banana pudding? I totally get it! There are always a few little things that pop up when you’re making a beloved dessert like this. Let’s dive into some of the most common ones I hear!
Can I use a different cookie instead of vanilla wafers?
Oh, absolutely! While vanilla wafers are the classic choice and what I grew up with, you can totally get creative. Graham crackers give it a nice, slightly different flavor. Even shortbread cookies can be delicious, though they might add a bit more sweetness, so keep that in mind! You just want a cookie that’s sturdy enough to hold up for a little while before it softens. For more creative dessert ideas, check out Catherine’s Chicken Alfredo Casserole – amazing comfort food!
My pudding came out too thin. What did I do wrong?
Don’t you worry, it happens! The most common culprit for thin pudding is usually not chilling it long enough. Remember, those wafers and the cream cheese really help thicken it up as it sets. Make sure you chilled it for at least 4 hours, or ideally overnight. Also, double-check that you used the correct amount of milk and didn’t accidentally add too much liquid. If it’s still too thin after chilling, gently fold in a bit more whipped topping – that usually does the trick to lighten it up!
Can I make this banana pudding with real custard instead of instant pudding?
You sure can! If you’re feeling adventurous and want to go fully from scratch, you can definitely make a cooked vanilla custard. You’d typically temper egg yolks with hot milk and thicken it on the stove. It gives a richer, more complex flavor, but it does add a cooking step and requires careful cooling before assembling. This recipe uses instant pudding for that delightful Magnolia-style ease and texture, but a homemade custard version is totally a valid and delicious route, too! For simpler, yet totally delicious recipes, you might like Catherine’s Smash Burger Recipe!
Share Your Banana Pudding Creations!
Now that you’ve got the lowdown on making this amazing banana pudding, I just HAVE to know what you think! Did you try it? Did you add your own little twist? I love hearing about your successes and any fun variations you come up with. Drop a comment below with your thoughts, a rating, or even just to say hello! And if you snap a picture of your masterpiece, tag us on social media—I’d be thrilled to see those beautiful layers! You can always reach out with questions or just to share at our contact page!
PrintClassic Banana Pudding
A classic Southern banana pudding recipe featuring layers of creamy custard, ripe bananas, and vanilla wafers. This recipe is perfect for potlucks and family gatherings.
- Prep Time: 25 min
- Cook Time: 0 min
- Total Time: 4 hr 25 min
- Yield: 10 servings 1x
- Category: Dessert
- Method: No Bake
- Cuisine: Southern
- Diet: Vegetarian
Ingredients
- 1 (14 ounce) can sweetened condensed milk
- 2 cups cold water
- 1 (3.4 ounce) package instant vanilla pudding mix
- 3 cups cold milk
- 8 ounces cream cheese, softened
- 1 teaspoon vanilla extract
- 1 (12 ounce) container frozen whipped topping, thawed
- 1 pound ripe bananas, sliced
- 1 (11 ounce) package vanilla wafers
Instructions
- In a large bowl, whisk together sweetened condensed milk and cold water. Gradually whisk in the instant vanilla pudding mix until smooth.
- In a separate large bowl, beat the 3 cups of cold milk, softened cream cheese, and vanilla extract until smooth and creamy.
- Add the pudding mixture to the cream cheese mixture and beat until well combined and smooth.
- Gently fold in the thawed whipped topping until no streaks remain.
- Arrange a layer of vanilla wafers in the bottom of a 9×13 inch baking dish or trifle bowl.
- Top the wafers with a layer of sliced bananas.
- Spread about one-third of the pudding mixture over the bananas.
- Repeat the layers: wafers, bananas, pudding, ending with a final layer of pudding mixture.
- Cover the dish tightly with plastic wrap. Chill for at least 4 hours, or preferably overnight, to allow the flavors to meld and the wafers to soften.
- To prevent bananas from browning, slice them just before assembling the pudding and ensure they are fully covered by the pudding mixture.
Notes
- For a no-bake Magnolia-style pudding, use instant pudding and condensed milk, and omit the cream cheese and extra milk.
- Chill time is crucial for the wafers to soften and absorb the pudding, creating the signature texture.
- You can make this pudding up to a day in advance.
- For a richer flavor, you can add a splash of heavy cream to the pudding mixture.
- Consider using slightly underripe bananas for firmer slices that hold their shape better.
Nutrition
- Serving Size: 1 cup
- Calories: 350
- Sugar: 45g
- Sodium: 250mg
- Fat: 15g
- Saturated Fat: 8g
- Unsaturated Fat: 7g
- Trans Fat: 0g
- Carbohydrates: 50g
- Fiber: 2g
- Protein: 5g
- Cholesterol: 30mg