
There’s just something magical about a warm, bubbling apple crisp on a chilly day, right? It instantly makes me think of cozy afternoons and the joy of creating something delicious from scratch. Here at Unfold Recipes, baking isn’t just about following steps; it’s about telling a story, and this easy apple crisp recipe has a sweet one. It’s become a go-to for satisfying those comforting dessert cravings, especially when you want something way simpler than a fuss-free pie. We’ve perfected this foolproof version so you get that amazing crunchy oat topping and perfectly tender apples every single time – no watery filling here! It’s the perfect way to capture that feeling of a perfect fall baking moment, and I’m so excited to share it with you. You can learn more about my baking philosophy over on my about page!
- Why You'll Love This Easy Apple Crisp Recipe
- The Best Apples for Apple Crisp
- Do You Peel Apples for Crisp?
- Ingredients for the Perfect Apple Crisp
- How to Make Apple Crisp: Step-by-Step
- Tips for the Crispiest Apple Crisp Topping
- Make-Ahead and Freezing Instructions
- Serving Suggestions for Apple Crisp
- Frequently Asked Questions about Apple Crisp
- Nutritional Information (Estimated)
- Share Your Apple Crisp Creations!
Why You’ll Love This Easy Apple Crisp Recipe
This apple crisp is just wonderfully simple, making it perfect for those busy days. You get that amazing, golden-brown crunchy oat topping that stays crisp, hugging tender, spiced apples underneath. It’s a champion for those lovely fall baking ideas and a crowd-pleaser for Thanksgiving desserts or any get-together!
The Best Apples for Apple Crisp
When you’re making an amazing apple crisp, the apples themselves are SO important! Picking the right kind makes all the difference between a mushy mess and pure apple perfection. I like to use a mix of sweet and tart apples because it gives the filling a really nice depth of flavor. My grandma always swore by a combination, and I’ve found that using apples like Honeycrisp or Gala for sweetness, along with something a little tarter like a Jonagold or even a Granny Smith (if you like a strong tartness!), works like a charm.
For this particular apple crisp recipe, the Honeycrisp, Fuji, and Gala are fantastic because they hold their shape so well while baking. They get fork-tender without turning into applesauce, which is exactly what you want. That slight bite they keep adds a lovely texture to the whole dish. I remember one fall, I only had Braeburn apples on hand, and while they tasted good, the texture just wasn’t quite the same! So yeah, choose wisely for the best apple crisp experience!
Do You Peel Apples for Crisp?
Okay, so one of the most common questions I get about making apple crisp is whether or not you *have* to peel the apples first. Honestly, it’s totally up to you and your personal preference! If you’re aiming for a super smooth filling where you just taste apple goodness and spice, then yes, peeling is the way to go. It also makes scooping the crisp easier, especially if you’re serving it to little ones.
But! If you don’t mind a bit of texture from the peel, or if you’re really in a rush (I get it!), leaving them on is perfectly fine for your apple crisp. The peels actually add a nice bit of color and a slight chewiness. My personal preference for this easy apple crisp? I like to peel them. It just feels a bit more refined, and I love how the lemon juice can really get into the apple slices without the peel getting in the way. Plus, it makes the whole thing look extra neat once it’s baked!
Ingredients for the Perfect Apple Crisp
So, what exactly goes into making this beautiful apple crisp? It’s really all about grabbing good quality ingredients that sing together. For the star of the show, we’re using about 6 medium apples, which is roughly 2.5 pounds. I always go for Honeycrisp, Fuji, or Gala because they’re naturally sweet and hold their shape so well. And don’t forget that tablespoon each of lemon juice for brightness! You can learn more about sourcing quality ingredients on my about page!
Now, for that magical, crunchy topping that’s the heart of any great apple crisp: you’ll need half a cup of all-purpose flour and half a cup of good old rolled oats – make sure they’re not the instant kind, okay? We also need half a cup of packed light brown sugar for that caramel-y sweetness, followed by a quarter teaspoon of salt to balance everything out. Of course, no apple crisp is complete without cinnamon and nutmeg – half a teaspoon of cinnamon and a quarter teaspoon of nutmeg give it that warm, cozy hug. And the secret to that perfect crumbly texture? Half a cup of cold, unsalted butter, cut into little cubes. Trust me, keeping that butter cold is super important for getting that nice, crisp topping!
How to Make Apple Crisp: Step-by-Step
Alright, let’s get this amazing apple crisp into the oven! It’s honestly so simple, you’ll wonder why you ever bothered with pie crusts. Follow these easy steps, and you’ll have a bubbling, golden masterpiece in no time. Remember, this is about creating that perfect contrast between tender, warm apples and a crunchy topping, and we’re going to nail it! For more simple fruit desserts, check out my apple crumble under an hour or my fun apple pie dump cake recipe!
Preparing the Apples for Your Apple Crisp
First things first, let’s get those apples ready! As we chatted about, I love peeling them for this apple crisp. Once they’re peeled, just give them a quick core and then slice them about a quarter-inch thick. Pop them right into a big bowl and give them a gentle toss with that lemon juice. This little step is key because it stops them from browning too quickly and adds a tiny bit of brightness that cuts through the sweetness.
Creating the Crispy Oat Topping
Now for the best part – the topping! In a separate bowl, this is where all the crunchy magic happens. Whisk together your flour, those lovely rolled oats, packed light brown sugar, salt, cinnamon, and nutmeg. Get them all happy and combined. Then, toss in your cold butter pieces. The trick here is to use your fingers (clean ones, of course!) or a pastry blender to cut the butter into the dry stuff. You want to keep going until it looks like coarse crumbs, almost like wet sand. Don’t overwork it; we want those buttery bits to create pockets of crispiness in your apple crisp. If you’re adding nuts, toss ’em in now!
Assembling and Baking Your Apple Crisp
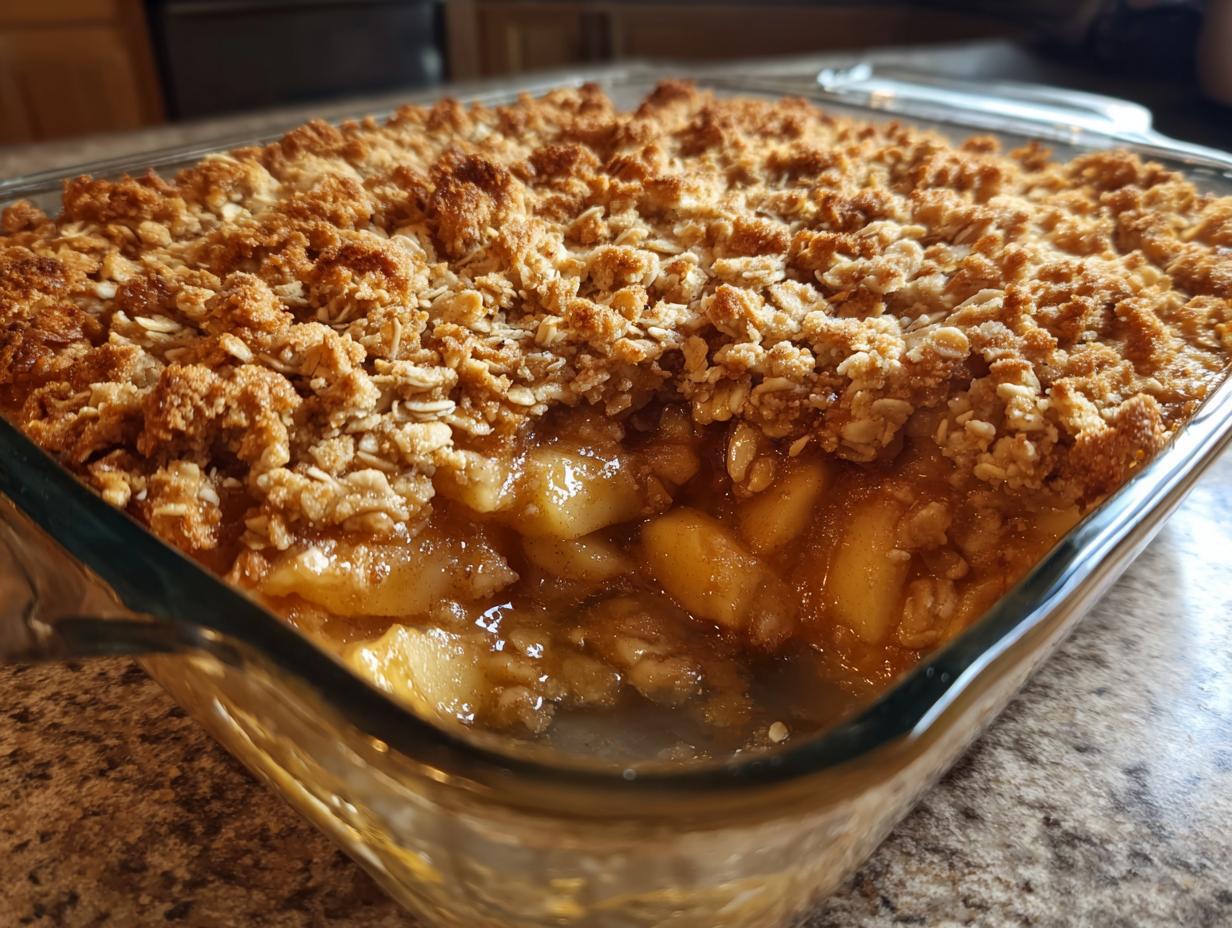
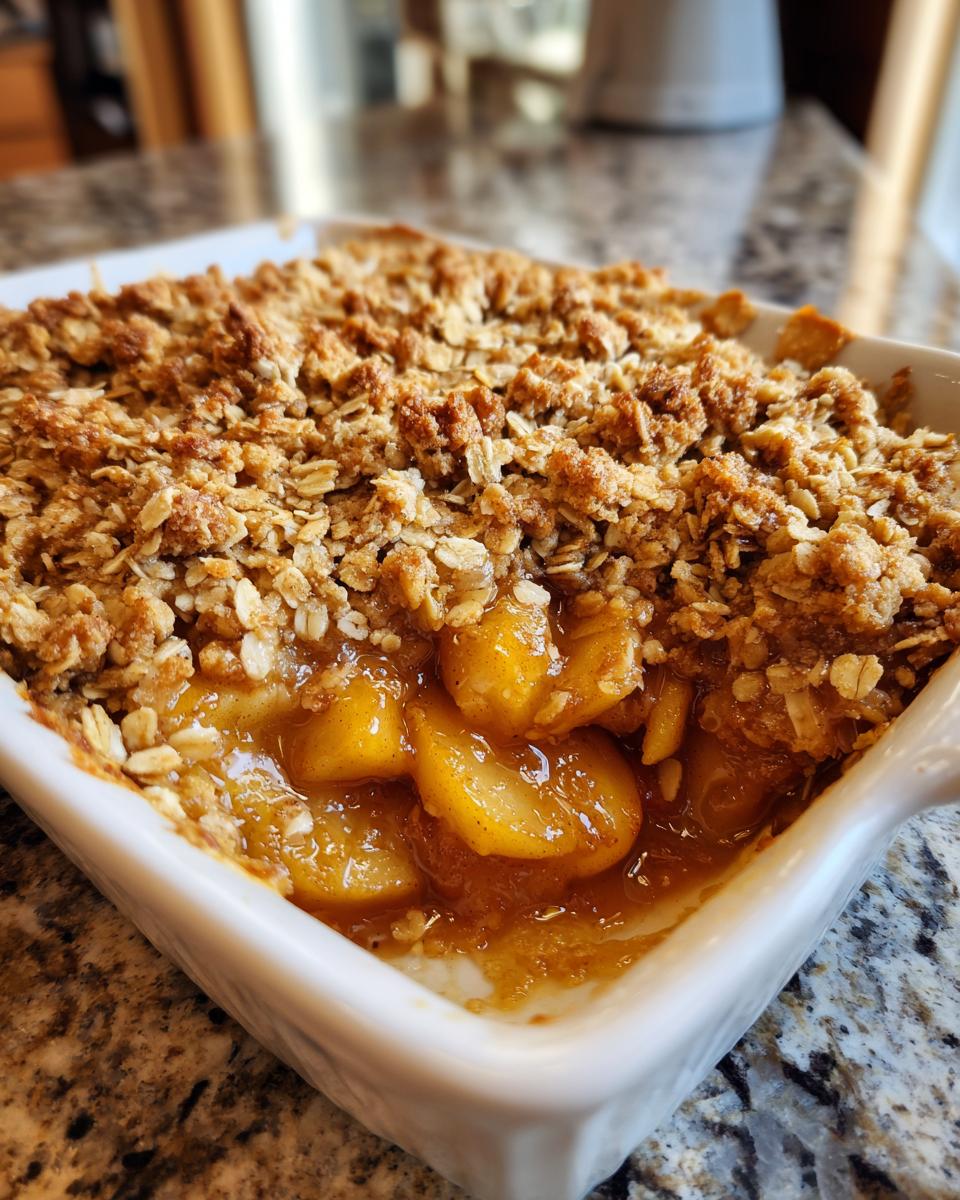
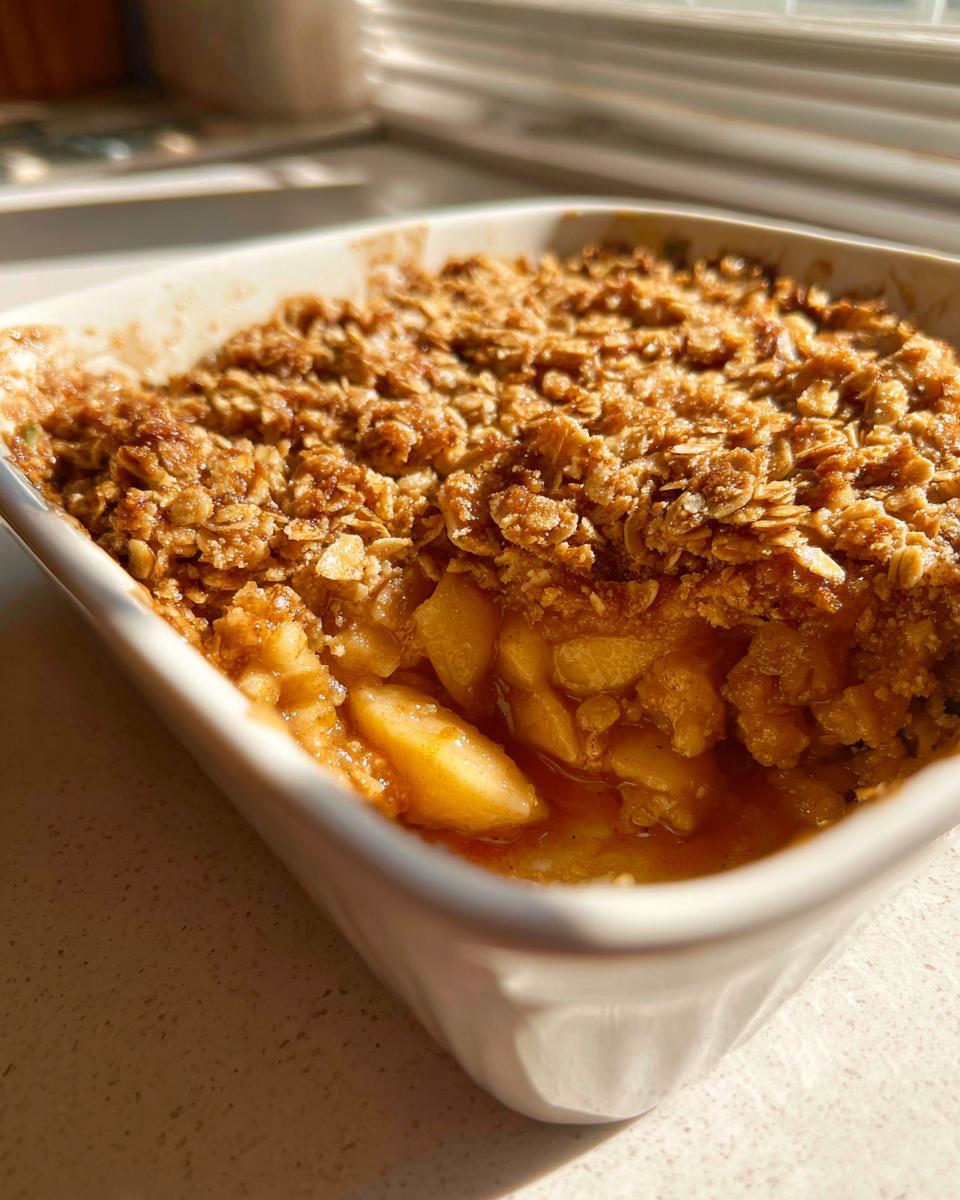
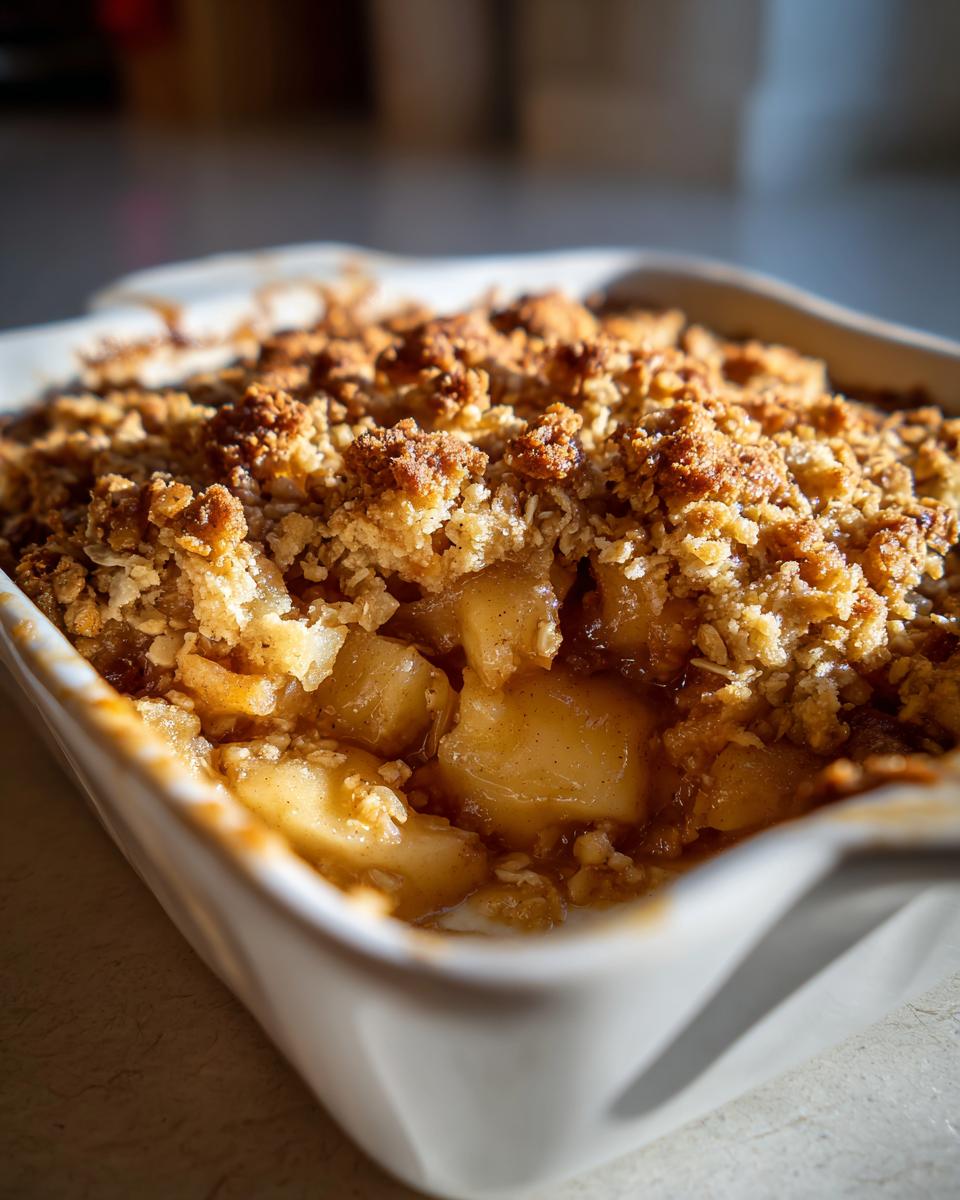
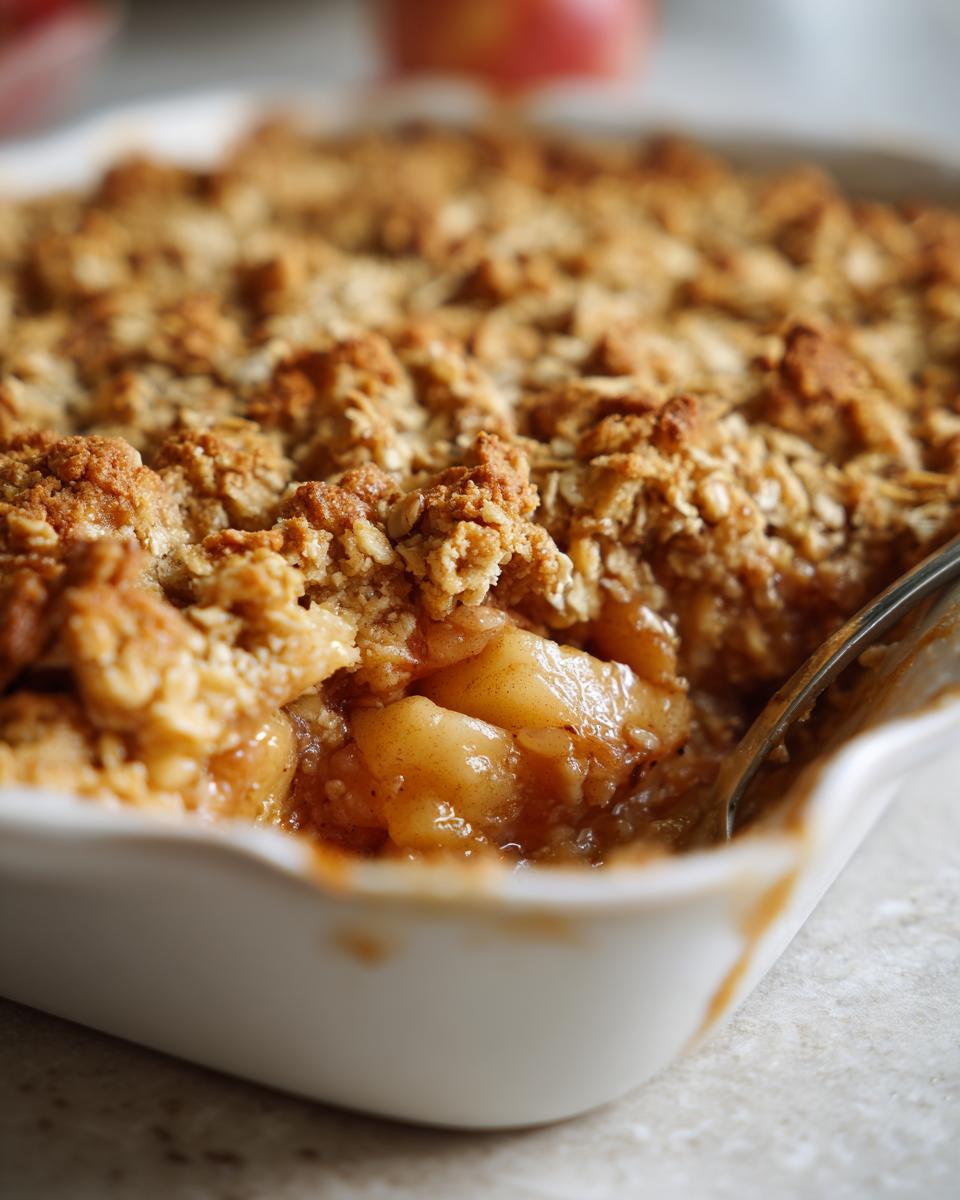
Okay, it’s assembly time! Pour those beautifully lemon-kissed apple slices into your baking dish or a nice oven-safe skillet. Don’t pack them down too much, just let them nestle in there. Now, take that gorgeous crumbly topping you just made and sprinkle it evenly all over the apples. Make sure to get it into all the nooks and crannies! While this is happening, make sure your oven is preheated to 375°F (190°C). Pop your apple crisp in and bake it for about 35 to 45 minutes. You’ll know it’s ready when that topping is a lovely golden brown and you can see the apple filling bubbling up around the edges. It smells absolutely heavenly at this point!
Tips for the Crispiest Apple Crisp Topping
Oh, that glorious apple crisp topping – it’s truly the crown jewel, isn’t it? The key to keeping it perfectly crisp and not soggy is all about a few simple tricks. First off, and I can’t stress this enough, make sure your butter is *cold*. Like, fridge-cold, cut into small cubes cold! This is what creates those lovely little pockets of buttery goodness when it bakes. When you’re mixing the topping, just cut the butter in until it resembles coarse crumbs; avoid overmixing, or you’ll lose that buttery structure. If you want even *more* crunch, you can always add in about a quarter cup of chopped nuts like pecans or walnuts. They add a fantastic texture and flavor to the classic apple crisp!
Make-Ahead and Freezing Instructions
You know what’s even better than a warm apple crisp? Having one ready to go when a craving strikes! You can totally get this apple crisp prepped ahead of time. Assemble the whole thing in your baking dish, cover it tightly with plastic wrap, and pop it in the fridge for up to 24 hours. When you’re ready to bake, just pull it out, maybe add a few extra minutes to the baking time since it’ll be chilled, and you’re golden. It’s like having dessert ready on demand, which I love! For even longer storage, you can freeze the assembled (but unbaked) apple crisp, wrap it really well, for up to 3 months. Reheat it in a 350°F oven until it’s warmed through and bubbly again. It’s just like magic, similar to how I prep my freezer breakfast burritos or my BBQ chicken foil packets!
Serving Suggestions for Apple Crisp
Now that you’ve baked this beautiful apple crisp, how do you serve it up? The classic pairing of warm crisp with a scoop of vanilla ice cream is honestly unbeatable – the cold ice cream melting into the warm, spiced apples is pure heaven! You can also add a dollop of fluffy whipped cream or a drizzle of caramel sauce for extra decadence. It’s a total showstopper for any meal, especially if you’re looking for perfect Thanksgiving desserts or just a comforting treat. It’s also great if you’re looking for fun dessert ideas that satisfy that sweet tooth!
Frequently Asked Questions about Apple Crisp
Got questions about whipping up this delightful apple crisp? I get it! Baking is all about confidence, and knowing the answers can really help. Here are a few things people often ask me:
Can I use different fruits besides apples?
Absolutely! While apples are classic for a reason, this easy apple crisp recipe is wonderfully versatile. Pears work beautifully, and you can even try a mix of apples and berries like blueberries or raspberries for a lovely tartness. Peaches or apricots are also great in the summer months. Just make sure your fruit isn’t TOO juicy, or you might end up with a bit of a watery situation!
What if my apples are really tart or too sweet?
No worries if your apples lean one way or the other! If they’re a bit too tart for your liking, you can increase the brown sugar in the filling just a touch. Conversely, if your apples are super sweet, a squeeze more lemon juice in the filling can help balance things out. Sometimes, I even add a pinch of extra cinnamon or a whisper of ginger to the apples themselves to add another layer of flavor that can mask any off-notes.
Can I make this apple crisp gluten-free?
Yes, you totally can! To make this apple crisp gluten-free, simply swap out the all-purpose flour in the topping for a gluten-free all-purpose flour blend. I’ve found that most 1-to-1 gluten-free baking flours work perfectly. You might need to adjust the amount of butter slightly, but usually, it’s a straightforward substitution. For broader options, you might want to check out some gluten-free meal delivery services if you’re looking for convenient ways to enjoy GF treats!
Nutritional Information (Estimated)
Just a heads-up, the nutritional info below is an estimate since everyone’s ingredients can vary a bit! This makes roughly 6 servings, and each one is around 350 calories, 30g sugar, 18g fat, with 4g fiber and 3g protein. It’s a pretty good balance for such a comforting dessert!
Share Your Apple Crisp Creations!
I absolutely LOVE hearing from you all! Seriously, seeing your recreations of this apple crisp makes my day. Please, tell me what you thought! Did you try any fun variations? Drop a comment below, or even leave a star rating on the recipe. If you share on social media, tag me – I’d be thrilled to see your beautiful apple crisp masterpieces! You can always send me a message through my contact page too!
PrintEasy Apple Crisp
A foolproof, cozy apple crisp with a perfectly crunchy oat topping, ideal for fall baking or any occasion. This recipe avoids a watery filling and offers make-ahead tips.
- Prep Time: 20 min
- Cook Time: 40 min
- Total Time: 60 min
- Yield: 6 servings 1x
- Category: Dessert
- Method: Baking
- Cuisine: American
- Diet: Vegetarian
Ingredients
- 6 medium apples (about 2.5 lbs), such as Honeycrisp, Fuji, or Gala
- 1 tablespoon lemon juice
- 1/2 cup all-purpose flour
- 1/2 cup rolled oats
- 1/2 cup packed light brown sugar
- 1/4 teaspoon salt
- 1/2 teaspoon ground cinnamon
- 1/4 teaspoon ground nutmeg
- 1/2 cup (1 stick) cold unsalted butter, cut into small pieces
Instructions
- Preheat your oven to 375°F (190°C).
- Peel, core, and slice the apples into 1/4-inch thick pieces. Place them in a large bowl and toss with lemon juice.
- In a separate medium bowl, whisk together the flour, oats, brown sugar, salt, cinnamon, and nutmeg.
- Add the cold butter pieces to the dry ingredients. Use your fingers or a pastry blender to cut the butter into the mixture until it resembles coarse crumbs.
- Pour the sliced apples into an 8×8 inch baking dish or a similar-sized oven-safe skillet.
- Evenly sprinkle the oat topping mixture over the apples.
- Bake for 35-45 minutes, or until the topping is golden brown and the apples are tender and bubbly.
- Let the crisp cool for at least 10 minutes before serving.
Notes
- For a crispier topping, you can add 1/4 cup chopped pecans or walnuts to the topping mixture.
- You can prepare the apple crisp ahead of time and refrigerate it for up to 24 hours before baking. Add a few extra minutes to the baking time if baking from chilled.
- Leftover apple crisp can be frozen, tightly wrapped, for up to 3 months. Reheat in a 350°F oven until warmed through.
- Serve warm with vanilla ice cream or whipped cream for the best experience.
Nutrition
- Serving Size: 1 serving
- Calories: 350
- Sugar: 30g
- Sodium: 150mg
- Fat: 18g
- Saturated Fat: 11g
- Unsaturated Fat: 7g
- Trans Fat: 0g
- Carbohydrates: 45g
- Fiber: 4g
- Protein: 3g
- Cholesterol: 45mg