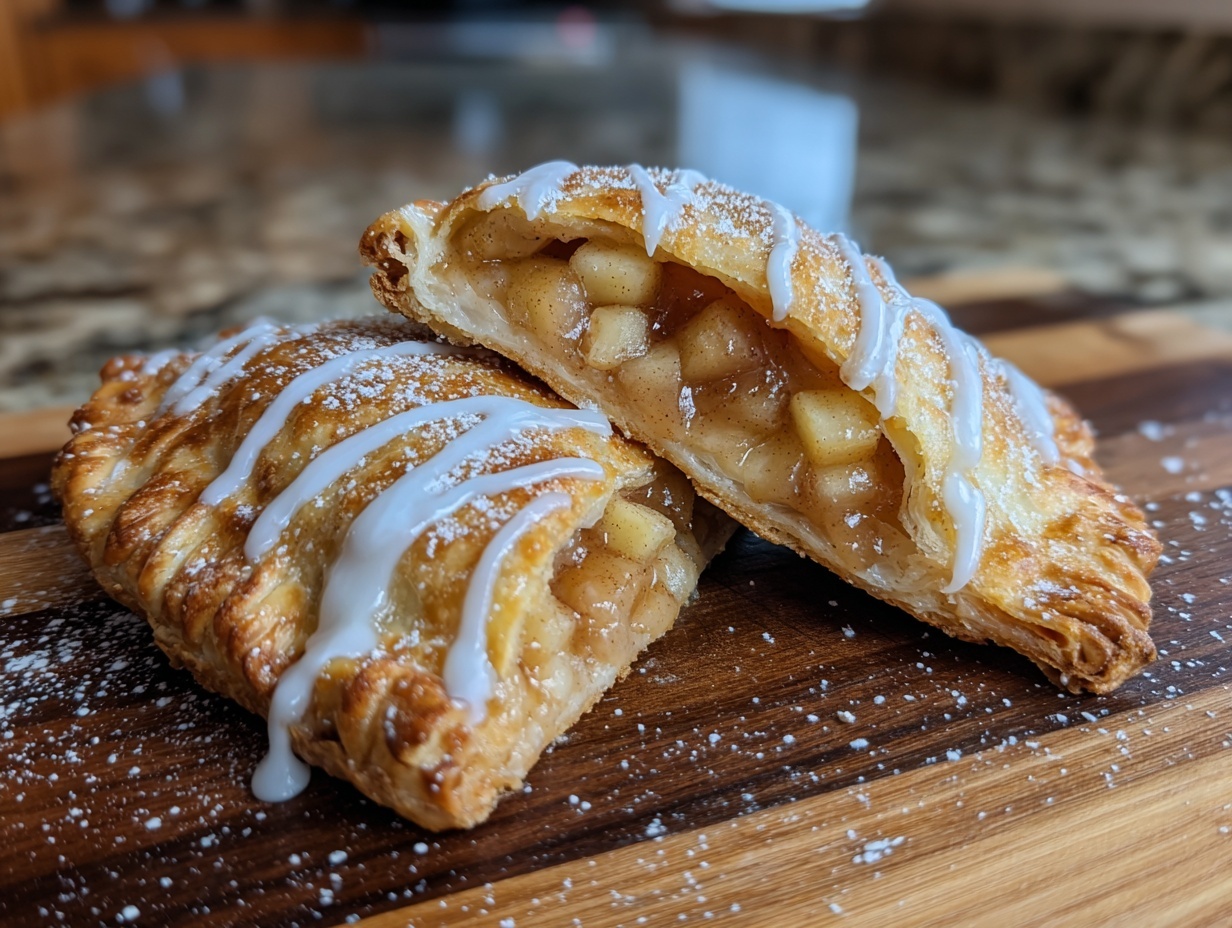

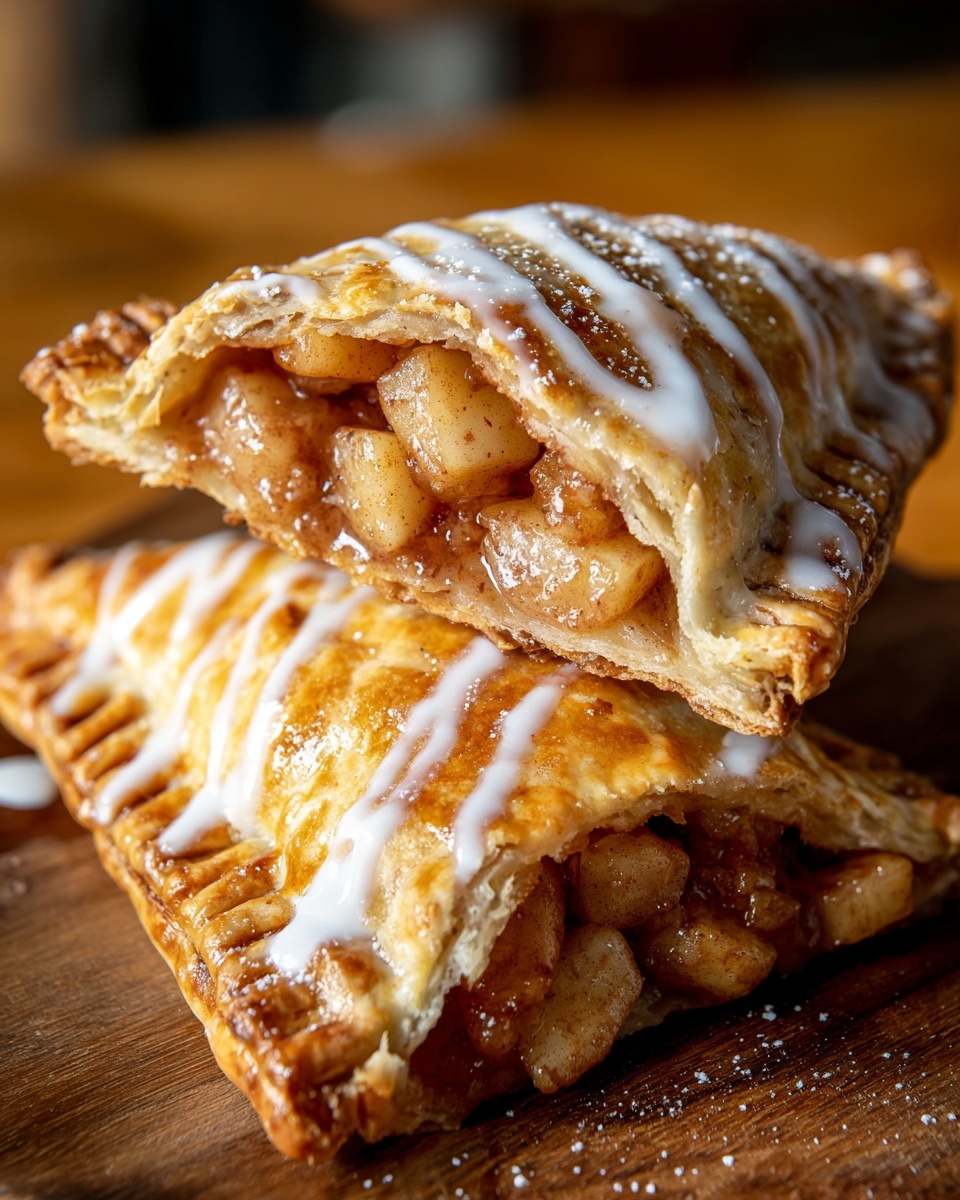
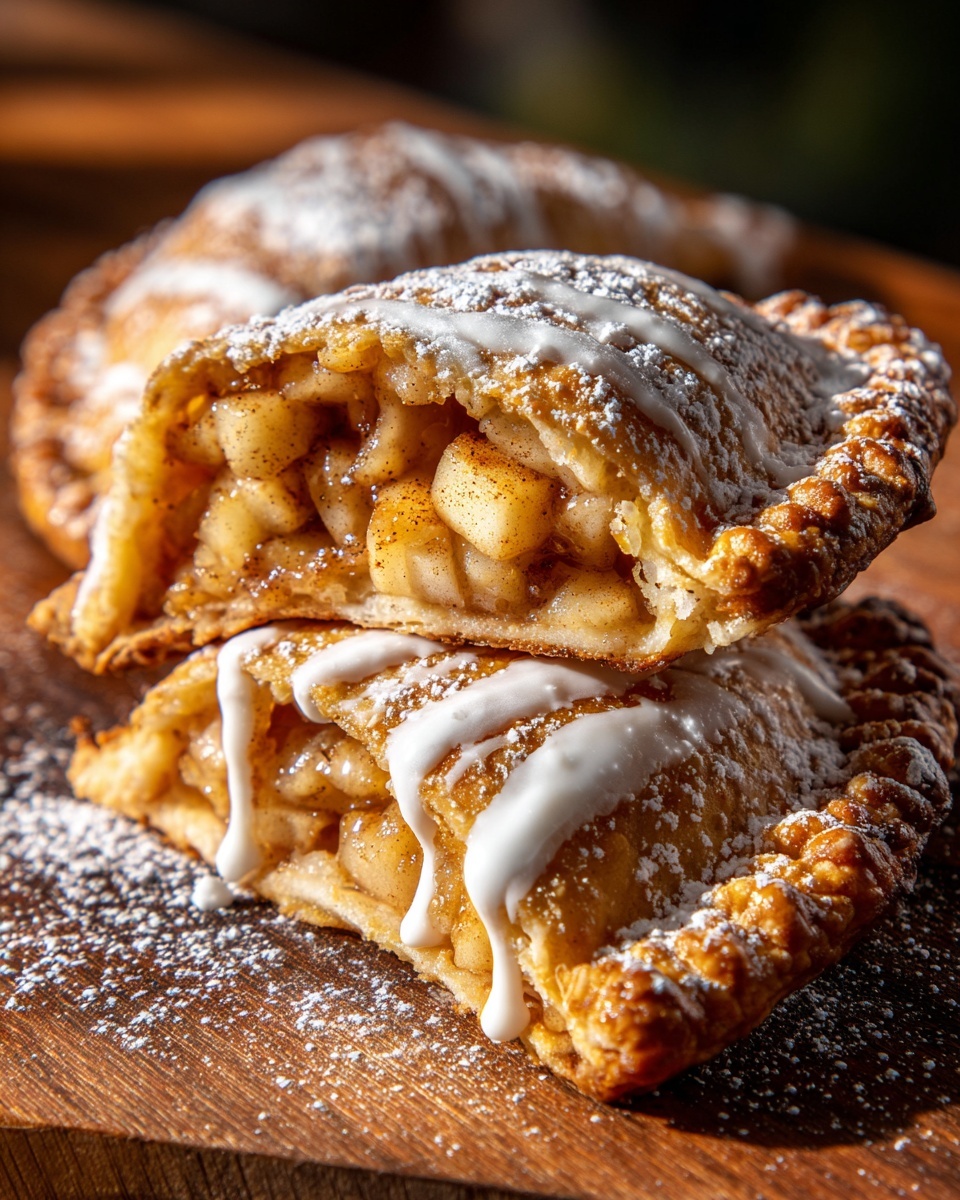
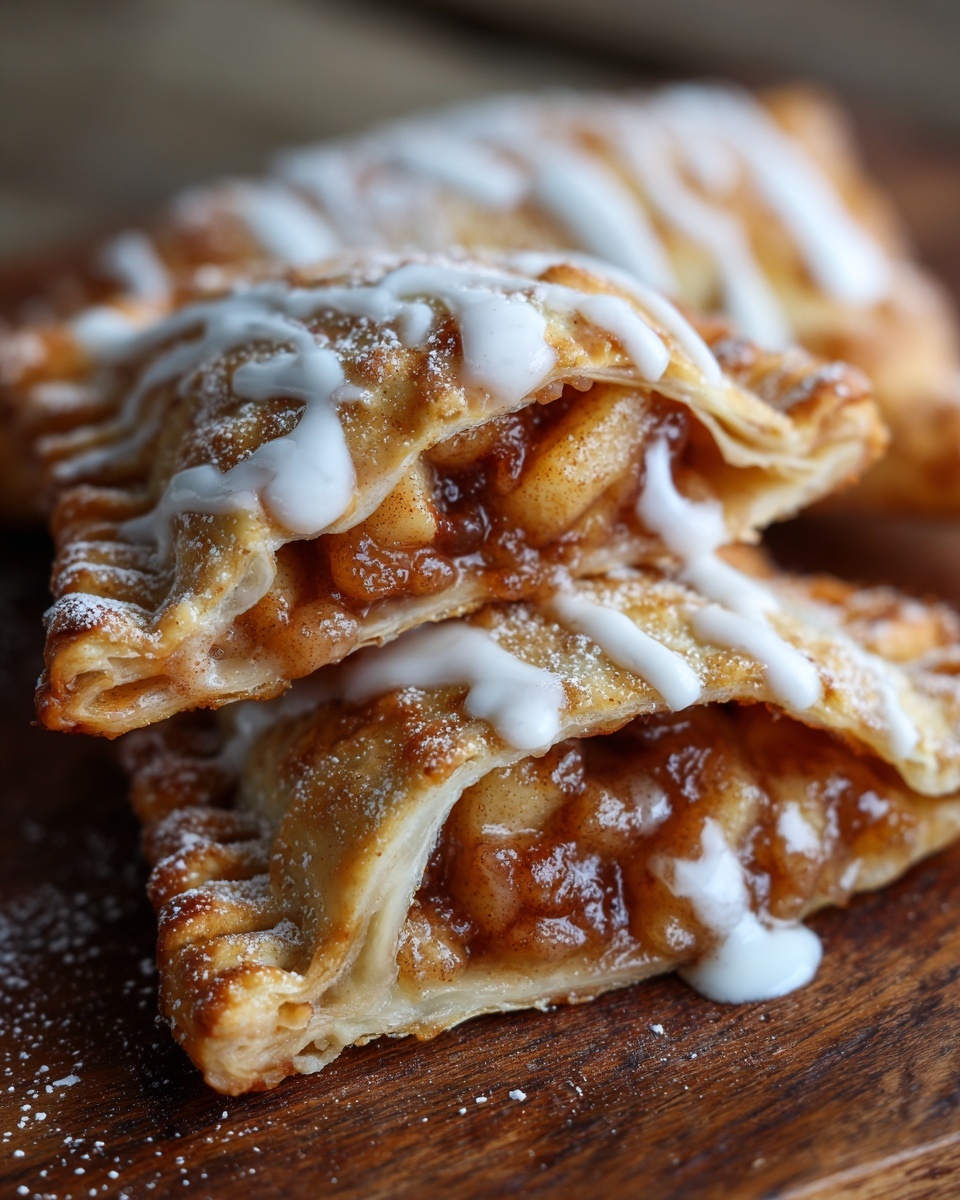
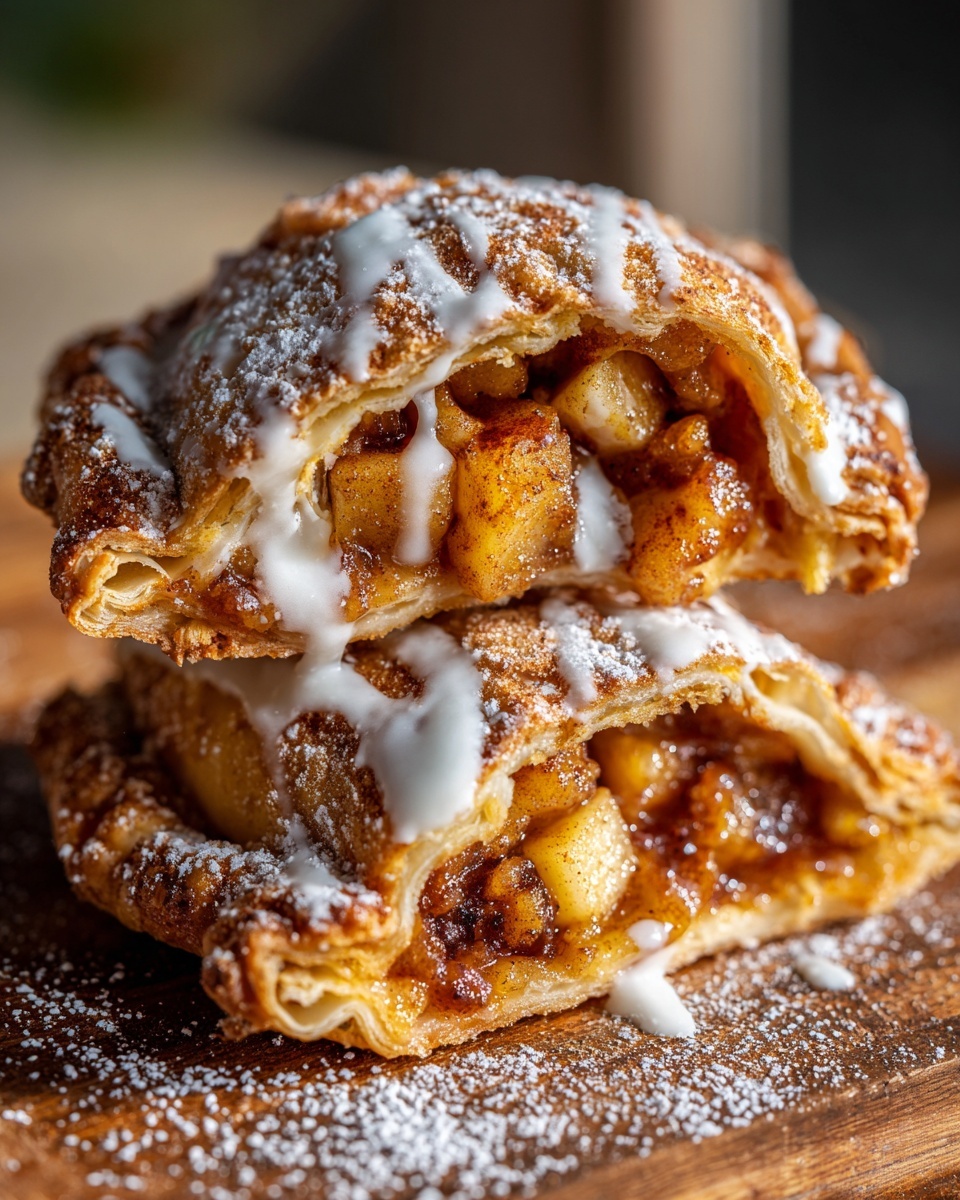
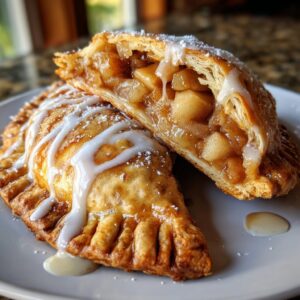
There is a certain magic that hangs in the air when you make food that tastes like history. For me, nothing captures that feeling quite like standing over a pot of shimmering oil, waiting for those first tell-tale bubbles to signal perfection. These old-fashioned **fried apple pies** are the ultimate nostalgic comfort dessert, aren’t they? My goal here is simple: deliver that supremely crispy, golden pastry shell contrasting perfectly with a warm, spiced apple filling bursting with cinnamon. I truly believe that learning to make these **hand pies from scratch** connects you to a beautiful American tradition. If you’re curious about my journey from corporate life to the kitchen, I share it all on my About Page! Come, pour yourself a coffee, and let’s unfold this story together.
- Why These Old-Fashioned fried apple pies Are the Best
- Gathering Ingredients for Perfect fried apple pies
- Step-by-Step Instructions: How to Make fried apple pies
- Tips for Success Making Crispy fried pies
- Variations on Classic fried apple pies
- Serving Suggestions for your homemade apple pies
- Storage and Reheating Instructions for fried apple pies
- Frequently Asked Questions about fried apple pies
- Nutritional Snapshot of these fried apple pies
- Share Your Experience Making fried apple pies
Why These Old-Fashioned fried apple pies Are the Best
Look, I’ve tried shortcuts, like everyone else, but nothing compares when you commit to this method. These aren’t just any quick snacks; they are proper, **nostalgic comfort food**. What sets our recipe apart from other **apple dessert recipes** is the texture contrast. We pair an exceptionally flaky pie crust recipe—made with ice-cold butter, mind you—with that sweet, thick filling. When you bite in, you get that satisfying crackle of the golden, fried exterior, immediately followed by the warm hug of cinnamon and tart apples. That’s the hallmark of true **southern style desserts**, and it’s what makes this my go-to holiday treat. If you love this kind of cozy flavor, you absolutely have to try my Southern Fried Chicken next!
Gathering Ingredients for Perfect fried apple pies
When making something this classic, you cannot cut corners on your ingredients. Quality matters immensely here, especially when we are aiming for that signature flaky crust and robust apple flavor. Keep everything for the pastry stage as cold as humanly possible—it truly is the secret weapon for achieving those shatteringly crisp layers you want in your **crispy fried pies**. Remember, you can find my favorite slow-cooker applesauce recipe here if you want to experiment later!
For the Flaky Pie Dough
- 2 1/2 cups all-purpose flour
- 1 teaspoon salt
- 1 cup (2 sticks) cold unsalted butter, cut into cubes
- 1/2 cup ice water, plus more if needed
For the Cinnamon Apple Filling
- 6 medium Granny Smith apples, peeled, cored, and sliced 1/4-inch thick
- 1/2 cup granulated sugar
- 1/4 cup packed light brown sugar
- 1 teaspoon ground cinnamon
- 1/4 teaspoon ground nutmeg
- 1 tablespoon lemon juice
- 1 tablespoon cornstarch (this is crucial for thickening the juices!)
- Vegetable oil or shortening, for frying
For the Powdered Sugar Glaze
- 1 cup powdered sugar
- 2 tablespoons milk (use exactly this much to start—we want it thick!)
- 1/2 teaspoon vanilla extract
Step-by-Step Instructions: How to Make fried apple pies
Alright, this is where the fun really starts! While the dough is chilling, we get our filling ready. This whole process moves fairly quickly once the dough is cold, so stay organized. Remember, we’re aiming for that beautiful contrast—a super flaky crust that shatters a little when you bite it, holding in that warm, spiced fruit. If you start feeling rushed, just take a breath! You can always pop everything back in the fridge if needed. For tips on making a fantastic standalone crust, check out my guide to an easy butter pie crust recipe.
Preparing the Flaky Pie Crust Recipe
First, grab your flour and salt and whisk them up. Now, the butter—it absolutely must be cold, right out of the fridge! You need to cut that butter into the flour until you have coarse crumbs, with some pieces still looking like small peas. Don’t overwork it! Those pea-sized bits are what create those gorgeous, flaky layers when they melt in the hot oil. Slowly drizzle in your ice water, just a tablespoon at a time, mixing with a fork until the dough barely holds together. Divide that beautiful mess into two smooth disks, wrap them tightly, and let them chill for at least an hour. Trust me, that chill time is non-negotiable for a quality **flaky pie crust recipe**!
Creating the Cinnamon Apple Filling
While the dough is busy getting cold, let’s tackle the apples. Peel, core, and slice those Granny Smiths about 1/4-inch thick; we want texture, not applesauce! In a bowl, gently combine the sliced apples with both sugars, cinnamon, and nutmeg. Add the lemon juice to keep them bright, and don’t forget the cornstarch—that little bit of starch is what gives us that perfectly set, luscious syrup instead of runny juice. Give it a gentle toss and let it sit on the counter while the dough chills. The sugar will start drawing out moisture almost immediately.
Assembling and Sealing the hand pies from scratch
Okay, dough is chilled! Dust your surface lightly. Roll one disk out until it’s thin, about 1/8 of an inch. I like using a 5-inch plate or cutter to get perfect circles. Put a generous spoonful—maybe two tablespoons—of the **cinnamon apple filling** right in the center of one circle. Brush water lightly around the edge, then top with a second circle. Press the edges firmly together with your fingers to seal, and then use a fork to crimp all the way around. This seals in all the goodness. Finally, cut two small slits in the top of each pie so the steam has a way to escape while frying. Pop the assembled **hand pies from scratch** onto a parchment-lined sheet and stick them in the freezer for 15 minutes before frying—this is key for preventing shrinkage!
How to fry apple pies for Golden Brown fried pies
Time for the sizzle! In a heavy pot, pour enough vegetable oil to reach about 2 to 3 inches deep. Heat that oil up to exactly 350 degrees Fahrenheit (175 Celsius). If you don’t have a thermometer, test it: a tiny scrap of dough should sizzle immediately and turn golden in about 30 seconds. Don’t drop in too many at once, or you’ll drop the oil temperature and get greasy pies! Fry them for about 2 to 3 minutes per side until they are deep golden brown. Use a slotted spoon to remove the **fried apple pies** and set them immediately on a wire rack over paper towels so they can drain properly. You want that crispy texture, not oil saturation!
Finishing with the Powdered Sugar Glaze for pies
While those gorgeous, freshly fried beauties are cooling slightly on the rack, whisk up your glaze quickly. Just mix the powdered sugar, vanilla, and milk. Start with the milk amount listed, but if it seems too thick for drizzling, add just a touch more milk, a half teaspoon at a time. The pies should still be warm—not piping hot, but definitely warm—when you dip or drizzle the glaze over them. The warmth helps that sweet coating set up perfectly. If you like a heavier coating, hold off until they cool a bit more so the glaze stays thick on top. If you love easy frying, you should look at my recipe for apple fritters too!
Tips for Success Making Crispy fried pies
To really master these **fried apple pies** and ensure they are spectacularly **crispy fried pies**, we need to focus on three main areas: extreme cold, perfect apples, and disciplined oil management. First, let’s talk about the dough again. If you want that incredible, light texture that rivals the **best apple pie crust** you’ve ever had, those butter pieces must stay frozen until they hit the flour. When you cut them in, work fast!
Second, the apples are crucial. Granny Smiths provide the tartness needed to cut through the richness of the fried pastry. If you use only sweet apples, the whole pie ends up cloyingly sweet. The slight acidity balances everything out.
Finally, the oil temperature cannot waver. If it’s too cool, the crust absorbs too much oil and becomes soggy—a total tragedy for a fried dessert! If it’s too hot, the crust burns before the thick apple filling has time to warm through. Keeping it locked at 350°F is essential for that thin, golden shell. These same principles of temperature control will really elevate my apple dumplings, too!
Variations on Classic fried apple pies
While I absolutely adore making these **fried apple pies** the truly **old fashioned fried pies** way, sometimes we need a little twist or perhaps a faster route! The beauty of a simple **cinnamon apple filling** is that it welcomes experimentation with open arms.
If you find yourself craving something a little different for your next batch of **easy fried desserts**, here are a few swaps I’ve played around with in the kitchen. Remember, these are fun adaptations—the original recipe still holds the crown, of course!
For a bolder spice profile, try adding a tiny pinch of ground cardamom along with the cinnamon and nutmeg. It adds this gorgeous, almost floral background note that pairs wonderfully with the apples. Or, if you have some jam lying around, why not mix a teaspoon of tart raspberry jam directly into the apple mixture?
If you are looking for a different topping than that simple glaze, swapping it out is super easy. Instead of the powdered sugar option, you can make a quick caramel drizzle. Just melt down some good quality caramel candies with a splash of cream—it makes these **homemade apple pies** feel incredibly decadent. Alternatively, for a very traditional finish, just stick to a heavy dusting of powdered sugar after they’ve cooled slightly. It lets that beautiful golden crust totally shine through. Speaking of easy baked apple treats, you should really look into my apple dump cake if you need something even simpler next time!
Serving Suggestions for your homemade apple pies
Once these **fried apple pies** are cooled enough so that the glaze doesn’t immediately dissolve into liquid mess, the real fun begins: deciding how to serve them! While they are absolutely divine served just warm and plain—that flaky crust is the star, after all—sometimes a little dressing up makes them truly spectacular, especially when you’re showing them off as one of your favorite **fall baking recipes**.
My absolute favorite, can’t-be-beat pairing is still a scoop of high-quality vanilla bean ice cream melting slowly into the warm folds of the pastry. The temperature contrast between the hot, spiced apple filling and the ice-cold cream? Perfection! It’s such a simple thing, but it transforms what was already a fantastic treat into a decadent dessert experience.
If you want something a little richer than the simple glaze we put on top, drizzle them with a thick, homemade caramel sauce. I’ve got a fabulous, easy recipe for caramel popcorn that you could adapt by just setting aside some extra sauce before you fold in the popcorn. A little drizzle across the top of your **homemade apple pies**? Heavenly!
Honestly, though, never underestimate the power of simplicity, especially with a perfectly executed crust. Sometimes, if I’ve made mine extra pretty with the fork crimping, I skip the glaze entirely and just use a light, even dusting of powdered sugar right before serving. It lets the beautiful, golden-brown exterior do all the talking. Whatever you choose, these little pockets of apple joy are always welcome on the table!
Storage and Reheating Instructions for fried apple pies
These **fried apple pies** are definitely at their peak textural glory the day they are made—that lovely crispness from the frying doesn’t last forever, bless its heart! But don’t worry, we can absolutely manage leftovers so you can enjoy them tomorrow.
If you have any left, my first suggestion would always be to keep them on the counter, enclosed in an airtight container, for up to two days. I generally try to avoid putting fried goods in the refrigerator if I can help it. Why? Because the moisture inside condenses, and that lovely, flaky crust turns soft and a little chewy. If you must keep them longer than two days, then yes, wrap them tightly and pop them in the fridge, but we need to plan a revival session!
The only way (and I mean the absolute *only* way) to bring back that satisfying crunch after refrigeration is using dry heat. Do not microwave them, please! You’ll just steam them into a sad, soggy state. Instead, reheat your leftover **homemade apple pies** in an oven or toaster oven preheated to about 350°F (175°C). Just five to seven minutes should do the trick—long enough to warm the filling back up and crisp the crust without burning those edges. Put them directly on the rack for maximum airflow. They come out tasting nearly as good as fresh, I promise!
Frequently Asked Questions about fried apple pies
It’s funny how many little questions pop up when you move from baking to frying, isn’t it? Even with what feels like a straightforward **fried apple pie recipe**, temperature and technique can make or break the experience. I’ve gathered the most common things I hear from people trying these **old fashioned fried pies** for the first time, so you can dive in with total confidence!
Can I use store-bought pie crust for these fried apple pies?
Oh, absolutely you can! Sometimes we just need a little help, and that’s perfectly fine. If you opt for store-bought, look for the refrigerated kind made with all-butter or shortening, avoiding the puff pastry sheets, as they behave differently in hot oil. While my homemade version gives you that superior, ultra-light flakiness, a quality store-bought crust will still yield delicious results, though perhaps a slightly denser texture. It definitely helps make this an **easy fried dessert**!
What is the secret to preventing the filling from leaking out of my fried apple pies?
This is the most common worry, and it nearly always comes down to two steps we covered: the seal and the chill. First, make sure you brush water all along the rim of the bottom crust before you place the top crust on. Then, crimp it firmly with a fork! You want that seal to be tight. Second, and this is non-negotiable for me: those assembled pies must go into the freezer for 15 minutes right before they hit the oil. This freezing sets the fat in the dough, helping it hold its shape against that boiling hot oil so the filling stays neatly tucked inside.
Can I make these old fashioned fried pies using an air fryer instead of deep frying?
Yes, you certainly can adapt them for the air fryer, which cuts way down on cleanup! Since you aren’t getting that direct oil contact, the texture will definitely be different—less shatteringly crispy, leaning closer to a baked hand pie, but still delicious and less messy. To adapt them, brush the tops lightly with milk or an egg wash. Set your air fryer to about 375°F (190°C) and cook them for about 12 to 15 minutes, flipping halfway through. Keep an eye on them after 10 minutes, as they can brown quickly! For more exciting apple ideas, check out my apple cider donuts recipe!
Nutritional Snapshot of these fried apple pies
Now, let’s talk turkey—or in this case, apples and flour! Since these indulgent **fried apple pies** involve deep frying and a rich, flaky crust, they definitely fall into the “treat yourself” category on my table. I always tell my readers at Unfold Recipes that while food should nourish the soul, it’s good to know what we’re working with here.
The numbers below are just estimates based on the recipe using standard ingredients, like vegetable oil for frying and Granny Smith apples. If you use a lighter frying oil, or skip the glaze, your totals will certainly shift. As always, use this as a general guide rather than a strict accounting for your family’s delicious **homemade apple pies**!
- Serving Size: 1 pie
- Calories: 450
- Sugar: 35g (mostly from the apples and glaze)
- Fat: 25g
- Saturated Fat: 10g
- Carbohydrates: 55g
- Protein: 5g
The fat content is higher because of the beautiful, crispy shell we achieve from frying—that’s the trade-off for that amazing texture! Enjoy them wholeheartedly, knowing you made every component from scratch!
Share Your Experience Making fried apple pies
And just like that, we’ve created pockets of pure, golden, **nostalgic comfort food**! I truly hope that as you pulled these **fried apple pies** from the oil, you felt that little rush of accomplishment that comes from mastering a truly classic, old-fashioned dessert. For me, the smell of that hot cinnamon apple filling mixing with the frying oil is just pure happiness.
Now that you’ve served them up, I would absolutely love to hear how they turned out in your kitchen! Did your crust get just as flaky as mine? Did you choose the powdered sugar glaze or perhaps go for a rich caramel drizzle? Don’t be shy—jump down to the comments section below and let me know!
If you made a batch, please take a picture and tag me on social media! Sharing those beautifully golden results makes my day even brighter. And if this recipe took you back, maybe it reminded you of a grandmother or a special time in your own history, I would be honored if you shared that small story too. Food is meant to be shared and remembered, after all. For more ongoing inspiration for your own culinary stories, feel free to browse my main Blog section!
If you found this recipe worth its weight in sugar and spice, please consider leaving a quick rating at the top of the page—it helps other home cooks, just like you, find these wonderful **Southern style desserts**. If you want to see another incredibly popular version that inspired me, you can check out this take on Amish Fried Pies! Happy baking, and I can’t wait to read your notes!
PrintThe Best Old-Fashioned Fried Apple Pies with Flaky Crust and Cinnamon Glaze
Make these irresistible fried apple pies for a comforting, nostalgic dessert. You get a crispy, golden pastry shell filled with sweet, spiced apples and finished with a simple powdered sugar glaze.
- Prep Time: 45 min
- Cook Time: 15 min
- Total Time: 60 min
- Yield: 8 hand pies 1x
- Category: Dessert
- Method: Frying
- Cuisine: American
- Diet: Vegetarian
Ingredients
- 2 1/2 cups all-purpose flour
- 1 teaspoon salt
- 1 cup (2 sticks) cold unsalted butter, cut into cubes
- 1/2 cup ice water, plus more if needed
- 6 medium Granny Smith apples, peeled, cored, and sliced 1/4-inch thick
- 1/2 cup granulated sugar
- 1/4 cup packed light brown sugar
- 1 teaspoon ground cinnamon
- 1/4 teaspoon ground nutmeg
- 1 tablespoon lemon juice
- 1 tablespoon cornstarch
- Vegetable oil or shortening, for frying
- 1 cup powdered sugar
- 2 tablespoons milk
- 1/2 teaspoon vanilla extract
Instructions
- Prepare the Pie Dough: In a large bowl, whisk together the flour and salt. Cut in the cold butter using a pastry blender or your fingers until the mixture resembles coarse crumbs with some pea-sized pieces of butter remaining. Gradually add the ice water, mixing until the dough just comes together. Divide the dough in half, form each half into a disk, wrap in plastic, and chill for at least 1 hour.
- Make the Apple Filling: In a separate bowl, gently toss the sliced apples with the granulated sugar, brown sugar, cinnamon, nutmeg, lemon juice, cornstarch, and a pinch of salt. Let the filling sit while you roll out the dough.
- Roll the Dough: On a lightly floured surface, roll out one disk of dough to about 1/8-inch thickness. Use a plate or a 5-inch round cutter to cut out circles. Repeat with the second disk.
- Fill the Pies: Place about 2 tablespoons of the apple filling onto the center of one dough circle. Brush the edges lightly with water. Place a second dough circle on top and press the edges firmly to seal. Crimp the edges with a fork to create a decorative seal. Cut two small slits in the top of each pie to allow steam to escape.
- Chill the Pies: Place the assembled pies on a baking sheet lined with parchment paper and chill them in the freezer for 15 minutes. This helps prevent the crust from shrinking during frying.
- Fry the Pies: Pour 2 to 3 inches of vegetable oil into a deep, heavy-bottomed pot or Dutch oven. Heat the oil to 350 degrees Fahrenheit (175 degrees Celsius). Carefully place 2 to 3 pies into the hot oil, ensuring you do not overcrowd the pot.
- Cook until golden brown on the bottom, about 2 to 3 minutes. Flip the pies and fry the other side until golden brown, another 2 to 3 minutes. Adjust the heat as necessary to maintain the oil temperature.
- Remove the fried apple pies with a slotted spoon and place them on a wire rack set over paper towels to drain excess oil.
- Make the Glaze: While the pies are still warm, whisk together the powdered sugar, milk, and vanilla extract until smooth.
- Dip or drizzle the warm pies with the cinnamon glaze. Let the glaze set before serving.
Notes
- For the flakiest crust, keep all your dough ingredients very cold. Do not overwork the dough.
- Use a mix of tart apples, like Granny Smith, and slightly sweeter apples for the best flavor in your cinnamon apple filling.
- If you prefer not to fry, you can brush these hand pies with an egg wash and bake them at 400 degrees Fahrenheit for 18-20 minutes until golden.
Nutrition
- Serving Size: 1 pie
- Calories: 450
- Sugar: 35g
- Sodium: 280mg
- Fat: 25g
- Saturated Fat: 10g
- Unsaturated Fat: 15g
- Trans Fat: 0g
- Carbohydrates: 55g
- Fiber: 3g
- Protein: 5g
- Cholesterol: 30mg