 Skip to content

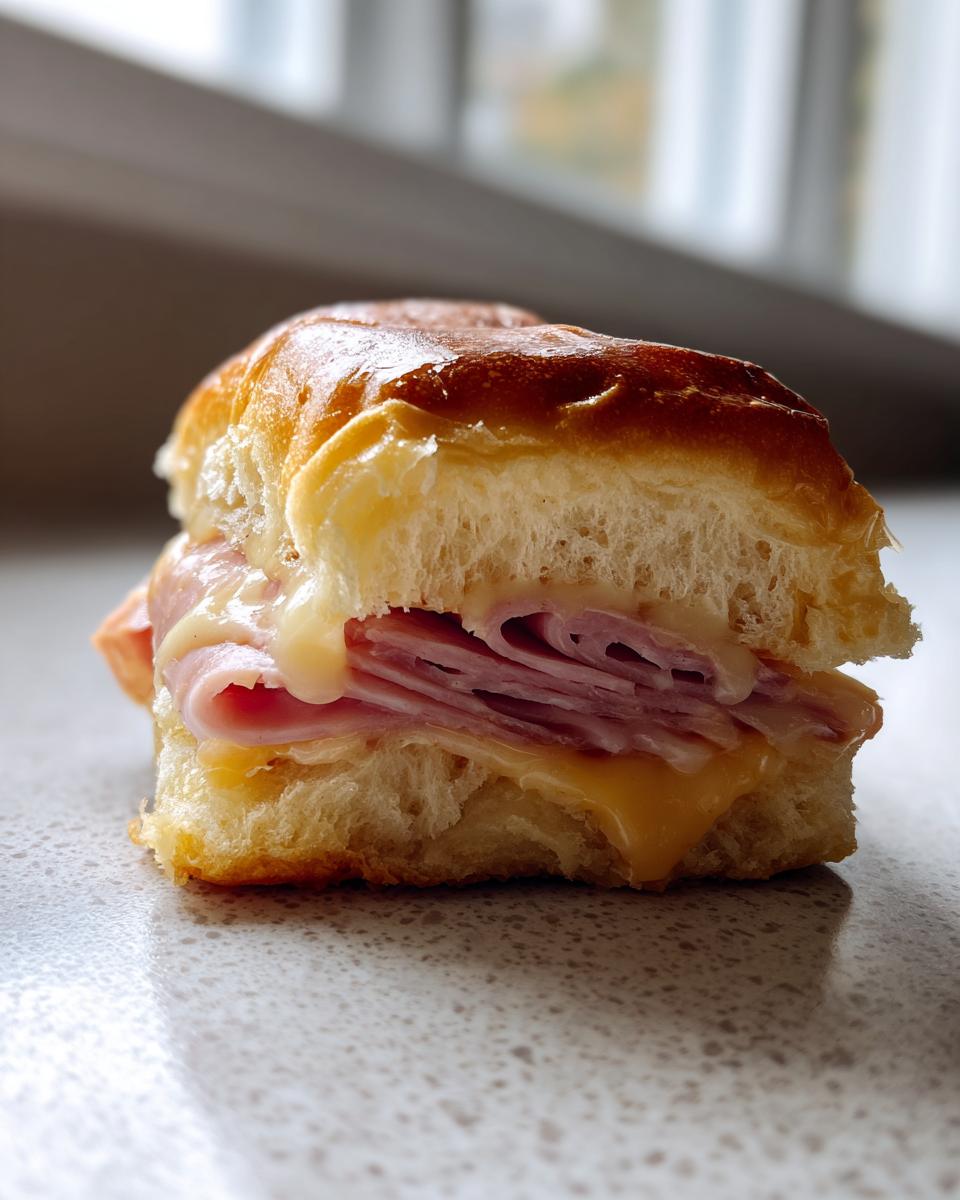
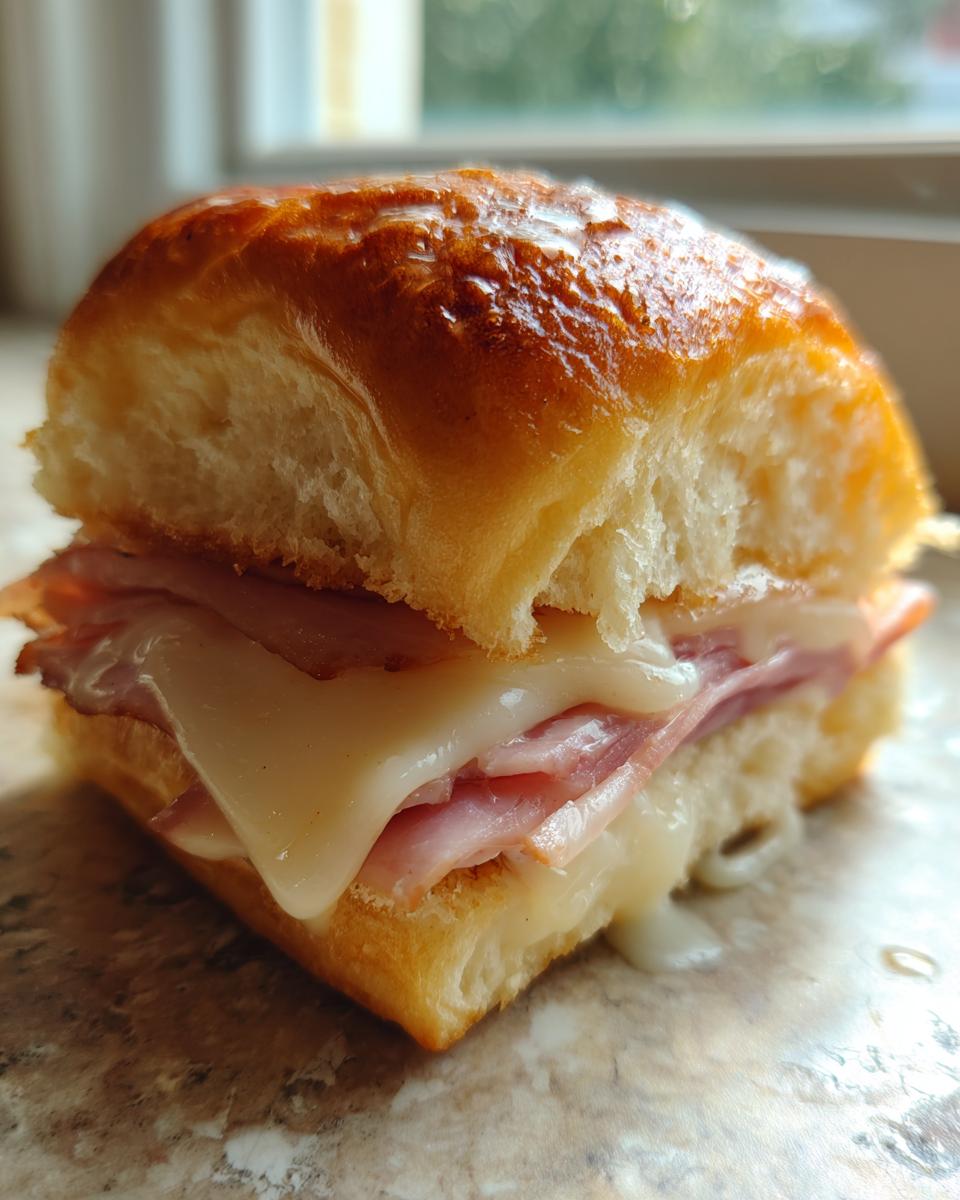
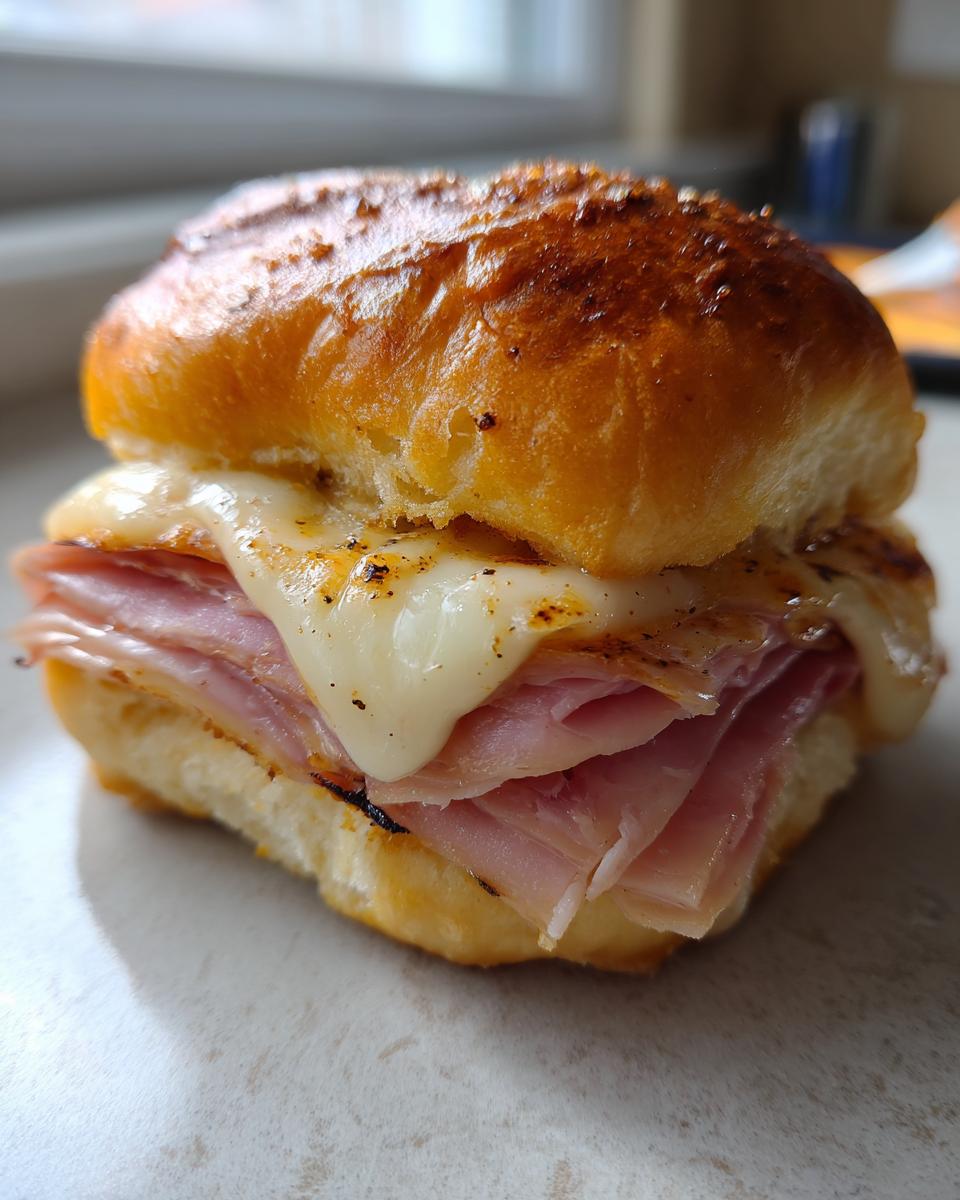
Oh, you know those moments when you need a food superstar that’s almost zero effort but seriously shines? That’s exactly where these Ham and Cheese Sliders come in! They’re the ultimate pull-apart sandwich dream, perfect for when you’re hosting, heading to a potluck, or just want something ridiculously delicious without a fuss. Seriously, the way they all come together in one pan, baked to gooey perfection with that amazing buttery glaze? It’s pure magic.
Here at Unfold Recipes, we’re all about food that tells a story, and these simple sliders definitely have one – the story of a stress-free host who still managed to wow everyone. Catherine, with her culinary background and obsession with testing recipes until they’re just right, poured all that passion into making sure these are genuinely easy *and* incredibly tasty. They’re more than just a snack; they’re a little bite of happiness, ready to fuel any good time.
- Why You'll Love These Ham and Cheese Sliders
- Gather Your Ingredients for Ham and Cheese Sliders
- Step-by-Step Guide to Making Ham and Cheese Sliders
- Tips for Success with Your Ham and Cheese Sliders
- Ingredient Spotlight: Hawaiian Rolls
- Variations for Your Ham and Cheese Sliders
- Serving and Storing Your Ham and Cheese Sliders
- Frequently Asked Questions about Ham and Cheese Sliders
- Nutritional Estimate for Ham and Cheese Sliders
- Share Your Ham and Cheese Slider Creations!
Why You’ll Love These Ham and Cheese Sliders
Honestly, what’s not to adore about these little guys? They’re a total lifesaver when you need a quick win! Here’s why they’ll become your go-to:
- Crazy Easy to Make: Seriously, you just layer and bake. No fuss, no mess!
- Insanely Delicious: That melty cheese, savory ham, and sweet, buttery roll combo? Pure heaven.
- Perfect for Sharing: The pull-apart style makes them super fun for parties, game days, or any get-together.
- So Versatile: Dress them up or down – they’re a hit for literally any occasion.
Gather Your Ingredients for Ham and Cheese Sliders
Alright, let’s get down to business! The beauty of these ham and cheese sliders is how simple the ingredient list is. You probably have most of this stuff in your kitchen right now. Here’s what you’ll need to round up:
- 1 (12 count) package Hawaiian sweet rolls – these are key for that slightly sweet, soft base!
- 1/2 pound thinly sliced deli ham – get the good stuff if you can!
- 1/2 pound thinly sliced Swiss or cheddar cheese – or a mix of both, who am I to judge?
- 1/2 cup (1 stick) unsalted butter, melted – gotta have that buttery glaze!
- 1 tablespoon Dijon mustard – this adds a little zing that really makes the glaze sing.
- 1 teaspoon Worcestershire sauce – just a splash for that deep, savory note.
- 1/2 teaspoon garlic powder – because garlic makes everything better, right?
- 1/4 teaspoon poppy seeds (optional) – I like to add these for a little visual pop and extra texture, but skip ’em if you’re not a fan!
Step-by-Step Guide to Making Ham and Cheese Sliders
Alright, let’s get these babies made! It’s honestly so simple, you’ll wonder why you ever bothered with those complicated party snacks.
Preparing the Rolls and Filling
First things first, preheat your oven to 350°F (175°C). While that’s warming up, grab your Hawaiian rolls. Slice the whole package in half horizontally – super easy! Lay the bottom halves down in your baking dish. Now, evenly spread out that yummy deli ham, followed by your cheese slices. Make sure everything is nice and covered, so every bite is cheesy and glorious. Then, just pop the top halves of the rolls right on top.
Crafting the Flavorful Butter Glaze
This is where the magic happens, not gonna lie! In a little bowl, just whisk together your melted butter, that Dijon mustard (it gives it this awesome little kick!), a splash of Worcestershire sauce for depth, and your garlic powder. If you’re feeling fancy, toss in those poppy seeds too. It’s like a flavour explosion waiting to happen, and it’s going to soak into those rolls and make them irresistible.
Baking Your Perfect Ham and Cheese Sliders
Okay, time for the oven! Pour that glorious butter mixture evenly all over the tops of the assembled sliders. Make sure to get it everywhere! Then, cover the whole dish tightly with aluminum foil. Pop it in the preheated oven for about 15 to 20 minutes. You want to let everything get nice and melty and heated through. After that, take off the foil and bake for another 5 minutes or so. This is just to get those tops a little golden brown and extra delicious. Let them rest for just a few minutes before you cut them apart – they’ll hold together better that way. Then, just pull and serve!
Tips for Success with Your Ham and Cheese Sliders
I’ve made these ham and cheese sliders so many times, and trust me, a few little tricks make them even *better*. So here are my absolute favorite tips to make sure yours turn out just perfect every single time:
- Quality Matters! Seriously, splurge a little on good deli ham and your favorite Swiss or cheddar cheese. It makes a huge difference in the flavor.
- Don’t Skimp on the Glaze: Make sure you pour that buttery, garlicky mixture evenly over *all* the tops. That’s where all the flavor magic happens!
- Got a Bunch of Sliders? If you’re making a double batch for a big game day party, you might want to split them between two pans. Crowding them can sometimes make the bottoms a little soggy instead of toasty.
- Spicy Kick? Yes, Please! If you like a little heat, totally add a pinch of cayenne pepper to that butter mixture. Wowza, it gives it just the right amount of warmth!
Ingredient Spotlight: Hawaiian Rolls
You know, the secret weapon in these ham and cheese sliders? Hands down, it’s the Hawaiian sweet rolls. They’re not just bread; they’re like little fluffy pillows of happiness! Their slightly sweet taste is the *perfect* counterpoint to the salty ham and melty cheese. Plus, their super soft texture makes them just melt in your mouth. Honestly, they’re what takes these sliders from good to absolutely unforgettable. They’re just made for this!
Variations for Your Ham and Cheese Sliders
While these ham and cheese sliders are absolutely divine as is, you know me – I love a good twist! Don’t be afraid to play around and make them your own. Feeling adventurous? Try swapping out the Hawaiian rolls for buttery brioche buns or even mini croissants if you’re feeling extra fancy. Instead of ham, maybe some thinly sliced roast turkey or even smoked turkey breast would be amazing. And cheese? Oh, the possibilities! Sharp provolone, gooey Gruyere, or even pepper jack for a little heat would be incredible.
For the glaze, I often add a sprinkle of dried Italian herbs or a pinch of smoked paprika right into the butter mixture. Sometimes, a little sprinkle of onion powder instead of garlic powder is super tasty too. It’s all about making these sliders uniquely yours!
Serving and Storing Your Ham and Cheese Sliders
Okay, so you’ve made these absolute beauties! The best way to serve them is warm, right out of the oven. Just let them cool for a few minutes so you don’t burn your fingers, then slice them apart and watch everyone grab their own little treasure. If, by some miracle, you have leftovers, don’t you worry! Just wrap them up tightly in plastic wrap or pop them into an airtight container. They’ll stay good in the fridge for a day or two. To reheat, just pop them in the oven covered at around 300°F (150°C) until they’re warm and gooey again!
Frequently Asked Questions about Ham and Cheese Sliders
Got questions about these yummy ham and cheese sliders? I’ve got answers! It’s totally normal to have a few things pop up when you’re making a new recipe, especially one this popular. Let’s dive in!
Can I make these ahead of time?
You totally can! You can assemble the sliders (ham, cheese, tops) and keep them covered in the fridge for a few hours before baking. Just mix up that butter glaze right before you’re ready to bake, pour it over, and then bake as directed, maybe adding a couple of extra minutes because they’ll be starting colder.
What other types of cheese work best?
Oh, the cheese possibilities are endless! While Swiss and cheddar are classics for a reason, provolone is super melty and delicious. Gruyere gives a fancier, nuttier flavor, and Monterey Jack melts like a dream. You can even do a mix! Just make sure it’s cheese that melts well.
Can I use a different type of bread?
Absolutely! While the Hawaiian rolls are pretty special with their sweetness, you can totally use other soft rolls. Brioche rolls, King’s Hawaiian sub rolls, or even just a good quality dinner roll would work. Just make sure they’re soft enough to soak up that glaze!
How do I prevent the bottoms from getting soggy?
A little trick for you! Make sure your ham and cheese aren’t too wet. Also, if you’re worried about sogginess, you can try lining your baking dish with parchment paper. It creates a bit of a barrier and helps keep things from sticking while ensuring a nice toasty bottom.
Can I add other ingredients besides ham and cheese?
You bet! Some people love adding a thin layer of deli turkey or even roast beef along with the ham. I’ve also seen people add a swipe of mustard or mayo directly onto the bottom roll before layering the ham, or even some caramelized onions. Get creative!

Nutritional Estimate for Ham and Cheese Sliders
Just so you know, giving exact nutritional info can be tricky since everyone uses slightly different ingredients – like, what kind of Swiss cheese did *you* snag? But generally, one of these yummy ham and cheese sliders, per the recipe, clocks in at around: Calories: 250, Sugar: 8g, Sodium: 600mg, Fat: 15g. Remember, these are just estimates, but they give you a good idea!
Share Your Ham and Cheese Slider Creations!
Okay, so you’ve whipped up these amazing ham and cheese sliders! I would absolutely LOVE to hear all about it. Did you try a new cheese? Add something fun to the glaze? Let me know in the comments below! Your feedback – and those star ratings! – seriously helps other home cooks find their new favorite party snack. Can’t wait to see what you create!
PrintHam and Cheese Sliders

Easy pull-apart sandwiches on Hawaiian rolls with melty cheese and a buttery glaze, perfect for game day or potlucks.
- Prep Time: 10 min
- Cook Time: 25 min
- Total Time: 35 min
- Yield: 12 sliders 1x
- Category: Appetizer
- Method: Baking
- Cuisine: American
- Diet: Vegetarian
Ingredients
- 1 (12 count) package Hawaiian sweet rolls
- 1/2 pound thinly sliced deli ham
- 1/2 pound thinly sliced Swiss or cheddar cheese
- 1/2 cup (1 stick) unsalted butter, melted
- 1 tablespoon Dijon mustard
- 1 teaspoon Worcestershire sauce
- 1/2 teaspoon garlic powder
- 1/4 teaspoon poppy seeds (optional)
Instructions
- Preheat your oven to 350°F (175°C).
- Slice the Hawaiian rolls in half horizontally. Place the bottom halves in a 9×13 inch baking dish.
- Layer the ham evenly over the bottom halves of the rolls.
- Top the ham with the cheese slices.
- Place the top halves of the rolls over the cheese.
- In a small bowl, whisk together the melted butter, Dijon mustard, Worcestershire sauce, garlic powder, and poppy seeds (if using).
- Pour the butter mixture evenly over the tops of the sliders.
- Cover the baking dish tightly with aluminum foil.
- Bake for 15-20 minutes, or until the cheese is melted and the rolls are heated through.
- Remove the foil and bake for an additional 5 minutes, or until the tops are lightly golden brown.
- Let the sliders rest for a few minutes before serving. Cut them apart and serve warm.
Notes
- For a spicier kick, add a pinch of cayenne pepper to the butter mixture.
- You can substitute other deli meats like turkey or roast beef.
- Experiment with different cheeses like provolone or Gruyere.
Nutrition
- Serving Size: 1 slider
- Calories: 250
- Sugar: 8g
- Sodium: 600mg
- Fat: 15g
- Saturated Fat: 7g
- Unsaturated Fat: 8g
- Trans Fat: 0g
- Carbohydrates: 18g
- Fiber: 1g
- Protein: 12g
- Cholesterol: 40mg