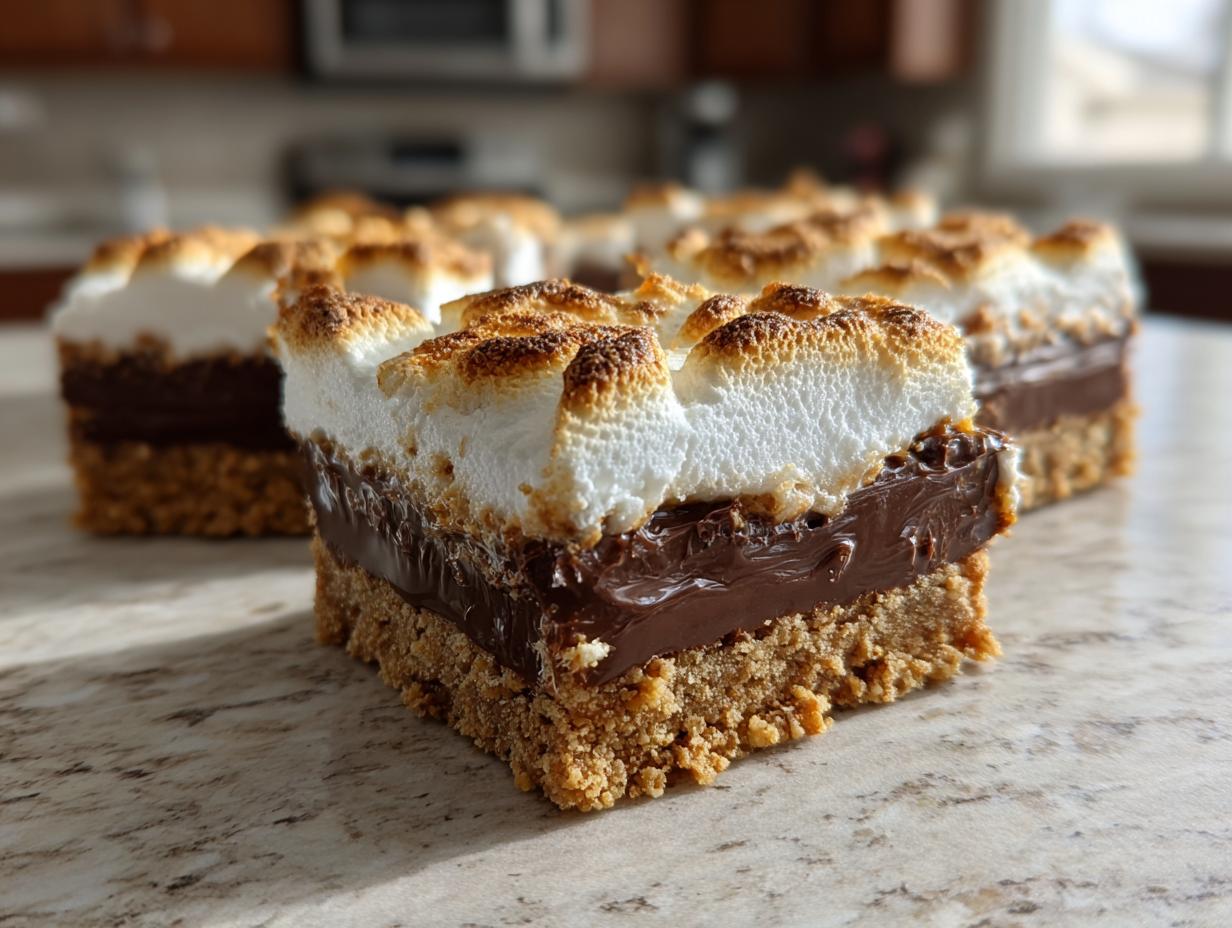

That perfect trinity of graham cracker crust, gooey chocolate, and fluffy marshmallow – it just screams comfort, doesn’t it? I’m Catherine, and I’ve always believed our kitchens are where the best stories happen. That’s why, when I think about simple, utterly satisfying treats, my mind instantly goes to these No-Bake S’mores Bars. They’re a total game-changer when you need something sweet *fast*, and the best part? Zero oven time needed! Seriously, they practically make themselves. Growing up, my family always celebrated with food, and I love creating those same kinds of heartwarming moments. These bars are perfect for a quick dessert fix after dinner, or they’re just fantastic to pack along as an easy camping snack. They bring that campfire magic right to your kitchen, no matter where you are!
- Why You'll Love These No-Bake S'mores Bars
- Gather Your Ingredients for No-Bake S’mores Bars
- Easy Steps to Make Your No-Bake S’mores Bars
- Tips for Perfect No-Bake S’mores Bars
- Making Vegan S’mores Bars
- Storing and Freezing Your No-Bake S’mores Bars
- Frequently Asked Questions About No-Bake S’mores Bars
- Estimated Nutritional Information
- Share Your No-Bake S’mores Bar Creations
Why You’ll Love These No-Bake S’mores Bars
Honestly, these bars are just the best! They’re ridiculously easy to whip up—think mix, press, layer, and chill. No fuss, no muss, just pure, unadulterated s’mores joy. Plus, they’re so quick, which is a lifesaver when you need a sweet treat *now*. You get all those campfire flavors without even needing a fire pit! They’re the ultimate easy camping snack or just a fantastic alternative when you don’t want to bake.
Gather Your Ingredients for No-Bake S’mores Bars
Alright, time to get our ingredients ready! To make these dreamy No-Bake S’mores Bars, you’ll need just a handful of things. Think of them as your little flavor treasures. I usually grab my ingredients when I’m at the grocery store, but if you ever want to streamline things, looking into services like the best meal delivery services can sometimes help with stocking your pantry, though I love the hunt for ingredients personally. Anyway, here’s what you’ll need:
- 1/2 cup unsalted butter, melted – gotta have that richness!
- 1 1/2 cups graham cracker crumbs – makes the perfect chewy base
- 1/4 cup granulated sugar – just a touch of sweetness for the crust
- 1 cup semi-sweet chocolate chips – because what’s s’mores without chocolate?
- 1 cup mini marshmallows – they get nice and melty!
- 1/2 cup chopped nuts, if you like! Walnuts or pecans are delicious here.
Easy Steps to Make Your No-Bake S’mores Bars
Okay, friends, let’s get down to the fun part – making these amazing bars! It’s seriously so easy, you’ll wonder if you did something wrong because it feels too simple. But trust me, it’s just that straightforward. These bars are perfect for any occasion, whether you’re planning a party or just need a super quick treat. They’re also fantastic if you’re heading out for some outdoor fun and need a great ‘fire pit dessert’ that won’t require you to hover over a flame!
Preparing the Pan and Crust
First things first, grab an 8×8 inch baking pan. I always line mine with parchment paper, letting the paper hang over the sides a bit. It makes getting the bars out so much easier later on – no sticking, no fighting! Then, in a bowl, just mix your melted butter, graham cracker crumbs, and that little bit of sugar until it all looks like damp sand. Press this mixture really, really firmly into the bottom of your pan. This step is crucial for a crust that holds its shape!
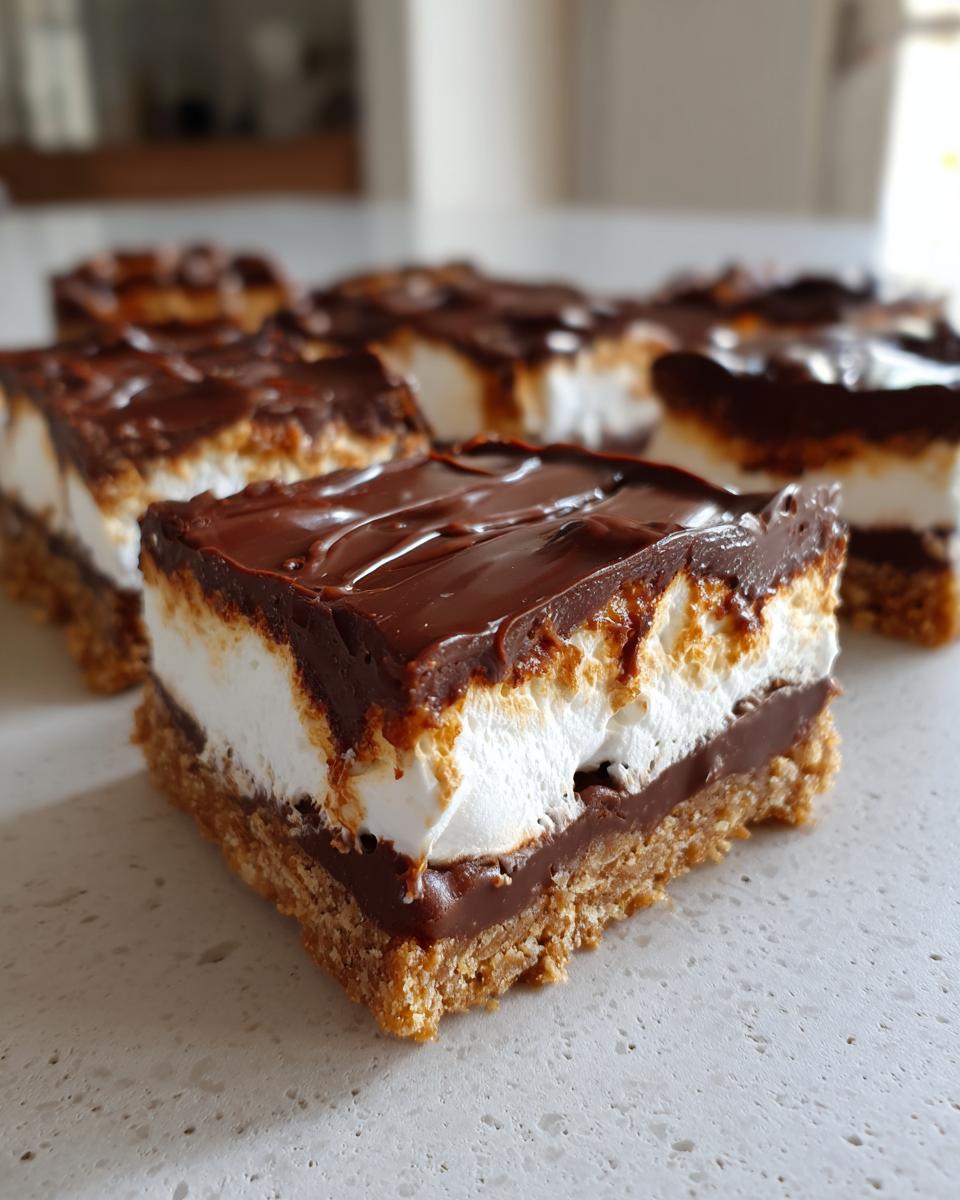
Layering the Chocolate and Marshmallows
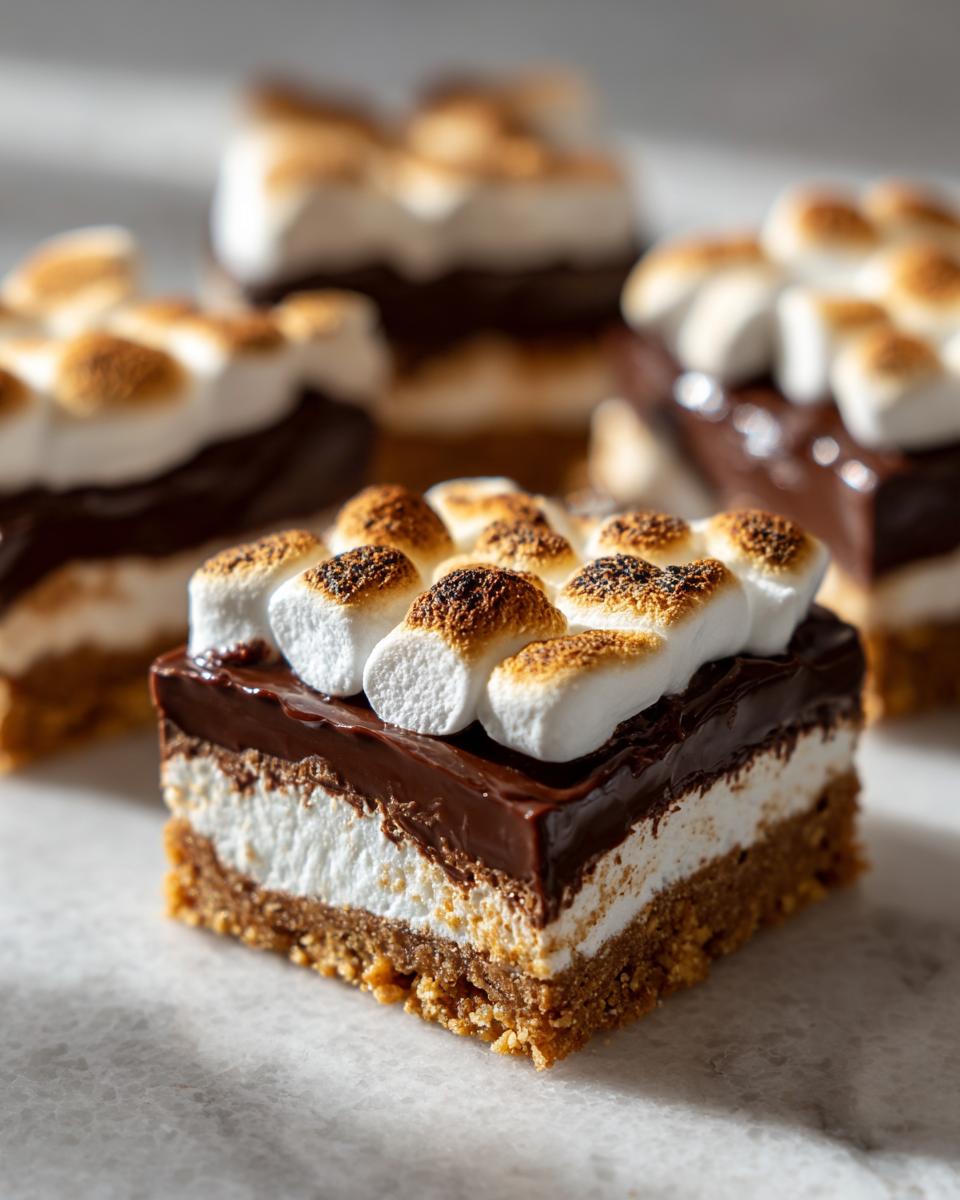
Now for the best part! Sprinkle those glorious chocolate chips all over your pressed crust. Make sure you get them pretty evenly spread. Then, pile on the mini marshmallows right on top of the chocolate. If you’re adding nuts, this is the time to give them a good sprinkle over the marshmallows. It adds a nice crunch and another layer of flavor!
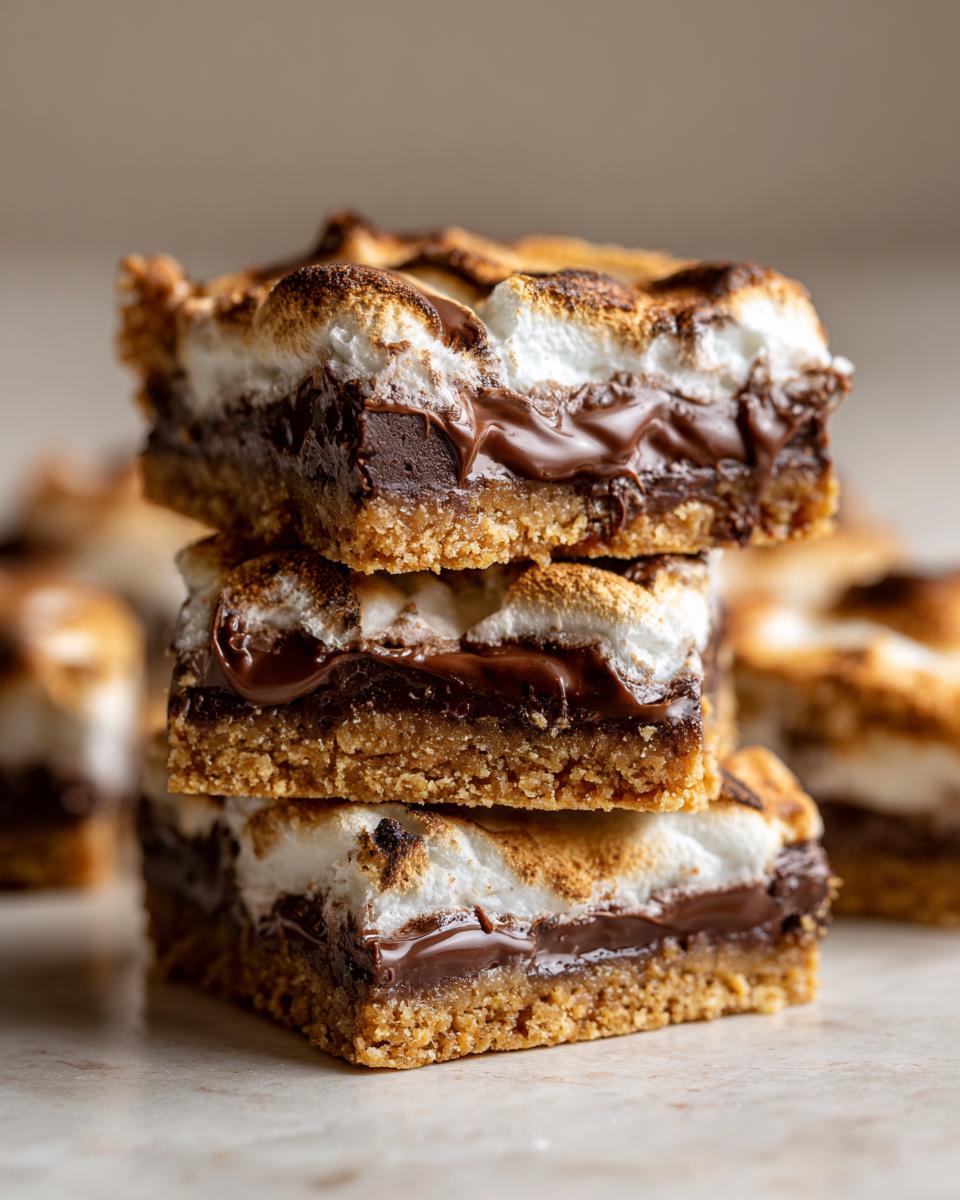
Chilling and Cutting Your No-Bake S’mores Bars
Once everything is layered, it’s time to let the magic happen in the fridge. Pop the pan in there for at least an hour, or until the bars are nice and firm. You want them solid enough to cut clean slices. When they’re ready, just lift them out using those parchment paper edges. Then, use a sharp knife to cut them into whatever size bars you like best. Clean cuts are key here!
Tips for Perfect No-Bake S’mores Bars
Okay, so these bars are pretty foolproof, but I do have a couple of little tricks up my sleeve to make them absolutely perfect every time. These are the kinds of things that really elevate them from just being *good* to being *wow*! If you’re always looking for those ‘quick no bake bars’ that impress, pay attention here!
Achieving the Best Crust Texture
After you press the graham cracker mixture into the pan, give it a good, firm pat down. Like, really squish it in there! This makes sure your delightful crust doesn’t crumble apart when you slice into it. And don’t be shy with the butter; it’s what holds everything together beautifully.
Toasting Marshmallows for Extra Flavor
Here’s a little secret: if you want to take these ‘smores dessert bars’ to the next level, try toasting your marshmallows just a tiny bit before chilling the bars. You can pop the pan under a broiler for about 30 seconds to a minute, keeping a *very* close eye on them so they don’t burn! It gives them that lovely toasted flavor without having to actually sit around a campfire. Careful, they toast fast!

Making Vegan S’mores Bars
Now, for all my plant-based pals out there, you’re going to love this! Making these ‘vegan smores bars’ is totally doable and just as delicious. The trick is making sure all your ingredients are vegan-certified. You’ll want to swap out the regular butter for some good vegan butter – there are tons of great options now! For the crust, make sure your graham crackers are vegan (most are, but it’s always good to double-check the label). And, of course, pick up some vegan chocolate chips and vegan marshmallows. They’re out there, I promise! Following these simple swaps means everyone can enjoy this sweet treat.
Storing and Freezing Your No-Bake S’mores Bars
Alright, so you’ve made these amazing No-Bake S’mores Bars, and now you’re thinking, ‘How do I keep these little beauties fresh?’ It’s super easy! Just pop them into an airtight container. If you’re keeping them at room temperature, they’re usually good for a couple of days, but honestly, they disappear so fast!
Now, for the *real* magic: freezing! These bars freeze like a dream. If you want to keep them for a longer haul, say up to 3 months, then the freezer is your best friend. Just make sure they’re in a good airtight container or a freezer bag. To prevent any freezer burn, you can wrap them tightly in plastic wrap or foil before putting them in the container. When you’re craving one, just let it thaw on the counter for about 10-15 minutes, and it’ll be perfect!
Frequently Asked Questions About No-Bake S’mores Bars
Got questions? I’ve got answers! These No-Bake S’mores Bars are pretty straightforward, but sometimes little things pop up. Think of me as your kitchen bestie here to help make your baking journey smooth sailing. They’re such a hit, you’ll want to make them again and again, especially when you need an ‘easy camping snack’!
Can I use different types of crackers for the base?
Oh, absolutely! While graham crackers are classic, you can totally switch it up. Chocolate graham crackers would make these even more decadent! Or try digestive biscuits for a different vibe. Just make sure you crush them up nice and fine, and stick to that 1 1/2 cup measurement for the best crust texture.
How do I prevent the chocolate from melting too quickly?
I totally get it, especially if it’s warm out! The best way to combat melting chocolate is to keep everything as cool as possible. Make sure your crust is really chilled and firm before you add the chocolate chips. If you’re making these for a party that’s going to be outdoors, maybe keep them in a cooler until serving time, then just take them out right before you want to enjoy your ‘smores dessert bars’!
Are these bars suitable for a ‘fire pit dessert’?
Are you kidding? They are PERFECT for a ‘fire pit dessert’! They’re an actual no-bake treat, so you don’t need a fire at all, but they deliver all that s’mores goodness. Just cut them into bars, pack them in a sturdy container (maybe with a little ice pack if it’s super hot), and you’ve got instant campfire magic anywhere you go!
Estimated Nutritional Information
Just a little note on nutrition: the numbers I have here are pretty much estimates, okay? They can totally change depending on the brands you use and if you add in any of the optional goodies like nuts. But, roughly speaking, each one of these yummy bars comes in around 200 calories, with say, 12g of fat, 25g of carbs, and 2g of protein. It’s good to know, but honestly, sometimes you just gotta have that s’mores magic!
Share Your No-Bake S’mores Bar Creations
I truly hope you give these No-Bake S’mores Bars a try! They’re such a simple joy to make and even better to eat. I’d absolutely love to hear how they turned out for you. Did you add anything special? Did the kids gobble them up? Please, leave a comment below or give the recipe a star rating – it really helps me know what you love!
PrintNo-Bake S’mores Bars
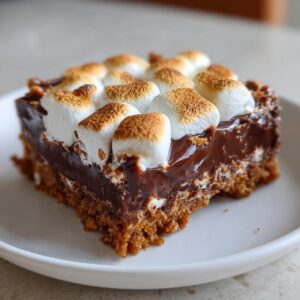
Enjoy these easy no-bake s’mores bars with a graham cracker crust, chocolate layer, and marshmallow topping. Perfect for a quick dessert or camping snack.
- Prep Time: 15 min
- Cook Time: 0 min
- Total Time: 1 hour 15 min
- Yield: 16 bars 1x
- Category: Dessert
- Method: No-Bake
- Cuisine: American
- Diet: Vegetarian
Ingredients
- 1/2 cup unsalted butter, melted
- 1 1/2 cups graham cracker crumbs
- 1/4 cup granulated sugar
- 1 cup semi-sweet chocolate chips
- 1 cup mini marshmallows
- 1/2 cup chopped nuts (optional)
Instructions
- Line an 8×8 inch baking pan with parchment paper.
- In a medium bowl, combine melted butter, graham cracker crumbs, and sugar. Mix until well combined.
- Press the crumb mixture evenly into the bottom of the prepared pan.
- Sprinkle chocolate chips over the crumb layer.
- Top with mini marshmallows. If using, sprinkle chopped nuts over the marshmallows.
- Chill in the refrigerator for at least 1 hour, or until firm.
- Cut into bars and serve.
Notes
- For vegan s’mores bars, use vegan butter, vegan graham crackers, and vegan chocolate chips. Ensure your marshmallows are also vegan.
- Store bars in an airtight container in the freezer for up to 3 months.
- You can toast the marshmallows slightly under a broiler before chilling for a toasted flavor.
Nutrition
- Serving Size: 1 bar
- Calories: 200
- Sugar: 20g
- Sodium: 100mg
- Fat: 12g
- Saturated Fat: 7g
- Unsaturated Fat: 5g
- Trans Fat: 0g
- Carbohydrates: 25g
- Fiber: 1g
- Protein: 2g
- Cholesterol: 20mg