
Oh, Halloween! It’s honestly one of my *favorite* times of the year, and not just for the costumes and the crisp autumn air, but because it’s the perfect excuse to get a little spooky and a LOT creative in the kitchen! If you’re hosting a Halloween bash or just want to surprise the kiddos with something extra special, you *have* to try these Graveyard Pudding Cups. They’re ridiculously fun to make, look absolutely adorable (in a creepy, crawly way!), and best of all, they taste just as amazing as they look. Seriously, my passion is taking those impressive-looking desserts and making them totally doable for us home cooks, and these little guys are the *perfect* example of that.
- Why You'll Love These Graveyard Pudding Cups
- Gather Your Ingredients for Spooky Graveyard Pudding Cups
- How to Make Delicious Graveyard Pudding Cups
- Tips for Perfect Graveyard Pudding Cups
- Ingredient Notes and Substitutions for Graveyard Pudding Cups
- Serving and Storing Your Spooky Treats
- Frequently Asked Questions about Graveyard Pudding Cups
- Nutritional Information for Graveyard Pudding Cups
- Share Your Spooky Creations!
Why You’ll Love These Graveyard Pudding Cups
These Graveyard Pudding Cups are just the *best* for so many reasons! Seriously, if you’re looking for a no-fuss, high-impact Halloween treat, you’ve found it. They’re:
- Super Easy to Make: You won’t spend hours in the kitchen, I promise! The steps are totally straightforward.
- So Festive and Spooky: They really capture that Halloween vibe with their adorable (and slightly creepy!) graveyard look.
- Crowd-Pleaser Alert: Everyone, from little ghouls to grown-ups, absolutely devours the chocolatey, creamy goodness.
- Perfect for Parties: Individual servings mean no messy slicing, and they look so cute lined up on a treat table.
- Totally Customizable: Feel free to swap out the candy decorations or cookies – let your creativity run wild!
- No Baking Involved: That’s right, we’re skipping the oven and keeping things simple and cool.
Gather Your Ingredients for Spooky Graveyard Pudding Cups
Alright, let’s get our spooky supplies ready! Making these Graveyard Pudding Cups is all about having the right bits and bobs to create that perfect, eerie scene. Trust me, using good quality ingredients here really lets those classic chocolatey flavors shine through. You’ll need:
- For the ‘Dirt’ Layer:
- 12 chocolate sandwich cookies (like Oreos), and yes, we need them finely crushed. Think of it as the dark earth!
- 1/4 cup unsalted butter, melted – this is what holds our dirt together.
- For the Creamy Pudding Filling:
- 1/4 cup granulated sugar
- 1/4 cup all-purpose flour
- 1/4 teaspoon salt
- 1 large egg yolk – this is super important for that homemade pudding texture!
- 1 tablespoon cornstarch
- 1 cup milk
- 1 teaspoon vanilla extract
- 1/2 cup heavy cream
- 1/4 cup powdered sugar
- For the Graveyard Decorations:
- 12 chocolate pudding cups (the individual kind you can buy, so easy!)
- 12 Milano cookies or similar flat cookies – these are our tombstones!
- 12 candy pumpkins or candy ghosts – the more ghoulish, ghoul-ish, the better!
- 12 pretzel sticks – perfect for little fences or crosses.
Don’t worry if you don’t have Milanos; any nice flat, rectangular cookie will work for a tombstone! And feel free to get creative with your candy – gummy worms are pretty fun too!
How to Make Delicious Graveyard Pudding Cups
Okay, deep breaths everyone, because this is where the magic *really* happens! Making these Graveyard Pudding Cups is honestly so much fun, and the steps are really forgiving, so don’t stress. We’re going to build these little spooky scenes layer by delicious layer, kind of like assembling a no-bake cookie masterpiece or those fun Halloween Oreo balls we love!
Preparing the Graveyard Base
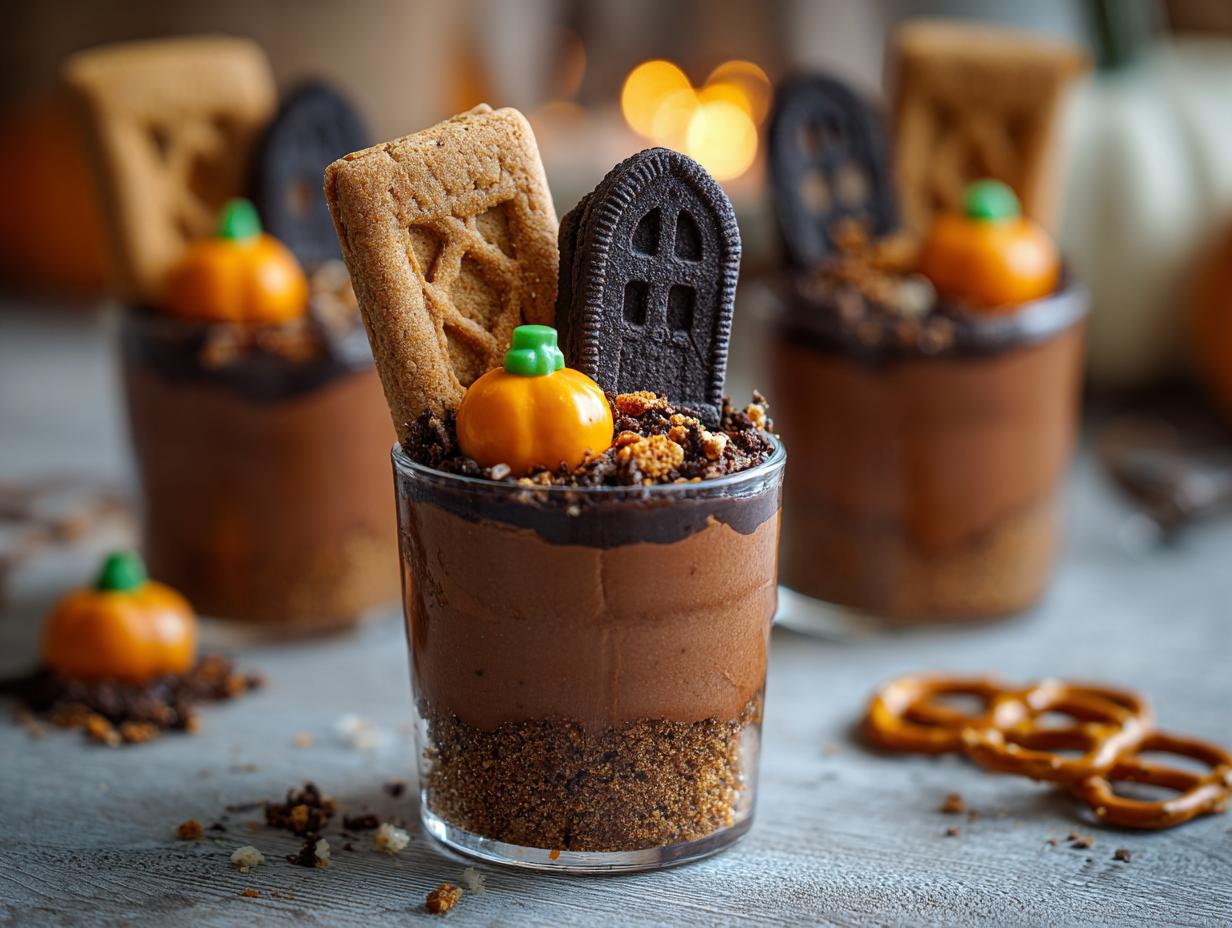
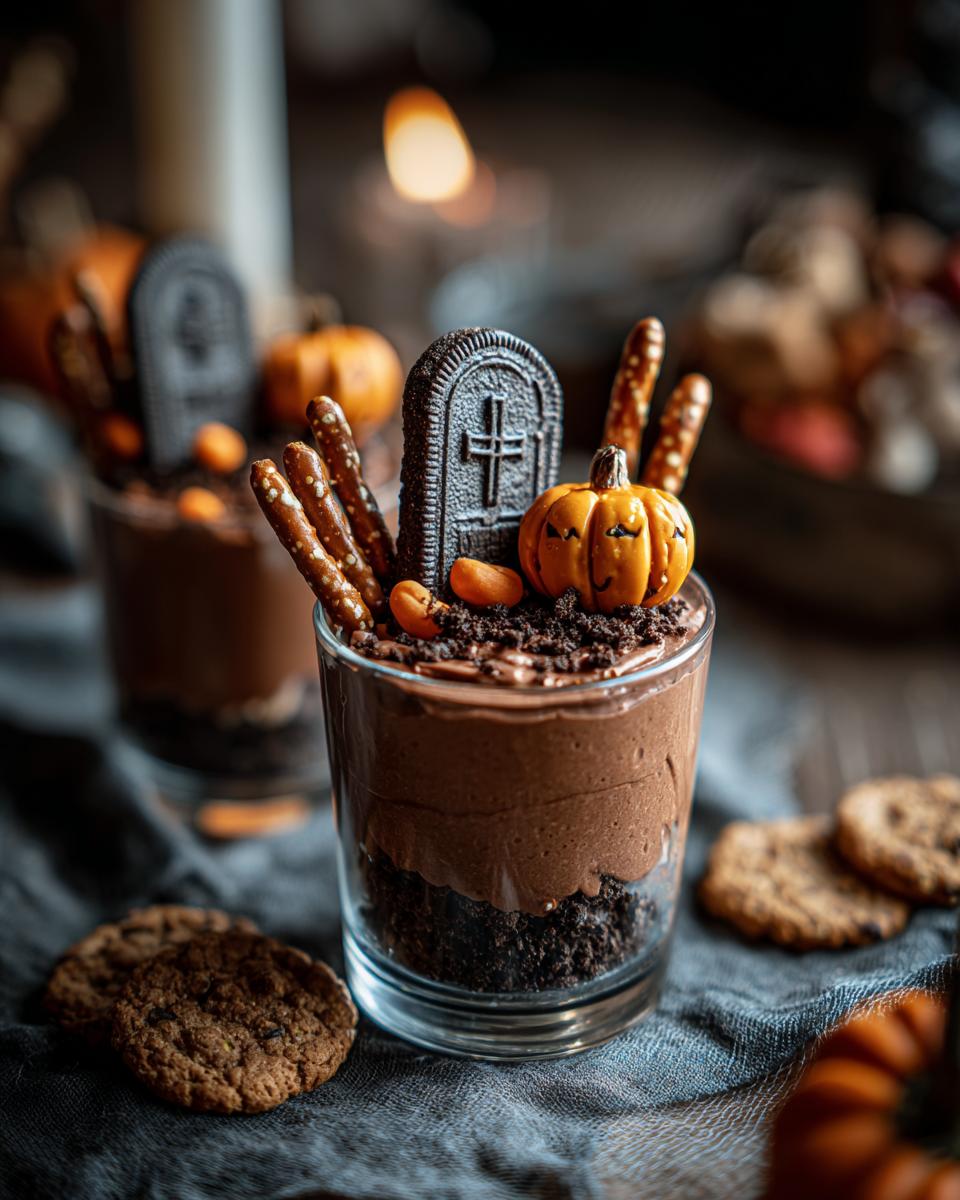
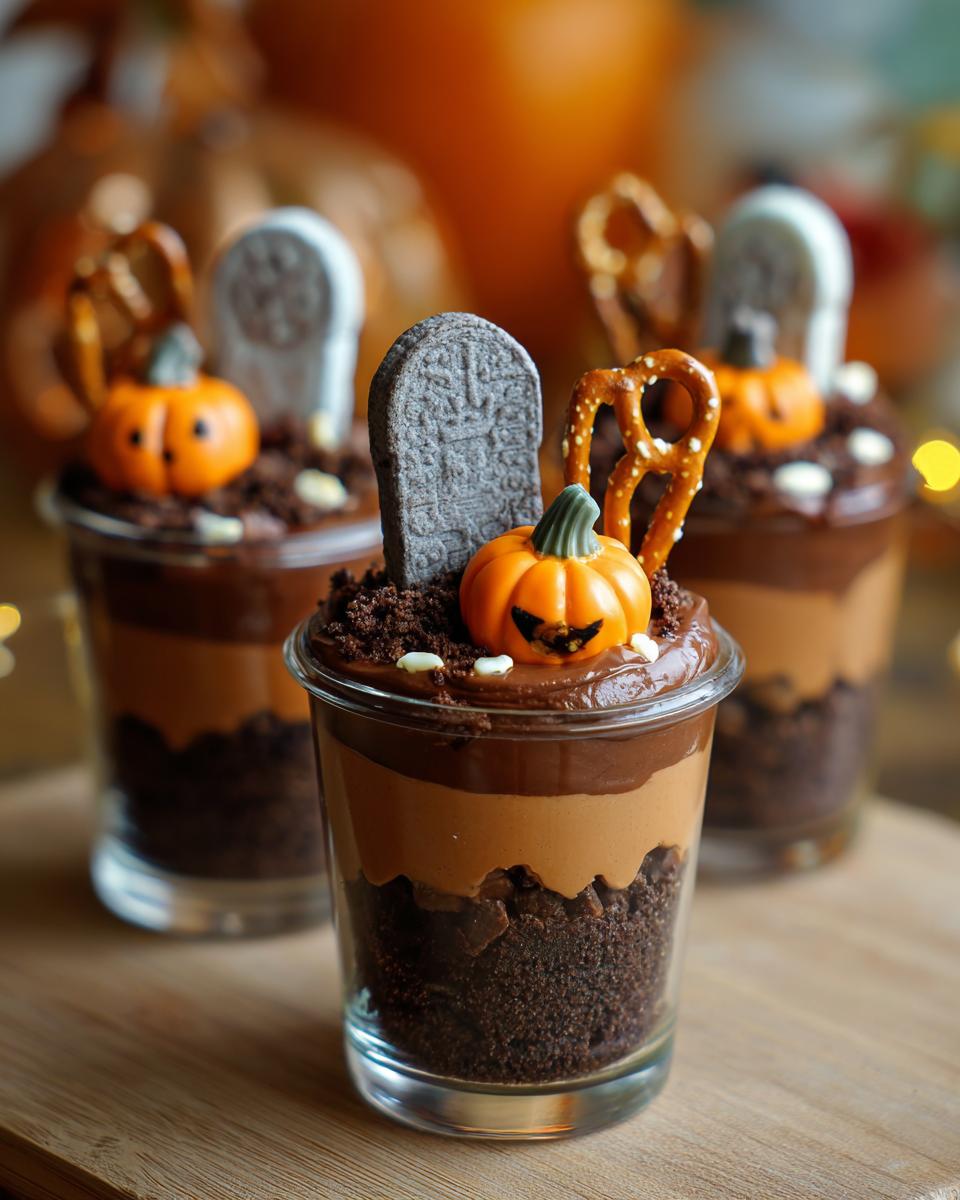
First things first, let’s get our “dirt” ready. Grab those finely crushed chocolate sandwich cookies and mix them with that melted butter. You want it to look like damp soil. Then, just spoon about a tablespoon of this yummy mixture into the bottom of each of your clear cups. Give it a little press down so it forms a nice, sturdy base for our spooky graveyard.

Making the Creamy Pudding Filling
Now for the creamy, dreamy part! In a saucepan, whisk together your sugar, flour, salt, that egg yolk (don’t skip it – it makes the pudding so rich!), and cornstarch. Then, slowly whisk in the milk until it’s all smooth. Cook this over medium heat, stirring *constantly* – seriously, don’t walk away! – until it gets nice and thick and starts to bubble. Then, stir in that vanilla extract and pour it into a bowl. Pop a piece of plastic wrap right on top, pressing it down so there’s no air. This stops that pesky skin from forming. Let it cool completely.
Whipping the Cream and Assembling the Graveyard
While the pudding cools, whip up your heavy cream with the powdered sugar until you get those lovely stiff peaks. It should look like fluffy clouds! Once your pudding is totally cool, gently fold that whipped cream into it. Don’t overmix, you just want to get it beautifully combined. Now, spoon this glorious mixture evenly over our cookie crumb bases in each cup. This is the spooky landscape! Then, gently push one of those Milano cookies into the pudding – that’s your tombstone! Then, pop in a candy pumpkin or ghost next to it. They look so cute peeking out! Lastly, stick a pretzel stick into the pudding. It makes a perfect little cross or even a fence post.

Chilling Your Graveyard Pudding Cups
Okay, so close to done! Pop these little guys in the fridge for at least 30 minutes. This helps everything set up just right and makes them even more refreshing to eat.
Tips for Perfect Graveyard Pudding Cups
Alright, let’s make sure your Graveyard Pudding Cups are absolutely spooktacular! I’ve done this a bunch of times, and a few little tricks really make them shine. First off, for that perfect tombstone look, make sure you gently push the Milano cookie straight down into the pudding – don’t angle it too much, or it might fall over! And for presentation? Line them up like a little cemetery on your dessert table; maybe add a few gummy worms crawling out of the dirt if you’re feeling extra creepy, like in those fun spider web brownies we make. If you want even more spooky characters, the ghost cupcakes are always a hit!
Ingredient Notes and Substitutions for Graveyard Pudding Cups
Sometimes the magic is in the switch-ups, right? If you can’t find Milanos, any flat, crisp cookie works perfectly for a tombstone moment. For the chocolate cookies at the bottom, feel free to use any chocolate sandwich cookie you love, or even some crushed chocolate graham crackers if that’s what you have! For a gluten-free treat, just grab your favorite gluten-free chocolate cookies and make sure your pudding base is gluten-free too – it’s an easy swap for our gluten-free meal delivery friends!
Serving and Storing Your Spooky Treats
These Graveyard Pudding Cups are best served chilled, so make sure they’ve had that little nap in the fridge! Arrange them on a platter or board for a totally festive Halloween display. Since they’re no-bake, they make for super easy party prep! If you happen to have any leftovers (which is rare, trust me!), just cover them tightly with plastic wrap and pop them back in the fridge. They’ll stay yummy for a couple of days, although the cookie “dirt” might get a little softer over time. They’re also great to make ahead if you want one less thing to worry about on party day, sort of like how perfectly planned appetizers can save you!
Frequently Asked Questions about Graveyard Pudding Cups
Got questions about whipping up these spooky delights? I’ve got you covered! Making these Graveyard Pudding Cups is so much fun and pretty straightforward, but sometimes a little extra info helps. Here are some common things people ask:
Can I make Graveyard Pudding Cups ahead of time?
Totally! In fact, I actually recommend it. Making them a few hours or even a day before your party is perfect. Just make sure they’re covered tightly and chill them in the fridge. This lets all those yummy flavors meld together and ensures they’re nice and cold for serving. It’s a lifesaver when you’re hosting!
Are these Graveyard Pudding Cups kid-friendly?
Oh absolutely! Kids adore these. They love helping to crush the cookies and decorate the little graveyards. The chocolate pudding and cookie base are classic kid favorites, and the spooky theme makes them extra exciting. They’re a great way to involve them in Halloween baking!
What kind of chocolate sandwich cookies work best for the base?
For that perfect “dirt” effect, classic chocolate sandwich cookies like Oreos are fantastic because they have a good chocolate flavor and crush up really well. But honestly, any chocolate cookie you love will work! If you’re looking for alternatives, even chocolate graham crackers can do the trick.
How do I customize the decorations on my Graveyard Pudding Cups?
Get creative! Besides the Milano tombstone and candy pumpkins or ghosts, you could use little candy crosses or even gummy worms crawling out of the “dirt.” Sometimes I’ll even add a spiderweb made from melting white chocolate and drizzling it over the Milano cookie if I’m feeling extra fancy. The possibilities are endless for making your desserts uniquely spooky!
Nutritional Information for Graveyard Pudding Cups
Now, like with most fun, festive treats, these Graveyard Pudding Cups are more about the spooky charm and deliciousness than counting every little calorie! But to give you a ballpark idea, here’s an estimate per serving. Keep in mind that the exact numbers can wiggle a bit depending on the brands of cookies and pudding cups you use. Basically, you’re looking at around 350 calories, with about 18g of fat (that’s the creamy goodness!), 48g of carbs packed with chocolatey flavor, and a little protein to boot. Enjoy them guilt-free – it’s Halloween, after all!
Share Your Spooky Creations!
I absolutely *love* seeing what you all create in your kitchens! Did you make these Graveyard Pudding Cups? Did you add your own spooky twists or discover a new favorite decoration? Please, please share your photos and stories in the comments below, or even rate the recipe! It makes my day and helps others find their next favorite Halloween treat. I can’t wait to see your ghoulish creations!
PrintGraveyard Pudding Cups
Create spooky and delicious graveyard pudding cups for your Halloween party. This easy recipe is a fun, festive treat that guests of all ages will enjoy.
- Prep Time: 25 min
- Cook Time: 10 min
- Total Time: 35 min
- Yield: 12 servings 1x
- Category: Dessert
- Method: No Bake
- Cuisine: American
- Diet: Vegetarian
Ingredients
- 12 chocolate sandwich cookies (like Oreos), finely crushed
- 1/4 cup unsalted butter, melted
- 1/4 cup granulated sugar
- 1/4 cup all-purpose flour
- 1/4 teaspoon salt
- 1 cup milk
- 1 large egg yolk
- 1 tablespoon cornstarch
- 1 teaspoon vanilla extract
- 1/2 cup heavy cream
- 1/4 cup powdered sugar
- 12 chocolate pudding cups (individual servings)
- 12 Milano cookies or similar flat cookies
- 12 candy pumpkins or candy ghosts
- 12 pretzel sticks
Instructions
- In a medium bowl, combine the crushed chocolate sandwich cookies and melted butter. Stir until the crumbs are moistened. Press about 1 tablespoon of the crumb mixture into the bottom of each of 12 small clear cups or jars.
- In a medium saucepan, whisk together the granulated sugar, flour, salt, egg yolk, and cornstarch. Gradually whisk in the milk until smooth.
- Cook over medium heat, stirring constantly, until the pudding thickens and bubbles. Remove from heat and stir in the vanilla extract.
- Pour the pudding into a bowl. Cover the surface directly with plastic wrap to prevent a skin from forming. Let cool completely.
- In a separate bowl, whip the heavy cream and powdered sugar until stiff peaks form.
- Gently fold the whipped cream into the cooled pudding until just combined.
- Spoon the pudding mixture evenly over the cookie crumbs in each cup.
- Insert one Milano cookie into the pudding in each cup to resemble a tombstone.
- Stick a candy pumpkin or ghost into the pudding next to the tombstone.
- Insert a pretzel stick into the pudding to resemble a cross or fence post.
- Chill the graveyard pudding cups for at least 30 minutes before serving.
Notes
- For a richer chocolate flavor, use chocolate pudding cups instead of vanilla.
- You can substitute gummy worms for candy pumpkins or ghosts for an extra creepy touch.
- For a gluten-free option, use gluten-free chocolate sandwich cookies and ensure your pudding mix is gluten-free.
- This recipe is a great alternative to traditional meal planning or can be a fun dessert to make if you are considering meal planning services.
Nutrition
- Serving Size: 1 cup
- Calories: 350
- Sugar: 45g
- Sodium: 150mg
- Fat: 18g
- Saturated Fat: 10g
- Unsaturated Fat: 8g
- Trans Fat: 0g
- Carbohydrates: 48g
- Fiber: 2g
- Protein: 4g
- Cholesterol: 30mg