
Oh, Halloween! It’s such a magical time, isn’t it? The air gets crisp, the decorations come out, and suddenly, all you want to do is bake (or, in this case, *no-bake*) something fun and festive. That’s exactly why I’m so excited to share these incredible Halloween Oreo balls with you today! Forget the complicated baking; these little beauties are ridiculously easy to whip up, and the decorating possibilities are just endless. Honestly, turning simple Oreo cookies and cream cheese into spooky little eyeballs, cheerful pumpkins, or creepy mummies is one of my absolute favorite ways to get into the Halloween spirit. As Catherine, I’ve always believed that food should tell a story, and these treats are like tiny edible tales of Halloween fun, perfect for parties or just making a regular Tuesday feel extra special. With a little bit of culinary know-how from my background, I promise these will be a hit! You can learn more about my passion for this in my about me section!
- Why You'll Love These Halloween Oreo Balls
- Gather Your Ingredients for Spooky Halloween Oreo Balls
- Step-by-Step Guide to Making Halloween Oreo Truffles
- Tips for Perfect Halloween Oreo Balls
- Making Ahead and Storing Your Spooky Oreo Cookie Balls
- Frequently Asked Questions about Halloween Oreo Balls
- Estimated Nutritional Information
- Share Your Spooky Creations!
Why You’ll Love These Halloween Oreo Balls
Seriously, these are a total lifesaver when you need a quick Halloween treat. They’re no-bake, which is a huge win in my book! Plus, they taste just like those classic cookies-and-cream cookies you love, but with a fun, festive twist that’ll wow everyone.
Gather Your Ingredients for Spooky Halloween Oreo Balls
Alright, let’s get our monster mash ingredients ready! To make these adorable Halloween Oreo balls, you’ll just need a few pantry staples. You’ll need about 24 Oreo cookies – the classic ones work perfectly. Make sure you have 8 ounces of cream cheese, softened is key here, so it mixes in nicely. For dipping and decorating, we’ll grab 12 ounces of white chocolate chips, maybe a tablespoon of coconut oil if you have it to make the melting super smooth, and then get ready for the fun – black edible marker or black decorating gel, orange candy melts, green candy melts, and some candy eyes. That’s it! See? Super simple.
Step-by-Step Guide to Making Halloween Oreo Truffles
Okay, let’s get down to business and make these adorable Halloween Oreo truffles! It’s a pretty straightforward process, and honestly, it’s where all the magic happens. We’ll go from a simple cookie crumb to these super cute, spooky little treats in just a few easy steps. If you’re looking for more Halloween inspo, you should totally check out my Halloween Rice Krispie Treats or my Halloween Chocolate Bark!
Preparing the Oreo Base for Halloween Oreo Balls
First things first, we need to get our Oreo base ready. Grab your 24 Oreos and either pop them into a food processor until they’re fine crumbs, or put them in a sturdy zip-top bag and go to town with a rolling pin! Once you have those lovely crumbs, mix them really well with your softened cream cheese. You want it to come together like a thick dough. It’s going to feel a little sticky, but trust me, that’s exactly what we’re looking for.
Shaping and Chilling Your Halloween Oreo Balls
Now, it’s time to get your hands a little messy again! Take about a tablespoon of that Oreo mixture and roll it into nice, neat 1-inch balls. It helps if your hands are slightly damp so the mixture doesn’t stick too much. Place all these little balls onto a baking sheet that’s lined with parchment paper – this makes life so much easier later. Pop that sheet into the freezer for at least 30 minutes. This step is super important because it firms them up, making them way easier to dip without falling apart!
Melting and Dipping Your Halloween Oreo Balls
While those little guys are chilling, let’s melt our white chocolate. Pop the white chocolate chips into a microwave-safe bowl. Add the coconut oil if you’re using it – it really does help make the chocolate melt super smooth and shiny. Microwave in 30-second bursts, stirring really well between each interval. You don’t want it to seize up! Once it’s all melted and lovely, take your nice, firm Oreo balls out of the freezer. Dip each one into the melted white chocolate, making sure it’s coated all over, and let any extra drip off. Pop them back onto your parchment paper.
Creative Decorations for Spooky Oreo Cookie Balls
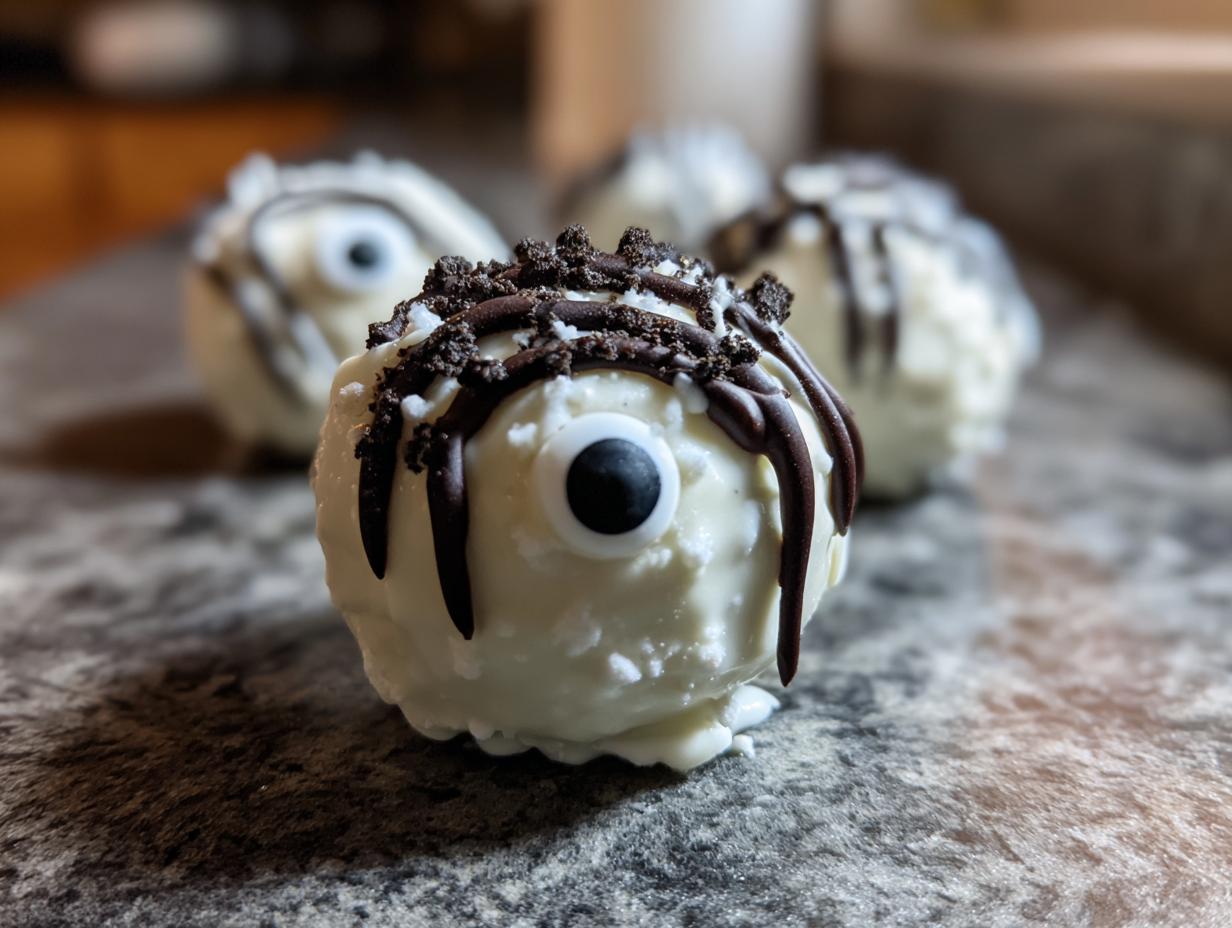
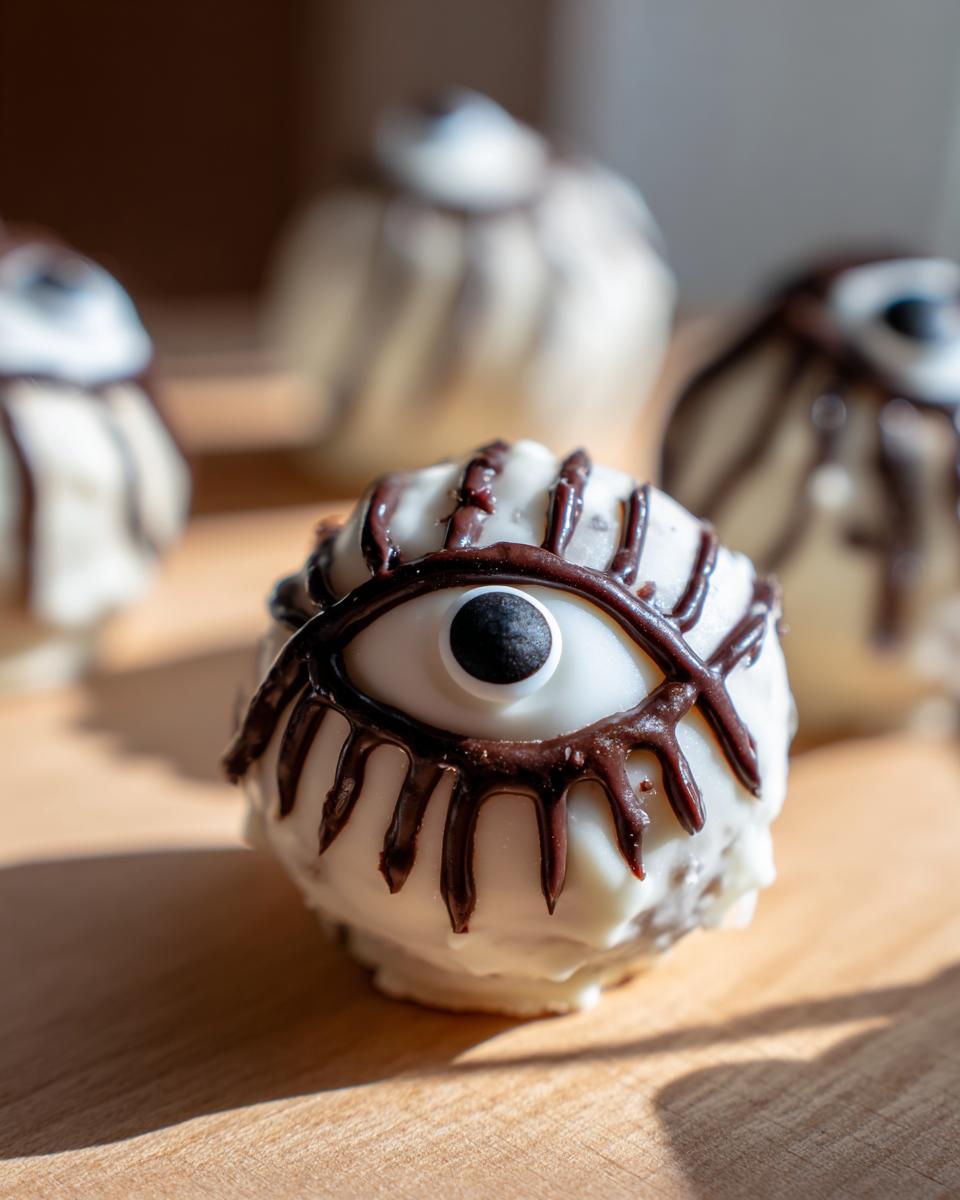
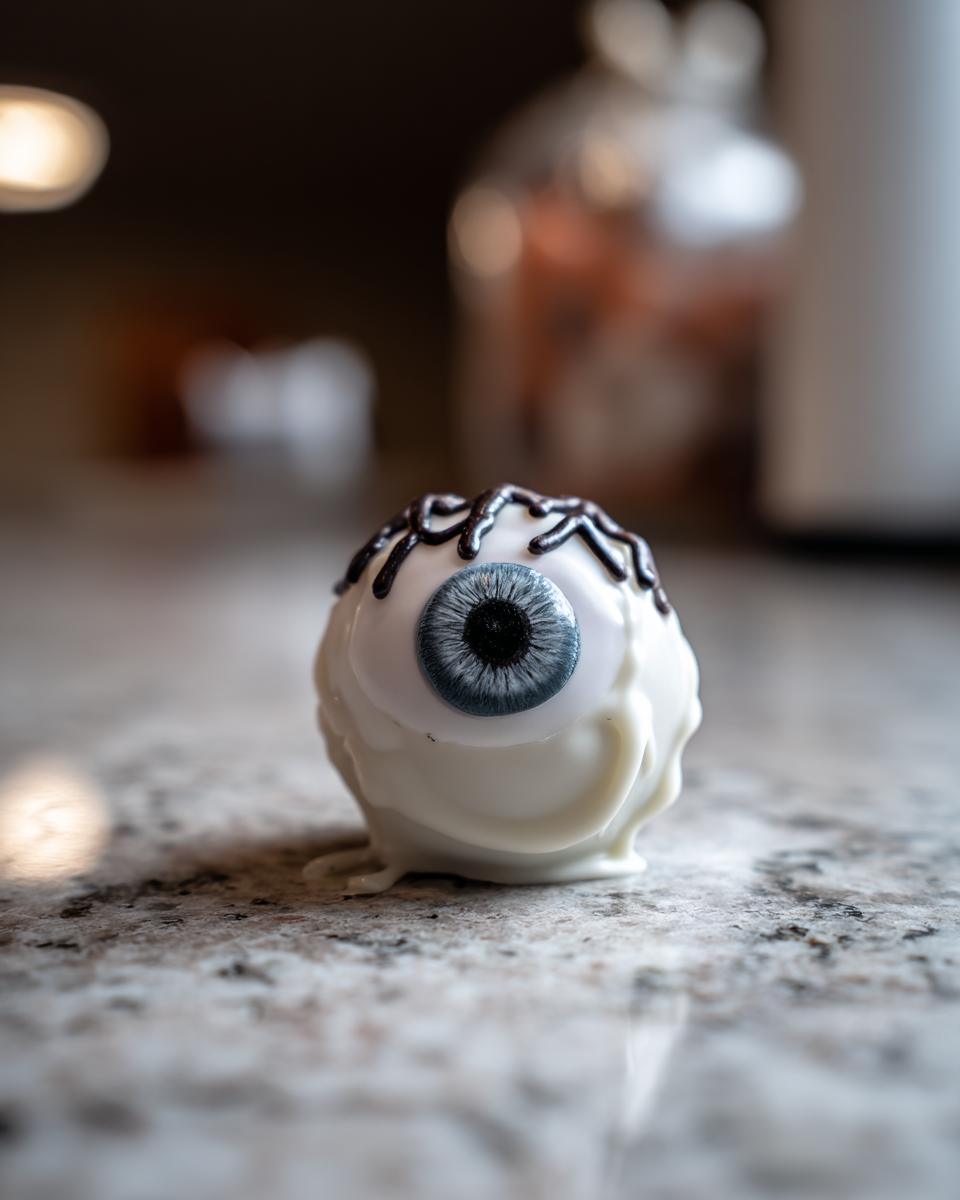
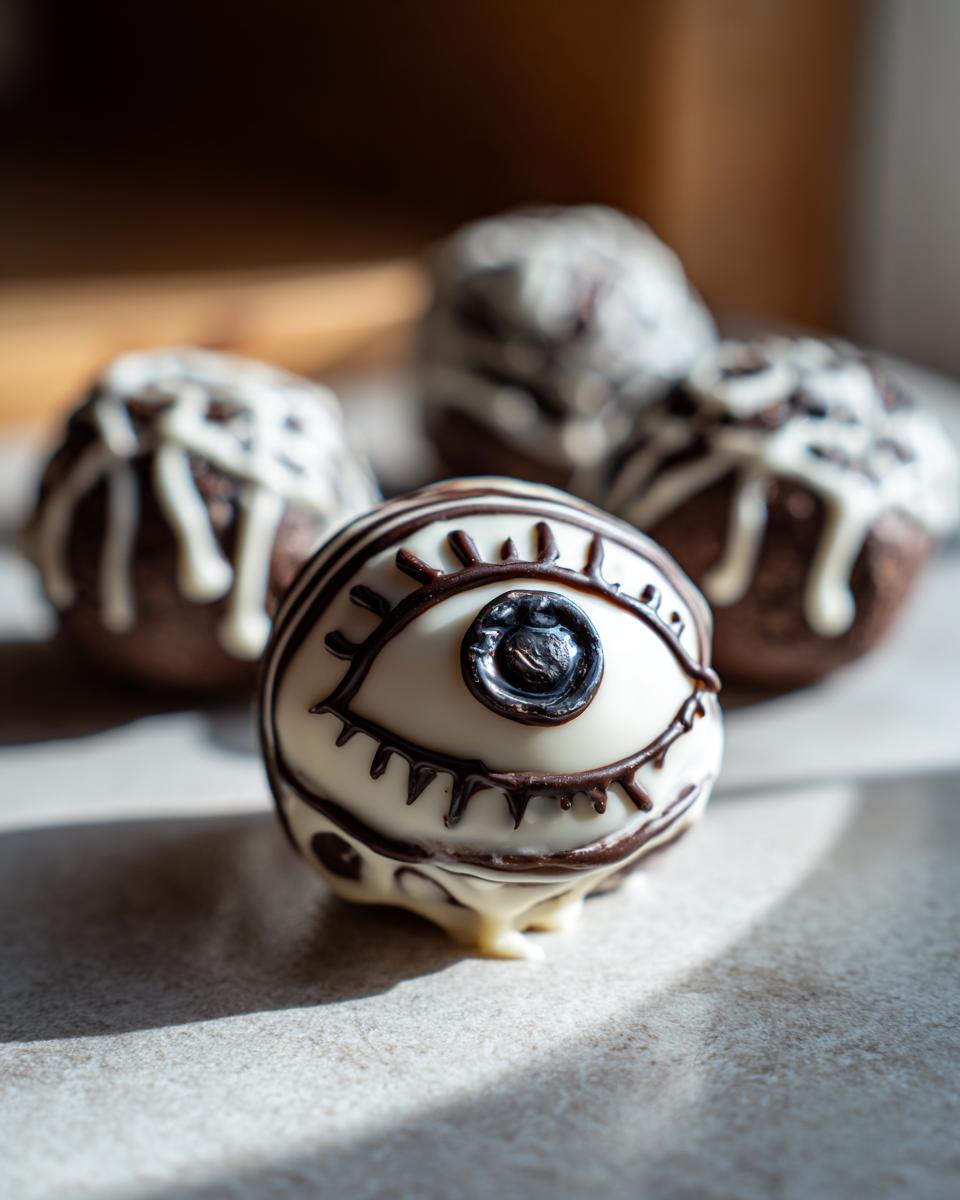
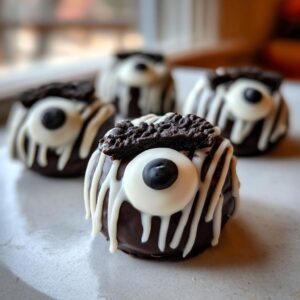
This is where the real fun begins! For the no-bake Oreo eyeballs, grab your black edible marker or decorating gel and draw a pupil and iris right onto the still-wet white chocolate. How creepy-cool is that?! You can gently press a candy eye on top while the chocolate is still a bit soft for an extra spooky effect.
To make our pumpkin Oreo ball recipe stars, melt your orange candy melts. Once your white chocolate-coated balls are set, dip them into the orange melt. Then, use a toothpick to gently drag lines down from the top to make those classic pumpkin segments. A tiny dab of green candy melt on top makes a perfect little stem! For the mummy look, just drizzle thin lines of that melted white chocolate all over the balls, leaving a space for two candy eyes.

Honestly, you can get so creative here – think ghosts, monsters, or whatever your spooky heart desires! These spooky Oreo cookie balls are basically a blank canvas.
Tips for Perfect Halloween Oreo Balls
You know, even with recipes that seem super simple, there are always those little tricks that make them go from good to absolutely amazing. I’ve learned a few over the years, and they really make a difference with these Halloween Oreo balls. First off, really make sure that cream cheese is softened – I can’t stress this enough! It needs to be room temperature so it blends smoothly with the crumbs. If it’s too cold, you’ll get lumps, and nobody wants lumpy Oreo balls. Also, when you’re melting that white chocolate, go slow! Don’t blast it in the microwave; brief intervals and stirring are your best friends to prevent it from burning or seizing up. And if your chocolate seems a little *too* thick for dipping, an extra tiny bit of coconut oil or even a neutral oil like vegetable oil can work wonders to thin it out just enough for that perfect coating. It’s all about that smooth, even finish! For more baking tips and inspiration, check out my blog!
Ingredient Notes and Substitutions for Halloween Oreo Balls
When it comes to the Oreos themselves, the classic chocolate sandwich cookies are really your best bet here. They have that perfect flavor and texture that works so well with the cream cheese. If, for some reason, you absolutely can’t get them, you could *try* other chocolate sandwich cookies, but the flavor will change a bit. As for the cream cheese, it’s really the binder that gives these their signature chewiness, so finding a direct substitute is tricky. I’d stick with it if you can! For the dipping, while white chocolate is traditional and a great base for decorating, you could experiment with milk or dark chocolate too. Just remember they’ll look different! And if you don’t have candy melts, you can sometimes use colored candy wafers, but be sure they’re designed for melting and coating, as not all baking chocolates behave the same. It’s always good to have options, but these are the tried-and-true for a reason!
Making Ahead and Storing Your Spooky Oreo Cookie Balls
One of the best things about these Halloween Oreo balls is how well they hold up! You can totally make them a day or two in advance, which is a lifesaver when you’re juggling a million things before a party. Just pop them into an airtight container once they’re fully set. I usually layer them with parchment paper in between just in case they stick together. Keep them in the refrigerator until you’re ready to serve. They stay perfectly firm and delicious, ready to spook and delight!
Frequently Asked Questions about Halloween Oreo Balls
Got questions about these fun little treats? I totally get it – baking is all about the details! Let’s dive into some of the things you might be wondering about as you whip up these spooky delights. If you have any other questions, don’t hesitate to reach out via my contact page!
Can I make Halloween Oreo balls without cream cheese?
So, the cream cheese is really what helps bind everything together and gives these Halloween Oreo balls that perfect, slightly chewy texture. While you *could* try other binders like butter and some milk, it won’t quite be the same as these classic spooky Oreo cookie balls. The cream cheese is pretty essential for that signature taste and texture!
How do I get a smooth chocolate coating for my Halloween Oreo balls?
Oh, a smooth coating is key, right? My best tip is to use that little bit of coconut oil or vegetable oil with the white chocolate chips when you melt them. It really helps thin out the chocolate and makes it super easy to dip those frozen balls without it getting thick and clumpy. Microwave in short bursts, stir *constantly* in between, and be patient! You want it silky smooth for those beautiful decorations, whether you’re making no-bake Oreo eyeballs or little pumpkins.
How long do Halloween Oreo truffles last?
These little Halloween Oreo truffles are pretty sturdy! Once they’re all decorated and the coating has fully set, you can store them in an airtight container in the refrigerator for about a week. They actually stay nice and firm in there, which is great! Just make sure they’re completely cooled and set before you put the lid on, otherwise, you might get some condensation inside.
Estimated Nutritional Information
Now, I always like to mention these numbers are just estimates, since everyone’s kitchen is a little different, right? Depending on the exact brands of Oreos or cream cheese you use, or even how thick you make your chocolate coating, these values can wiggle around a bit. But, generally speaking, each one of these delightful Halloween Oreo balls packs about 120 calories, with around 12g of sugar and 7g of fat. They’re a perfect little bite of festive fun!
Share Your Spooky Creations!
Alright, now it’s your turn to have some spooky fun in the kitchen! I just *love* seeing how your Halloween Oreo balls turn out. Did you go for creepy eyeballs, or maybe a whole pumpkin patch? Snap a pic and share it in the comments below – I can’t wait to see your masterpieces! And if you try these and they become your new go-to Halloween treat, please give them a rating. It really helps others find these little bites of joy. For more info on how we handle your shared content, check out our terms of use and privacy policy. Happy haunting… and happy baking!
PrintHalloween Oreo Cookie Balls
Create festive, no-bake Oreo cookie balls perfect for Halloween parties. These easy treats are shaped and decorated to look like spooky eyeballs, pumpkins, and mummies.
- Prep Time: 30 min
- Cook Time: 0 min
- Total Time: 30 min
- Yield: 24 balls 1x
- Category: Dessert
- Method: No-Bake
- Cuisine: American
- Diet: Vegetarian
Ingredients
- 24 Oreo cookies
- 8 ounces cream cheese, softened
- 12 ounces white chocolate chips
- 1 tablespoon coconut oil (optional, for smoother melting)
- Black edible marker or black decorating gel
- Orange candy melts
- Green candy melts
- Candy eyes
Instructions
- Crush the Oreo cookies into fine crumbs using a food processor or by placing them in a zip-top bag and crushing with a rolling pin.
- In a medium bowl, combine the Oreo crumbs and softened cream cheese. Mix until well combined and a dough-like consistency forms.
- Roll the mixture into 1-inch balls. Place the balls on a baking sheet lined with parchment paper.
- Freeze the Oreo balls for at least 30 minutes, or until firm.
- Melt the white chocolate chips (and coconut oil, if using) in a microwave-safe bowl in 30-second intervals, stirring between each, until smooth.
- Dip each frozen Oreo ball into the melted white chocolate, ensuring it is fully coated. Let excess chocolate drip off.
- Place the coated balls back on the parchment-lined baking sheet.
- For eyeball decorations: Use the black edible marker or decorating gel to draw a pupil and iris on the white chocolate coating. Add candy eyes on top of the wet coating.
- For pumpkin decorations: Melt the orange candy melts. Dip the white chocolate-coated balls into the orange candy melts. Use a toothpick to create lines resembling pumpkin segments. Add a small piece of green candy melt for a stem.
- For mummy decorations: Melt the white chocolate. Drizzle thin lines of melted white chocolate over the Oreo balls to create a mummy-like pattern, leaving a small space for candy eyes. Place candy eyes in the space.
- Allow the decorations to set completely. Store in an airtight container in the refrigerator.
Notes
- For best results, ensure your cream cheese is fully softened.
- Freezing the balls before dipping helps them hold their shape and makes coating easier.
- If white chocolate is too thick, add a little more coconut oil to thin it out.
- Get creative with your decorations! You can use different colored candy melts and edible markers.
Nutrition
- Serving Size: 1 ball
- Calories: 120
- Sugar: 12g
- Sodium: 50mg
- Fat: 7g
- Saturated Fat: 4g
- Unsaturated Fat: 3g
- Trans Fat: 0g
- Carbohydrates: 14g
- Fiber: 1g
- Protein: 1g
- Cholesterol: 10mg