
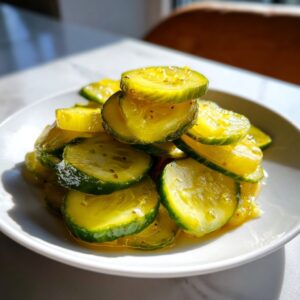
There is something profoundly comforting about opening a jar of homemade preserves when the seasons change. It’s like capturing the very best sunshine of summer and sealing it away just for you. I always find myself looking out at the garden in late summer, knowing exactly what I need to make: the Classic Bread and Butter Pickles Recipe: Easy Canning & Refrigerator Options. This recipe is my answer for anyone who craves that perfect sweet and tangy balance paired with a truly satisfying crunch.
We’ve tested this method until it’s absolutely flawless, ensuring you get that delightful snap every single time. Whether you’re a beginner looking for a simple refrigerator batch or you want to safely put up jars for winter with proper canning, this single recipe handles both beautifully while delivering the quintessential homemade bread and butter pickle flavor. It captures that bright, sunny taste of summer so vividly, and I’m thrilled to share every step with you today.
- Why This Bread and Butter Pickle Recipe is Your New Favorite (E-E-A-T)
- Ingredients for Classic Bread and Butter Pickles
- How to Make Bread and Butter Pickles: Step-by-Step Instructions
- Tips for Success: Mastering Your Bread and Butter Pickle Batch
- Variations on the Bread and Butter Pickle Flavor
- Serving Suggestions for Your Homemade Bread and Butter Pickles
- Storage and Shelf Life for Bread and Butter Pickles
- Frequently Asked Questions About Bread and Butter Pickles
- Estimated Nutrition for Bread and Butter Pickles
Why This Bread and Butter Pickle Recipe is Your New Favorite (E-E-A-T)
When I develop a recipe here at Unfold Recipes, trust is everything. You need to know that when you spend time slicing vegetables and heating up your stove, the results will be superb. This bread and butter pickle recipe has been tested repeatedly—it’s simple, but it’s exact.
What makes this recipe shine is its flexibility and texture. We aren’t settling for limp pickles, ever! Here’s why you’ll love turning to this formula again and again:
- Dual Method Magic: You get to decide! Whether you use the canning bread and butter pickles method for long-term storage or opt for the super quick bread and butter pickles refrigerator method, the flavor base is the same.
- Guaranteed Crunch: We take texture seriously. The prep step ensures your slices snap when you bite into them.
- Perfect Balance: The brine is perfectly calibrated—brightly sweet but with that essential vinegar tang that makes them addictive.
For more reliable results and inspiration, you can always check out my latest thoughts on my blog!
The Secret to Crunchy Bread and Butter Pickles
If you want those treasured crunchy homemade preserves, you absolutely cannot skip the initial soak. This is non-negotiable for a perfect bread and butter pickle!
We soak the sliced cucumbers and onions for a full three hours submerged in ice and salt. That cold shock firms up the cell walls of the cucumber. When they hit the hot brine later, they hold their structure beautifully. It’s a simple technique, but it’s what separates a great pickle from a squishy disappointment.
Ingredients for Classic Bread and Butter Pickles
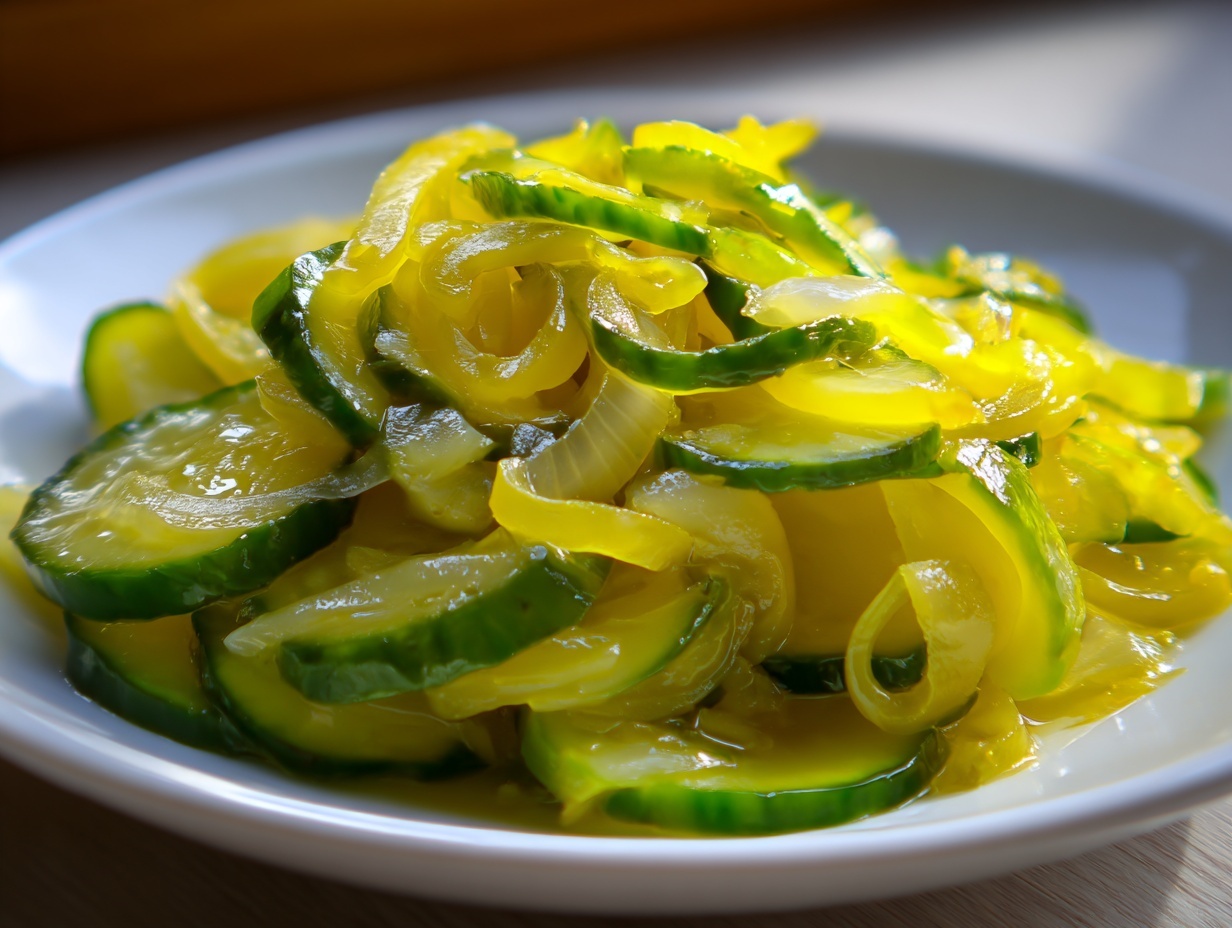
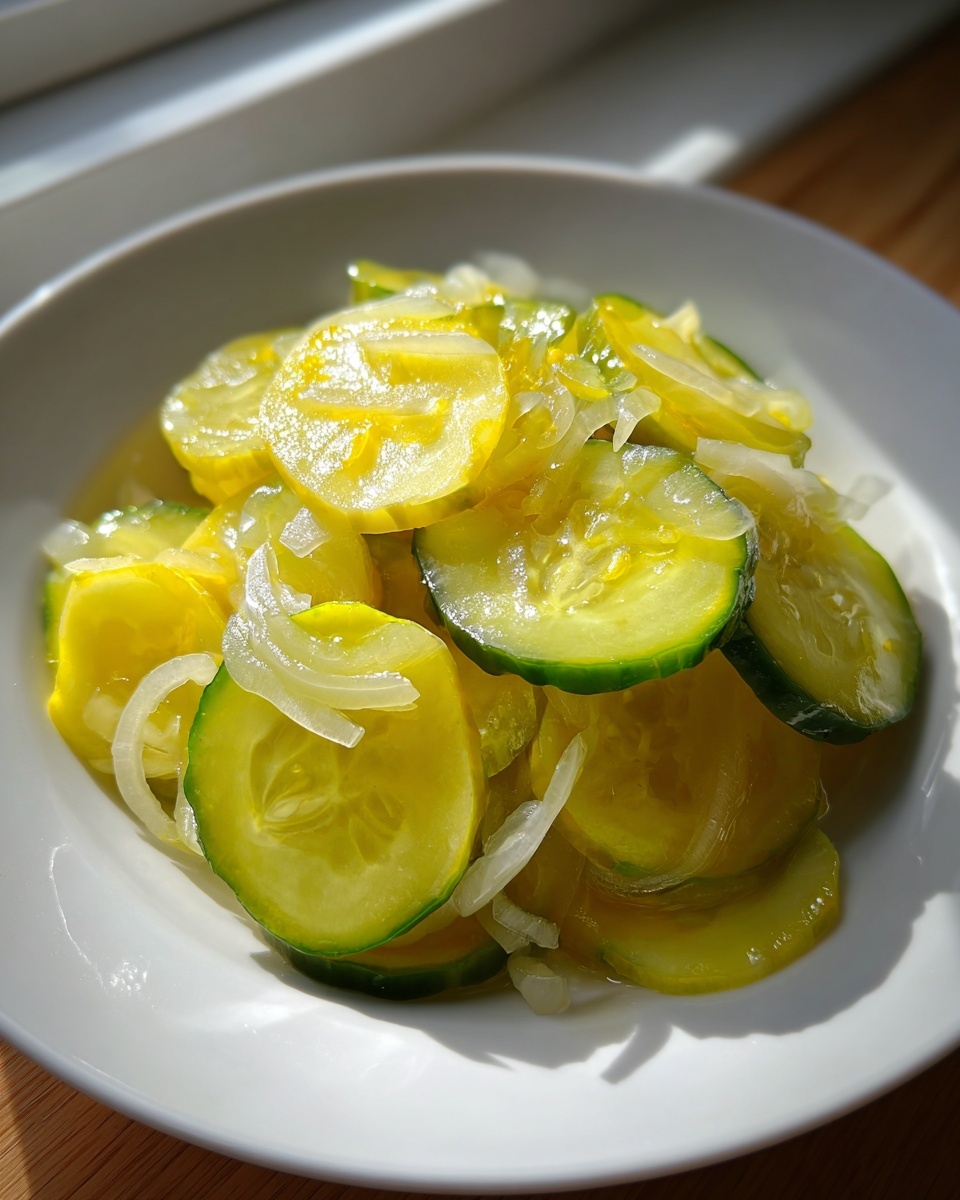
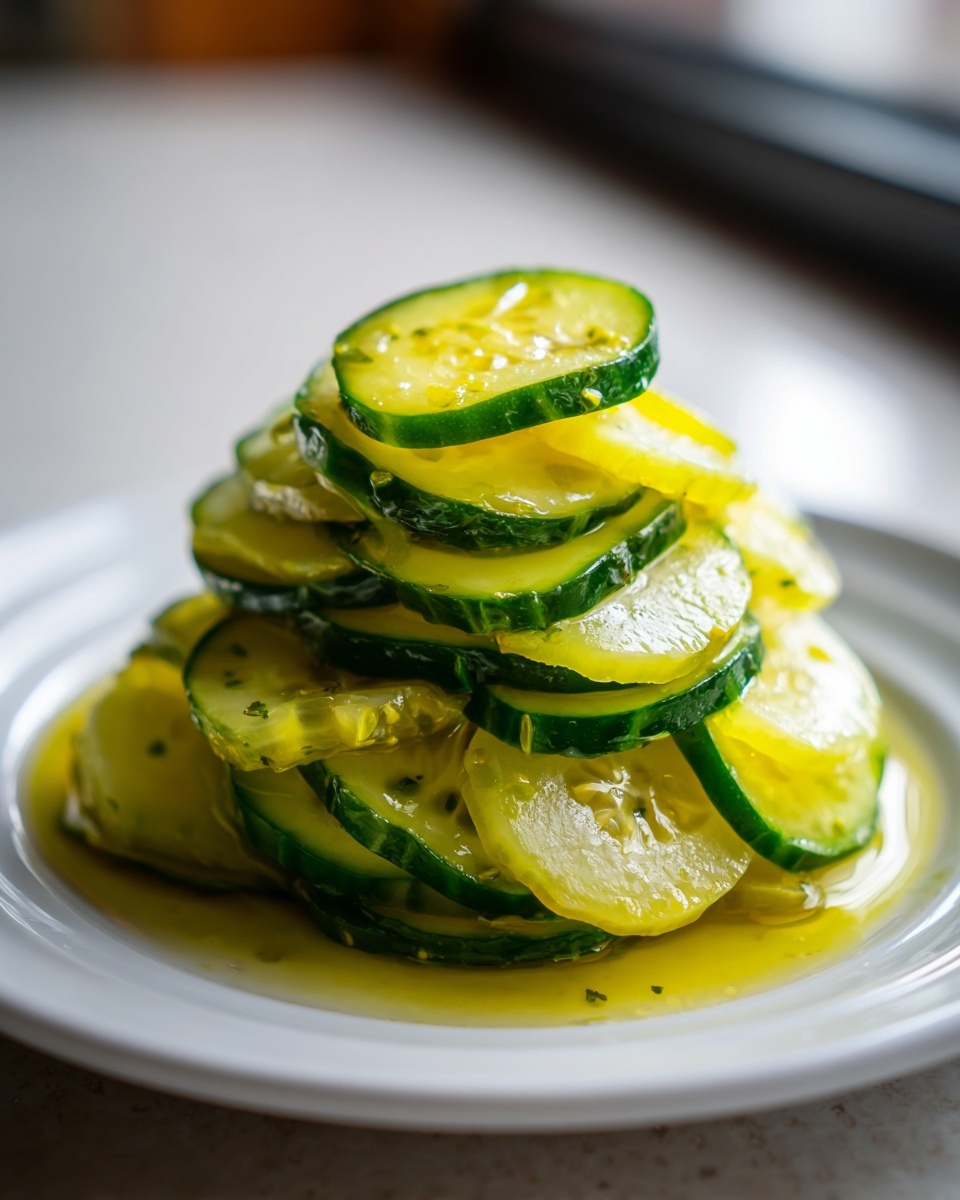
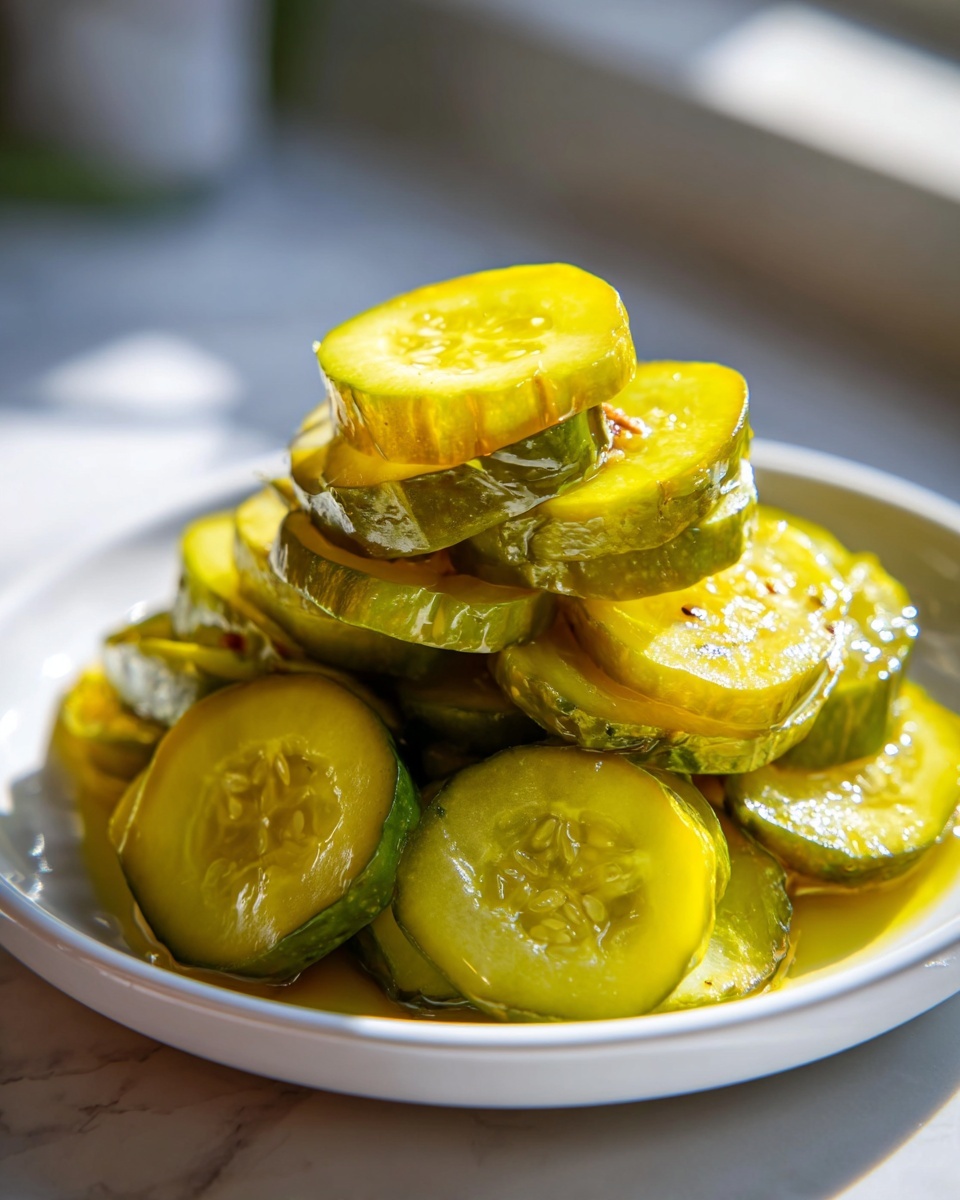
As you gather your supplies, remember that the quality of your cucumbers really sets the stage for these beautiful bread and butter cucumber slices. Using fresh pickling cucumbers makes such a difference!
You’ll need a few things for the vegetables, and then we’ll whip up that signature sweet brine. Keep everything measured out before you start the soaking process; it makes everything flow so much better, trust me.
- 3 pounds pickling cucumbers, thinly sliced
- 2 large yellow onions, thinly sliced
- 1/4 cup pickling salt
- 4 cups ice cubes (yes, ice!)
- 2 cups white vinegar
- 2 cups granulated sugar
- 1 tablespoon celery seed
- 1 teaspoon ground turmeric
- 1 teaspoon mustard seed
- 1/2 teaspoon ground cloves
The turmeric is what gives these their lovely golden hue, and the cloves? That’s the hint of warmth in this easy pickle recipe. It’s all about these warm spices combined with that sugar to hit that perfect sweet spot.
How to Make Bread and Butter Pickles: Step-by-Step Instructions
Now we move from prep work into the actual assembly, and this is the most dynamic part of making your homemade preserves. Follow these steps closely, especially regarding the heat exposure, because we are aiming for that signature *snap*, not mush!
Once the cucumbers have finished their soak—and trust me, you need to see how much water they draw out—the process moves quickly towards developing that gorgeous, flavorful tangy sweet brine recipe we want. If you’re interested in learning more about preserving vegetables generally, I have some helpful tips on how to preserve summer vegetables.
Preparing the Cucumbers and Onions for Perfect Bread and Butter Pickles
This initial prep is all about extraction and texture. Take your salted, iced cucumbers and onions and drain them really, really well in a colander. Don’t be shy here; rinse them under cold water for several minutes until you feel all that saltiness has washed away. Then drain them one last time.
Tip for the beginner pickle making journey: try to slice your cucumbers and onions to a uniform thickness—about an eighth of an inch is great. If some are too thick, they won’t absorb the brine evenly, and you’ll end up with inconsistent texture. We want every bread and butter cucumber slice to be perfect!
Creating the Tangy Sweet Brine Recipe
While draining is happening, pivot to your saucepan. This is where the magic flavor happens! Combine the vinegar, sugar, celery seed, turmeric, mustard seed, and cloves. You must bring this up to a full boil over medium-high heat. Keep stirring until that sugar is completely dissolved. I watch for the slight sheen on the surface indicating everything is perfectly mingled.
Once the brine is boiling, drop in your drained cucumbers and onions. We only simmer because we’re locking in flavor, not cooking them through. Bring it back to a gentle simmer and let it cook for just two minutes. Seriously, two minutes is the maximum if you want those crisp results!
Choosing Your Method: Canning Bread and Butter Pickles or Refrigerator Pickles Recipe
Right after those two minutes, take the pot off the heat. Now you choose your path! If you want pickles right away, this is where you pack them into clean jars, pour the hot mixture over them, and start chilling—hello, refrigerator pickles recipe!
If you are planning on long-term storage, you must move immediately into the safe processing phase. Fill your sterilized jars, leaving that half-inch headspace, and process them in a boiling water bath canner according to tested guidelines—check your altitude settings! This ensures safe canning bread and butter pickles. Always prioritize tried-and-true preservation methods for safety.
Tips for Success: Mastering Your Bread and Butter Pickle Batch
Making incredible sweet and tangy pickles isn’t just about the brine; it’s about respecting the cucumber. To ensure you get that premium texture, I always recommend slicing your cucumbers as evenly as possible. When the slices are uniform, they absorb the brine’s flavor perfectly across the whole batch.
Next, let’s talk patience for the quick version. If you opt for the refrigerator pickles recipe—which is so convenient for immediate gratification—you really must wait! Don’t sneak a taste after just an hour. Allowing them at least 24 hours in the fridge gives the vinegar and sugar time to truly marry into that classic flavor profile. It’s worth the small wait, I promise.
And finally, if you are canning, remember that safety comes first. Always reference trusted USDA guidelines when processing jars; we want these delicious pickles safe for the pantry for months to come. For extra reassurance on preparation techniques, I’ve put together some extra thoughts over on my guide to beginner pickle making.
Variations on the Bread and Butter Pickle Flavor
While this recipe is my tried-and-true, old fashioned pickle recipe, I love encouraging you all to play a little when the main batch is safely done! Once you’ve nailed the base, you can start introducing exciting elements.
For those who like a little heat against that sweetness, try adding thinly sliced jalapeños right along with your cucumbers and onions. They infuse beautifully and give you a fantastic little kick with every bite.
Another lovely variation involves swapping out the vinegar. If you find straight white vinegar a bit too sharp, try substituting half of it with apple cider vinegar. It gives the brine a softer, fruitier undertone, which pairs wonderfully with the sugar—almost like a subtle hint of apple butter sweetness in the background!
Don’t be afraid to experiment sparingly with spices too. Maybe a pinch more mustard seed for earthiness. This is your kitchen, after all!
Serving Suggestions for Your Homemade Bread and Butter Pickles
Once these bright, tangy-sweet beauties are chilled or safely processed, the real fun begins: eating them! These aren’t just for snacking, although I certainly eat them straight from the jar sometimes when no one is looking.
These are essential for any great sandwich. Think about layering them onto a hearty deli turkey or ham sandwich; they cut right through the fattiness. They are non-negotiable when you are making a fantastic, messy burger. That pop of crunch and sweet vinegar brightens everything right up!

I also love setting a small bowl of these alongside slow-cooked meats. They are marvelous with pulled pork—the sweet cuts the smoky richness so well. Check out my recipe for BBQ pulled chicken; these pickles are the perfect cool counterpoint. Honestly, they elevate anything that needs a little lift, making them the star of your personal sandwich pickles recipe collection.
Storage and Shelf Life for Bread and Butter Pickles
Now that you’ve done the hard work, we have to talk about keeping these treasures safe and delicious! Storage is where we really lean into that trustworthiness we strive for here at Unfold Recipes.
If you went the fast route and made our refrigerator pickles recipe, those jars need to stay nestled right in the cold part of your fridge. They stay wonderfully crisp and flavorful for about two to three months, which is great for smaller batches.
If you decided on canning bread and butter pickles, which I highly recommend for enjoying this flavor all year long, your shelf life is significantly extended! Sealed jars, stored in a cool, dark pantry, are good for at least a year. But listen, if you’re canning, please, please make sure you are following tested USDA guidelines precisely. Safety first so you can enjoy the fruits of your labor later! For more organizational tips on keeping track of your pantry items, you might find my notes on no-bake cookies storage helpful, as the organization principles overlap!
Frequently Asked Questions About Bread and Butter Pickles
It’s natural to have questions when you dive into a new preserving project! Especially when you are looking for that specific sweet and tangy pickles texture, you want to make sure you’ve covered all your bases before sealing that jar.
Here are some of the common queries I get about achieving perfection with these jars of sunshine:
How long do refrigerator bread and butter pickles need to sit before eating?
If you chose the refrigerator route for your quick bread and butter pickles, you absolutely need patience for the first taste! I always tell people the bare minimum is 24 hours. That first day is when the ingredients really start melding together. Trust me, waiting that extra time turns them from ‘good’ to ‘absolutely essential’ for your next sandwich.
Can I use regular salt instead of pickling salt for my bread and butter pickle recipe?
This is a great question for any beginner pickle making project. While you technically *can* use regular table salt, I really advise against it if you want crystal-clear brine. Pickling salt is pure sodium chloride and has no anti-caking additives. Those additives in regular salt can sometimes cloud up your tangy sweet brine recipe, making your beautiful pickles look a little murky. If you must substitute, use slightly less regular salt, but stick to pickling salt if you can!
What is the difference between these and regular dill pickles?
The fundamental difference lies entirely in the flavor balance! Regular dill pickles are all about savory, herbaceous goodness—garlic, fresh dill, peppercorns, and that sharp sourness from the vinegar. They are savory and sharp.
Our bread and butter pickle recipe, on the other hand, is defined by sweetness. We load the brine with sugar and warm spices like turmeric and cloves. This creates that signature sweet butter pickles experience—a delightful contrast that makes them perfect served alongside rich foods.
Estimated Nutrition for Bread and Butter Pickles
I always love adding this information because it helps you understand what you are truly putting on your plate—though, let’s be honest, when I’m eating something this good, I try not to think about the numbers too hard!
Here is the breakdown for what these homemade bread and butter pickles generally look like nutritionally, based on a small serving size. Since this recipe is so clean, focusing on cucumbers and vinegar, it’s a wonderfully light addition to almost any meal.
- Serving Size: 3 slices
- Calories: 55
- Sugar: 13g (This explains that delicious sweetness!)
- Sodium: 280mg
- Fat, Saturated Fat, Trans Fat, Cholesterol: 0g
- Carbohydrates: 14g
- Protein: 0g
A quick word of caution: please keep in mind that these are just estimates based on the core recipe ingredients. The exact values can change a tiny bit depending on the brands of vinegar or sugar you use, or if you decide to make a very small batch where the concentration of sugar might shift. If you are canning them, the preservation process itself keeps the nutrients stable, but the sodium level is largely determined by how well you rinsed them after that initial salt soak we talked about!
If you want to see another beautiful interpretation of a classic family pickle, check out this wonderful recipe for old fashioned pickle recipe inspiration!
PrintClassic Bread and Butter Pickles Recipe: Sweet and Tangy Crunch
Make homemade bread and butter pickles using this easy recipe. You can choose between canning for long-term storage or making quick refrigerator pickles for immediate enjoyment. These sweet and tangy cucumber slices offer a satisfying crunch perfect for sandwiches or snacks.
- Prep Time: 3 hours 30 min
- Cook Time: 10 min
- Total Time: 3 hours 40 min
- Yield: About 4 pints 1x
- Category: Preserves
- Method: Stovetop / Canning
- Cuisine: American
- Diet: Vegetarian
Ingredients
- 3 pounds pickling cucumbers, thinly sliced
- 2 large yellow onions, thinly sliced
- 1/4 cup pickling salt
- 4 cups ice cubes
- 2 cups white vinegar
- 2 cups granulated sugar
- 1 tablespoon celery seed
- 1 teaspoon ground turmeric
- 1 teaspoon mustard seed
- 1/2 teaspoon ground cloves
Instructions
- Combine the sliced cucumbers and onions in a large bowl. Sprinkle with pickling salt and toss to coat. Add ice cubes until the cucumbers are covered. Let this mixture sit for 3 hours, stirring every 30 minutes.
- Drain the cucumbers and onions thoroughly in a colander. Rinse them well under cold running water for several minutes to remove excess salt. Drain again.
- In a large non-reactive saucepan, combine the white vinegar, sugar, celery seed, turmeric, mustard seed, and ground cloves.
- Bring the vinegar mixture to a boil over medium-high heat, stirring until the sugar dissolves completely.
- Add the drained cucumber and onion mixture to the boiling brine. Return the mixture to a simmer.
- Cook for 2 minutes, stirring gently. Do not overcook; you want the cucumbers to remain crisp.
- Remove the pan from the heat.
- For Refrigerator Pickles: Pack the warm pickles and brine into clean jars, leaving 1/2 inch headspace. Seal and refrigerate once cooled. They are ready to eat after 24 hours.
- For Canning: Pack the hot pickles into sterilized pint or half-pint canning jars, ensuring the brine covers the cucumbers, leaving 1/2 inch headspace. Wipe rims clean. Process in a boiling water bath canner according to tested guidelines (usually 10 minutes for pints, adjusting for altitude). Remove jars and let cool completely before checking seals.
Notes
- For the best crunch, slice your cucumbers evenly.
- Allow refrigerator pickles at least 24 hours in the fridge before tasting them to let the sweet and tangy flavor develop.
- If you are new to canning, follow USDA guidelines precisely for safe food preservation.
Nutrition
- Serving Size: 3 slices
- Calories: 55
- Sugar: 13
- Sodium: 280
- Fat: 0
- Saturated Fat: 0
- Unsaturated Fat: 0
- Trans Fat: 0
- Carbohydrates: 14
- Fiber: 0
- Protein: 0
- Cholesterol: 0