
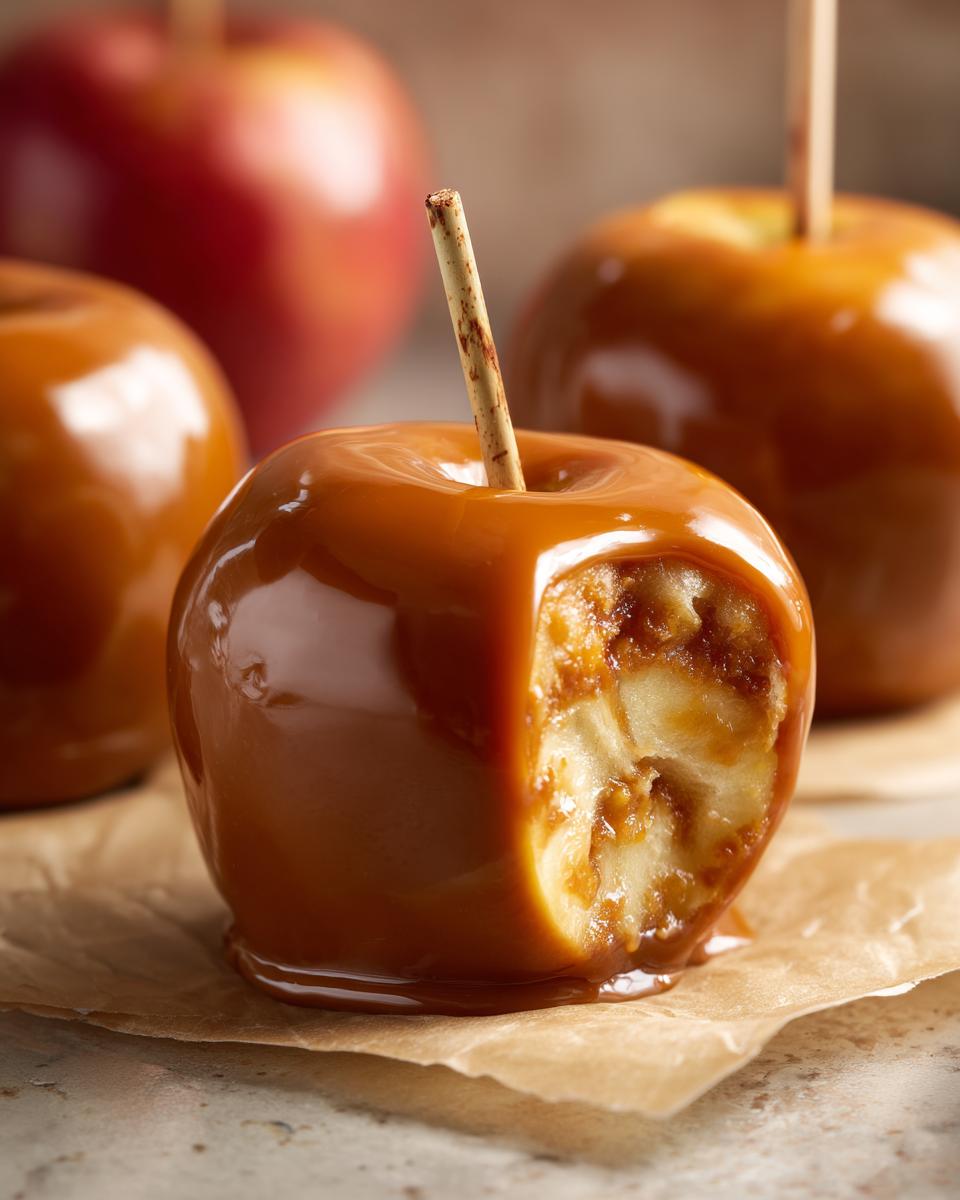
Oh, fall! Is there anything cozier than the crisp air, the changing leaves, and the sweet, sticky anticipation of a perfect, homemade caramel apple? I’m Catherine, and just like in my family, food is so much more than just what’s on the plate – it’s about the stories we create and share around it. That’s why I’m so excited to share this classic **caramel apples** recipe with you. Forget those frustrating moments of caramel sliding right off the apple! This foolproof homemade caramel truly clings, giving you those stunning, gourmet-looking treats you dream of. Trust me, this recipe is a game-changer!
- Why You'll Love This Caramel Apples Recipe
- Gather Your Ingredients for Perfect Caramel Apples
- How to Prepare Apples for Dipping: The Secret to Sticking Caramel
- Crafting the Perfect Caramel for Your Caramel Apples
- Dipping and Decorating Your Caramel Apples
- Setting and Storing Your Homemade Caramel Apples
- Frequently Asked Questions About Caramel Apples
- Understanding Caramel Apple Calories
- Share Your Caramel Apple Creations!
Why You’ll Love This Caramel Apples Recipe
You’re going to adore making these classic caramel apples! They’re:
- Super Easy to Make: Seriously, the caramel comes together with simple ingredients and a little patience.
- Guaranteed to Stick: No more sad, sliding caramel! We’ve got the secrets to make it really cling.
- Crowd-Pleasers: Perfect for parties, Halloween, or just a cozy night in. Everyone loves a good caramel apple!
- Totally Customizable: Dip ’em, roll ’em, top ’em – make them your own with your favorite goodies.
Gather Your Ingredients for Perfect Caramel Apples
Alright, let’s get our mise en place ready so we can whip up these beauties! Having all your ingredients prepped is key, especially when you’re working with hot caramel. It makes the whole process so much smoother, trust me. These aren’t just any caramel apples; they’re the kind that impress, and that starts with using good stuff!
Here’s what you’ll need to grab:
- 6 medium apples: I absolutely love using Honeycrisp, Fuji, or Gala for these. They’re crisp and have just the right amount of sweetness without being overpowering.
- 6 wooden popsicle sticks or lollipop sticks: Make sure they’re sturdy enough to hold the weight of the apple and caramel.
- 2 cups granulated sugar: This is our base for that gorgeous caramel.
- 1/2 cup water: Just a little to help the sugar dissolve.
- 1/2 cup light corn syrup: This is super important for that smooth, glossy caramel that doesn’t crystallize easily!
- 1 (14 ounce) can sweetened condensed milk: This is where the richness comes from, making it creamy and delicious.
- 1 teaspoon vanilla extract: For that little hint of warmth and flavor magic.
- 1/4 teaspoon salt: A tiny bit of salt really makes the caramel flavor pop!
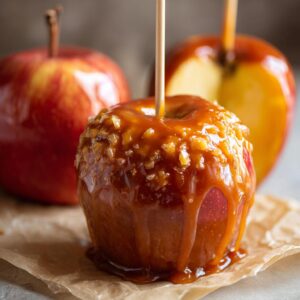
- Optional toppings: Get creative here! Chopped nuts (like pecans or peanuts), festive sprinkles, mini chocolate chips, or even shredded coconut are amazing.
How to Prepare Apples for Dipping: The Secret to Sticking Caramel
Okay, this is where the magic *really* starts, because if your apples aren’t prepped right, that lovely caramel you worked so hard on will just slide right off into a sticky puddle. Ugh, the worst! So, let’s talk about how to keep our caramel from sliding off apples. First things first, wash those apples super well. You know how sometimes they have that waxy coating? We absolutely need to get rid of that. You can give them a good scrub with a vegetable brush in warm water. Honestly, I usually just rinse them under hot water and give them a really good scrub with my hands – it’s amazing how much wax comes off! For extra insurance, especially if you’re worried about the wax, you can dip them in boiling water for about 10 seconds. Just be super careful, and have your sticks ready to go right after.
I remember one time, I skipped the boiling water dip because I was in a rush, and oh boy, the caramel just slid off three of them before I could even add toppings! My family still teases me about it. Cleaning up that mess was NOT fun. So, make sure they’re bone dry after washing. I usually pat them with a clean kitchen towel or even let them air dry for a few minutes. Proper prep is honestly half the battle for the best homemade caramel apples! Makes all the difference, I promise! You can find more tips on everything baking over on my blog!
Choosing the Best Apples for Caramel Apples
When you’re picking out your apples, you want ones that are firm and crisp. That’s the biggest thing! If they’re too soft, they’ll get mushy in all that warm caramel. I really steer clear of anything too tart or anything that goes mealy fast. The Honeycrisp, Fuji, and Gala apples I mentioned earlier are just perfect because they hold their shape and have a lovely, balanced sweet and slightly tart flavor that really lets the caramel shine. They’re just meant for this!
Crafting the Perfect Caramel for Your Caramel Apples
Now for the fun part – making that glorious caramel sauce! So much depends on getting this just right; it’s really the heart of a fantastic caramel apple. We want that perfect amber hue and that smooth texture that just *loves* to hug the apple. The key here is temperature and a little bit of patience. When folks ask about what temp for caramel apples, I always say aim for that sweet spot between 240°F and 245°F (about 116-118°C). Too cool, and it’ll run off; too hot, and it gets hard as a rock!
Start by grabbing a medium saucepan. We’re going to combine the granulated sugar, water, and light corn syrup. Give it a little stir just to get the sugar to dissolve. Then, let it come to a boil *without* stirring – seriously, resist the urge! We’ll stick our candy thermometer in there. Let it simmer away until it hits that first magic number, 240°F. Once it reaches that, *gradually* stir in that can of sweetened condensed milk. Keep stirring constantly now, with a good, sturdy spoon, until it climbs to that final temperature, 245°F. This stage is crucial for that lovely, thick caramel that actually sticks! It’s a bit like making my Apple Fritter Bread – precision matters.
My little trick to avoid the sugar seizing up? Make sure the sides of your pan are clean before you start boiling. If any sugar crystals get splashed up there and harden, they can make the whole batch grainy. Just use a wet pastry brush to gently wipe down any rogue crystals around the edge of the pot as it heats up.
Achieving the Right Caramel Consistency
Once you’ve hit that 245°F mark, carefully remove the saucepan from the heat. Stir in the vanilla extract and that pinch of salt – oh, it just smells divine! Now, here’s where we wait just a few minutes. Let that caramel cool down a bit for about 5 to 10 minutes. You’ll see it start to thicken up, which is exactly what we want. You can test it by dipping your spoon in; the caramel should coat the back of the spoon nicely, like a velvety jacket. If it seems a bit too thick and hard to stir, you can add a tiny splash more milk, maybe just a tablespoon, and stir until it’s pourable again. If for some reason it’s still too thin (maybe your thermometer was a little off!), pop it back on the lowest heat for a minute, stirring constantly, until it thickens up a touch more. We’re aiming for that perfect thick-but-still-pourable consistency.
Dipping and Decorating Your Caramel Apples
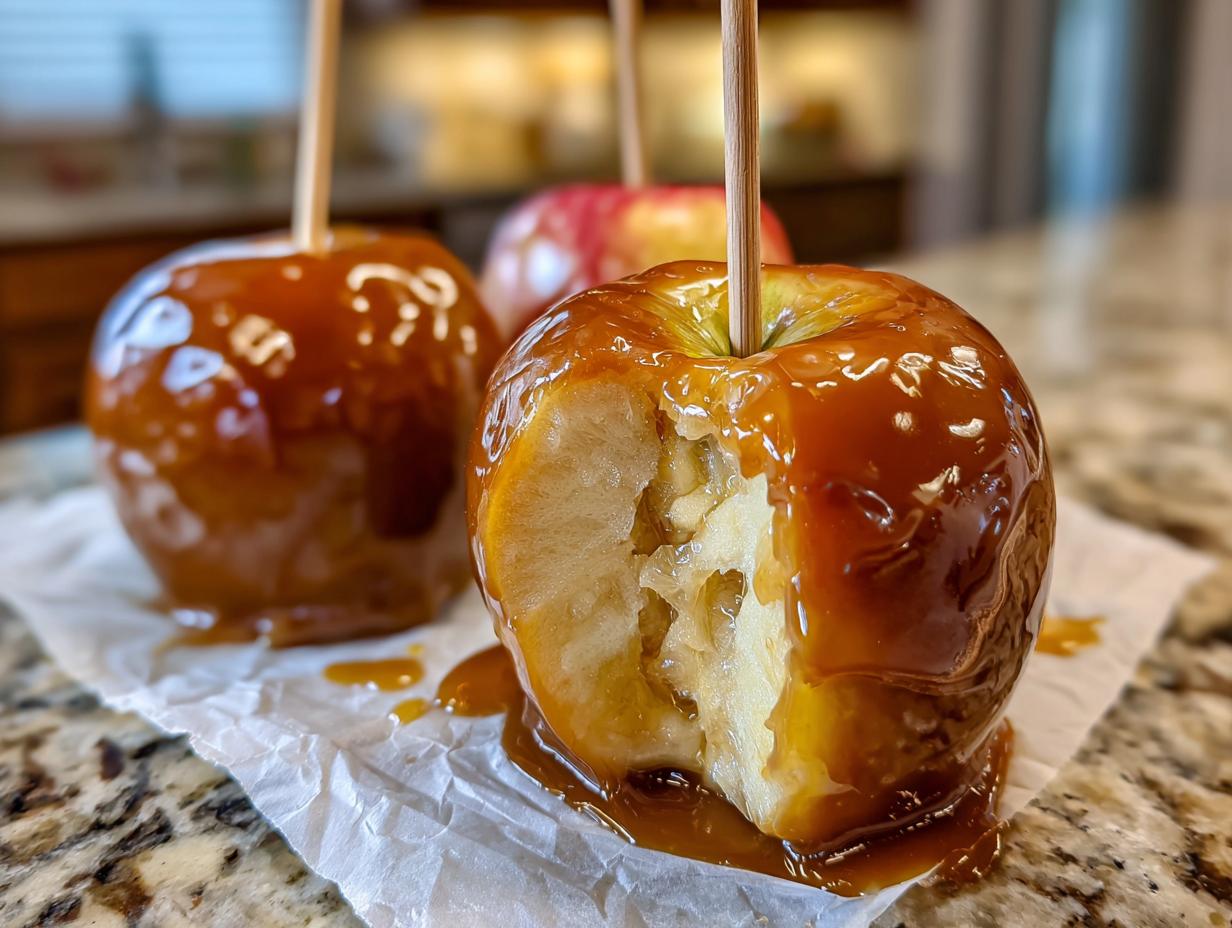
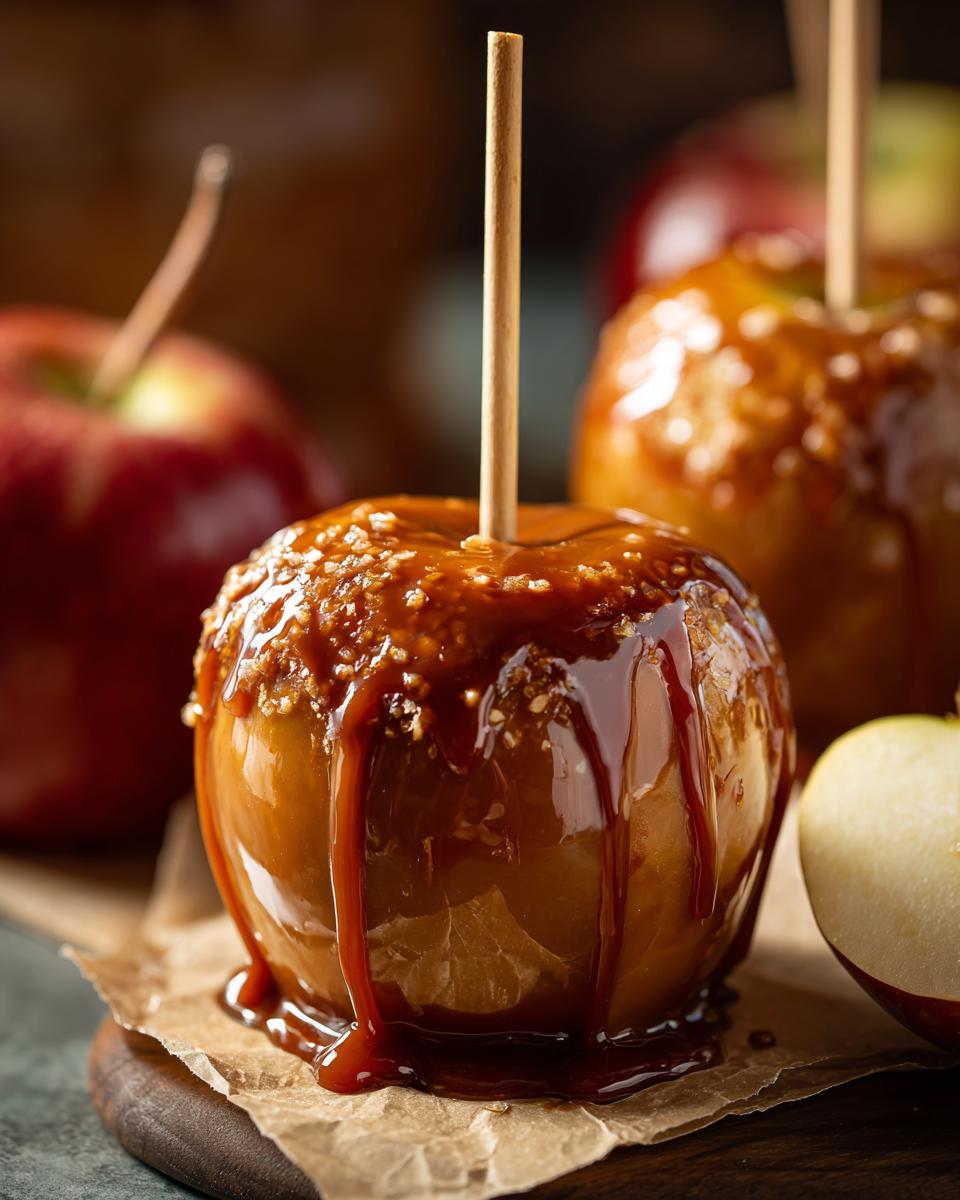
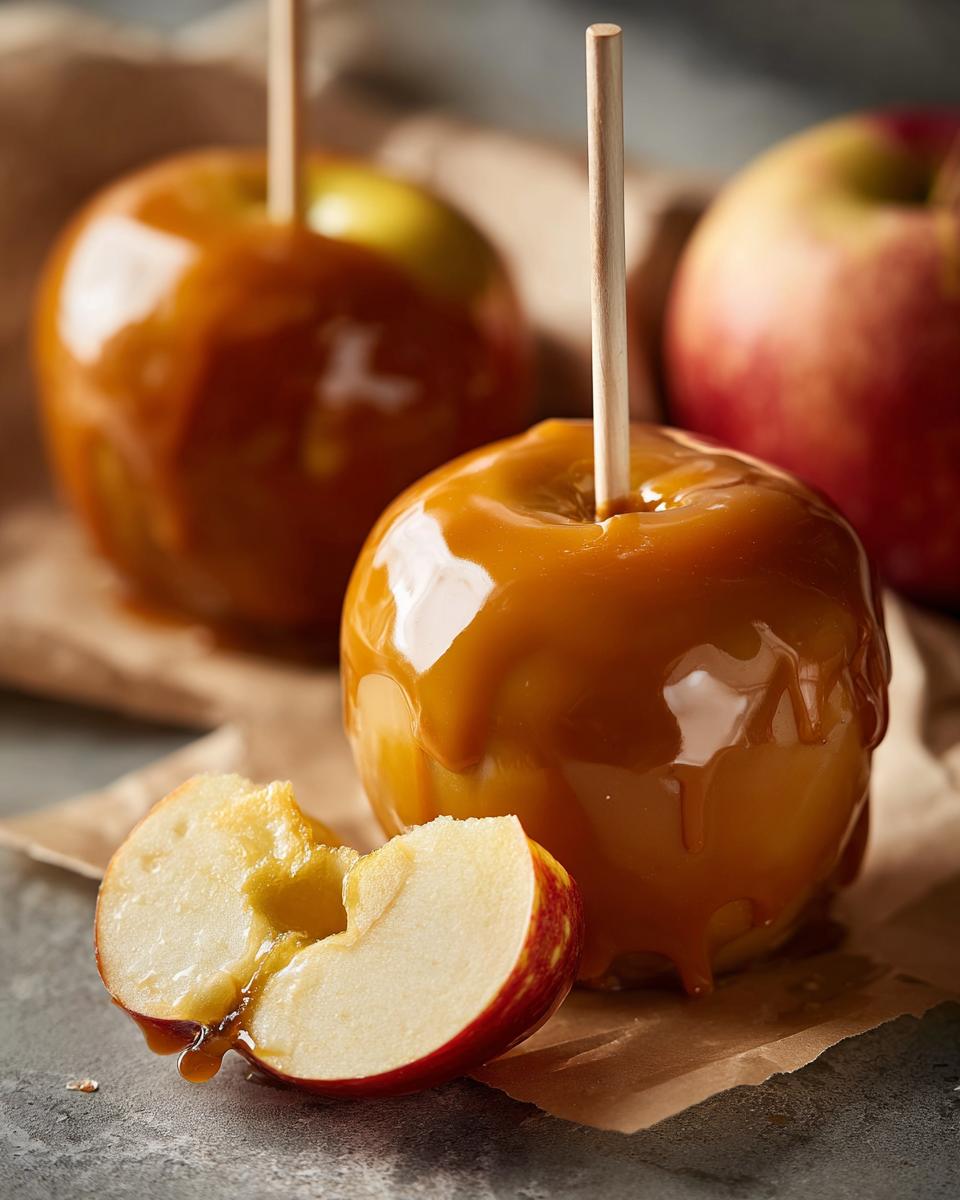
Alright, the caramel is perfect, the apples are prepped and waiting – time for the fun part! Grab your stick-skewered apples and carefully dip each one into that luscious, warm caramel. I like to tilt the pan a bit so the caramel flows up the sides, giving it a nice, even hug all the way around. Let any excess caramel drip back into the pan for just a second or two. Don’t let it drip for too long, or you’ll end up with a lonely caramel puddle at the bottom, and we want all that goodness on our apples!
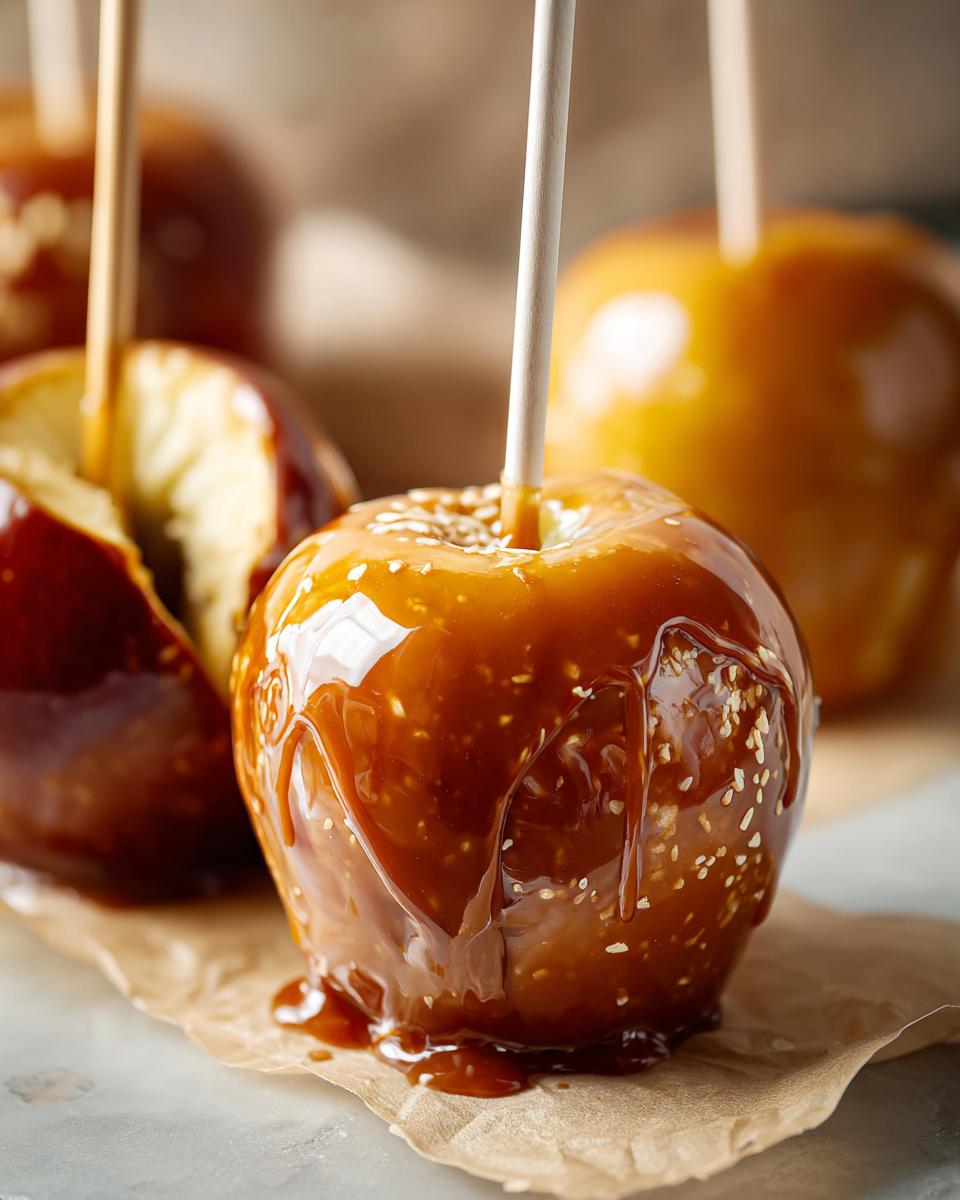
Now, while the caramel is still gooey and warm, that’s the *only* time your toppings will stick. This is where you can go wild! Think chopped nuts, colorful sprinkles, maybe some mini chocolate chips, or even shredded coconut. It’s also a fantastic idea to set up a little ‘caramel apple bar’ if you’re having people over. Just put out bowls of different toppings and let everyone customize their own masterpiece! If you’re feeling really creative, you can even make adorable ‘mini caramel apples’ by using smaller apples or cutting larger ones into wedges before dipping. Or, for easier snacking, try my ‘sliced sheet pan caramel apples’ where you just dip apple slices and arrange them on parchment paper. My trick for getting a really smooth, even coat? Dip the apple, give it a gentle swirl to coat, lift it up, and let it drip for a moment, then give the stick a little rotation – it really evens things out beautifully!
Setting and Storing Your Homemade Caramel Apples
Once your beautiful caramel apples are dipped and decorated, it’s time for them to set. You have a couple of options here! You can let them set up at room temperature on parchment paper for about 30 minutes to an hour. This is often the best way to avoid any condensation forming on the caramel later on, which can make it a little foggy. If you’re in a hurry though, a quick stint in the refrigerator for about 15-20 minutes will also do the trick. Just be mindful that chilling them might cause a little moisture to bead up on the surface later, but honestly, who can wait that long when they look this good?
Stored correctly, your homemade caramel apples will stay delicious for a few days. For the best texture and that lovely glossy finish, I really recommend enjoying them within 2-3 days. Keep them at room temperature, loosely covered or uncovered if you’ve managed to avoid condensation. If they need to last a bit longer, pop them in the fridge in an airtight container, but let them come back to room temp for about 15 minutes before you dive in. It makes all the difference! Speaking of delicious fall treats, you might also love my super moist Pumpkin Bread – it’s like a hug in a slice!
Frequently Asked Questions About Caramel Apples
Got questions? I’ve got answers! Making caramel apples might seem tricky, but it’s really quite forgiving if you know a few little secrets. Here are some things people often ask me:
Can I make caramel apples without corn syrup?
You know, you *can*, but it’s a bit riskier! Corn syrup is a stabilizer. It helps prevent the sugar from crystallizing, which is what gives you that dreaded grainy texture. If you absolutely must skip it, you’ll need to be extra careful with your sugar dissolving and temperature control. Some people try brown sugar or even butter as substitutes, but honestly, corn syrup is your best bet for that super smooth, reliable caramel. It’s worth finding!
Why is my caramel grainy or crystallized?
Oh, this is the most common caramel apple woe! It usually happens for a couple of reasons. Either the sugar didn’t dissolve completely before you started boiling, or maybe some sugar crystals splashed onto the sides of the pan and then fell back into the caramel. Stirring *too much* after it starts boiling can also encourage crystallization. If you see any crystals forming on the sides, gently brush them down with a wet pastry brush before they can cause trouble. The goal is a steady, gentle boil!
How do I prevent caramel apples from melting or sliding off?
This really comes down to two main things: the temperature of your caramel and how you prep your apples. For the caramel, making sure it reaches that firm ball stage (around 240-245°F or 116-118°C) is key. If it’s too soft, it just won’t set properly. And for the apples, as we talked about, make sure they’re super clean and completely dry! Removing that waxy coating is crucial for the caramel to grip onto. If you do everything right, it should stick beautifully!
Are caramel apples difficult to make?
Honestly, I don’t think they’re difficult at all, especially with this recipe! The most “difficult” part is just paying attention to the caramel’s temperature. Once you get that down, the dipping and decorating are really easy and fun. It’s a great recipe to try if you’re new to candy making because the result is so rewarding and impressive!
Understanding Caramel Apple Calories
Okay, let’s talk about the delicious reality of these treats! When you’re diving into a scrumptious caramel apple, you’ve got to remember it’s a pretty decadent dessert. On average, a classic homemade caramel apple like ours, without a ton of extra toppings, often lands somewhere between 300 to 500 calories per apple. That range can jump quite a bit if you go wild with nuts, chocolate chips, or extra drizzles! The recipe itself gives you a good baseline – think around 350 calories – but it’s always an estimate. It’s really part of the joy of these autumn goodies, right? A sweet treat that’s totally worth it!
Share Your Caramel Apple Creations!
I would absolutely LOVE to hear how your caramel apples turned out! Did you try any fun topping combinations? What was your favorite part of making them? Drop a comment below and let me know, or tell me your experience! You can also learn more about my culinary journey and inspiration over on my About page!
PrintClassic Caramel Apples
Learn how to make perfect caramel apples with a homemade caramel sauce that stays put. This recipe includes tips for preparing your apples, achieving the right caramel consistency, adding toppings, and storing your treats.
- Prep Time: 20 min
- Cook Time: 20 min
- Total Time: 40 min
- Yield: 6 servings 1x
- Category: Dessert
- Method: Stovetop
- Cuisine: American
- Diet: Vegetarian
Ingredients
- 6 medium apples (Honeycrisp, Fuji, or Gala recommended)
- 6 wooden popsicle sticks or lollipop sticks
- 2 cups granulated sugar
- 1/2 cup water
- 1/2 cup light corn syrup
- 1 (14 ounce) can sweetened condensed milk
- 1 teaspoon vanilla extract
- 1/4 teaspoon salt
- Optional toppings: chopped nuts, sprinkles, mini chocolate chips, shredded coconut
Instructions
- Wash apples thoroughly. If apples are waxed, scrub them with a vegetable brush in warm water. For extra security, you can dip them in boiling water for 10 seconds and then dry them completely. This ensures the caramel adheres well.
- Insert a stick firmly into the stem end of each apple, pushing about halfway through.
- In a medium saucepan, combine sugar, water, and corn syrup. Cook over medium heat, stirring until sugar dissolves.
- Bring the mixture to a boil without stirring. Cook until it reaches 240°F (116°C) on a candy thermometer. This is the firm ball stage.
- Gradually stir in the sweetened condensed milk. Continue to cook, stirring constantly, until the mixture reaches 245°F (118°C) on the candy thermometer. This is the firm ball stage, crucial for caramel that clings.
- Remove the saucepan from the heat. Stir in the vanilla extract and salt.
- Let the caramel cool slightly for about 5-10 minutes, until it thickens enough to coat the back of a spoon but is still pourable.
- Dip each apple into the caramel, tilting the pan to coat evenly. Let excess caramel drip off.
- If using toppings, sprinkle them onto the caramel immediately after dipping, before the caramel sets.
- Place the coated apples on a baking sheet lined with parchment paper.
- Allow the caramel apples to set completely at room temperature for at least 30 minutes, or refrigerate for faster setting.
Notes
- For a caramel apple bar, offer a variety of chopped nuts, sprinkles, and other toppings.
- Mini caramel apples are fun for parties; use smaller apples or cut larger apples into wedges before dipping.
- Sliced sheet pan caramel apples are easier to eat; slice apples and arrange on a parchment-lined baking sheet, then drizzle with caramel.
- Store caramel apples at room temperature for up to 2 days, or in the refrigerator for up to a week. They are best enjoyed within a few days.
- The calorie count for a standard caramel apple can range from 300-500 calories, depending on size and toppings.
Nutrition
- Serving Size: 1 apple
- Calories: 350
- Sugar: 60g
- Sodium: 50mg
- Fat: 15g
- Saturated Fat: 9g
- Unsaturated Fat: 6g
- Trans Fat: 0g
- Carbohydrates: 55g
- Fiber: 3g
- Protein: 2g
- Cholesterol: 30mg