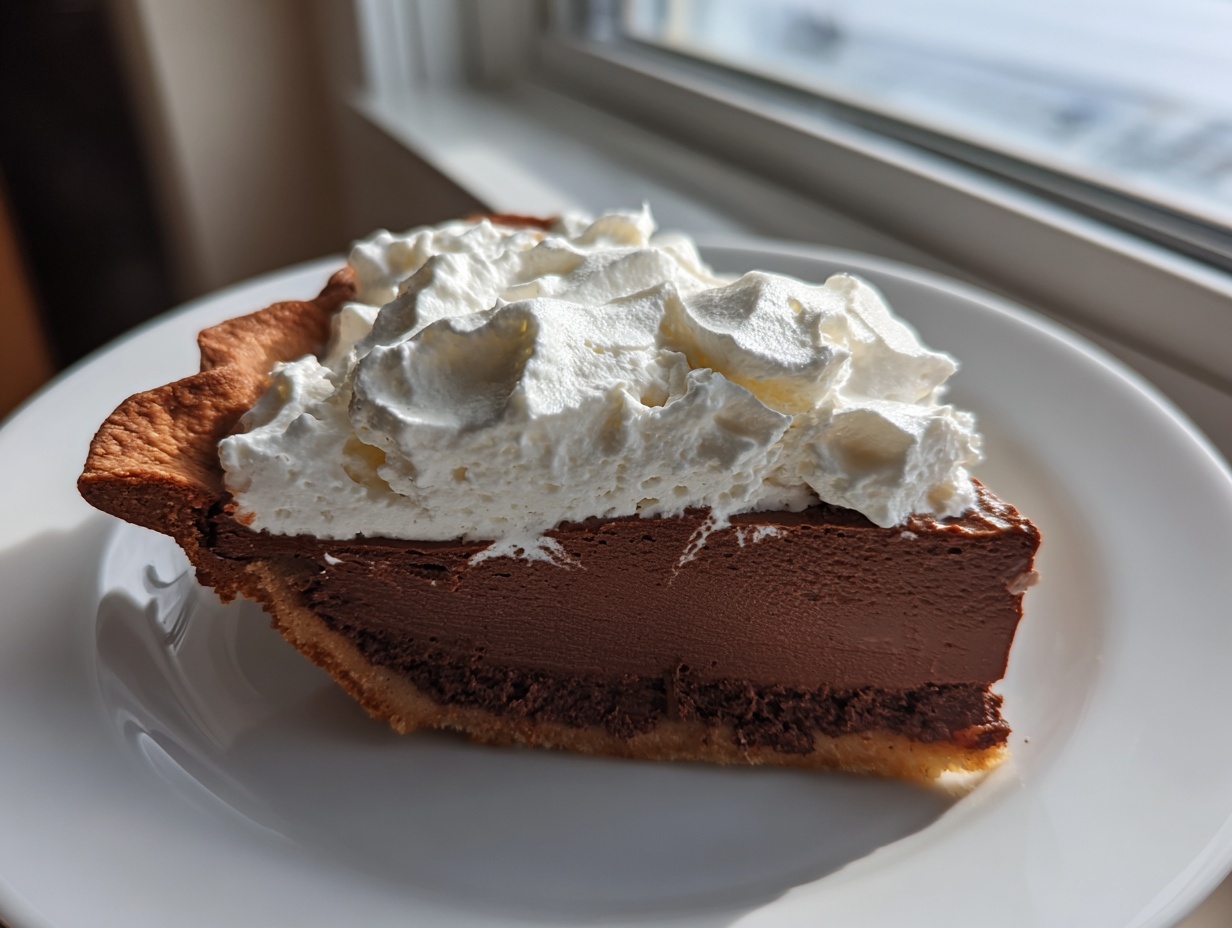

There is something truly magical about a perfectly executed classic dessert, isn’t there? Something that speaks of tradition and pure, unadulterated comfort. If you ask me, nothing fits that description better than the ultimate chocolate cream pie. Forget those overly processed, wobbly versions you might have tried before. This is my tried-and-true, Best Classic chocolate cream pie recipe, featuring a filling so rich and velvety it melts the moment it hits your tongue. Through my culinary training and my mother’s handwritten notes, I’ve refined this recipe to be wonderfully approachable for you, delivering that decadent, old-fashioned flavor every single time. Get ready for your new favorite showstopper! You can find more amazing creations like this in my collection of favorite desserts.
- Why This Classic chocolate cream pie Recipe Works (EEAT)
- Ingredients for the Best chocolate cream pie
- How to Make a Classic chocolate cream pie From Scratch Chocolate Pie
- Ingredient Notes and Substitutions for Your chocolate cream pie
- Tips for the Ultimate Decadent Chocolate Dessert
- Storage and Reheating Instructions for your chocolate cream pie
- Frequently Asked Questions about this Easy Chocolate Pie
- Share Your Homemade chocolate cream pie Experience
- Estimated Nutrition for This Creamy Chocolate Pudding Pie
- Share Your Homemade chocolate cream pie Experience
- Estimated Nutrition for This Creamy Chocolate Pudding Pie
Why This Classic chocolate cream pie Recipe Works (EEAT)
When you’re making an Old Fashioned Chocolate Pie, reliability is everything. This recipe wins because we cook the filling right on the stovetop—no oven fuss required for the custard! This method is my promise to you that you will achieve that thick, stable custard you crave. It’s about technique, and I learned the best ones when I honed my skills after leaving my corporate life for formal training. Trust me, this is how you guarantee a consistently delicious result. You can read more about my journey and general kitchen wisdom on my blog.
Achieving the Perfect Silky Chocolate Filling
The secret ingredient for that unbelievable texture isn’t just cocoa; it’s cornstarch! When you cook the mixture until it bubbles hard—and you must keep stirring!—you’re activating that starch perfectly. That one full minute after it starts boiling is vital. It cooks out any raw taste and guarantees a wonderfully Silky Chocolate Filling that holds its shape beautifully when sliced. No runny regrets here!
The Importance of a Fully Cooled Flaky Pie Crust Dessert
If you pour hot filling into a warm crust, you’re essentially inviting sogginess to the party, and we absolutely don’t want that. The crust, whether it’s my flaky recommendation or a cookie crumble shell, must be stone cold. Patience in this cooling step keeps the bottom crisp and prevents the rich custard from mixing with the baked pastry. If you’re looking for a different crust approach, check out my tips on making a buttery crust.
Ingredients for the Best chocolate cream pie
When I tell you that an elegant dessert like this comes together with simple pantry staples, I mean it! Having everything measured and ready before I even turn on the stove is my secret to avoiding kitchen chaos. Remember, clarity here means success later—we need precise measurements for that luxurious, thick filling. You can start practicing your dough skills ahead of time with my favorite easy butter pie crust recipe if you wish!
For the Flaky Pie Crust Dessert (Pre-Baked)
This is non-negotiable: you need a fully cooled, ready-to-go vessel for all that chocolate magic. Don’t even rush this part! We are using:
- 1 recipe for a 9-inch flaky pie crust (must be baked until golden brown and completely cooled)
For the Creamy Chocolate Pudding Pie Filling
This is where the velvety texture is born. Make sure your milk is cold before you start whisking!
- 1 1/2 cups granulated sugar
- 1/3 cup unsweetened cocoa powder
- 1/4 cup cornstarch
- 1/4 teaspoon salt
- 1 3/4 cups cold whole milk
- 2 large egg yolks, lightly beaten
- 2 tablespoons unsalted butter
- 1 teaspoon vanilla extract
For the Whipped Cream Topped Pie Finish
A cloud of homemade goodness is the only way to top this decadent dessert. It makes all the difference!
- 1 1/2 cups heavy whipping cream
- 2 tablespoons powdered sugar
- 1/2 teaspoon vanilla extract
- Chocolate shavings, for garnish (this is optional but highly encouraged!)
How to Make a Classic chocolate cream pie From Scratch Chocolate Pie
Okay, get your whisk ready! Making this incredible chocolate cream pie truly is a dance between heat and timing on the stovetop. Since we’re making this from scratch chocolate pie goodness, the steps need to be followed closely, especially when we handle those eggs. Don’t worry, it’s straightforward once you see it in action. Before you start, make sure you have everything else ready to go, especially that cooled crust! If you want to practice making the filling on its own first, try my recipe for homemade chocolate pudding.
Preparing the Custard Base
First things first: since we are baking the filling in the crust, you need to make sure that crucial crust step is done! You must have your 9-inch pastry ready, golden brown, and absolutely cooled down on a wire rack. No shortcuts there!
Once the crust is chilling out, grab a medium saucepan. This is where the magic starts. Whisk together your sugar, cocoa powder, cornstarch, and salt until they look like one unified dry mix. Then, slowly whisk in the cold whole milk until everything is smooth—I mean perfectly smooth, no lumps allowed!
Cooking the Silky Chocolate Filling
Now, turn your heat on to medium. You must stir this constantly with your whisk as it heats up. We’re waiting for it to thicken up so much that it actually starts bubbling—you’ll see those big, slow bubbles form on the surface. This is a major checkpoint, so don’t walk away!
Here’s the part that guarantees that amazing, silky chocolate filling: once it starts bubbling, keep whisking and cooking for a full minute longer. Yes, a whole 60 seconds! This cooks the starch properly. After that minute, take the pan off the heat immediately.
Next, we temper those egg yolks. In a separate little bowl, give those two yolks a quick whisk, and then slowly pour maybe half a cup of that hot chocolate mixture into the yolks while whisking the yolks like crazy. This stops them from scrambling! Once they look warm and happy, pour that yolk mixture right back into the main saucepan. Return it to low heat and cook gently, stirring constantly, for just another minute or two until it thickens up even more. Shut off that heat right away! Stir in your butter and vanilla until everything melts into an unbelievably rich, glossy sauce.
Chilling and Setting the chocolate cream pie
We need to get that beautiful hot filling into that cooled crust right now! Pour your hot filling into the crust evenly. Here’s a trick I picked up: press a piece of plastic wrap directly onto the surface of the filling. This little barrier stops a dry, wrinkly skin from forming on top while it cools.
Let it cool on the counter for about 30 minutes, just until it’s not scorching hot anymore. Then, it has to go into the fridge. You need a minimum of three hours—really, make it four—if you want this chocolate cream pie to truly set up firm enough to slice prettily. Three hours is the absolute least, but overnight is always best!
Finishing with the Whipped Cream Topping
Right before you’re ready to serve this showstopper, it’s time for the topper! I always use a very cold metal bowl and very cold heavy cream for this. Add your heavy whipping cream, powdered sugar, and vanilla extract to that bowl. Now, beat it! I use my electric mixer, but you can do it by hand if you need a workout. Mix until you have stiff peaks—that glossy, firm texture that holds its shape when you lift the whisk. For best results and to avoid any mishaps, make absolutely sure your whipping bowl is sparkling clean and super cold. A little fatty residue can stop the cream from whipping correctly!
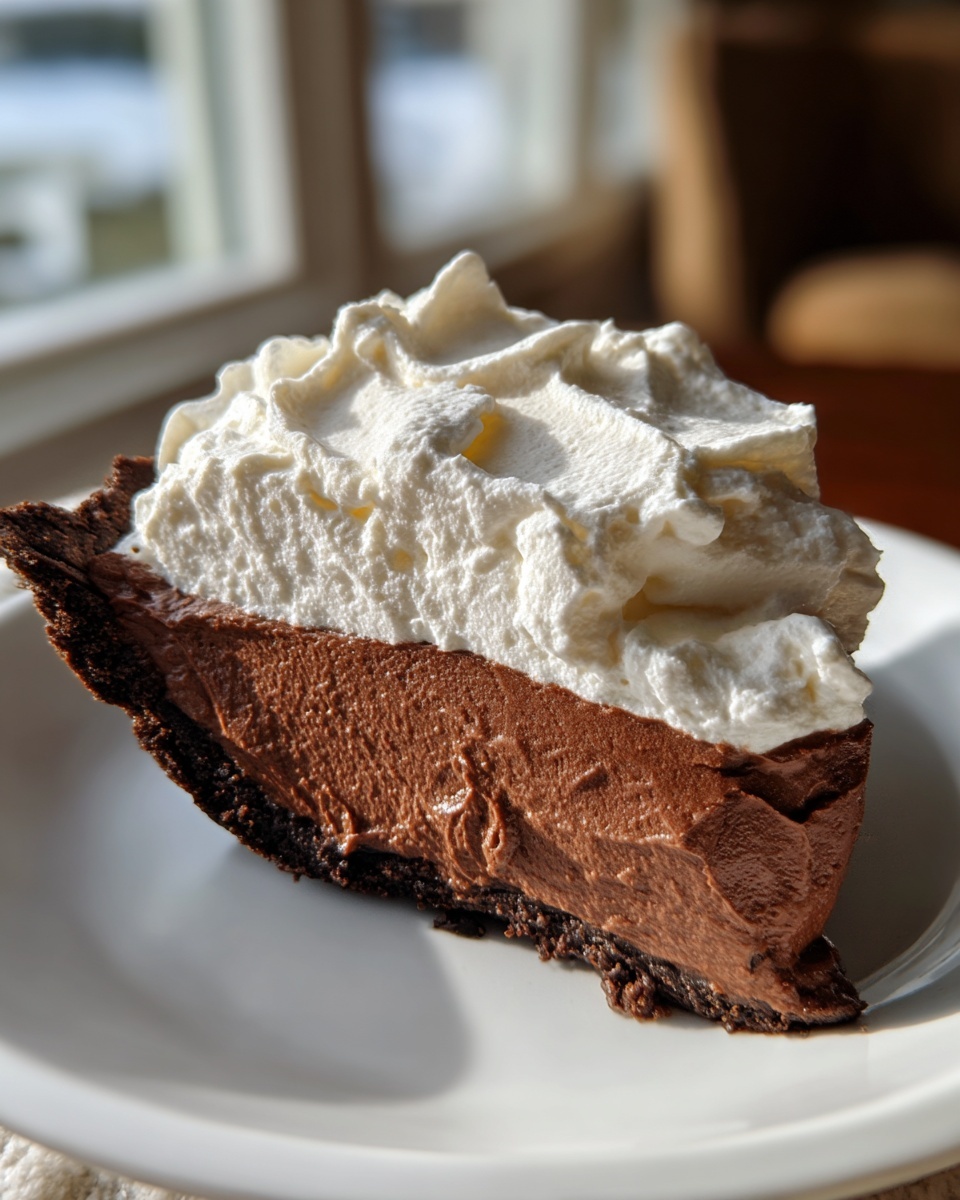
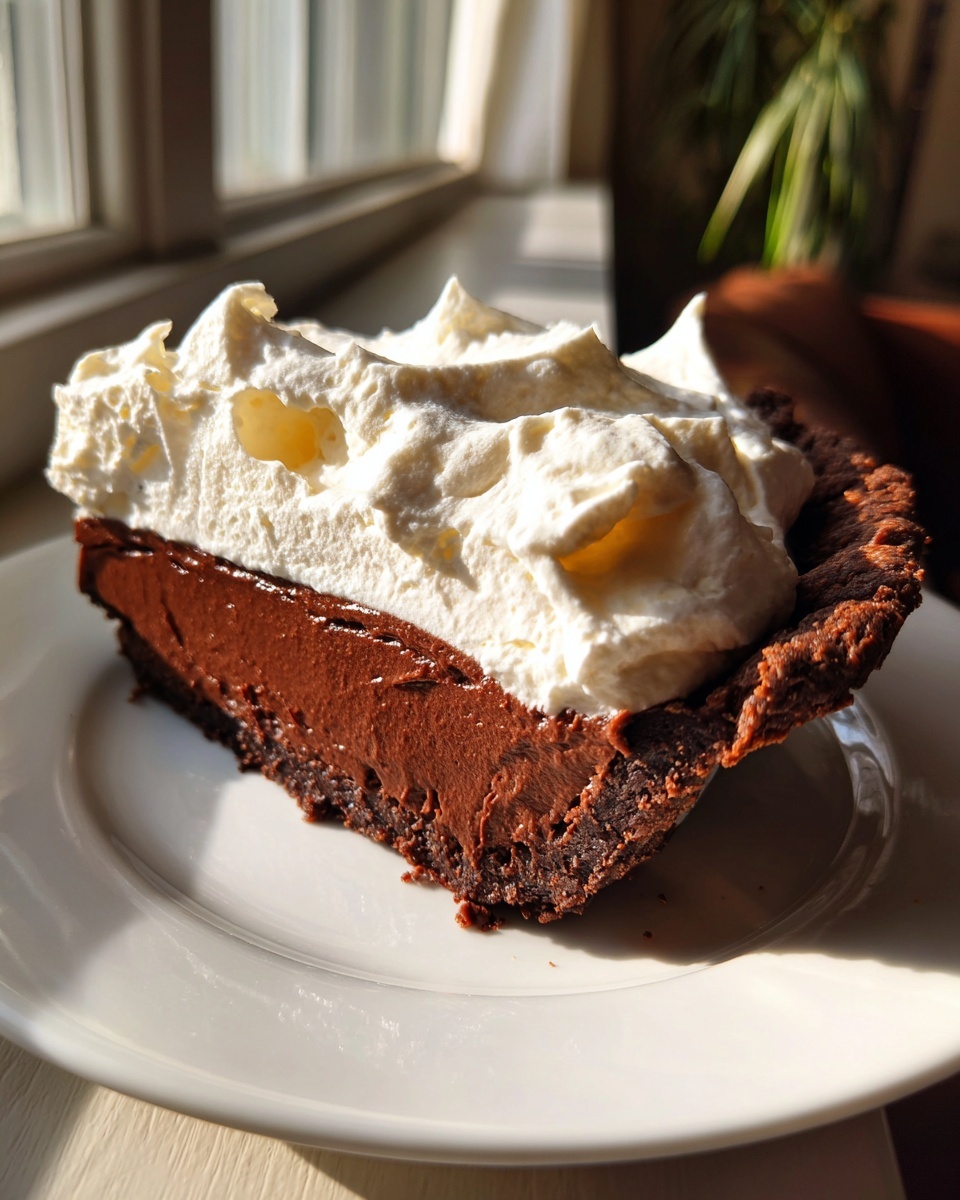
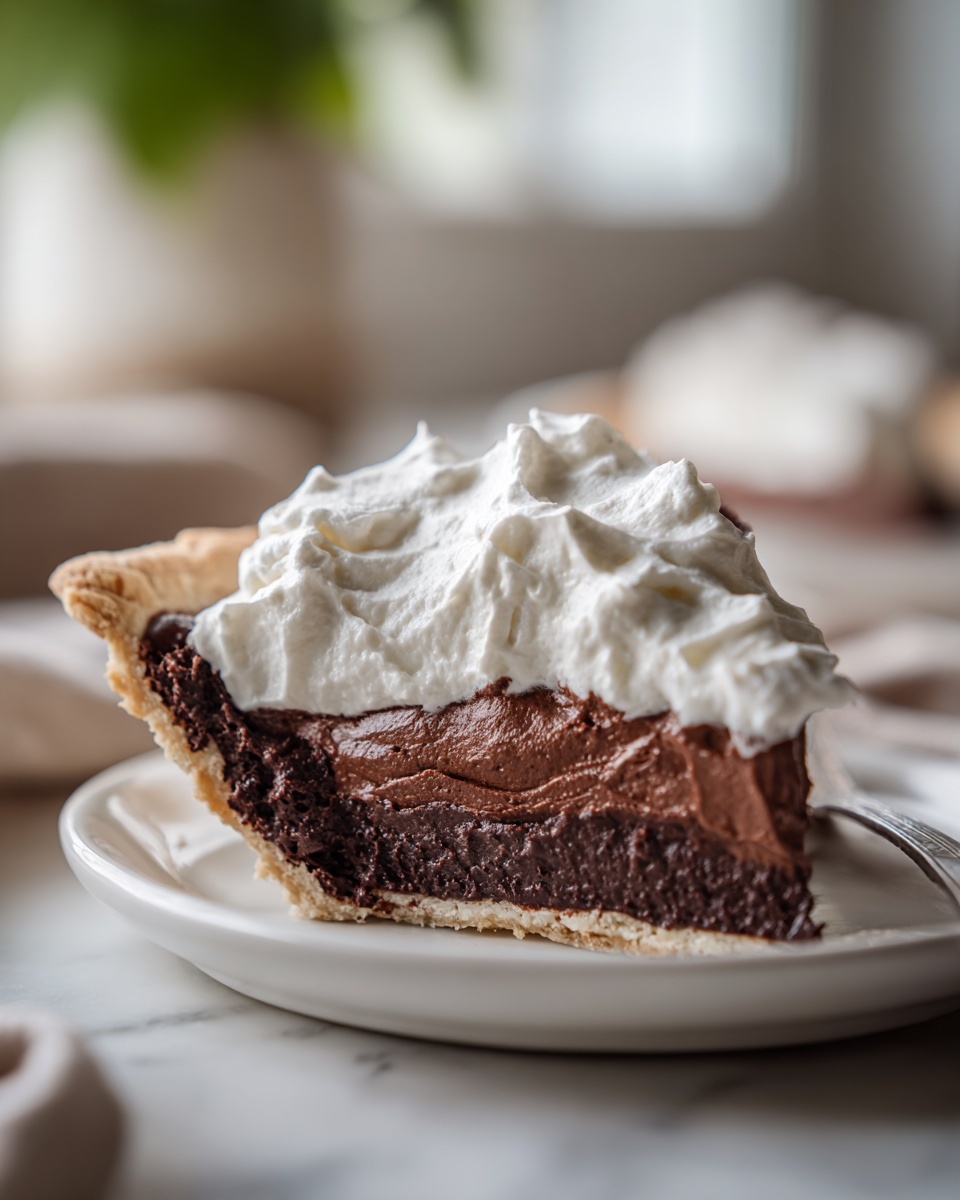
Once the pie is perfectly chilled, gently spread or pipe that glorious whipped cream topping right over the top. A sprinkle of chocolate shavings, and that, my friend, is the ultimate Decadent Chocolate Dessert. Slice big pieces!
Ingredient Notes and Substitutions for Your chocolate cream pie
I completely get it—sometimes you need a shortcut, or maybe you just don’t have all the ingredients for a full homemade pastry on hand. Don’t worry! This recipe is flexible, even though I absolutely adore the flaky crust. I want you to feel confident making this chocolate cream pie even if it means swapping a component out. Knowing the ‘why’ behind the ingredients, like the cornstarch, is what helps you adapt successfully. If you’re looking for other quick treats, my site has some great no-bake cookie recipes, too!
Crust Options: Flaky vs. Cookie Crumble
If you’re skipping my favorite flaky crust recipe, I have a couple of other standby options. If you love chocolate flavor throughout the entire dessert, an Oreo crust is fantastic! It’s so simple, and it requires no pre-baking, just chilling. If you do this, you’ll want to crush about 24 of those chocolate sandwich cookies—yes, including the cream filling!
Once they are finely crushed, mix that dust with about 6 tablespoons of melted butter until it holds together when you squeeze it. Press that mixture firmly into your pie plate and pop the whole thing into the freezer while you make your filling. It sets up beautifully!

Now, if you were hoping for a No Bake Chocolate Cream Pie altogether, you can certainly go that route, but it changes the character of the dessert quite a bit. The stovetop custard delivers that deep, classic richness that you can’t replicate perfectly with instant mixes. For this recipe, however, stick to a pre-baked shell of some kind!
Guaranteeing a Thick Set Custard
I hear from people sometimes that their custard ends up a bit like soup, and that just breaks my heart! If you are nervous about that, let me just reiterate the one technique that will save your creamy chocolate pudding pie. Remember when I said you have to cook the mixture for a full minute *after* it starts boiling? That is gospel! If you stop stirring or take it off the heat too soon, that cornstarch won’t reach its full thickening potential, and your pie will wobble when it should be slicing cleanly.
Don’t be afraid of a vigorous boil for that one minute. It’s what gives us that perfect, stable custard structure that holds up beautifully under the fresh whipped cream. Do this step right, and you’ve succeeded in making a truly from scratch chocolate pie!
Tips for the Ultimate Decadent Chocolate Dessert
We’ve made the rich filling and we’ve nailed the chilling time, which means we are in the final stages of creating the most amazing Decadent Chocolate Dessert! But just because the main steps are done doesn’t mean we can stop focusing on the details. The little things, especially when you’re aiming for that restaurant-quality look, are what truly elevate this pie from great to unforgettable. I love sharing those extra secrets I picked up in culinary school that make hosting so much easier and more elegant. Since we are celebrating with chocolate, which pairs beautifully with deeper flavors, may I suggest pouring yourself a small glass of an earthy Zinfandel or perhaps a sweeter Port wine while you finish up? They really enhance the cocoa notes in the filling! Speaking of special drinks, if you ever need inspiration for a cozy evening treat, you should check out my recipe for mulled wine.
Preventing Plastic Wrap Sticking
Remember that crucial step where we press plastic wrap directly onto the surface of the hot filling before chilling? That prevents that awful, dry skin from ruining the beautiful silky chocolate filling upon refrigeration. Well, here’s a tiny hack: Before covering the pie, take a tiny bit of non-stick cooking spray and lightly mist one side of the plastic wrap. Then, place that lightly sprayed side directly down onto the custard surface. The spray acts like an invisible barrier, and when you pull the wrap off before topping, the surface is absolutely pristine. It’s magic, and it keeps your surface looking perfect for that final layer of cream.
Whipping Cream Tips for Stiff Peaks
Achieving stiff peaks with your whipped cream topping is all about temperature control. If your cream is even slightly warm, it won’t whip up to its full potential; you’ll end up with soft, droopy peaks, and we need majestic, tall clouds for this pie!
My tip? Before you even start, put your mixing bowl (and the whisk attachments, if you use an electric mixer) into the freezer for about 15 minutes. Your heavy whipping cream should come straight from the coldest part of your refrigerator. Use cold ingredients in cold equipment, and you are virtually guaranteed stiff, glorious peaks. If you feel the bowl starting to warm up halfway through mixing, just pop it back in the freezer for five minutes! Trust me, the extra chill is worth the effort for the final presentation.
Storage and Reheating Instructions for your chocolate cream pie
Now that you’ve made this spectacular chocolate cream pie, the big question is: how do we keep it looking and tasting like we just pulled it out of the fridge an hour ago? Keeping this dessert fresh is all about managing that beautiful, delicate balance between the chilled custard and the airy topping.
This is an old-fashioned pie that really relies on being served cold to maintain that gorgeous texture. So, the refrigerator is definitely its best friend. Once assembled with the fresh whipped cream, you want to cover it loosely—avoid pressing plastic directly onto the cream, or it will deflate!
Generally, a freshly assembled pie like this tastes best within the first 24 hours. You can definitely push it to three days in the fridge. The filling, that silky chocolate filling, will stay perfectly set, but after day three, the crust might start to lose some of its integrity, or the whipped cream might start weeping a little. That’s just the nature of fresh dairy and pastry, sadly!
As for freezing this beauty? I strongly advise against it, especially once the whipped cream is on top. Freezing and thawing wreak absolute havoc on fresh cream; it separates and turns granular. If you absolutely must freeze a piece, I suggest chilling the pie completely, slicing it, and then freezing the slices *without* the whipped cream topping. You can wrap those slices tightly in plastic wrap and foil. When you thaw it in the fridge, you just top it with fresh whipped cream right before serving. Honestly though, a pie this good never lasts long enough to worry about freezing!
Frequently Asked Questions about this Easy Chocolate Pie
It’s totally normal to have a few questions when you’re making your first from scratch chocolate pie! I’ve gathered the main worries people have—usually around texture and timing—and I’m here to reassure you that this Easy Chocolate Pie recipe is designed to be foolproof once you know these tricks. We want that perfect slice every time, right?
Can I make this chocolate cream pie ahead of time?
Absolutely, and I highly recommend it! Making things ahead is essential for stress-free entertaining, which is what I focus on in my recipes. You can easily make the creamy chocolate pudding pie filling and pour it into your pre-baked crust up to 24 hours in advance. Just follow Step 8 carefully: cover the top with plastic wrap directly touching the surface and keep it chilled.
However, the delicate whipped cream topping needs to wait. If you add that cloud of fresh cream more than an hour or two before serving, it starts to soften and potentially weep a little. So, my advice is: make the pie shell and filling the day before, cover it, and then just whip the cream and assemble the final dessert right before you plan to serve it. This ensures maximum presentation glory!
What if I don’t want to use a homemade flaky crust?
Listen, I love baking pastry, but sometimes life calls for a little break! You can certainly use a good quality, store-bought, pre-baked 9-inch pie shell. Just make sure it’s a standard shortcrust or pastry shell; you want to avoid the deep-dish foil pans unless you adjust your cooking time significantly, which I don’t recommend for this filling.
If you’re looking for an even simpler treat, remember I mentioned the Oreo crust option? That’s fantastic for an easy chocolate pie, too, as it chills firm enough to hold the filling without any oven time for the crust itself. You can find the simple ingredient ratio for that in the notes above. If you enjoy baking chocolate treats in general, you might also appreciate my reliable chocolate cupcakes recipe!
How do I prevent the chocolate filling from cracking?
That smooth, glossy surface is gorgeous, but a crack can definitely ruin the look when you go to slice it! Cracking usually happens for two reasons: either the filling was packed down too hard when it went into the shell, or it wasn’t covered properly while chilling. We addressed the chilling cover in Step 8—press that plastic rap right on top!
For preventing cracks upon slicing, make sure you let the pie chill for the full required time (at least three hours, preferably longer). When you go to slice it, use a sharp, thin knife that you wipe clean between cuts. If I’m serving immediately, sometimes I dip the knife blade quickly in hot water first—that little bit of warmth helps the knife glide right through the set custard without catching or tearing the surface. That preserves that beautiful, smooth layer.
Share Your Homemade chocolate cream pie Experience
I truly hope making this chocolate cream pie brought you the same joy it brings me every time I whip up a batch. It’s my absolute favorite way to share a little bit of classic comfort. Once you’ve had a slice of that rich, velvety custard topped with real whipped cream, I have a feeling you’ll be making this year after year!
Please, if you made this recipe, take a moment to rate it at the top of the page—five stars if it earned them! And don’t be shy about dropping a comment below if you have any other questions about tempering eggs or achieving that perfect set. Or, even better, snap a picture of your stunning finished pie and tag me on social media. I absolutely love connecting with you all and seeing your beautiful bakes come to life!
Estimated Nutrition for This Creamy Chocolate Pudding Pie
When you are preparing a truly decadent chocolate dessert, we know it’s rich, but it’s good to have a general idea of what’s in that luxurious slice! Please remember that these numbers are estimates and will shift depending on the type of crust you use (a flaky homemade crust vs. a buttery Oreo crust makes a difference) and exactly how much whipped cream you pile on top.
This information is provided for transparency, keeping with my promise to give you complete details about the food we are making together:
- Serving Size: 1 slice
- Calories: 420
- Sugar: 45g
- Sodium: 180mg
- Fat: 22g
- Saturated Fat: 12g
- Unsaturated Fat: 10g
- Trans Fat: 0.5g
- Carbohydrates: 55g
- Fiber: 2g
- Protein: 6g
- Cholesterol: 75mg
Share Your Homemade chocolate cream pie Experience
I truly hope making this chocolate cream pie brought you the same joy it brings me every time I whip up a batch. It’s my absolute favorite way to share a little bit of classic comfort. Once you’ve had a slice of that rich, velvety custard topped with real whipped cream, I have a feeling you’ll be making this year after year!
Please, if you made this recipe, take a moment to rate it at the top of the page—five stars if it earned them! And don’t be shy about dropping a comment below if you have any other questions about tempering eggs or achieving that perfect set. Or, even better, snap a picture of your stunning finished pie and tag me on social media. I absolutely love connecting with you all and seeing your beautiful bakes come to life!
Estimated Nutrition for This Creamy Chocolate Pudding Pie
When you are preparing a truly decadent chocolate dessert, we know it’s rich, but it’s good to have a general idea of what’s in that luxurious slice! Please remember that these numbers are estimates and will shift depending on the type of crust you use (a flaky homemade crust vs. a buttery Oreo crust makes a difference) and exactly how much whipped cream you pile on top.
This information is provided for transparency, keeping with my promise to give you complete details about the food we are making together. My background in public relations taught me the importance of accurate disclosure, even when it’s just for a delicious dessert!
- Serving Size: 1 slice
- Calories: 420
- Sugar: 45g
- Sodium: 180mg
- Fat: 22g
- Saturated Fat: 12g
- Unsaturated Fat: 10g
- Trans Fat: 0.5g
- Carbohydrates: 55g
- Fiber: 2g
- Protein: 6g
- Cholesterol: 75mg
The Best Classic Chocolate Cream Pie with Silky Filling

This recipe guides you through making an old-fashioned chocolate cream pie featuring a rich, velvety chocolate custard filling and a light, homemade whipped cream topping. It is designed to be approachable for the home cook while delivering decadent results.
- Prep Time: 25 min
- Cook Time: 15 min
- Total Time: 40 min
- Yield: 8 servings 1x
- Category: Dessert
- Method: Stovetop Cooking
- Cuisine: American
- Diet: Vegetarian
Ingredients
- 1 recipe for a 9-inch flaky pie crust (baked and cooled)
- 1 1/2 cups granulated sugar
- 1/3 cup unsweetened cocoa powder
- 1/4 cup cornstarch
- 1/4 teaspoon salt
- 1 3/4 cups cold whole milk
- 2 large egg yolks, lightly beaten
- 2 tablespoons unsalted butter
- 1 teaspoon vanilla extract
- 1 1/2 cups heavy whipping cream
- 2 tablespoons powdered sugar
- 1/2 teaspoon vanilla extract
- Chocolate shavings, for garnish (optional)
Instructions
- Prepare your 9-inch pie crust and bake it according to your preferred recipe until golden brown. Let the crust cool completely on a wire rack.
- In a medium saucepan, whisk together the granulated sugar, cocoa powder, cornstarch, and salt.
- Gradually whisk in the cold whole milk until the mixture is smooth and there are no lumps.
- Place the saucepan over medium heat. Cook, stirring constantly with a whisk, until the mixture thickens significantly and begins to bubble. This step is key for a thick, set custard. Continue to cook and whisk for one full minute after it starts bubbling.
- Remove the saucepan from the heat. In a small bowl, quickly whisk the egg yolks. Temper the yolks by slowly whisking about 1/2 cup of the hot chocolate mixture into the yolks.
- Pour the tempered yolk mixture back into the saucepan with the remaining hot chocolate mixture. Return the pan to medium-low heat. Cook, stirring constantly, for 1 to 2 minutes until the custard thickens further. Do not let it boil after adding the yolks.
- Remove from heat. Stir in the butter and vanilla extract until the butter is fully melted and incorporated.
- Pour the hot, silky chocolate filling immediately into the cooled, pre-baked pie crust. Press a piece of plastic wrap directly onto the surface of the filling to prevent a skin from forming. Cool at room temperature for 30 minutes, then refrigerate for at least 3 hours, or until completely chilled and set.
- When ready to serve, prepare the topping: In a chilled bowl, beat the heavy whipping cream, powdered sugar, and vanilla extract with an electric mixer until stiff peaks form.
- Spread or pipe the fresh whipped cream over the chilled pie filling. Garnish with chocolate shavings if desired. Slice and serve this decadent chocolate dessert immediately.
Notes
- For an Oreo crust, crush 24 chocolate sandwich cookies and mix with 6 tablespoons of melted butter before pressing into the pie plate. Bake briefly or chill until firm.
- If you prefer a no-bake chocolate cream pie, you can substitute the stovetop custard with a mixture of cream cheese, powdered sugar, and instant chocolate pudding mix, folded into whipped topping.
- To guarantee a thick, set custard, make sure you cook the mixture for the full minute after it begins to boil before tempering the eggs.
Nutrition
- Serving Size: 1 slice
- Calories: 420
- Sugar: 45g
- Sodium: 180mg
- Fat: 22g
- Saturated Fat: 12g
- Unsaturated Fat: 10g
- Trans Fat: 0.5g
- Carbohydrates: 55g
- Fiber: 2g
- Protein: 6g
- Cholesterol: 75mg