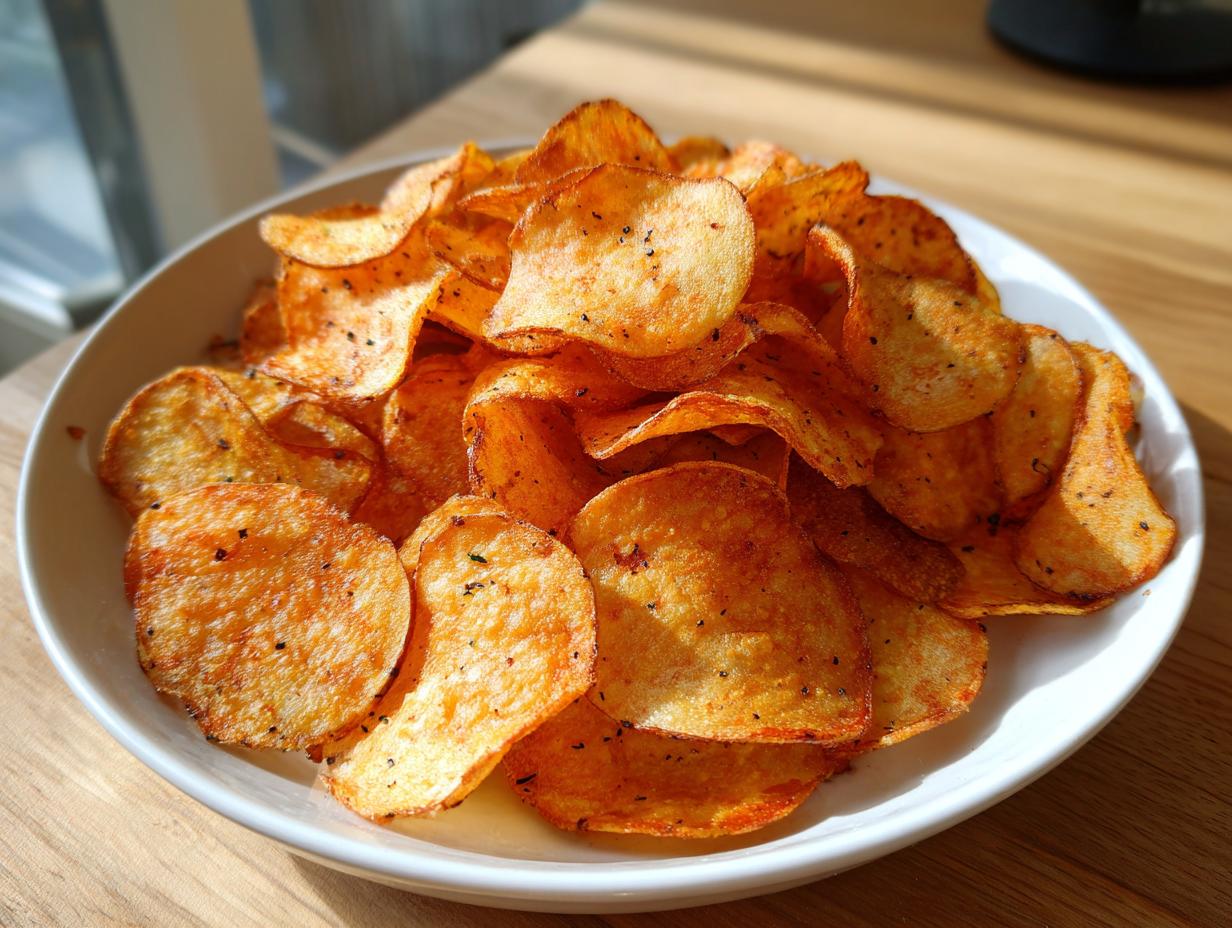

There are those moments, aren’t there? That undeniable, sudden craving for something salty, crunchy, and utterly satisfying that only a perfect bag of potato chips can cure. But I never want to reach for the mystery oil and preservatives of the store-bought kind. That’s why, here at Unfold Recipes, I spent weeks chasing the pinnacle of homemade crunch. My aim was straightforward: create reliable, elegant yet simple recipes—whether through the air fryer or the oven—that deliver maximum crispiness using pantry staples. Trust me, these homemade versions are worth the small bit of effort.
- Why Making Homemade potato chips Recipe is Worth the Effort
- Ingredients for the Crispiest potato chips
- The Essential Prep Steps for Perfect potato chips
- How to Make Air Fryer potato chips: The Quick Method
- Oven-Baked potato chips: Creating Healthy Chip Alternatives
- potato chip Seasoning Ideas for Flavor Variations
- Tips for Success When Making potato chips
- Storing and Serving Your Homemade potato chips
- Frequently Asked Questions About Making potato chips
Why Making Homemade potato chips Recipe is Worth the Effort
I realize that opening a bag is easier, I completely get it. But honestly, once you master this homemade potato chips recipe, you’ll never look back. The main reason I insist on doing this myself is the control. You control the exact type of fat used, and you can skip right over those artificial flavor enhancers that seem to fill every commercial bag.
For me, the true payoff is the texture. Store-bought chips often feel heavy or slightly stale the next day. When you make them fresh, especially using the right technique, you create the most unbelievably crisp and crunchy homemade snacks. It’s a simple joy that elevates a standard afternoon. I’m linking to my main recipe index if you want to see how this fits into my overall cooking philosophy!
- Flavor Customization: You season these to *your* taste—more salt, less salt, or that incredible vinegar powder I’ll mention later!
- Ingredient Transparency: Knowing exactly what went into your snack is priceless. It’s just potatoes, oil, and flavor.
- Superior Crunch: Properly prepared slices yield a brittle, satisfying snap that bagged chips usually can’t match.
Ingredients for the Crispiest potato chips
I’ve found that the quality of the potato is truly second to none when we are aiming for that perfect, golden crunch. You might be tempted to grab any potato in the bin, but trust me on this—the right starch content makes all the difference in achieving truly crispy potato chips. This is why I always recommend Russets or Yukon Golds for my scratch recipes.
My recipe keeps things beautifully simple, focusing on letting the potato shine, but you can always pivot to my other BBQ seasoning ideas later if you want something bolder!
- 3 large Russet or Yukon Gold potatoes: These varieties are high in starch, which is non-negotiable for that airy, brittle texture we’re seeking. You want them large enough to yield wide slices!
- 2 tablespoons olive oil: We use this sparingly for the baking method. If you are testing the air fryer, you’ll want a light cooking spray instead, which is much more efficient.
- 1 teaspoon fine sea salt: Fine salt adheres best to the surface area, so avoid coarse varieties for the initial seasoning.
- 1/2 teaspoon garlic powder: For that subtle, savory depth.
- 1/4 teaspoon paprika (optional, for color and flavor): This little bit helps warm up the color, giving you that classic, inviting golden hue.
As I strive to deliver recipes you can trust here at Unfold Recipes, I can confidently say that using Russets over waxy types like reds ensures your slices don’t turn gummy when cooked down. It’s a fundamental step that guarantees better results.
The Essential Prep Steps for Perfect potato chips
Okay, this is where we separate the merely *good* homemade potato chips from the truly *unbelievably crispy* ones. You cannot rush this part! It’s all about managing the starch hidden inside those lovely potatoes, which, if left alone, turns into steam and makes your chips soft instead of crunchy. We need dry, uniform pieces!
If you’re planning to make these for your next party, whipping up a batch of my French Onion Dip to go alongside them is a non-negotiable elegance move. But first, let’s focus on the potatoes.
Achieving Uniformly Thinly Sliced Potatoes
Consistency is everything here. If you have thick chips next to thin ones, the thick ones will still taste slightly underdone while the thin ones burn. I highly, highly recommend using a mandoline slicer set to about 1/16 of an inch. It gives you that glass-like thinness instantly. If you don’t have one, grab your sharpest knife and slice with patience! Remember, we are going for almost translucent here—that’s the sweet spot for achieving those beautifully delicate crispy potato chips.
The Starch Removal Secret to Crunchy homemade potato chips recipe
Once sliced, they go straight into a large bowl of ice-cold water. Cold water stops them from oxidizing (turning brown), and swirling them aggressively releases all that sticky surface starch. Let them soak for at least half an hour—seriously, don’t skimp! After soaking, drain them and rinse again until the water runs totally clear. Then comes the most vital part of answering how to make potato chips that snap: drying them. You must press them between tea towels or paper towels until they feel bone dry to the touch. Moisture is the sworn enemy of crunch!
How to Make Air Fryer potato chips: The Quick Method
When I need that satisfying salt fix *right now*, the air fryer is my absolute best friend. This method skips the oil-splattering fun of deep-frying but still gets you incredibly light and crisp air fryer potato chips. Remember all that prep work we did removing the starch? It pays off huge here because less starch means less steaming!
For this quick method, we skip the liquid oil bath and use just a light coating of cooking spray or, if you must, just 1 tiny teaspoon of olive oil tossed really well. After seasoning them with our salt and garlic mix, the layering technique is everything. This is where so many people go wrong!
You have to treat the air fryer basket like precious cargo—no overcrowding allowed! If the chips overlap, they steam, and you end up with soft, lukewarm potato slices. Arrange them in a single layer, and cook at 350°F (175°C). I check them at the 10-minute mark, give the basket a good vigorous shake—really get them moving around—and then check every two minutes after that. Once they are golden brown and you hear that satisfying, brittle sound, they are done. Pull them out immediately! If you want more inspiration on using this fantastic appliance, you can check out my guide on air fryer frozen shrimp, but trust me, these chips are legendary for party snack recipes.
Once they cool slightly, they take on that perfect crunch. For a fun, extra decadent twist that someone else shared online, you might even try following tips similar to those found when looking up loaded baked potato chips, perhaps piling these fantastic homemade chips high with toppings!
Oven-Baked potato chips: Creating Healthy Chip Alternatives
If you don’t have an air fryer, or if you’re baking for a seriously large crowd, the oven is still your best route to achieving fantastic, non-greasy crunch. This is truly the best way to create healthy chip alternatives that let you indulge without that heavy, post-snacking guilt. Because the oven environment is less intense than the enclosed heat of an air fryer basket, we need to turn the temperature up a bit higher to force out all that remaining moisture.
Preheat your oven to a nice warm 400°F (200°C). The secret to success here, besides having perfectly dry slices, is making sure they don’t touch each other on the pan. I line two large baking sheets with parchment paper for easy cleanup—and because peeling a chip off a hot, bare metal sheet is just asking for tears!
Toss your seasoned slices with just enough olive oil so they look slightly glossy, but not shiny or wet. Spread them out in a strict single layer. They will need about 15 to 20 minutes total, but you absolutely must flip them over halfway through the baking time. This ensures both sides get equally beautiful, golden color. Once you see them starting to brown around the edges, watch them like a hawk! They go from perfect to burnt in seconds flat. If you’re looking for more inspiration on beautiful baking techniques, check out my guide on crispy baked tofu—the logic for removing moisture is similar!
When they pull out golden, transfer them immediately onto a cooling rack, just like you would for any delicate pastry. While I always love a recipe that provides oven baked potato chips that are good for you, remember that the frying method is also an option if you feel like truly indulging!
potato chip Seasoning Ideas for Flavor Variations
That simple salt and garlic powder mix is fantastic for a classic taste, but honestly, the real fun begins when you start exploring potato chip seasoning ideas! Since we used a very light coating of spray or oil, the seasonings will stick beautifully, but only if you get them on right after they exit the heat source. This is one of my key tips for reliable results.
Don’t be shy about mixing and matching! I adore a little real dried dill mixed with onion powder for a homemade ranch feel. If you want that sharp, addictive tang, a sprinkle of white vinegar powder (yep, it exists!) makes my day. Or, if you’re hoping for something smoky, a good quality smoked paprika really deepens the flavor profile—similar flavor depths I aim for when I make my BBQ Pulled Chicken.

Just remember: season immediately when they are hot off the rack or basket. The residual heat helps the powder dissolve just slightly into the oil, making sure every single one of your from scratch chips is perfectly flavored!
Tips for Success When Making potato chips
Creating truly exceptional potato chips at home boils down to controlling three small, but mighty, variables. If you nail these fundamentals, you’ll find that achieving that beautiful, shatteringly crisp texture, whether baked or air-fried, becomes automatic. I want you to feel confident when you try this, so consider these my parting notes of hard-won wisdom!
First, let’s circle back to uniformity. I know I sound like a broken record, but if your slices aren’t the exact same thickness, you are setting yourself up for frustration. Please invest in a mandoline or use your sharpest knife and practice until those slices are nearly transparent—think 1/16th of an inch. This consistency allows the heat to cook every chip equally.
Second, remember the soak! Don’t skip the cold water bath. That starch is what keeps your chips gummy and soft. Swirling and rinsing until the water is clear and then drying them thoroughly is the only way to guarantee your crispy potato chips truly snap. If you feel like you’ve dried them enough, dry them one more time!
Third, for both the air fryer and the oven, avoid the temptation to pile them up. Overcrowding suffocates the chips, trapping steam and making them soggy. It means working in a few more batches, but it is completely worth the minor inconvenience for that perfect, light result. Cooking in small batches ensures you get that elegant crunch every single time. If you want a deeper, richer crunch, I have to mention the traditional deep-fry method noted in my ingredients guide—it will give you the ultimate texture, though it requires careful oil temperature management!
If you’re looking for other amazing side dishes that pair perfectly with snacks like this, you should check out my recipe for stuffed mushrooms as well. And don’t forget to check out fantastic resources like the guide on air fryer potato chips for extra technique ideas!
Storing and Serving Your Homemade potato chips
The hardest part is over—they’re cooked! Now, we need to treat these beautiful, delicate chips right so they retain their magic. Immediately transfer them from the baking sheet or air fryer basket onto a wire rack. This lets air circulate all around them, stopping residual heat from softening the bottoms. Honestly, the absolute best way to enjoy these potato chips is within the hour of making them. That’s when the crunch is truly unparalleled.
If you must store leftovers (and I can’t blame you if you make enough!), place them in an airtight container at room temperature. I’ve found that anything more than a day, and they start to lose that fresh snap. To really elevate your snack presentation for any party snack recipes gathering, serve them alongside a killer dip, like my recipe for a vibrant seven-layer dip!
Frequently Asked Questions About Making potato chips
I always get so many questions when people first try making homemade potato chips, which is completely understandable! It feels like magic when they turn out perfectly crunchy. Below are some of the common things I hear, hoping to clear up any confusion so you can nail that perfect snack every time.
Are baked potato chips truly healthier than fried ones?
Absolutely, yes, they are! When we talk about healthy chip alternatives, the baked and air-fried methods win because they drastically reduce the amount of added fat. Deep-frying requires submerging the potatoes, meaning they soak up oil. With baking, you are using maybe a teaspoon or two of olive oil for an entire batch of chips, which makes a huge difference in the overall calorie and fat content. It’s a simple adjustment that makes them feel far more guilt-free!
What is the best potato type for achieving the ultimate crunch?
If you want that loud, satisfying snap, you absolutely must stick to high-starch potatoes. My go-to recommendation remains Russets, followed closely by Yukon Golds. These varieties break down in a way that results in a light, brittle texture when cooked. If you were to use a lower-starch, waxy potato (like a red potato), they tend to hold too much water and can end up tasting denser or slightly gummy, no matter how well you dry them!
Here are a couple of other essentials that come up often:
- Why are my chips soggy? This nearly always comes down to two things: either they weren’t dried thoroughly enough after soaking, or you overcrowded the air fryer/baking sheet, which trapped the steam. Remember, moisture = sogginess!
- Can I make these ahead of time? While they are sensational eaten immediately, if you must make them ahead, store them in a completely airtight container at room temperature for up to 12 hours. I wouldn’t recommend making them more than a day in advance, though, as they lose that unparalleled fresh crunch. If you are making these for a party, prepare the sliced potatoes ahead of time and keep them submerged in cold water in the fridge until you are ready to start the drying process.
If you’re looking for other amazing side dishes that pair perfectly with snacks like this, you should check out my recipe for creamy, crunchy coleslaw!
PrintCrispy Homemade Potato Chips: Air Fryer and Baked Methods
Make the crispiest, golden homemade potato chips from scratch using simple pantry staples. This guide provides reliable instructions for both air fryer and oven-baked methods for a satisfying, crunchy snack.
- Prep Time: 15 min
- Cook Time: 20 min
- Total Time: 35 min
- Yield: 4 servings 1x
- Category: Snack
- Method: Air Frying / Baking
- Cuisine: American
- Diet: Vegetarian
Ingredients
- 3 large Russet or Yukon Gold potatoes
- 2 tablespoons olive oil (for baking/frying) or cooking spray (for air frying)
- 1 teaspoon fine sea salt (or to taste)
- 1/2 teaspoon garlic powder
- 1/4 teaspoon paprika (optional, for color and flavor)
Instructions
- Prepare the Potatoes: Wash and dry the potatoes completely. You do not need to peel them for a rustic chip. Using a mandoline slicer or a very sharp knife, slice the potatoes as thinly as possible, aiming for uniform thickness (about 1/16 inch).
- Rinse and Soak: Place the thin potato slices in a large bowl of cold water. Swirl them around to release excess starch. Let them soak for at least 30 minutes, or up to 2 hours in the refrigerator. This step is key for maximum crispiness.
- Dry Thoroughly: Drain the potatoes and rinse them under cold running water until the water runs clear. Spread the slices in a single layer on several layers of clean kitchen towels or paper towels. Press firmly to remove as much moisture as possible. Dry potatoes are essential for crunch.
- Seasoning (Air Fryer Method): In a bowl, lightly toss the dried potato slices with cooking spray or 1 teaspoon of olive oil. Sprinkle with salt, garlic powder, and paprika. Toss gently to coat evenly.
- Air Fry: Preheat your air fryer to 350°F (175°C). Arrange the seasoned potato slices in a single layer in the air fryer basket. Work in batches to avoid overcrowding. Cook for 10 to 15 minutes, shaking the basket every 5 minutes, until the chips are golden brown and crisp.
- Seasoning (Oven-Baked Method): Preheat your oven to 400°F (200°C). Line two large baking sheets with parchment paper. Toss the dried potato slices with the remaining 1 tablespoon of olive oil and the seasonings. Spread the slices in a single layer on the prepared sheets.
- Bake: Bake for 15 to 20 minutes, flipping the chips halfway through. Watch closely during the last few minutes, as they can burn quickly once they start to brown.
- Cool and Serve: Transfer the finished chips (either method) to a wire rack or a plate lined with paper towels to cool completely. They will crisp up further as they cool. Taste and add extra salt if needed immediately after cooling. Serve your crunchy homemade potato chips right away.
Notes
- For extra flavor, try seasoning variations like onion powder, black pepper, or a dash of cayenne pepper for heat.
- If you prefer a deep-fried version, heat 2 inches of neutral oil (like canola) to 350°F (175°C) and fry small batches for 3-5 minutes until golden, then drain well and season immediately.
- Uniform slicing is the secret to achieving consistent texture in your homemade potato chips.
Nutrition
- Serving Size: 1 serving (approx. 1/4 of recipe)
- Calories: 180
- Sugar: 1
- Sodium: 250
- Fat: 9
- Saturated Fat: 1.5
- Unsaturated Fat: 7.5
- Trans Fat: 0
- Carbohydrates: 23
- Fiber: 2
- Protein: 3
- Cholesterol: 0