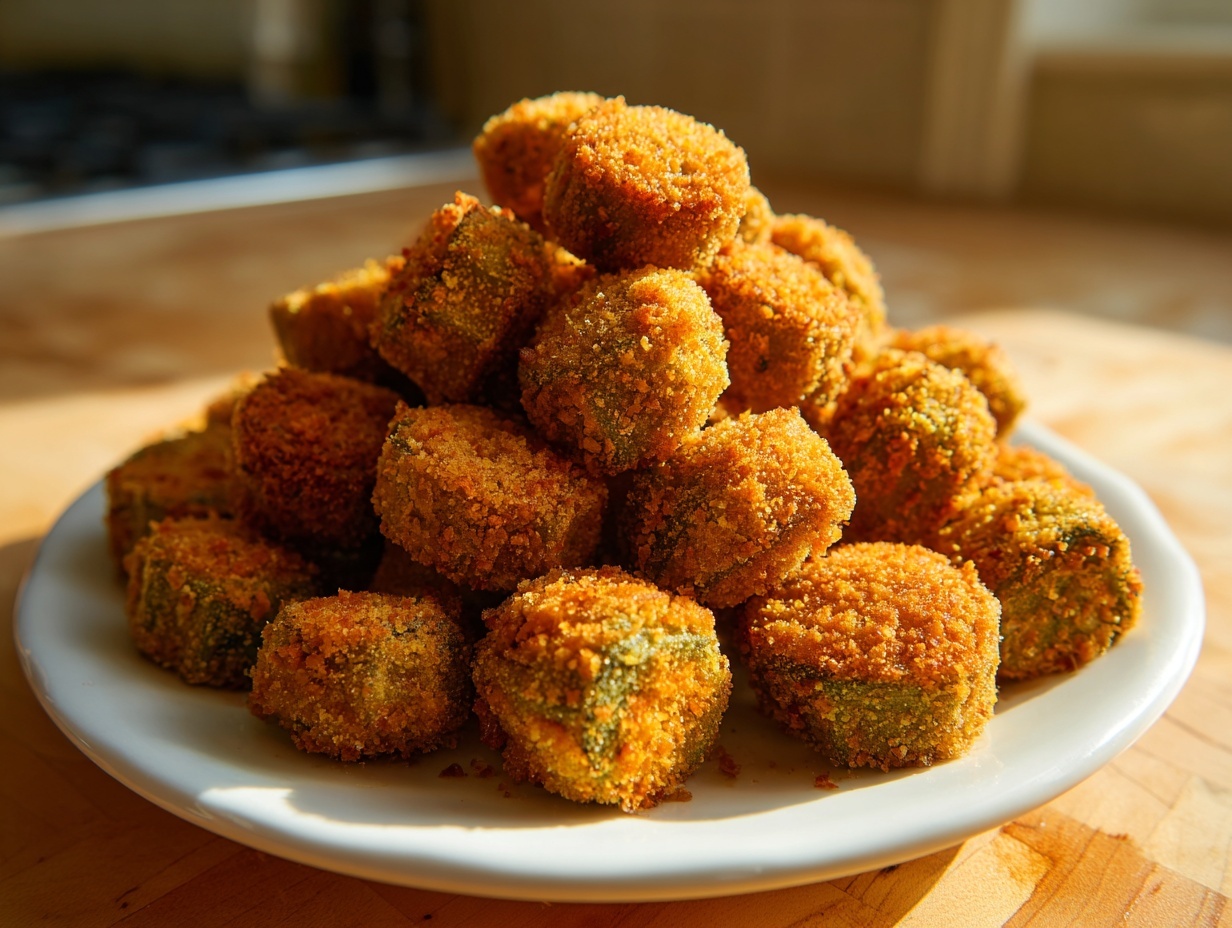

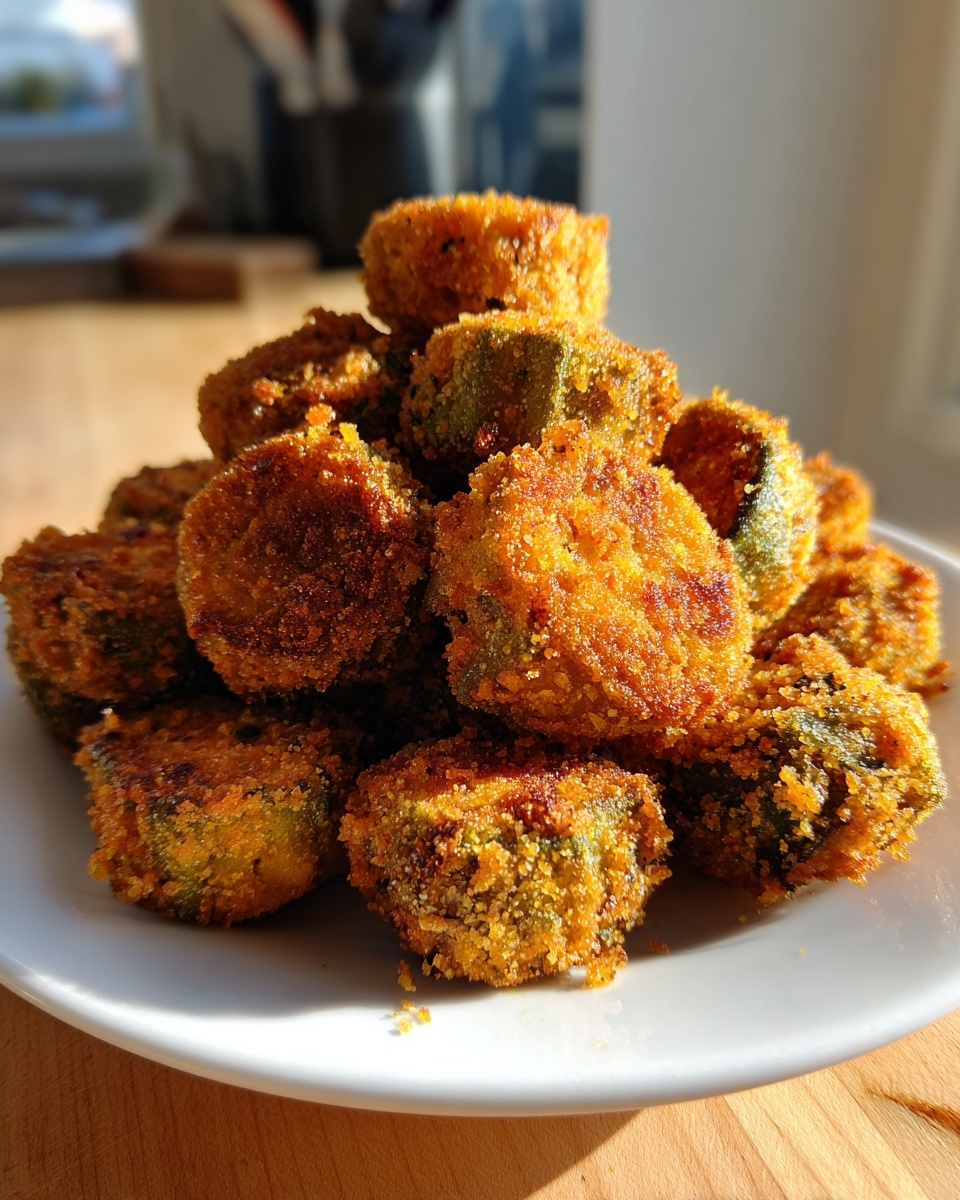
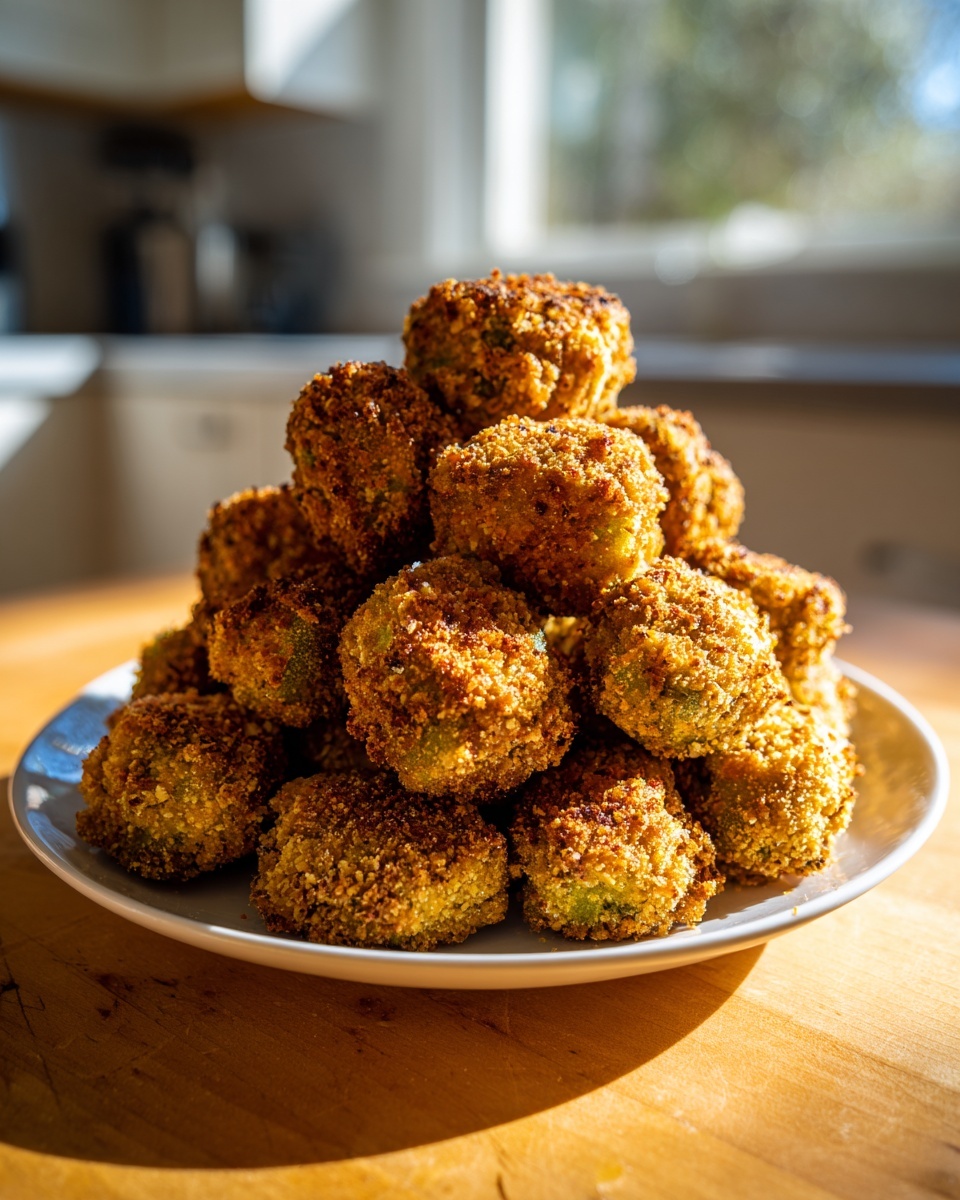
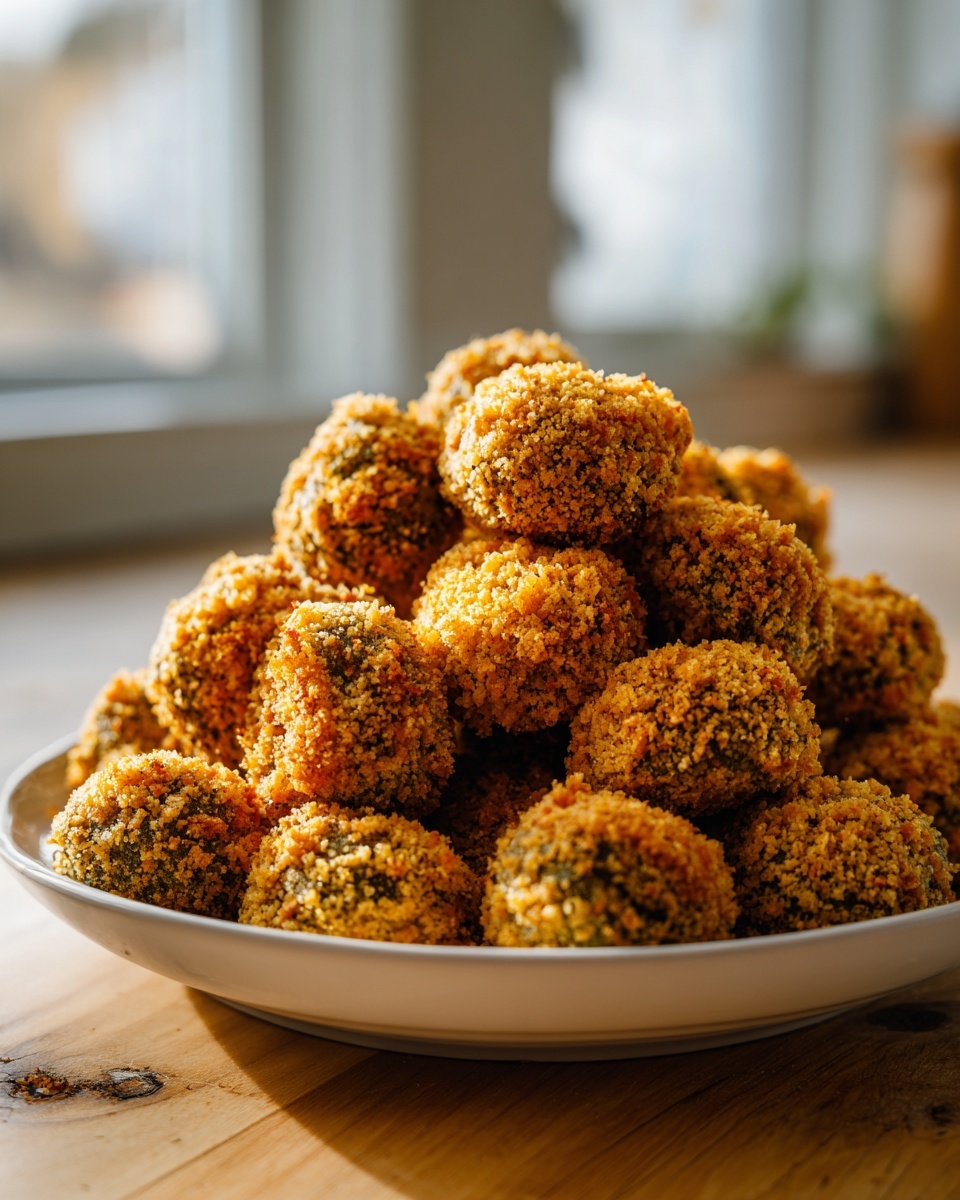
There is nothing quite like biting into a piece of perfectly prepared Southern food, and for me, that means that quintessential side dish: fried okra. Who hasn’t faced the sad reality of soggy, slippery okra instead of the crunchy dream we crave? It’s frustrating, but please don’t give up on it! After all my time developing and testing recipes, both professionally and in my own kitchen, I found the exact combination that conquers that infamous sliminess for good. We are going to achieve genuinely Crispy Fried Okra using the classic buttermilk soak paired with a hearty cornmeal dredge. Trust me, this recipe is meticulously tested so you can bring that golden, delightful crunch right to your table. It follows the same foundational principles I use for everything, even fantastic dishes like my Southern Fried Chicken—it’s all about technique!
- Why This Crispy Fried Okra Recipe Works: The Secret to No Slime
- Gathering Ingredients for Perfect Fried Okra
- How to Make Fried Okra: Step-by-Step Skillet Instructions
- Tips for Success: Mastering the Art of Fried Okra
- Alternative Cooking Methods for Fried Okra
- Serving Suggestions for Your Easy Okra Side Dish
- Storage and Reheating Instructions for Fried Okra
- Frequently Asked Questions About Making Fried Okra
- Nutritional Snapshot of This Comfort Food Sides Dish
Why This Crispy Fried Okra Recipe Works: The Secret to No Slime
When you look up traditional Southern cooking, you often see promises of crispy vegetables, but the difference between a good batch and a spectacular one is beating the okra’s natural texture. This recipe succeeds because we respect the vegetable and use simple chemistry. It’s all about controlling that pectin—the ingredient that causes the dreaded sliminess! We tackle that head-on before the frying even begins, which is why this consistently delivers that sought-after, beautiful crunch.
This preparation is the secret weapon for achieving real No Slime Okra.
The Buttermilk Soak: Breaking Down the Mucilage
My culinary training taught me that acid is our friend here. When you cover fresh okra with buttermilk, the lactic acid gets to work almost immediately, gently dissolving the sticky mucilage. It sounds complicated, but trust me, it’s magic! I vividly remember my instructor emphasizing this step; she said, “You must tame the slime before you season the crust.” It’s that tiny, patient wait that guarantees your end result is tender inside and shatteringly crisp outside.
Achieving Maximum Crunch with Cornmeal Breaded Okra
Once the okra has soaked, we need the coating to stick well and hold up to the hot oil. That’s why we use a precise mix of cornmeal and flour. The cornmeal provides that signature, rustic texture, while the flour helps bind it all together. You can’t just dust it lightly, either! You have to press that dredge firmly onto every single piece. That solid grip is what turns these into genuinely Crunchy Fried Vegetables instead of soggy, oily little rings.
Gathering Ingredients for Perfect Fried Okra
To get that beautiful, consistent crunch we talked about, you can’t just grab whatever you have lying around. Ingredient quality matters, especially when dealing with fresh produce! I always lay out exactly what I need before I even think about heating the oil, because once this process starts, it moves fast. When you use the right components—and pay attention to the prep—it really sets you up for success, just like when I make my cast iron skillet cornbread alongside it.
Okra and Dairy Requirements for Fried Okra
We need two pounds of okra for this batch, and please, make sure it’s fresh for the best texture. You must wash it thoroughly and slice every round precisely into half-inch thick pieces—uniform size helps everything cook evenly! Then, we have our liquid gold: two full cups of buttermilk to tame that slime. Don’t try to substitute milk here; the slight acidity of the buttermilk is absolutely non-negotiable if you want that lovely texture later on.
Seasoning and Frying Oil for Southern Fried Okra Recipe
The dredge is where we layer in the flavor for our Southern Fried Okra Recipe. You’ll whisk together a cup and a half of yellow cornmeal with a half-cup of white flour. To this, we add salt, pepper, garlic powder, and just a tiny little pinch of cayenne if you like a little warmth. Crucially, for that traditional Skillet Fried Okra result, you need a high smoke point oil, like peanut or vegetable oil, deep enough in the pan to really sizzle around the coating.
How to Make Fried Okra: Step-by-Step Skillet Instructions
Now that we have perfect ingredients ready to go, it’s time for the fun part—the actual cooking! Remember, this is a fast process once that oil heats up, so organization is everything. You’ll want your seasoned cornmeal mixture right next to your bowl of buttermilk-soaked okra. Because we want the absolute best fried okra experience possible, rushing the temperature checks is not an option. We are aiming for that beautiful, deep southern golden brown that crackles when you tap it. If you’ve perfected your collard greens, you know timing is key!
The Soaking and Dredging Process for Crispy Fried Okra
First up, make sure that okra has enjoyed its minimum of 30 minutes bathing in the buttermilk; this really gets the slime working its way out. While it’s soaking, go ahead and whisk your dredge ingredients thoroughly in a shallow dish. When you move the okra over, lift it out of the buttermilk, give it a gentle shake so the biggest drips fall off, and then drop it straight into that cornmeal mix. Don’t just toss it; you need to press that coating onto every single surface. That serious coating is what locks in the crunch for truly Crispy Fried Okra.
Frying Technique for Perfect Fried Okra
This is where cast iron really shines, but any heavy-bottomed skillet will do the trick. You need your oil heated up and stable at 375°F. If you don’t use a thermometer, you can test it by dropping a tiny bit of coating in—if it starts sizzling hard right away, you’re golden. Carefully place your dredged okra into the hot oil, but be very mindful not to overcrowd the pan. Crowding drops the oil temperature instantly, and that’s how you get soggy fried okra! Fry them for a solid 3 to 4 minutes on one side, turn them gently, and fry the second side until they hit that perfect golden hue.
Tips for Success: Mastering the Art of Fried Okra
Getting this fried okra right isn’t just about following the steps once; it’s about executing those critical moments perfectly. I’ve learned that small details—like how you handle the okra after it leaves the oil—make the difference between a great side dish and frankly, the best fried okra you’ve ever had. These are the small tweaks that elevate the experience from good home cooking to truly elegant and delicious results, which is what we always aim for here at Unfold Recipes. You can read more about embracing the techniques of Traditional Southern Cooking if you’re looking to deepen your skills.
Oil Temperature and Batch Management
I can’t stress this enough: if your oil isn’t hot enough, you are essentially going to boil the coating instead of frying it, which means soggy okra every time. Keep that thermometer steady at 375°F! Once the okra comes out of the skillet, avoid piling it high on paper towels. That traps steam underneath and undoes all our hard work! Always transfer the freshly fried pieces to a wire rack set over a baking sheet to allow air circulation all around. This keeps the coating dry and utterly crisp.
Quick Southern Sides: Serving Immediately
Fried okra, much like French fries, doesn’t wait well for latecomers to the dinner table! This dish truly shines when it’s served piping hot, moments after it’s left the oil and received that final, light sprinkle of salt. It’s meant to be an immediate highlight of your meal. Making these Quick Southern Sides means they should be timed to finish just as your main course is plated. If you do happen to have leftovers, save them for an oven reheat!
Alternative Cooking Methods for Fried Okra
While nothing beats the deep, dark crunch achieved by properly managed hot oil in a skillet—and I truly adore that traditional method—I know not everyone wants a big fry session, or maybe you’re just looking for a slightly lighter dish for a weeknight. As a culinary professional, I always feel it’s important to offer reliable alternatives that respect the fundamental structure of the recipe. So, if you’ve mastered the skillet version, let’s pivot and talk about making this happen in your air fryer. It’s a fantastic way to still get that good coating without a big pot of oil, giving you fantastic Air Fryer Fried Okra.
Making Air Fryer Fried Okra
The key to crispiness here is getting that dredge well adhered, just like before! Once coated, you don’t want to pack the basket full; give everything space. Set your air fryer to 390°F (199°C). You’ll cook them for about 12 to 15 minutes total. The most important bit is that you must pause halfway through to give the basket a good shake. This ensures even browning on all those wonderful cornmeal-coated sides. You can read more about getting crispy results with less oil in my tips for crispy baked tofu!
Serving Suggestions for Your Easy Okra Side Dish
This crispy, slightly smoky fried okra is just so versatile! While it screams summer cookout, it fits just as beautifully onto a serious comfort food plate any time of year. I often serve this Easy Okra Side Dish alongside something slightly tangy or creamy to balance the deep savoriness from the frying process. It is phenomenal next to slow-cooked BBQ pulled pork or alongside a beautiful, crisp creamy coleslaw. Honestly, a basket of this hot okra with a side of ranch or comeback sauce for dipping is a meal in itself. Just make sure you make enough, because these disappear frighteningly fast!
Storage and Reheating Instructions for Fried Okra
Let’s face it—fried okra rarely makes it to the next day, but just in case you are blessed with leftovers, we need a plan! The sad truth is that once fried food cools, it loses that initial magic crunch. You absolutely must avoid the microwave; it heats the okra from the inside out and guarantees sogginess. Instead, if you want to revive that crispy texture, you should aim for dry heat.
Pop the leftovers on a wire rack set inside a baking sheet and reheat them in an oven preheated to about 375°F for about 8 to 10 minutes. If you happen to have your air fryer out, that works even faster! A brief blast in the air fryer is truly the best way to bring back that satisfying, satisfying crispness to your favorite side dish.
Frequently Asked Questions About Making Fried Okra
It’s completely normal to have a few lingering questions when tackling a classic like this! So many people feel intimidated by the idea of making crispy vegetables at home, especially when they’ve had disappointing results before. I always review the common sticking points so you feel completely confident bringing this dish to your next gathering. If you’re hungry for even more kitchen wisdom, feel free to stop by my main blog page!
Can I use frozen okra for this fried okra recipe?
Oh, please don’t! I know sometimes the convenience is tempting, but I have to advise against it for the best results with this recipe. Frozen okra comes pre-packaged with a lot more moisture trapped inside, even after you try to thaw it. That extra water fights against your beautiful cornmeal dredge, making it almost impossible to get that deep, satisfying adherence we need for fried okra that truly stays crisp.
What oil is best for traditional Southern Fried Okra Recipe?
For that authentic, old-school crunch that defines the Southern Fried Okra Recipe, you need an oil that can handle high heat without smoking or breaking down too quickly beneath your crunchy coating. That means you should absolutely stick to peanut oil or a neutral vegetable oil. These fats have a high smoke point, allowing you to keep that temperature steady right around 375°F, which is the magic range for getting that gorgeous golden coloring.
How long does the buttermilk soak need to be?
We set the minimum soak time in the recipe at 30 minutes, and that is genuinely the minimum baseline you need to give the buttermilk acid enough time to tackle that natural slime. If you are making a big batch and need to manage your time, you can certainly let it soak for up to an hour, no problem! The longer it soaks (within reason, of course), the more you neutralize that mucilage, leading to those perfectly crunchy fried vegetables we adore.
Nutritional Snapshot of This Comfort Food Sides Dish
Because we are frying the okra, these numbers are definitely reflective of a rich, traditional Southern preparation meant for enjoyment! Please remember that this is an estimate, especially since the final result depends a lot on the specific kind of oil you use for frying and how much you drain it afterward. For this classic, comforting side, we estimate about 280 calories per serving.
PrintCrispy Southern Fried Okra: The No-Slime Skillet Recipe

Achieve perfectly golden, crunchy Southern Fried Okra using a simple buttermilk soak and cornmeal dredge. This skillet recipe delivers classic comfort food flavor with zero slime, ready quickly for your next dinner side.
- Prep Time: 35 min
- Cook Time: 15 min
- Total Time: 50 min
- Yield: 6 servings 1x
- Category: Side Dish
- Method: Deep Frying
- Cuisine: Southern American
- Diet: Vegetarian
Ingredients
- 2 lbs fresh okra, washed and sliced into 1/2-inch rounds
- 2 cups buttermilk
- 1 1/2 cups yellow cornmeal
- 1/2 cup all-purpose flour
- 1 teaspoon salt
- 1/2 teaspoon black pepper
- 1/2 teaspoon garlic powder
- 1/4 teaspoon cayenne pepper (optional)
- Vegetable oil or peanut oil, for frying
Instructions
- Prepare the okra: Place the sliced okra in a bowl and cover completely with buttermilk. Let it soak for at least 30 minutes. This step helps reduce sliminess.
- Prepare the dredge: In a shallow dish, whisk together the cornmeal, flour, salt, pepper, garlic powder, and cayenne pepper.
- Heat the oil: Pour enough oil into a large, heavy-bottomed skillet (cast iron works best) to reach a depth of about 1/2 inch. Heat the oil over medium-high heat until it reaches 375°F (190°C).
- Coat the okra: Working in batches, remove the okra from the buttermilk, allowing excess to drip off. Immediately dredge the okra thoroughly in the cornmeal mixture, pressing gently to make sure it adheres well.
- Fry the okra: Carefully place the coated okra into the hot oil, ensuring you do not overcrowd the skillet. Fry for 3 to 4 minutes per side, turning occasionally, until the coating is deep golden brown and crisp.
- Drain: Use a slotted spoon to remove the fried okra from the oil. Place it on a wire rack set over paper towels to drain excess oil.
- Season and serve: Sprinkle lightly with extra salt immediately after removing from the oil. Serve hot as a quick Southern side dish.
Notes
- For an air fryer variation, toss the dredged okra lightly with cooking spray and cook at 390°F (199°C) for 12-15 minutes, shaking the basket halfway through.
- To ensure maximum crispiness, do not skip the buttermilk soak, and make sure your oil is hot enough before adding the okra.
- This recipe focuses on the skillet method for traditional results, which provides the best crunchy texture.
Nutrition
- Serving Size: 1 cup
- Calories: 280
- Sugar: 4
- Sodium: 450
- Fat: 18
- Saturated Fat: 3
- Unsaturated Fat: 15
- Trans Fat: 0
- Carbohydrates: 28
- Fiber: 6
- Protein: 5
- Cholesterol: 15