
There’s nothing quite like pulling a bubbling, warm dessert out of the oven when you need a little comfort, right? That’s exactly what our easy mixed berry cobbler delivers—it’s pure, cozy dessert magic with minimal fuss. This isn’t just any dessert; it’s an incredibly reliable berry cobbler built for the home cook who wants elegant results without spending hours in the kitchen. Trust me, I’ve tested every trick, and this version shines because it works perfectly whether you have gorgeous summer fruit or just a bag of frozen berries hiding in the freezer—prep time is just 15 minutes! This recipe follows the principles I learned in culinary school but simplifies everything down to deliver that approachable elegance we all crave.
- Why This Easy Berry Cobbler Recipe is Your New Favorite Comfort Food Dessert
- Ingredients for the Perfect Mixed Berry Cobbler Dessert
- Expert Tips for Your Cobbler with Frozen Berries
- How to Prepare the Best Berry Cobbler
- Serving Suggestions for Your Warm and Cozy Berry Cobbler
- Storage and Make Ahead Berry Dessert Instructions
- Frequently Asked Questions About Making Berry Cobbler
- Estimated Nutritional Data for This Easy Fruit Dessert
- Share Your Experience Making This Berry Cobbler
Why This Easy Berry Cobbler Recipe is Your New Favorite Comfort Food Dessert
I truly believe this mixed berry cobbler recipe hits that sweet spot between satisfying and simple. It’s everything you want in great Comfort Food Desserts, but it comes together faster than you think. Forget complicated pastry work! This is why you need to bookmark this recipe right now, especially if you are looking into alternatives like a pure blackberry cobbler recipe.
- It’s so versatile—works amazingly well with frozen fruit, meaning you can bake a cozy treat any time of year.
- It’s incredibly forgiving; you don’t need to be a professional baker to nail this biscuit topping.
- It delivers that incredible, bubbly, sweet-tart fruit layer that makes everyone ask for seconds.
Quick Prep Time for Your Berry Cobbler
Seriously, you only need about 15 minutes of active work here! That makes this the ultimate Quick Berry Dessert when you need something special without planning days ahead. If you’ve ever hesitated about baking because it feels too long, this Easy Berry Cobbler Recipe is your answer for those nights when you need a Last Minute Dessert Idea. You’ll have it in the oven before the kettle even finishes boiling!
Ingredients for the Perfect Mixed Berry Cobbler Dessert
When making this berry cobbler, remember that the quality of the fruit dictates the final flavor—so grab the best-looking berries you can find! Whether they’re fresh from the market or frozen solid, they bring that beautiful, vibrant pop that defines this dessert. I always use the exact measurements listed below because precision matters when dealing with fruit alchemy. You’ll see how simple it is to bring together those bright flavors we love in a Spanish-inspired dish, even when we’re just baking classic American desserts.
If you’re curious why I love using mixed berries so much, check out some inspiration for using different blends like raspberries and blackberries in this lovely recipe!
For the Sweet and Tart Berry Filling
- 4 cups mixed berries (fresh or frozen)
- 1/2 cup granulated sugar
- 2 tablespoons cornstarch
- 1 tablespoon lemon juice
- 1 teaspoon vanilla extract
That’s it for the filling! And please, if you’re using frozen berries—which is my favorite trick for this Mixed Berry Cobbler Dessert—do not thaw them first. They will release all their juices perfectly fine in the oven, thickened by that cornstarch.
For the Tender Biscuit Topping Cobbler
- 1 1/2 cups all-purpose flour
- 2 teaspoons baking powder
- 1/2 teaspoon salt
- 1/2 cup cold unsalted butter, cut into small pieces
- 1/2 cup milk
- 2 tablespoons coarse sugar, for sprinkling
The key to the most tender and fluffy Biscuit Topping Cobbler is keeping that butter fiercely cold! It melts in the oven and creates perfect little pockets of steam, which keeps the topping light and tender, not tough.
Expert Tips for Your Cobbler with Frozen Berries
Okay, let’s talk about the magic of using frozen fruit in your berry cobbler. This is where so many home cooks get nervous, but honestly, it is one of my favorite shortcuts! As the notes mentioned, you absolutely do not need to thaw those frozen berries first.
Don’t thaw them! Just toss them right into the dish with the sugar and cornstarch. The starches are there to handle all the extra liquid that releases while baking, and trust me, the result is just as jammy and wonderful as using fresh fruit. This makes the recipe fantastic for flexible meal planning throughout the year, giving you a cozy dessert whenever the craving hits.

Ingredient Substitutions for Your Berry Cobbler
Feel free to swap out what you have on hand! If you only have blackberries or just blueberries, go for it. If you’re craving a specific mix, a triple berry cobbler is always a win. If you’re really in a pinch and want to avoid making the biscuit dough entirely—though I love it!—you can totally use something like a standard yellow cake mix combined with melted butter for a topping. It won’t be the same classic biscuit texture, but it’s guaranteed easy and still delicious.
How to Prepare the Best Berry Cobbler
Alright, let’s get baking! I know the ingredient list looks simple, but the magic really happens in the technique. I want you to feel confident making this, so think of this as your professional walkthrough—only much warmer and friendlier. We are aiming for that perfect, bubbly fruit base hidden under a soft, golden biscuit. Remember, this is a super easy berry cobbler, but a little care goes a long way toward making it the *best* one you’ve ever had.
Assembling the Berry Cobbler Filling
First things first: get your oven hot—375°F (190°C). Lightly grease that 8×8 dish so we don’t have any sticking drama later. Now, you just combine your berries, sugar, cornstarch, lemon juice, and vanilla right in a bowl. Here’s my loving tip: toss this mixture gently! We want the berries coated, not crushed into mush. Pour that beautiful, colorful mix into your prepared dish. That’s the filling done. See? So fast!
Creating the Biscuit Topping Cobbler
Next up is the topping, which gives us that wonderful Classic Berry Cobbler feel. Whisk your flour, baking powder, and salt together in a clean bowl. Now comes the crucial part: the butter! You must use cold butter cut into small cubes. Use your fingertips—or a pastry blender if you have one—to work that butter into the dry ingredients until it looks like coarse breadcrumbs. Don’t let it get greasy; stop when it just starts resembling rough sand. Stir in the milk until it barely comes together. I mean it, do not overmix this dough!
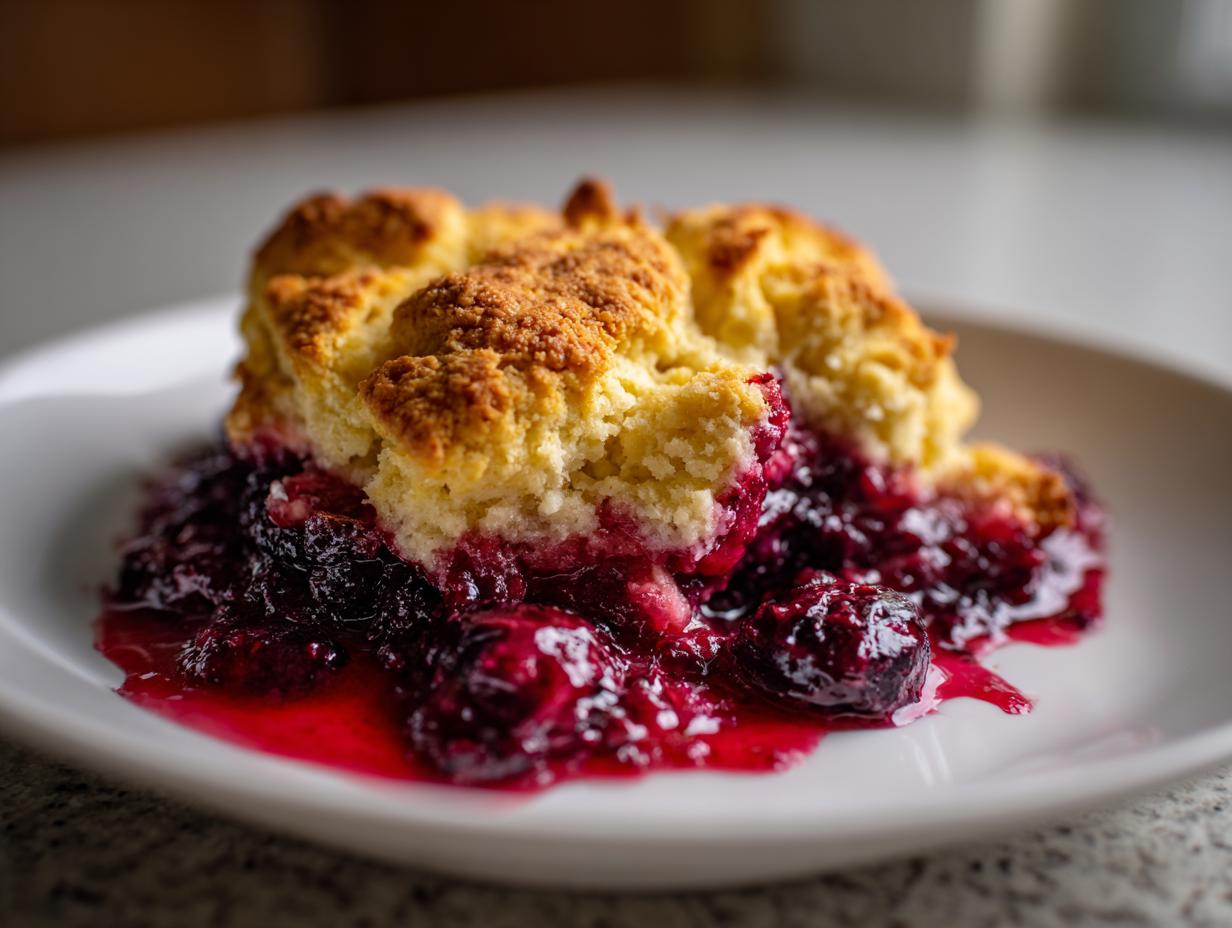
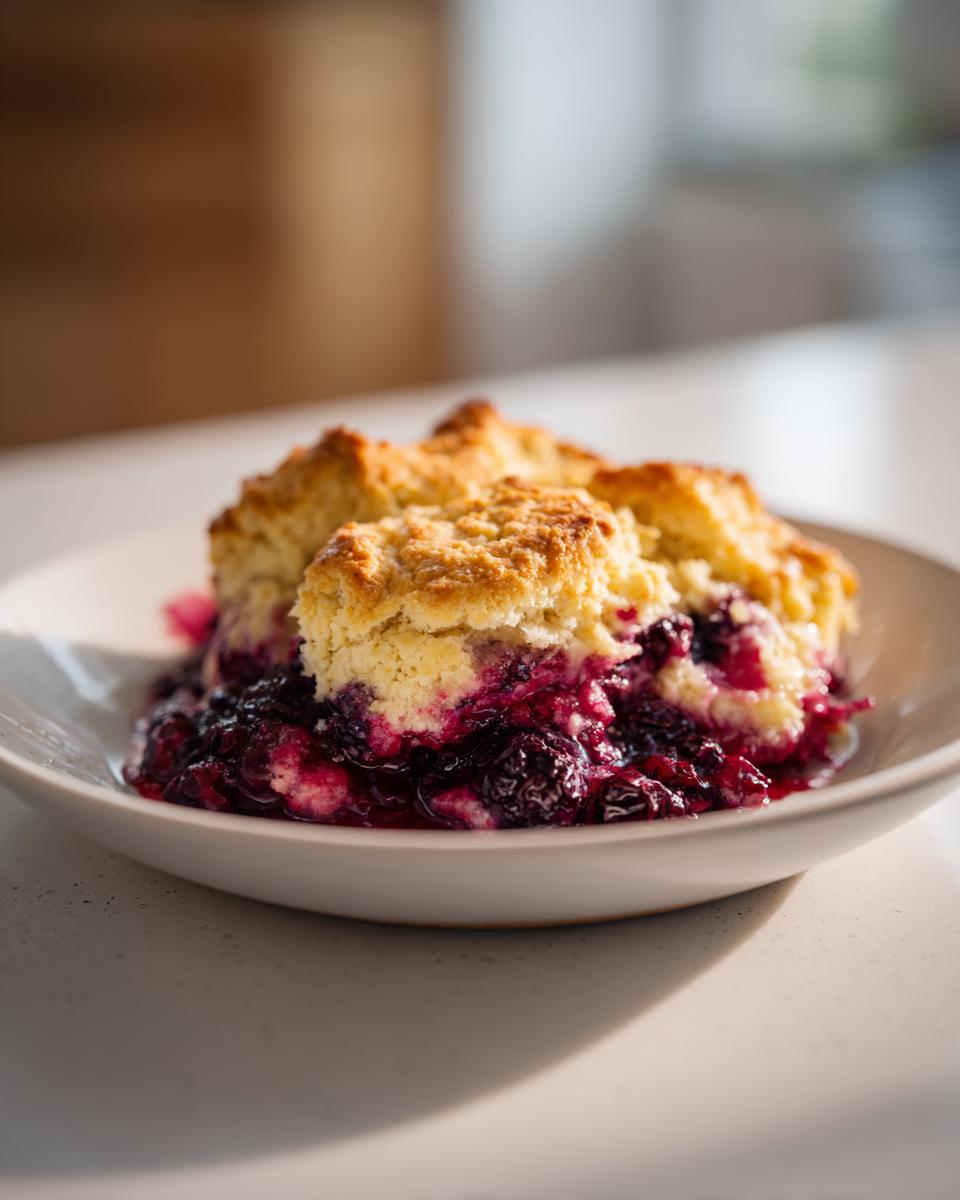
Baking and Serving Your Berry Cobbler
Time to cover the fruit! Drop spoonfuls of that delicate dough evenly over the berry filling. It’s okay if there are gaps; that’s how the steam escapes and bubbles up. Sprinkle that coarse sugar over the top for a little crunch, and pop it into the preheated oven for about 35 to 45 minutes. You’ll know it’s done when the topping is beautifully golden brown and the berry juices are actively bubbling up around the edges. This part is my favorite smell! Crucially, take it out and let it cool for at least 15 minutes. It holds temperature better and serves up much cleaner after that short rest. You can see more tips on easy baking finishes at this recommendation.

Serving Suggestions for Your Warm and Cozy Berry Cobbler
Now that your kitchen smells absolutely incredible, the best part is figuring out how to serve this masterpiece! This berry cobbler is supposed to be rustic, warm, and incredibly Dessert Warm and Cozy, so we aren’t going for fussy plating here. Anything too formal just ruins the spirit of a good cobbler, if you ask me.
The number one absolute, non-negotiable way to serve this is warm with a big, glorious scoop of vanilla ice cream melting right into the bubbly fruit. That mix of hot, tart berries and cold, creamy ice cream is just divine. It’s the ultimate Cobbler Topped with Ice Cream moment, and honestly, it’s the perfect pairing.
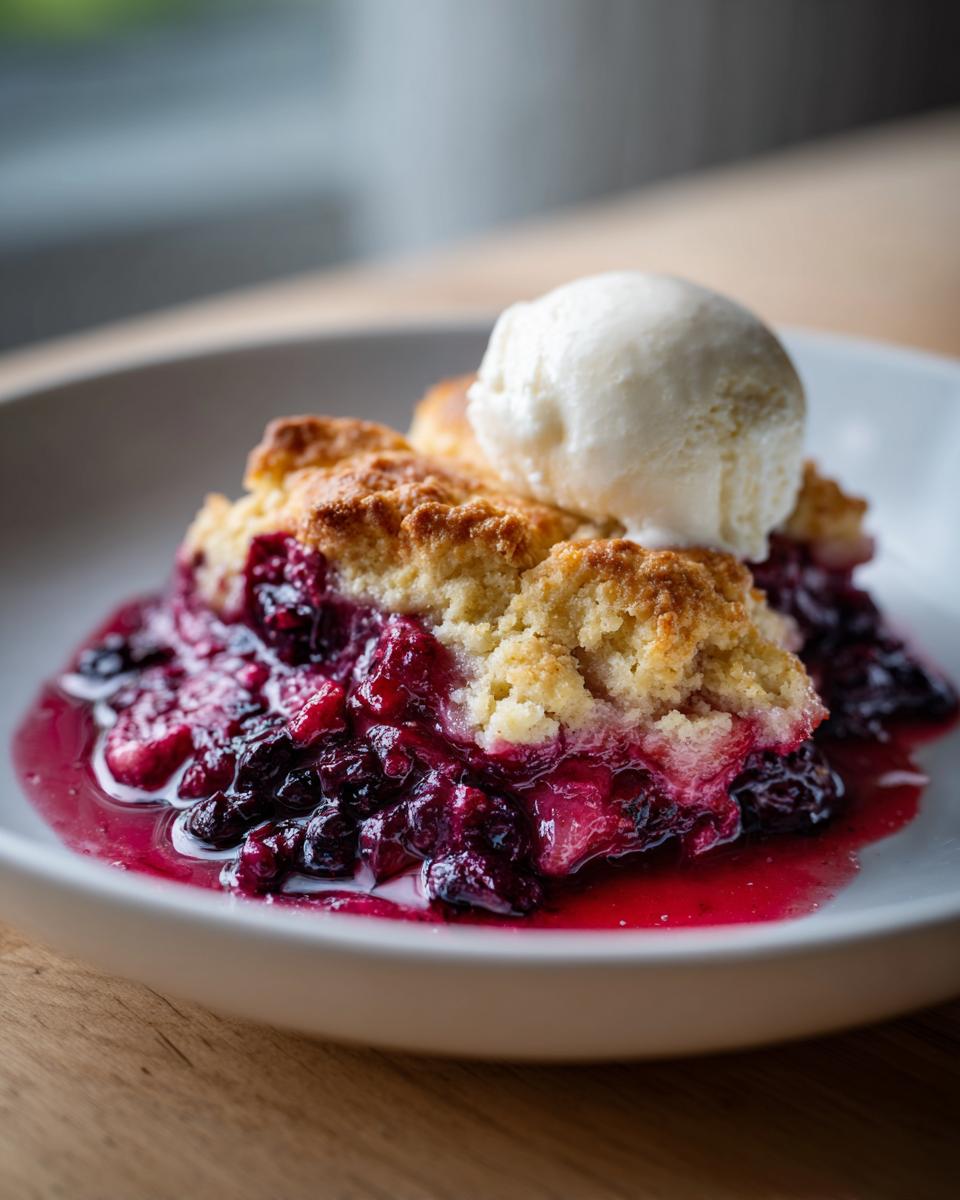
Here’s a hosting tip from my entertaining background: if you are serving a crowd, maybe warm up the ice cream slightly (just leave it on the counter for five minutes). It scoops cleaner, and when it melts over the hot cobbler, it creates a gorgeous, creamy river cascading down the sides. If you want a little extra texture, a sprinkle of chopped pecans or walnuts over the top before serving adds a lovely crunch, too! I talk a bit more about perfecting those little touches for entertaining in this recipe collection.
Storage and Make Ahead Berry Dessert Instructions
This Make Ahead Berry Dessert is fantastic because leftovers are almost non-existent, but in case you have any glorious remains of this berry cobbler, storing it is simple. Keep the cooled cobbler covered tightly in the refrigerator for up to three days. Don’t worry about the topping getting a little soft; we can fix that quickly!
When you are ready for round two—and trust me, you will be—reheat individual slices in the oven or an air fryer rather than the microwave. The microwave makes the biscuit topping soggy, and we want to restore that lovely crisp edge! A quick 10 minutes at about 300°F (150°C) gets the filling hot and the topping slightly crispy again. It takes me right back to making a perfect berry crumble when I’m reheating leftovers!
Frequently Asked Questions About Making Berry Cobbler
I know you might still have a few little questions bubbling up—it happens to every cook when trying a new recipe! I absolutely love hearing from you and making sure you feel totally confident before you start mixing. That’s what this whole site is for, right? To help you create those beautiful, yet simple, dishes! For more reassurance, you can always check out the techniques others use in this trusted recipe.
Can I use only one type of berry in this berry cobbler?
Oh, absolutely! You are the boss of what goes into your dessert. If your heart is set on making a pure Blackberry Cobbler Recipe, go for it. Or maybe you only have bags of frozen strawberries. The key thing to watch out for, though, is the liquid. If you use a very watery fruit like fresh strawberries compared to denser frozen mixed berries, you might need to bump that cornstarch up just a tiny bit—maybe an extra half teaspoon in the filling—to ensure you still get that gorgeous, thick, jammy base. For more on mixed fruit flavor combinations, check out the ideas shared at this excellent resource.
What is the difference between a cobbler and a crisp?
This is a classic question, and it totally comes down to the topping we choose! For this recipe, we are making a true berry cobbler because the topping is a sweet, slightly flaky biscuit dough that gets dropped over the fruit—it looks a bit like cobblestones, hence the name! A crisp, on the other hand, usually has a streusel topping that contains oats, nuts, or both, giving it a crunchy texture all over the top once baked. Both are heavenly, but today we’re sticking to the tender biscuit!
Can I make this berry cobbler ahead of time?
Yes, you certainly can! This makes it a great option for Make Ahead Berry Dessert prep. If you want to get ahead of things, prepare the berry filling and store it in the baking dish, covered, in the fridge for up to 24 hours. However, I strongly recommend keeping the biscuit topping ingredients dry and separate until just before you bake. If you mix the dough too early, the baking powder starts working, and the topping won’t be as light when it hits the oven. You can also try a super quick version if you don’t want to fuss with the biscuit like the great recipe showcased on The Lazy Dish.
Estimated Nutritional Data for This Easy Fruit Dessert
Since we want this delicious berry cobbler to fit into any lifestyle, I always include a general estimate of the nutrition. Remember, these numbers are just approximations based on the ingredients listed and are calculated for one serving size from the full recipe.
Since this is a homemade, rustic dessert, recipes can vary widely based on the actual sugar content in your berries! This is just a general guide for your Easy Fruit Dessert.
- Serving Size: 1 serving
- Calories: 350
- Sugar: 28g
- Fat: 15g
Always treat these figures as an estimate rather than a precise calculation for your daily weight loss programs planning. Enjoy this treat without too much worry!
Share Your Experience Making This Berry Cobbler
Well, that’s it! We have gone from a humble bag of frozen berries to a bubbling, aromatic, perfect berry cobbler. I truly hope you loved making this as much as I love sharing this foolproof recipe with you. Now, while I stand here waiting for mine to cool down enough so I don’t burn my tongue off (but still warm enough for ice cream, of course!), I’d love to hear from you!
Did you try this with all blackberries, or did you stick to the mixed batch? Let me know down in the comments how it turned out for you! Seriously, rate this recipe—even if you think you messed up the biscuit topping, tell me the honest truth. Honesty is the best ingredient in any kitchen, especially when we are discussing Simple Berry Baking.
If this easy dessert saved your dinner party or was the perfect weeknight hug you needed, please share this recipe! Sending it along to friends who need an easy fruit dessert is the highest compliment you can give me. If you’re looking for even more seasonal fruit inspiration, remember you can check out the delicious variations shared over at Great Grub Delicious Treats. Happy baking, friend!
PrintEasy Mixed Berry Cobbler with Biscuit Topping (Using Frozen Berries)

Make this cozy, comforting mixed berry cobbler using fresh or frozen berries. It features a simple, sweet-tart fruit filling and a tender biscuit topping, perfect for a quick dessert.
- Prep Time: 15 min
- Cook Time: 40 min
- Total Time: 55 min
- Yield: 6 servings 1x
- Category: Dessert
- Method: Baking
- Cuisine: American
- Diet: Vegetarian
Ingredients
- 4 cups mixed berries (fresh or frozen)
- 1/2 cup granulated sugar
- 2 tablespoons cornstarch
- 1 tablespoon lemon juice
- 1 teaspoon vanilla extract
- 1 1/2 cups all-purpose flour
- 2 teaspoons baking powder
- 1/2 teaspoon salt
- 1/2 cup cold unsalted butter, cut into small pieces
- 1/2 cup milk
- 2 tablespoons coarse sugar, for sprinkling
Instructions
- Preheat your oven to 375°F (190°C). Lightly grease an 8×8 inch baking dish.
- Prepare the filling: In a bowl, gently toss the mixed berries with the granulated sugar, cornstarch, lemon juice, and vanilla extract until the berries are coated. Pour this mixture into the prepared baking dish.
- Prepare the biscuit topping: In a separate medium bowl, whisk together the flour, baking powder, and salt.
- Cut in the cold butter using a pastry blender or your fingertips until the mixture resembles coarse crumbs.
- Stir in the milk until just combined; do not overmix the dough.
- Drop spoonfuls of the biscuit dough evenly over the berry filling. It is fine if the berries show through.
- Sprinkle the coarse sugar over the biscuit topping.
- Bake for 35 to 45 minutes, or until the topping is golden brown and the berry filling is bubbly.
- Let the cobbler cool for at least 15 minutes before serving warm, perhaps with a scoop of vanilla ice cream.
Notes
- If you use frozen berries, do not thaw them first. The cornstarch in the recipe helps thicken the juices released during baking.
- For a slightly different texture, you can use a cake mix and butter for a very quick topping instead of the biscuit dough.
- This recipe is a great option if you are looking into simple meal planning for weeknight desserts.
Nutrition
- Serving Size: 1 serving
- Calories: 350
- Sugar: 28g
- Sodium: 250mg
- Fat: 15g
- Saturated Fat: 9g
- Unsaturated Fat: 6g
- Trans Fat: 0g
- Carbohydrates: 52g
- Fiber: 3g
- Protein: 5g
- Cholesterol: 35mg