
There is such a deep, soul-satisfying joy that comes from pulling a truly rustic loaf from your own oven—the sharp crackle of the crust echoing in a quiet kitchen. If you’ve ever thought that achieving bakery-quality italian bread meant hours of kneading and fussy techniques, I want you to set those worries aside right now. This recipe is pure magic, born from the desire to create something elegant without the stress. We are focusing on that incredible contrast: a shattering, crisp exterior hugging the softest, airiest interior imaginable. Trust me, this no-knead method is my go-to for adding that perfect touch of approachable elegance to any weeknight meal. If you’re curious about my journey to bringing these simple, beautiful recipes to you, you can always read more about me over at the About page.
- Why This No-Knead italian bread Recipe is Your New Favorite
- Gathering Ingredients for Your Rustic italian bread Loaf
- Step-by-Step Instructions: How to Prepare your italian bread
- Tips for Success When Making Homemade Italian Bread
- Serving Suggestions: Pairing Your Rustic Italian Loaf
- Storage and Reheating for Your italian bread
- Frequently Asked Questions About Artisan Bread Baking
- Estimated Nutritional Data for this italian bread
- Share Your Homemade italian bread Creations
Why This No-Knead italian bread Recipe is Your New Favorite
I developed this method because I adore the results of slow fermentation but I don’t always have the time for hard work. This italian bread delivers that gorgeous, bakery-style finish with virtually zero effort from you. It’s simply the most reliable way to make a stunning, rustic loaf! If you love this style, you might also enjoy my recipe for easy homemade bread bowls.
- The long, slow proof deepens the flavor far beyond what you get with quick recipes.
- It leaves you with a loaf that is incredibly versatile—from dipping in olive oil to serving with a hearty sauce.
Achieving the Perfect Crusty Loaf Recipe Texture
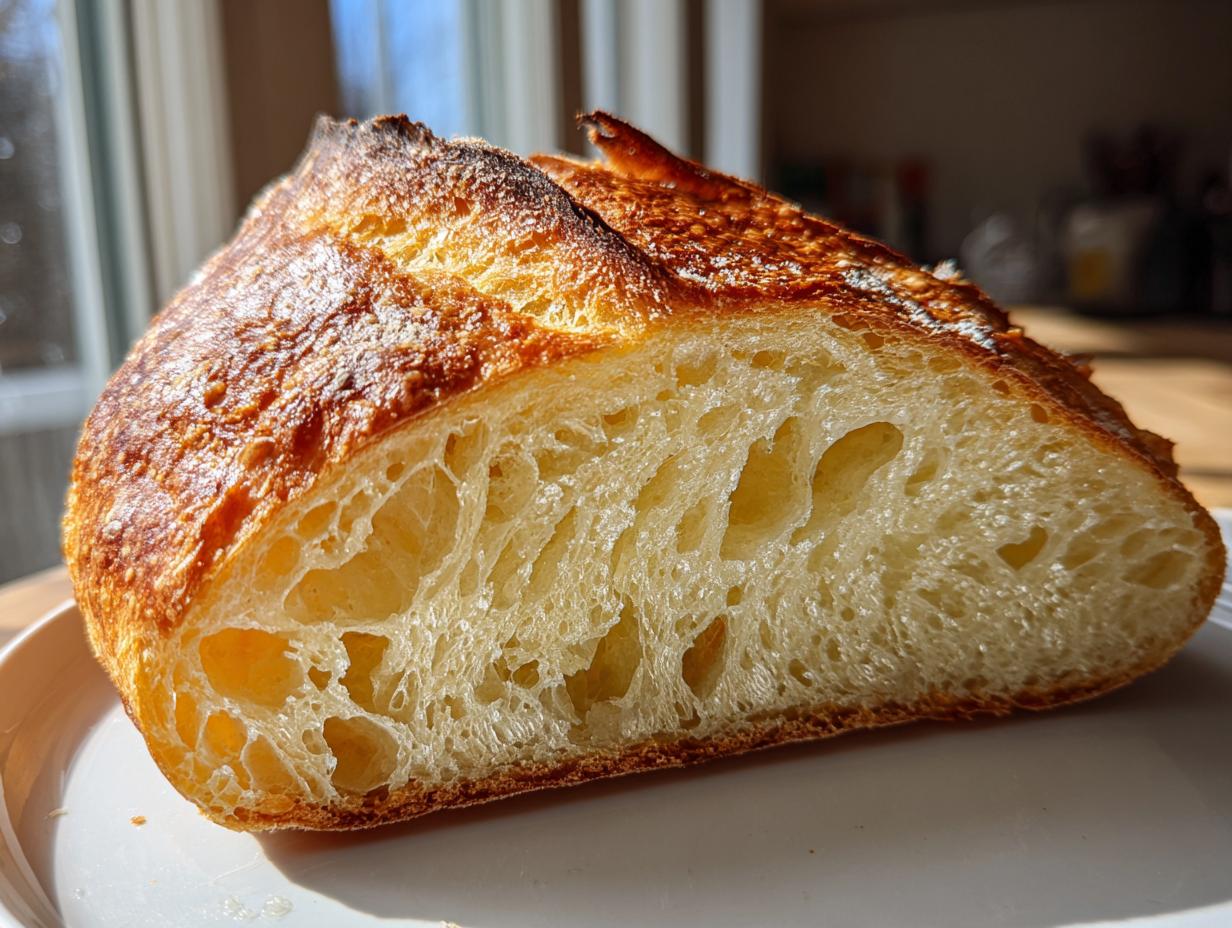
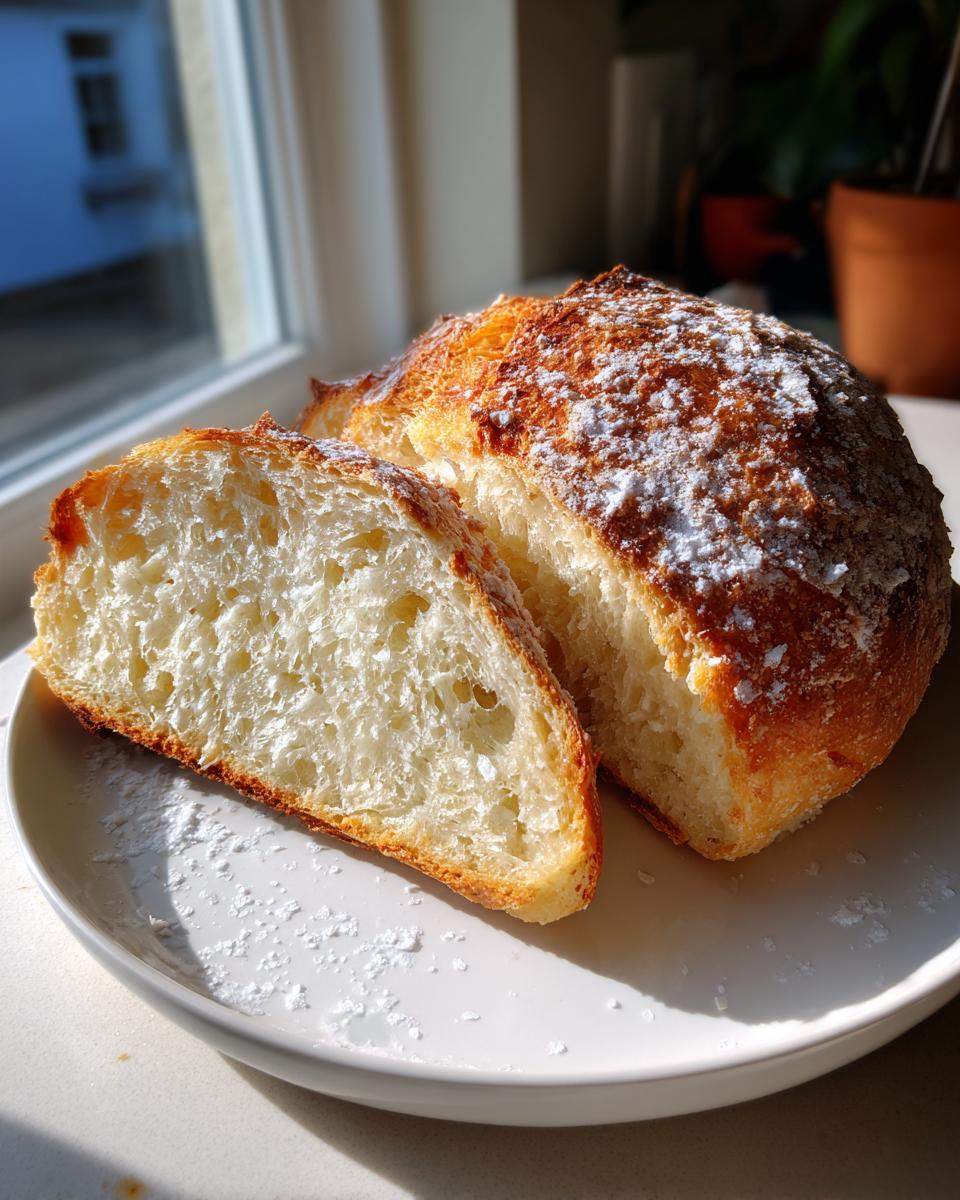
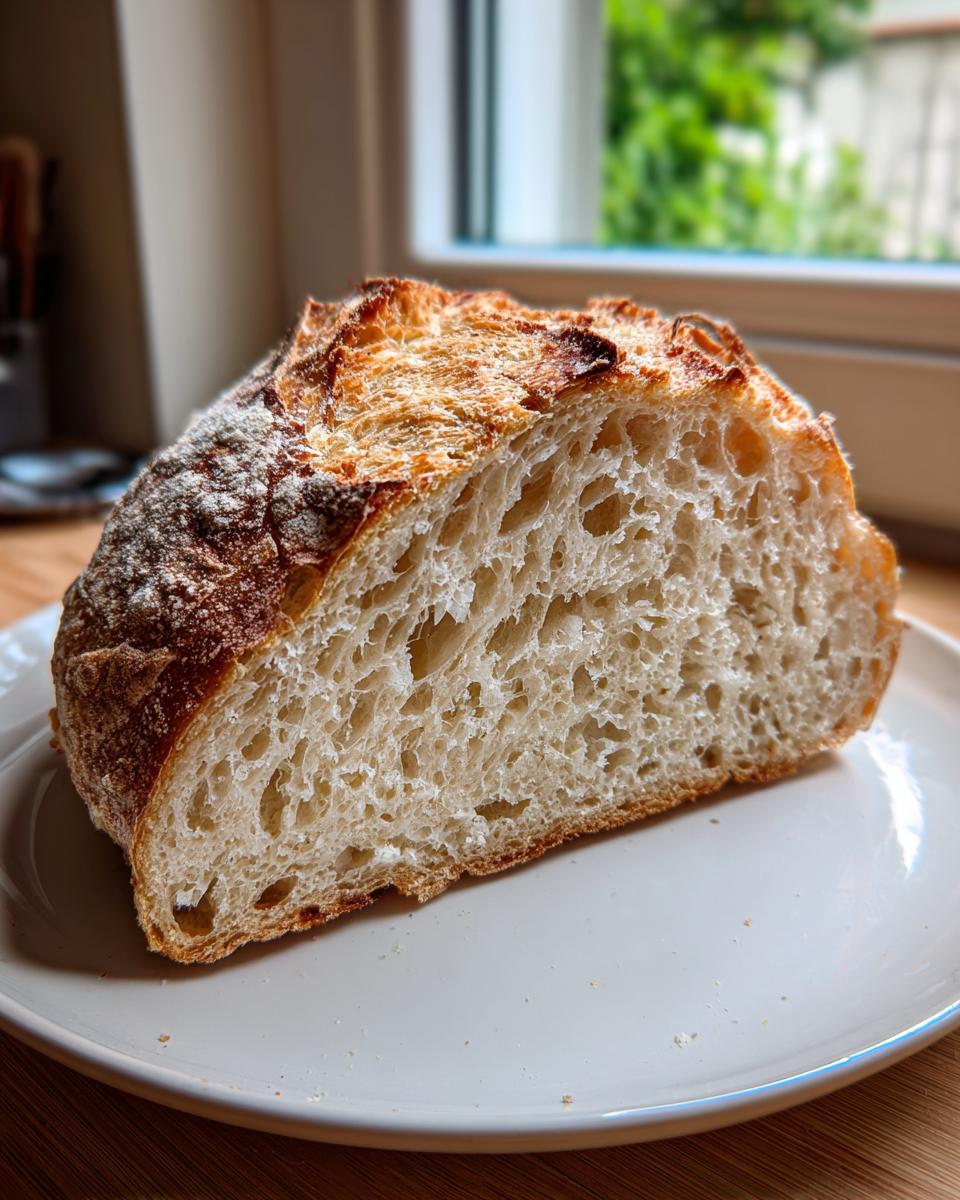
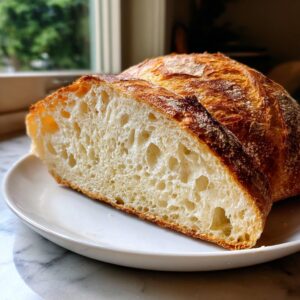
This is where the magic truly happens! We rely on the Dutch oven—it mimics the professional steam injection of a commercial oven. That quick blast of heat trapped inside the pot causes the dough to spring up beautifully, giving you that wonderful, ear-marked, crusty loaf recipe exterior. Because the inside stays protected, it bakes slowly into that soft, airy crumb we love.
The Simplicity of No Knead italian bread Baking
Forget punching down, folding, and straining your wrists! This is truly an easy yeast bread that anyone can tackle. Honestly, it’s the best beginner bread recipe because your main job is simply mixing the ingredients and being patient while the yeast works its magic over nearly a full day. That’s it! The long rest is the technique, not the mixing.
Gathering Ingredients for Your Rustic italian bread Loaf
Baking artisan bread at home doesn’t require a massive shopping trip! This simple italian bread recipe relies on pantry staples to achieve that incredible flavor profile. You probably have everything needed right now. For a rich, savory version perfect for dipping, consider exploring my olive oil bread dip recipe, too!
Ingredient Notes and Substitutions
The precision here really aids in that long fermentation, so try to stick closely to the measurements. Since we are not kneading, we rely on the yeast doing its job slowly. You *must* use cool water; hot water will kill the yeast and ruin your long rest! If you only have Active Dry Yeast, no panic—just mix it with a tiny bit of the water and a pinch of sugar and let it foam for five minutes before adding it to the flour mixture. If you’re ready to make that savory variation, this is also where you’d gently mix in your cheese and herbs for the Italian Herb Cheese Bread.
Step-by-Step Instructions: How to Prepare your italian bread
Now that we have our ingredients ready, let’s talk process. The true flavor in this italian bread comes from time, not effort, so the next step isn’t about mixing vigorously; it’s about waiting! This long fermentation is what gives us that deep, slightly tangy flavor that makes the bread taste like it came from an old-world Italian bakery. For more tips on achieving that perfect crackle, especially when baking loaves like this or my crusty homemade French bread, keep reading!
Mixing and the Essential Long Fermentation
Grab a large bowl and whisk those dry ingredients together first, then pour in your cool water. You’re only mixing until everything just comes together—it needs to be a very messy, shaggy dough. Don’t even think about kneading it! Seriously, stop when you can’t see dry flour streaks anymore. Drizzle a tiny bit of olive oil over the top, cover it tightly with plastic wrap, and now you wait. This dough needs 12 to 18 hours sitting comfortably at room temperature. This long rest is our secret weapon.
Shaping and Final Proof for Artisan Bread Baking
Once your dough has bubbled up and looks beautifully pillowy, you’ll gently scrape it onto a lightly floured counter. We aren’t kneading aggressively here; we just need to persuade it into a rough ball shape by folding the edges toward the center a few times. This tightens up the exterior just enough. Place that ball onto a sheet of parchment paper, cover it lightly, and let it chill out for a final 30 minutes. This brief proofing right before baking gives it that final lift.

Baking the Crusty Loaf Recipe in a Dutch Oven
This is the critical part for achieving that bakery style bread at home texture! Place your lid-on Dutch oven into the oven while setting the temperature to 450 degrees Fahrenheit. Once it’s screaming hot, use the parchment paper as a sling to gently drop your dough right into that hot oven pot. Cover it and bake for 30 minutes. Then, take the lid off and bake for another 10 to 15 minutes until the color is a deep, glorious golden brown. If you really want to amplify the crust, try putting a small pan of hot water on the bottom rack when you put the bread in—that steam is everything!
Tips for Success When Making Homemade Italian Bread
We’ve all been there—the dough is sticking, or the color just isn’t that rich brown we see in photos. Don’t let a little hiccup stop you from enjoying this beautiful italian bread! Patience during the long rest and aggressive heat during baking are your biggest allies here. If you enjoyed how easy this was, you might want to bookmark my bread bowl recipe for next time.
Troubleshooting Common italian bread Issues
If your dough seems way too sticky when you go to fold it, resist the urge to dump flour in. Instead, use a bench scraper coated lightly with oil—it saves the texture. If you’re aiming for a deeper color on your crust but the inside feels done, try taking the lid off the Dutch oven about ten minutes sooner next time, or briefly place the loaf directly on the oven rack for a minute or two before pulling it out. For ultimate precision, especially as you advance in your baking journey, I highly recommend using a kitchen scale instead of cups for measuring your flour. That consistency really helps when working with a no-knead dough like this.
Serving Suggestions: Pairing Your Rustic Italian Loaf
Once this gorgeous, crusty loaf has cooled—and trust me, resisting that initial slice is torture!—it becomes the perfect centerpiece for so many meals. That light, airy texture screams for something rich to soak up. It’s absolutely essential for wiping the plate clean after a big saucy meal. Think about serving it alongside my recipe for classic lasagna so you can drag that sauce right up. Or, for a delightful appetizer, it’s just heavenly dipped into a good quality olive oil alongside my garlicky stuffed mushrooms. It truly elevates any simple dinner into something special.
Storage and Reheating for Your italian bread
This is where we have to be realistic: This italian bread is undeniably best within that first hour of coming out of the oven. That crisp crust just can’t stay perfectly crisp forever, no matter how hard we try! That’s the trade-off for earning that incredible texture in the first place, right?
However, we don’t have to treat leftovers like sad, stale bread bricks! If you have any left over the next day, the best way to revive it is with a quick blast of heat. Never use the microwave—that steam will absolutely ruin the structure. Instead, wrap the loaf (or the remaining pieces) loosely in foil with maybe a very light spritz of water, and put it back into a 350-degree oven for about eight minutes. This softens the crumb back up and brings a little bit of that initial crust back to life.

Store any uncut bread tightly wrapped in a brown paper bag at room temperature for up to two days. If it’s already sliced, tuck it into an airtight container, but know that keeping it airtight will soften that glorious crust faster. Honestly, I rarely have leftovers because it’s too good for dipping!
Frequently Asked Questions About Artisan Bread Baking
I always love hearing from you all about your first time tackling a no knead bread recipe. It can feel a bit strange when you mix up a wet puddle and then leave it alone for a day! Here are a few things I get asked most often as you master artisan bread baking at home. If you have more questions after this, feel free to browse my general baking tips linked here!
Can I use Active Dry Yeast instead of Instant Yeast in this italian bread?
Yes, you absolutely can, but you need to wake that Active Dry Yeast up first! Unlike instant yeast, which can just hit the dry flour, Active Dry needs a little attention. Take about a quarter cup of your total required cool water, warm it slightly (it should feel lukewarm, not hot—think bathwater), and sprinkle the yeast and a pinch of sugar on top. Let it sit for five to ten minutes until it looks foamy and bubbly. If it doesn’t foam, your yeast is dead, and you’ll need a new packet. Once it’s foamy, proceed with the rest of the recipe as written, using the remaining (cool) water.
How do I get a truly soft interior bread?
That beautiful, steamy, soft interior bread texture is completely dependent on two things we talked about: the long ferment and the steam! The slow, 18-hour rest develops complex flavors and structure without needing kneading. But for that airy middle, you need steam during the first half of the bake. That’s why we use the covered Dutch oven—it traps all the moisture escaping the dough, which keeps the crust soft long enough for the inside to fully puff up before the crust sets hard.
Estimated Nutritional Data for this italian bread
As a home cook stepping into the world of professional recipe development, I always want to give you a clear picture of what you’re serving! Please keep in mind that since this recipe uses only five simple base ingredients and the final yield can vary slightly depending on how much water your flour absorbs, these numbers are just an educated estimation based on standard USDA values. This bread truly shines because it’s made from such basic components—flour, water, salt, yeast, and oil—keeping things wonderfully simple.
These estimates below are calculated based on dividing the entire recipe yield (one large loaf) into 12 even slices:
- Serving Size: 1 slice
- Calories: 185
- Fat: 1.5g
- Saturated Fat: 0.2g
- Cholesterol: 0mg
- Sodium: 350mg
- Carbohydrates: 38g
- Fiber: 1.5g
- Sugar: 0.5g
- Protein: 6g
Share Your Homemade italian bread Creations
Honestly, seeing your successes is the absolute best part of running this site! When you create something beautiful, like this perfect, no-knead italian bread, I want to know all about it. Did the crust crackle just right? Were you able to resist slicing into it before it cooled down? These intimate moments in the kitchen—where a simple recipe unfolds into a memory—are what I live for.
If you followed these steps and ended up with a beautiful, crusty loaf perfect for dipping, please take a moment to leave a rating and your thoughts in the comments below. Your feedback genuinely helps other home cooks gain the confidence that they, too, can master this artisan bread baking technique. I read every single comment, and I love hearing how you’ve made this recipe your own.
And please, if you’re sharing your golden loaves on social media—maybe pairing it with a beautiful glass of wine or placing it next to a stunning pasta dish—tag me! It warms my heart to see my recipes making their way into your family’s celebrations. You can always reach out with questions or praise via my contact page, too. Happy baking, everyone!
PrintEasy No-Knead Crusty Italian Bread for Dipping
Bake a bakery-quality, crusty Italian bread loaf at home with this simple, no-knead recipe. This bread features a crisp exterior and a soft, airy interior, making it perfect for dipping in olive oil or serving alongside your favorite pasta dishes.
- Prep Time: 15 min
- Cook Time: 45 min
- Total Time: 13 hours 45 min
- Yield: 1 large loaf 1x
- Category: Bread
- Method: Baking
- Cuisine: Italian
- Diet: Vegetarian
Ingredients
- 3 cups All-Purpose Flour
- 1 1/2 teaspoons Salt
- 1/4 teaspoon Instant Dry Yeast
- 1 1/2 cups Cool Water
- 1 tablespoon Olive Oil, plus more for drizzling
Instructions
- In a large bowl, whisk together the flour, salt, and yeast.
- Pour in the cool water and mix with a wooden spoon until just combined into a shaggy dough. Do not overmix.
- Drizzle the top of the dough with olive oil, cover the bowl tightly with plastic wrap, and let it rest at room temperature for 12 to 18 hours. This is the long fermentation period.
- After the long rest, gently scrape the dough onto a lightly floured surface. Fold the dough over itself a few times to form a rough ball.
- Place the dough ball onto a piece of parchment paper, cover loosely with a clean kitchen towel, and let it rest for 30 minutes.
- While the dough rests, place a Dutch oven (with the lid on) into your oven and preheat to 450 degrees Fahrenheit (232 degrees Celsius).
- Carefully remove the hot Dutch oven from the oven. Use the parchment paper to lift the dough and gently place it inside the hot pot.
- Cover the Dutch oven with the lid and bake for 30 minutes.
- Remove the lid and continue baking for another 10 to 15 minutes, or until the crust is deep golden brown.
- Carefully remove the loaf from the Dutch oven and let it cool completely on a wire rack before slicing.
Notes
- For a crispier crust, you can place a shallow pan on the bottom rack of the oven during preheating and pour 1 cup of hot water into it right before placing the bread inside to create steam.
- This bread is excellent served warm with high-quality olive oil and balsamic vinegar for dipping.
- If you want an Italian Herb Cheese Bread variation, gently fold 1/2 cup of shredded mozzarella and 1 teaspoon of dried Italian herbs into the dough just before the final 30-minute rest.
Nutrition
- Serving Size: 1 slice
- Calories: 185
- Sugar: 0.5
- Sodium: 350
- Fat: 1.5
- Saturated Fat: 0.2
- Unsaturated Fat: 1.3
- Trans Fat: 0.0
- Carbohydrates: 38
- Fiber: 1.5
- Protein: 6
- Cholesterol: 0