

Sometimes, you just need dessert, and you need it fast, right? No fancy oven work before a big gathering, just pure, blissful indulgence. That’s exactly why this Easy No-Bake Creamy Peanut Butter Pie shot straight to the top of my favorite recipes. When my calendar gets tight, especially around holidays, I need a true crowd-pleaser that doesn’t require babysitting the oven all afternoon. This rich, unbelievable peanut butter pie delivers that velvety smooth texture everyone adores without raising the temperature in my kitchen even one degree. It’s simple perfection, made effortlessly.
- Why This No Bake Peanut Butter Pie Recipe is a Crowd Pleaser Dessert
- Gathering Ingredients for Your Creamy Peanut Butter Pie
- Step-by-Step Instructions for the Easy Peanut Butter Pie Recipe
- Ingredient Notes and Substitutions for Your Peanut Butter Pie
- Perfecting Your Peanut Butter Pie Toppings
- Make Ahead Dessert Recipes and Storage for Peanut Butter Pie
- Frequently Asked Questions About This Peanut Butter Dessert
- Estimated Nutritional Data for a Slice of Peanut Butter Pie
- Share Your Homemade Peanut Butter Pie Creations
Why This No Bake Peanut Butter Pie Recipe is a Crowd Pleaser Dessert
I honestly don’t know why anyone bothers with a baked version when this recipe exists! It’s genuinely the easiest dessert I pull out when hosting, and it always vanishes first. If you need a reliable Crowd Pleaser Dessert, especially for warm weather or busy holiday spreads like Thanksgiving, this no-bake peanut butter pie is your answer. It’s all about maximizing flavor while minimizing effort, trust me.
- It’s fast! We’re talking serious speed here.
- No turning on the oven, which is glorious in the summer.
- It’s the ultimate showstopper when you need a make-ahead treat.
Quick Peanut Butter Dessert Prep Time
When I say quick, I mean shockingly quick. You only need about 20 minutes of active time to mix everything up. Zero minutes in the oven! That means you can easily get this done after you finish prepping dinner. It definitely earns its stripes as a Quick Peanut Butter Dessert.
Rich Dessert Pie Texture
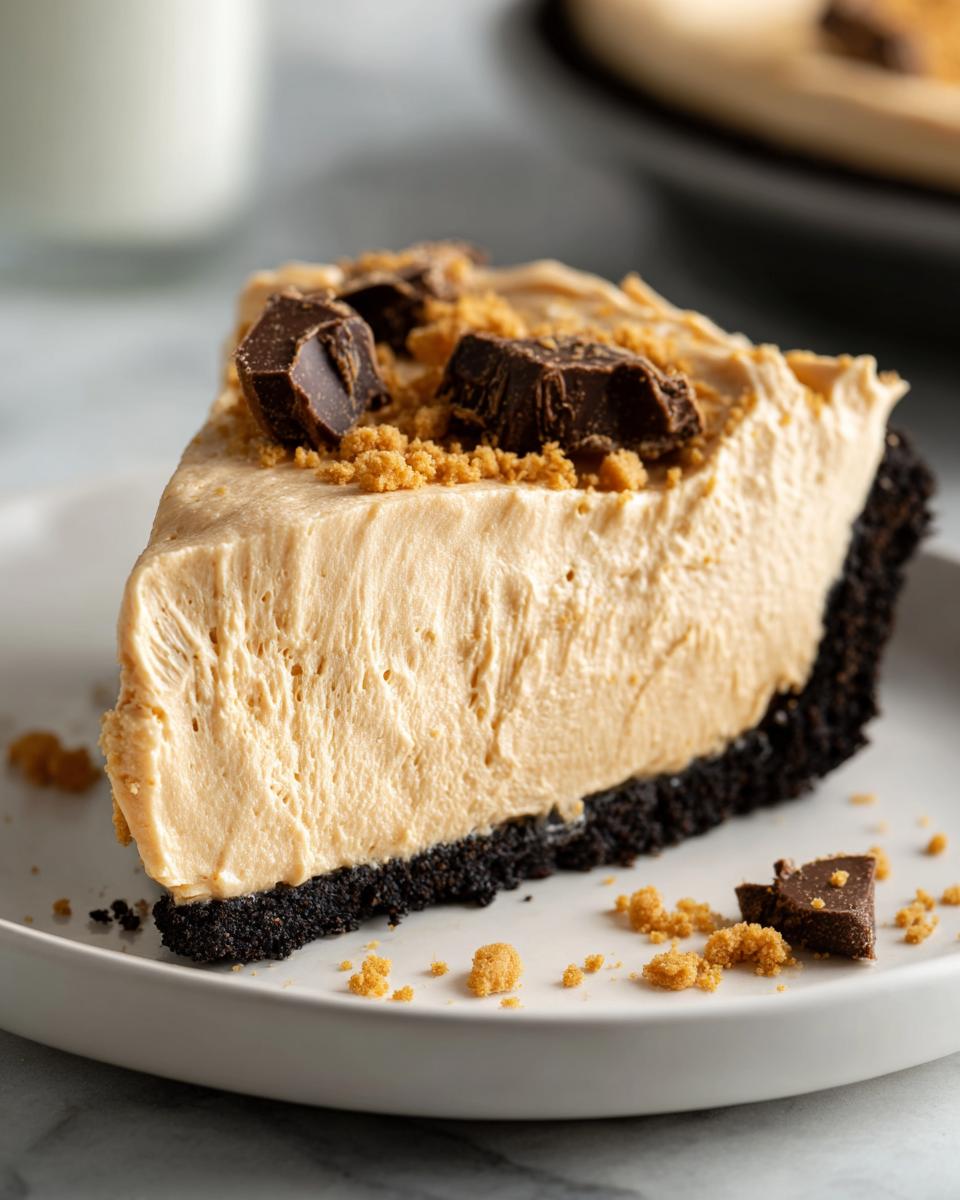
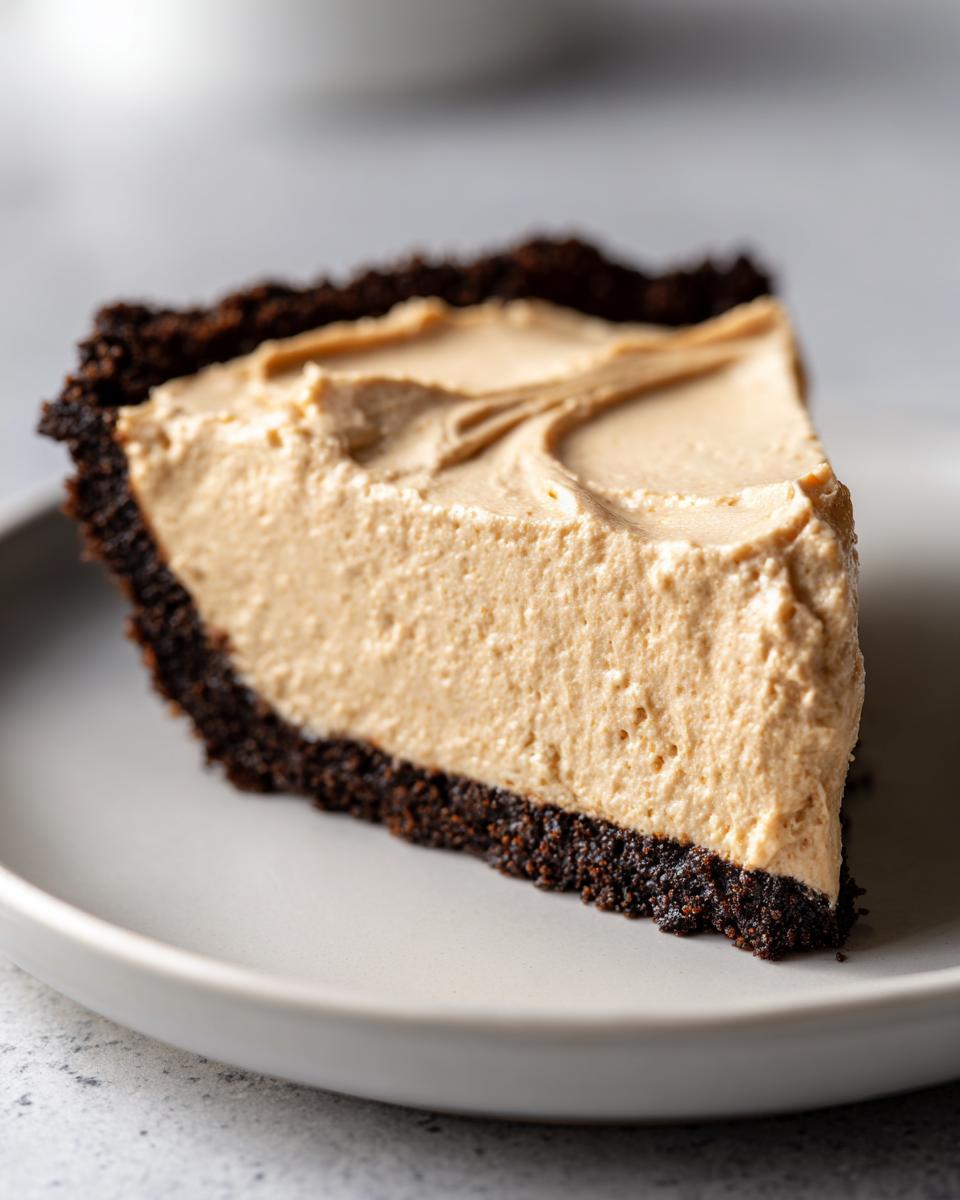
This pie manages to be deeply indulgent while still feeling light. The filling is unbelievably smooth—think fluffy clouds of peanut butter goodness—and that buttery graham cracker crust gives that necessary salty crunch. It’s the perfect sweet and salty contrast that screams Rich Dessert Pie!

Gathering Ingredients for Your Creamy Peanut Butter Pie
Okay, assembling this peanut butter pie is almost embarrassingly easy because the ingredient list is short and sweet. Since this is a no-bake recipe, the quality of the main components really shines through, so try to grab good stuff where you can! Remember, precision matters here, especially when we talk about temperature and texture for that perfect filling.
One crucial tip before we list things out: Use standard, creamy peanut butter—the kind that you stir when you first open the jar, like Jif or Skippy. If you use natural peanut butter that separates, you risk ending up with a runny pie filling because the structure relies on that specific fat content. Don’t use crunchy unless you absolutely love chewing your dessert!
For the Graham Cracker Crust Pie
This forms the sturdy, buttery base for our pie. Make sure your butter is fully melted so it binds everything together nicely before you chill it.
- 1 1/2 cups graham cracker crumbs (about a sleeve and a half of crackers, crushed finely)
- 1/4 cup granulated sugar
- 6 tablespoons unsalted butter, melted
For the No Bake Peanut Butter Pie Filling
The secret to that luscious, creamy texture lives right here. Cream cheese absolutely must be softened—I mean, room temperature soft. If it’s even slightly cold, you’ll end up with lumps, and we want smooth sailing!
- 1 (8 ounce) package cream cheese, fully softened
- 1 cup creamy peanut butter (the stirred kind!)
- 1 1/2 cups powdered sugar
- 1 teaspoon vanilla extract
- 1 (12 ounce) container frozen whipped topping, thawed
And naturally, you’ll need one of those optional extras for the top, like chocolate syrup or some chopped Reese’s if you’re feeling extra decadent!
Step-by-Step Instructions for the Easy Peanut Butter Pie Recipe
Now we put it all together! The beauty of this peanut butter pie is that the hardest part is waiting for it to chill. Honestly, if you can stir ingredients in a bowl, you can nail this recipe. Follow these steps precisely, and you’ll have the most amazing slice imaginable. Since this is an all-in-one assembly, many people actually make this right after they finish up other no-bake cookies they might be whipping up for a party!
Preparing the Graham Cracker Crust Pie Base
First things first, let’s lock in that crust. In a bowl, go ahead and mix those graham cracker crumbs, the reserved 1/4 cup of sugar, and your melted butter. You want this mixture to look evenly damp—like wet sand you’d use to build a decent castle. Press this firmly into the bottom and up the sides of your 9-inch pie plate. Use the bottom of a measuring cup to really pack it down tight so it holds its shape. Once it’s packed neatly, pop that crust into the freezer for about fifteen minutes while we whip up the filling. This keeps it nice and solid!
Creating the Creamy Peanut Butter Pie Filling
This is where we build the dream. Grab your big mixing bowl, and I mean it: beat that softened cream cheese first until it is perfectly, beautifully smooth—no lumps allowed! Then, mix in the peanut butter until they are one happy, creamy unit. Next, gradually add in that powdered sugar, beating slowly so it doesn’t go flying everywhere, followed by the vanilla extract. Look how smooth that base is!
Assembling and Chilling the Peanut Butter Pie
Here’s my favorite part, but be gentle! Take your thawed whipped topping—if you’re using homemade cream, make sure it’s just barely stiff—and carefully *fold* it into the peanut butter mixture. I mean gently, like you’re trying not to wake a sleeping baby. Overmixing will deflate the air, and we want this filling light! Pour that lovely mixture into your chilled crust and smooth out the top. Now, the hard part: chilling. You need at least 4 hours in the fridge for this No Bake Peanut Butter Pie to firm up, but trust me, overnight is always grander. It sets up so much better!
Ingredient Notes and Substitutions for Your Peanut Butter Pie
I get so many questions about tweaking this recipe, which is great! It shows how much everyone loves this peanut butter pie. Since this is a make-ahead superstar—perfect when you’re using meal planning for a busy week—it’s good to know your options before you start. You can definitely customize the base, but you have to be careful with the filling components if you want that signature creamy texture.
Crust Variations: Graham Cracker Crust Pie vs. Oreo Crust Peanut Butter Pie
If you’re feeling chocolatey, swapping the crust is super easy! For an Oreo Crust Peanut Butter Pie, just use 2 cups of finely crushed Oreo cookies—the whole cookie, crumbs and filling included—instead of the graham crackers. You typically don’t need extra butter since the Oreo filling has fat, but check that the crumbs hold together when you squeeze them. You might need an extra tablespoon of melted butter if they seem too dry, but usually, it’s a direct swap!
Peanut Butter Selection Tip
This is important, sweetie: stick to the creamy, shelf-stable peanut butter here. That means brands like Jif or Skippy, where the peanut butter doesn’t separate naturally. If you use one of those natural peanut butters where the oil sits on top, the structure of this No Bake Peanut Butter Pie will collapse. You need that specific consistency for the filling to set up properly in the fridge.
Perfecting Your Peanut Butter Pie Toppings
Once your peanut butter pie has set up beautifully—and trust me, the waiting is worth it—it’s time for the finishing touch! I love keeping it simple because the filling is already so rich. The classic move is a generous drizzle of good quality chocolate syrup, maybe scattered with mini peanut butter cups if I’m feeling celebratory. But if you want one more layer of flavor that really pops, try sprinkling just a tiny bit of coarse sea salt or some finely chopped salted peanuts over the top.
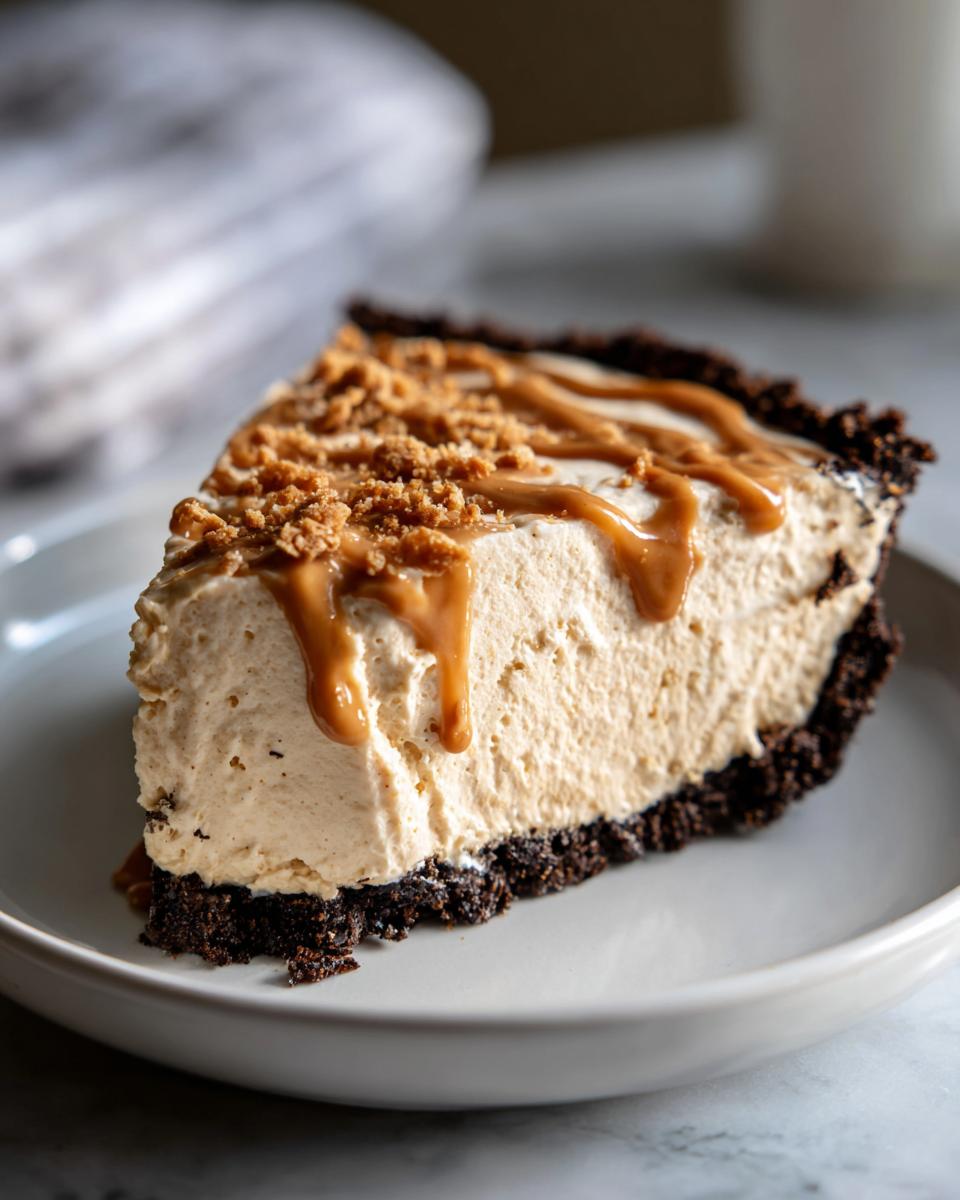
That hint of salt after a bite of the sweet filling is just divine, and it makes the presentation look so professional. Don’t overdo it, though; we want the creamy interior to be the star, as seen in this beautiful example from no-bake peanut butter pie recipes!
Make Ahead Dessert Recipes and Storage for Peanut Butter Pie
This is absolutely why the Make Ahead Dessert Recipes category exists! Because this peanut butter pie requires zero oven time, it’s one of the best things you can prep early. Once it’s firmly set in the fridge, you can cover it loosely with plastic wrap and it stays perfect for up to two full days. That means you can bake your crust and whip up the filling the day before Thanksgiving, and then just top it right before serving!
I’ve successfully frozen this pie, too! If you’re planning way ahead—maybe for a big potluck a week out—just make sure the serving dish is freezer-safe and wrap that pie tightly in several layers of plastic wrap, followed by foil. When you want to serve it, just transfer it to the fridge and let it thaw slowly overnight. It comes out tasting just as creamy and delicious as the day you made it. Isn’t it great not having to worry about dessert when everything else is chaos?
Frequently Asked Questions About This Peanut Butter Dessert
I know when you find a great peanut butter dessert recipe, you always have a few burning questions before you commit! Believe me, I do too. Since this recipe is designed to be foolproof and deliver that perfect Creamy Peanut Butter Pie texture, I wanted to clear up the most common things people ask me about making this truly Easy Peanut Butter Pie Recipe at home. You can find more general blog tips over on my main page!
Can I use crunchy peanut butter in this Easy Peanut Butter Pie Recipe?
You certainly can! I usually stick to creamy because I love that melt-in-your-mouth smoothness, but if you prefer a little texture, crunchy peanut butter works just fine. Just know that it will change the overall mouthfeel of the filling slightly. You won’t get quite that ultra-smooth sensation, but honestly, it’s still incredibly delicious!
What is the best way to get a smooth filling for my Creamy Peanut Butter Pie?
This is the #1 trick for a perfect No Bake Peanut Butter Pie. You absolutely must beat the cream cheese by itself first until it’s light, fluffy, and totally smooth before even thinking about adding the peanut butter. If you mix everything together while the cream cheese is stiff, you’ll get tiny, unmixed chunks, and nobody wants that!
Is this a suitable Simple Thanksgiving Dessert?
Oh, absolutely! This is the perfect Simple Thanksgiving Dessert or any large gathering dessert where you are cooking all day. Because it’s a no-bake situation, you can make it days ahead and keep it hidden in the fridge. It takes up zero oven space, which is priceless when you are juggling turkey and sides. Your guests are going to rave about this rich treat!
Estimated Nutritional Data for a Slice of Peanut Butter Pie
Now, I have to be upfront with you all. Since my journey here at Unfold Recipes is about approachable elegance and enjoying the process, I’m not overly focused on weighing every speck of sugar that goes into my beloved peanut butter pie! My priority is always flavor and making sure it brings joy to the table. However, I know many of you like to keep track, so I’ve pulled together the estimated nutritional breakdown for one generous slice based on the standard ingredients we used above.
Please remember, these numbers are approximations based on standard commercial brands of peanut butter, cream cheese, and whipped topping. If you use low-fat cream cheese or swap out the graham crackers for a different crust, these figures will absolutely change. Think of this as a helpful guide, not a strict law!
- Serving Size: 1 slice
- Calories: 450
- Sugar: 35g
- Sodium: 300mg
- Fat: 28g
- Saturated Fat: 10g
- Unsaturated Fat: 18g
- Trans Fat: 0g
- Carbohydrates: 45g
- Fiber: 2g
- Protein: 8g
- Cholesterol: 35mg
While this No Bake Peanut Butter Pie definitely falls firmly into the “indulgent” category—hello, rich dessert pie!—the fact that it requires zero baking time means you’re spending far less time fussing over it. It’s a treat you can feel good about making because it’s so incredibly easy to pull off!
Share Your Homemade Peanut Butter Pie Creations
That’s it! You’re officially ready to make what I firmly believe is the Best Peanut Butter Pie you’ll ever whip up without a single minute under the broiler. I hope this recipe brings as much easy joy and deliciousness to your table as it does to mine. We all need those reliable, stress-free desserts, right?
Now that you’ve tasted the magic of this No Bake Peanut Butter Pie, I would absolutely love to hear what you thought! Please take a moment right below this section to leave a star rating—it genuinely helps other home cooks discover this simple treat. Did you stick with the chocolate drizzle, or did you try another one of those fun pie toppings?
If you snapped a picture of your finished Creamy Peanut Butter Pie—especially if the chocolate swirls look amazing—please tag me! I absolutely adore seeing your creations pop up. You can connect with me directly through my contact page if you have any specific questions or just want to share a victory story. Happy baking (or, well, happy *not* baking)!
PrintEasy No-Bake Creamy Peanut Butter Pie

Make this simple, rich, and creamy peanut butter pie without turning on your oven. It features a buttery graham cracker crust and a decadent filling, perfect for any gathering.
- Prep Time: 20 min
- Cook Time: 0 min
- Total Time: 4 hr 20 min
- Yield: 8 servings 1x
- Category: Dessert
- Method: No-Bake
- Cuisine: American
- Diet: Vegetarian
Ingredients
- 1 1/2 cups graham cracker crumbs
- 1/4 cup granulated sugar
- 6 tablespoons unsalted butter, melted
- 1 (8 ounce) package cream cheese, softened
- 1 cup creamy peanut butter
- 1 1/2 cups powdered sugar
- 1 teaspoon vanilla extract
- 1 (12 ounce) container frozen whipped topping, thawed (or homemade whipped cream)
- Optional topping: Chocolate syrup or mini peanut butter cups
Instructions
- Prepare the crust: In a medium bowl, mix the graham cracker crumbs, 1/4 cup granulated sugar, and melted butter until combined. Press the mixture firmly into the bottom and up the sides of a 9-inch pie plate. Place the crust in the freezer while you prepare the filling.
- Make the filling base: In a large bowl, beat the softened cream cheese until smooth. Add the creamy peanut butter and beat until fully incorporated.
- Add sweetness and flavor: Gradually beat in the powdered sugar until the mixture is smooth. Mix in the vanilla extract.
- Fold in whipped topping: Gently fold in the thawed whipped topping until no streaks remain. Do not overmix.
- Assemble the pie: Spoon the peanut butter filling evenly into the chilled graham cracker crust. Smooth the top with a spatula.
- Chill: Cover the pie loosely with plastic wrap and refrigerate for at least 4 hours, or until firm. For best results, chill overnight.
- Serve: Before serving, top the pie with chocolate syrup or chopped peanut butter cups, if desired. Slice and serve cold.
Notes
- For an Oreo crust variation, substitute 2 cups of finely crushed Oreo cookies (filling included) for the graham cracker crumbs.
- If you are making this ahead for entertaining, keep it covered in the refrigerator for up to two days. This is a great make ahead dessert recipe.
- If you are looking for simple meal planning ideas for desserts, this pie fits perfectly as it requires minimal active time.
Nutrition
- Serving Size: 1 slice
- Calories: 450
- Sugar: 35g
- Sodium: 300mg
- Fat: 28g
- Saturated Fat: 10g
- Unsaturated Fat: 18g
- Trans Fat: 0g
- Carbohydrates: 45g
- Fiber: 2g
- Protein: 8g
- Cholesterol: 35mg