
There is nothing quite like the scent of autumn settling into the kitchen, is there? For me, that scent always means it’s time to start preserving the harvest before the first frost hits. My background is steeped in canning traditions, and I’ve carried that passion forward, simplifying techniques so they fit easily into modern life. That’s why I’m so thrilled about this recipe for rich, spiced pear butter. Forget standing over a hot stove for hours! My big secret here is using the slow cooker, which lets the complexity of the spices bloom naturally while you go about your day. You can always find wonderful inspiration for preserving over on the main Unfold Recipes blog. And don’t worry if you aren’t planning on gifting jars immediately—I include full canning instructions so you can preserve this taste of fall for months to come. Trust me, this homemade pear butter recipe is the one that you’ll return to year after year.
- Why This Homemade Pear Butter Recipe is Your New Fall Favorite
- Gathering Ingredients for Your Spiced Pear Butter
- How to Make Pear Butter Using the Slow Cooker Method
- Mastering Canning Pear Butter Recipe for Long-Term Storage
- Alternative Cooking Methods: Instant Pot Pear Butter and Stovetop
- Serving Suggestions for Your Autumn Fruit Spread
- Storage and Keeping Your Fruit Butter Fresh
- Frequently Asked Questions About Making Pear Butter
- Estimated Nutritional Profile for This Simple Fruit Spread Recipe
Why This Homemade Pear Butter Recipe is Your New Fall Favorite
I know, I know—we all have our favorite apple butter recipe tucked away, but once you try this, I promise you’ll happily make room for this pear butter right alongside it. Why does this version stand out? Because it delivers incredible depth of flavor without demanding all of your attention. It’s truly what I call an elegant, yet effortless, approach to fall preserves. This is designed to be the easiest pear butter you will ever make, letting the fruit and spices do all the heavy lifting. If you love the seasonal flavors, you should definitely check out my notes on our Fall Harvest Salad for another way to celebrate the season!
- It’s practically hands-off! Pure magic in the Crockpot means less time hovering over a hot pot.
- The flavor sings—it’s that perfect balance of sweet fruit and warm, cozy spices we crave every autumn. This truly allows you to experience the best pear butter flavor.
- It yields beautiful results that are perfect for dressing up a simple breakfast or packing into lovely holiday food gifts.
- It’s naturally vegan and dairy-free, so everyone at your table can enjoy this amazing spiced fruit butter.
Convenience: Slow Cooker Pear Butter Magic
When I developed this version, my goal was making it foolproof. If you think making homemade preserves sounds intimidating, think again! The slow cooker pear butter method is the answer. You just toss everything in, set it, and forget it until it’s time to blend and reduce. It cooks down gently, which prevents scorching far better than the stovetop sometimes allows. This hands-off approach means fewer emergency checks and more time enjoying your home fill with that warm, comforting aroma. Honestly, I forget I even started it most days until I smell the house transforming!
Flavor Profile: The Best Pear Butter Flavor Combination
The real heart of this recipe isn’t just the pears; it’s the supporting cast of spices we use. We’re going for that rich, cozy autumnal depth. We use a classic blend of cinnamon, cloves, and nutmeg, but what makes it truly special is the addition of maple syrup alongside the brown sugar. That maple note lifts the sweetness beautifully, and we finish it with a splash of vanilla pear butter infusion right at the end. It adds a mellow warmth that makes people ask, “What *is* that incredible flavor?” It makes for a truly sublime autumn fruit spread, distinct from your standard apple preserve.

Gathering Ingredients for Your Spiced Pear Butter
Building a truly memorable pear butter starts right here, with the quality of what you put in the slow cooker. For this recipe, we’re using four pounds of beautifully ripe pears. Now, here is a beautiful shortcut that really showcases why this is such an easy pear butter recipe: you absolutely do not need to peel them! Seriously, save yourself the time and the mess. We wash them well, core them, and chop them into chunks. They break down completely during the slow cooking, so the skin just vanishes into the final velvety texture.
For the sweet side of things, we achieve that deep, rich flavor by combining one cup of packed dark brown sugar with a generous half cup of pure maple syrup. The maple gives it that signature depth that pairs so wonderfully with the earthiness of the pears. Then come the warm spices: we use a full tablespoon of ground cinnamon, a strong half teaspoon of ground cloves, and just a tiny whisper of nutmeg—that’s about a quarter teaspoon. We also need a tiny bit of liquid to get things moving, so we add in a quarter cup of water, and finally, a teaspoon of lovely vanilla extract, which we stir in later.
Ingredient Notes and Substitutions for Pear Butter
I get asked all the time if you can swap out the sweeteners. Yes, you can! If you don’t have maple syrup on hand, feel free to push that brown sugar up to a cup and a half, but I really do love that maple complexity. Do you find cloves overpowering? You can certainly cut back on them, but remember, they are key to that authentic spiced fruit butter taste often associated with traditional preservation.
Another question I often hear relates to texture. Since this is a no pectin fruit butter recipe, it relies entirely on slow cooking to concentrate the fruit’s natural sugars and break down the fibers. That’s why the long cooking time is non-negotiable! It’s this slow reduction that miraculously thickens the mixture into that beautiful, spreadable consistency without needing any help from added thickeners or gelling agents. It’s nature, pure and simple, doing the thickening work for us!
How to Make Pear Butter Using the Slow Cooker Method
Now we get to the fun part—the actual building of this glorious pear butter! Because we’re skipping the peeling step with this wonderful no peel pear butter technique, preparation is incredibly fast. First things first, just give those four pounds of pears a good wash. Core them up, chop them into rough chunks—don’t stress about neatness; they are going to disappear anyway! Toss those chunks right into your slow cooker basin.
Next, we add all those flavor-makers we gathered: the brown sugar, the pure maple syrup, and all those beautiful spices—cinnamon, cloves, and nutmeg—plus that little quarter cup of water to prevent anything from seizing up right away. Cover that pot up! I find cooking on the LOW setting for about 6 to 8 hours gives the best, most mellow flavor, but if you need it quicker (maybe you have unexpected visitors coming!), 3 to 4 hours on HIGH works wonders too. You’ll know they are done when the pears are practically melting under the slightest touch.
This is where the magic shifts gears. We need to turn those soft chunks into a smooth spread. Carefully transfer the cooked pear mixture to a high-speed blender, or if you’re feeling brave and your slow cooker insert is safe, use an immersion blender right there in the pot. Blend until it is utterly, completely smooth. You want velvet! You can look for some great tips on finishing the slow cooker process over at Spoonful Snap if you have any questions about the cook times.
Blending and Reducing for Perfect Pear Butter Consistency
Once you have your smooth puree, we have to thicken it up. This reduction stage is absolutely critical for achieving that signature, heavy, spreadable texture that separates fruit butter from simple applesauce. If your slow cooker bowl is oven-safe or you have a spare large pot, transfer the smooth fruit back in or over. Stir in that teaspoon of vanilla extract now—it tastes brighter when added toward the end! If you’re looking for techniques similar to how they achieve that signature texture in traditional Amish pear butter recipe styles, this slow reduction is the secret! You can check out how the wonderful team over at The Frugal Navy Wife approaches their Amish version for comparison!
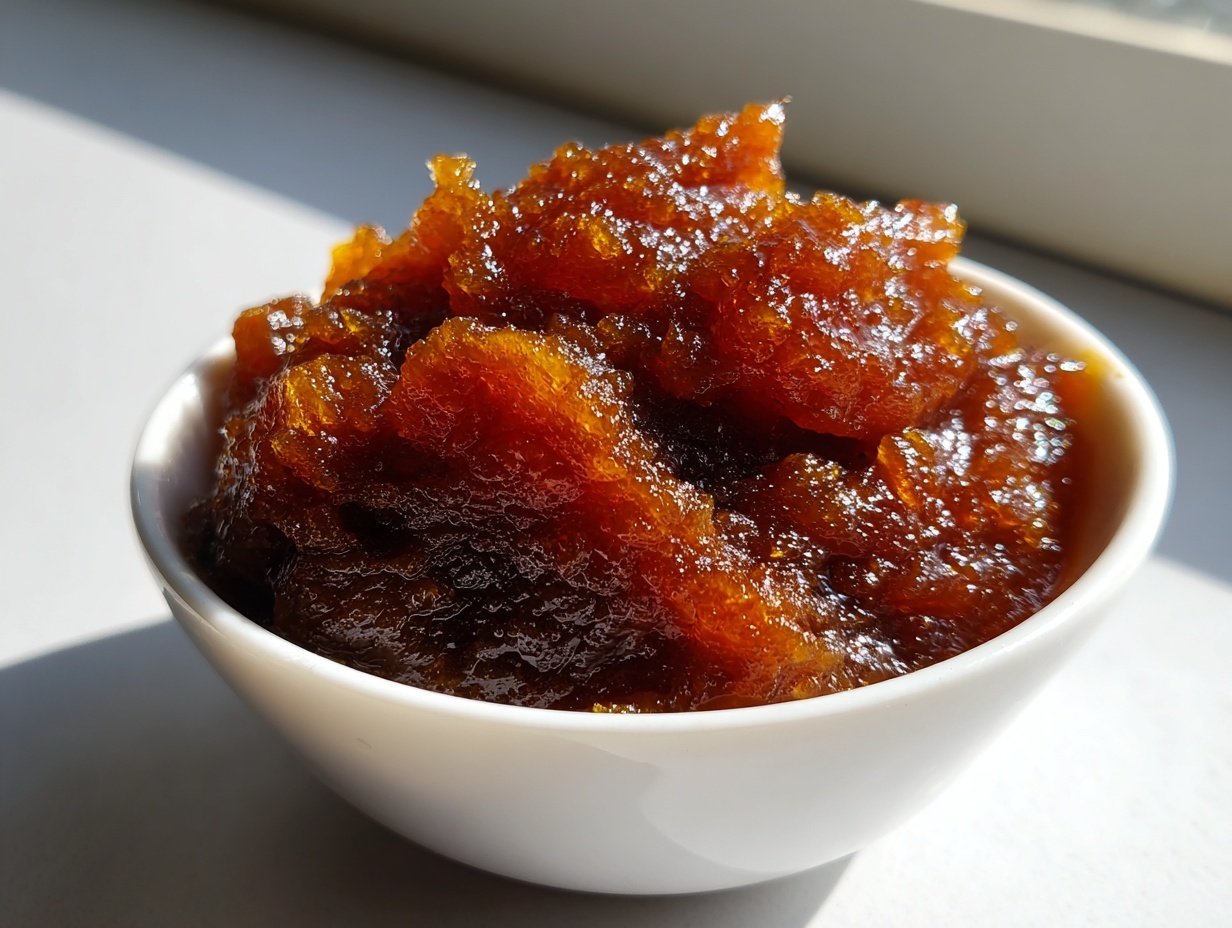
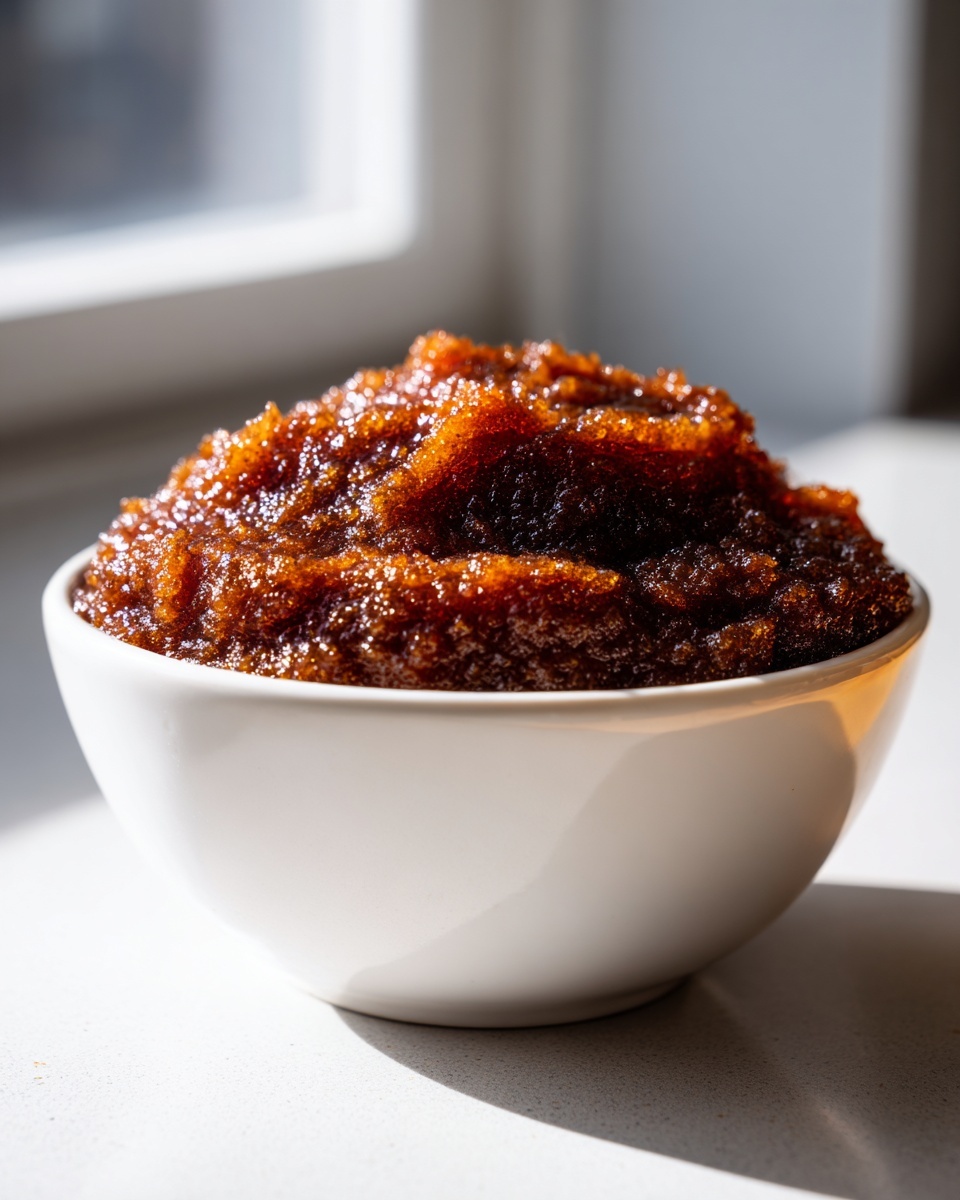
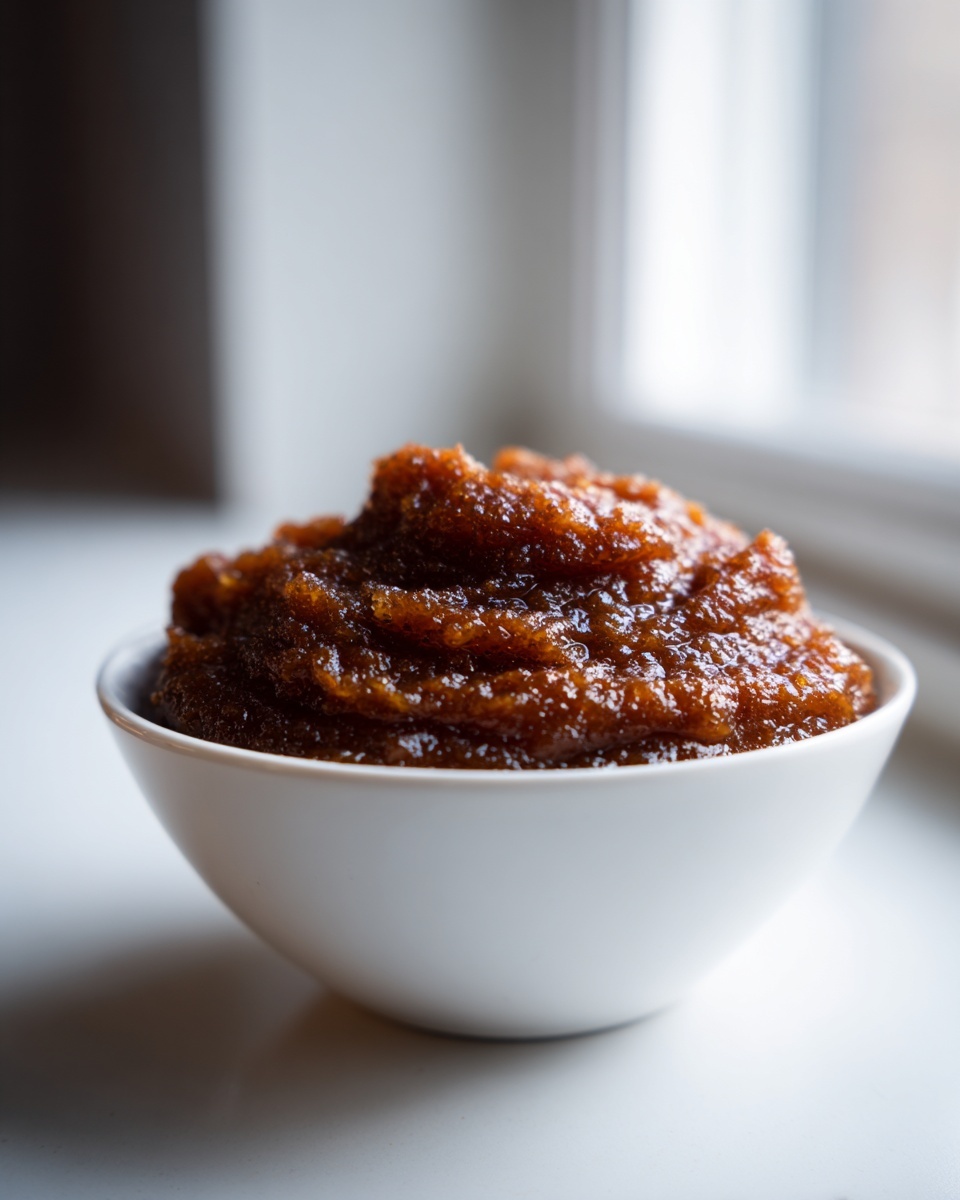
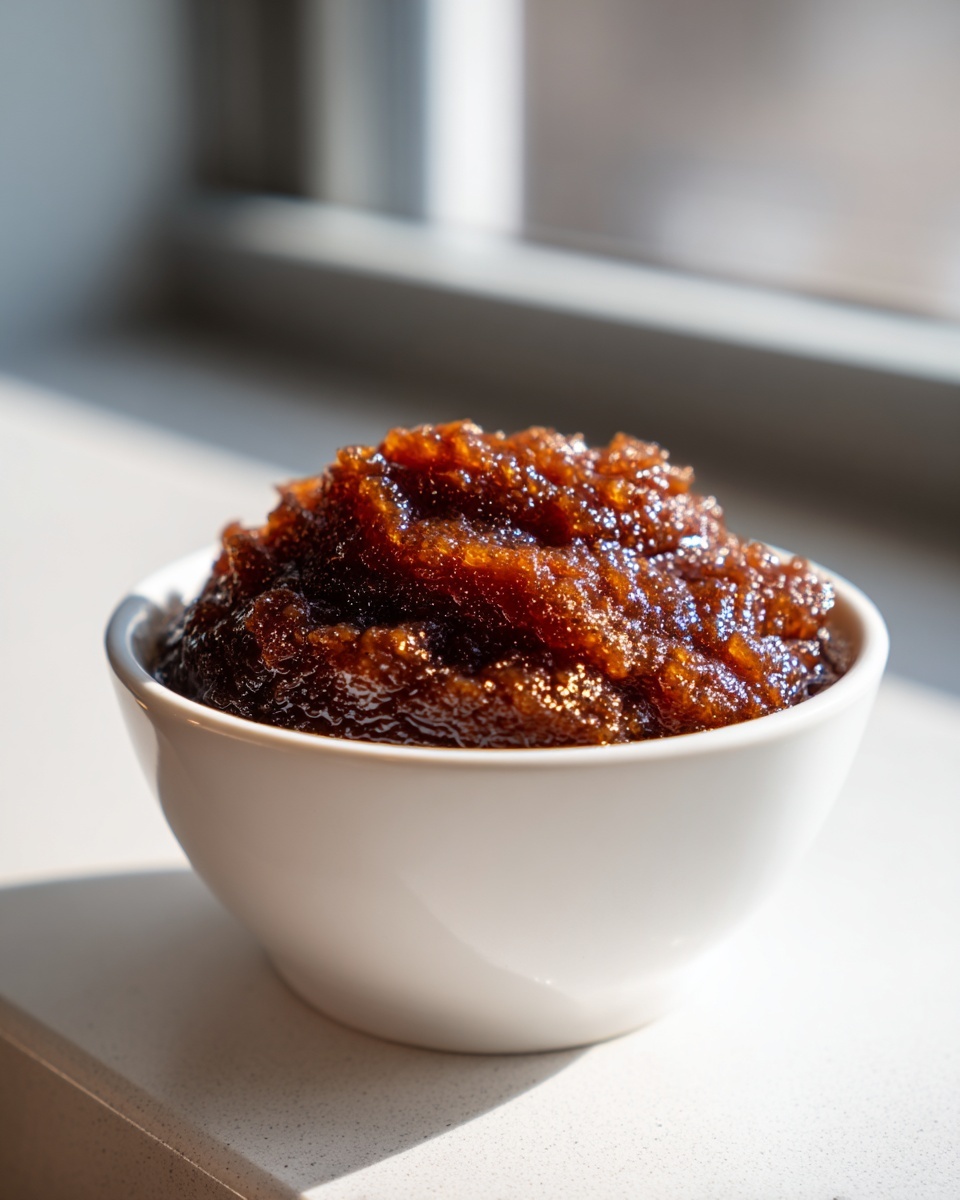
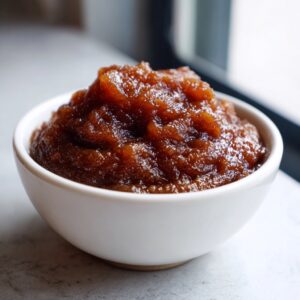
Now, cook it *uncovered*. Whether it’s slow cooking on LOW or simmering on the stovetop over medium-low heat, keep that lid off. The entire goal of the next hour or two is evaporation. Stir it every 15 to 20 minutes so nothing sticks and scorches on the bottom—nobody wants burned flavor in their beautiful pear butter! How do you know when it’s ready? This is the visual cue: it should coat the back of a spoon richly, and when you pull a spoon through the center, the trail should stay open for a few seconds before slowly closing up.
Mastering Canning Pear Butter Recipe for Long-Term Storage
Once your gorgeous, reduced pear butter has reached that perfect thick consistency, you might want to make sure this taste of fall lasts you right through the winter holidays! Canning is my favorite way to preserve these seasonal treasures, and it instantly transforms what you’ve cooked into wonderful, ready-to-go holiday food gifts. If you’re new to this, don’t be intimidated! The key to a safe, shelf-stable jar of canning pear butter recipe success lies in a few simple preparatory steps.
First, make sure your jars are sparkling clean and sterilized. I pull mine out of the dishwasher after a hot cycle or give them a quick dip in boiling water before filling. You want to ladle that hot pear butter right into those warm jars. This is important: make sure you leave exactly 1/4 inch of space at the top—we call that ‘headspace.’ Too much space, and the seal won’t take properly; too little, and it might bubble over!
Wipe the rims down with a clean, damp cloth to ensure no sticky residue interferes with the seal. Pop those clean lids and bands on, screwing them to ‘fingertip tight’—don’t crank them down, or air can’t escape! Then, they go right into a vigorously boiling water bath canner. The standard processing time for half-pint jars of spiced fruit butter like this is 10 minutes. I always tell people, if you live high up where the air is thinner, double-check your local extension office guidelines because you might need to adjust that time slightly for altitude safety.
For a fantastic guide on getting a perfect seal for your jars, you can look over the helpful steps that the folks at Molly’s Home Guide have outlined for traditional canning. Once that 10 minutes is up, turn off the heat, remove the jars, and let them sit undisturbed on the counter for 12 to 24 hours. You’ll hear that satisfying *pop-pop-pop* as they seal—that’s the sound of perfect preservation!
Alternative Cooking Methods: Instant Pot Pear Butter and Stovetop
While I absolutely adore the gentle, unattended nature of the slow cooker for making this pear butter—it really deepens the maple and spice notes—I know not everyone wants to wait eight hours! Maybe you need a batch of this delicious autumn fruit spread today. Good news: this recipe easily transitions to two other methods. It’s flexible, just like the best homemade recipes should be.
You can certainly make this on the stovetop if you don’t mind being a bit more hands-on. Essentially, you’d combine the pears, water, spices, and initial sweeteners in a large, heavy-bottomed pot. Bring it to a gentle simmer, cover it partially, and let it cook down until the pears are soft—this usually takes around an hour, maybe a little more, depending on your stove.
The important thing is stirring often once it concentrates just to keep things from burning to the bottom of the pot. You can read more about general tips for adapting these kinds of preserves over at Know Your Produce.
For those of you who love the speed of pressure cooking, the Instant Pot pear butter adaptation is fantastic, though it still requires that reduction step at the end. You’ll cook the raw pear chunks, spices, and liquids on HIGH pressure for about 15 minutes. Once done, let it do a Natural Pressure Release (NPR) for at least 10 minutes before moving on. This gets them softened up beautifully!
After blending the cooked pears until smooth, you’ll assemble the vanilla and any remaining sweetener. Then, you switch the Instant Pot to the SAUTÉ setting and cook it UNCOVERED. This is where the magic happens! You’ll let it simmer down until it achieves that same thick texture we talked about for the stovetop method. The folks at Redbud Haven have a brilliant take on this combination method if you want extra guidance on the pressure versus simmer timing for your new favorite quick pear preserve.
Serving Suggestions for Your Autumn Fruit Spread
Now that you have glorious jars of homemade pear butter, the real fun begins: eating it! Honestly, I find myself reaching for it constantly from the moment the weather cools down right through till spring. It’s so much more versatile than just spreading on morning toast, though it is absolutely divine on a thick slice of toasted sourdough or homemade quick bread. It brings such a lovely, spiced sweetness to everything.
Think beyond breakfast, though! This autumnal treat is fantastic folded into plain Greek yogurt—it instantly turns it into something decadent. Drizzled warm over a stack of my fluffy biscuits? Heavenly. It’s wonderful mixed into muffin batter right before baking for an extra burst of spiced fruit flavor, or even used as a filling layer in a simple cake instead of jam.
And let’s talk about gifting! This is where the jars you lovingly processed really shine. This fruit spread makes for such elegant, thoughtful holiday food gifts. Imagine packaging a small jar with a wedge of sharp cheese or a lovely loaf of homemade bread—it feels so personal. Since it tastes like cozy comfort in a jar, everyone appreciates receiving a batch of homemade spiced fruit butter when they visit.
Storage and Keeping Your Fruit Butter Fresh
This is such an important step because we want to make sure every spoonful tastes as amazing as the first! Whether you canned your pear butter successfully or you just made a small batch to keep in the fridge, proper storage is key for food safety and flavor preservation. We want this beautiful autumn fruit spread to last, but we also need to be realistic about how long things last when they are not commercially sealed.
If you skipped the water bath canning process entirely and your homemade pear butter recipe is just sitting in a regular glass jar, treat it like jam made without full sterilization. Keep it tightly covered in the refrigerator. Because of the natural acidity and sugar concentration we achieved during the reduction, it keeps wonderfully! You can expect it to be absolutely delicious for about three to four weeks in the fridge. I always suggest tasting a little bit after the third week just to be sure the spices haven’t faded, but honestly, it usually lasts longer if you’re dipping into it regularly!
Now, if you’re determined to keep that perfect, velvety texture for months on end—for example, if you’re saving some jars until December for gifts—then the canning method is your best friend. Jars processed correctly should sit happily in a cool, dark pantry for up to one year. Once you open a sealed jar, then the same refrigerator rules apply—it needs to be treated like a perishable item.
What about freezing? Yes, you absolutely can freeze your simple fruit spread recipe! Once the butter has completely cooled, ladle it into freezer-safe containers or heavy-duty zip-top bags. If you use bags, try to press out as much air as possible before zipping them up. Leave at least an inch of space at the top of any container, because liquids expand when they freeze, and we don’t want any messy freezer explosions!
Frozen pear butter holds its flavor beautifully for about six months. When you’re ready to enjoy it again, just move the container from the freezer into the refrigerator the day before you plan to use it. It thaws beautifully and is ready for your morning toast or yogurt just like it was fresh off the stovetop. Making sure you store it well means you get to enjoy the fruits (literally!) of your labor for much longer.
Frequently Asked Questions About Making Pear Butter
I always love hearing what curious cooks are wondering before they dive in! Making any fruit butter, even an easy pear butter, brings up specific questions about texture and technique. I’ve gathered a few of the most common queries I receive when people are trying this lovely recipe for the first time or comparing it to other fall preserves.
Can I make this recipe without peeling the pears?
Oh, this is my favorite question because it lets me talk about the saving grace of this recipe! Absolutely, yes, you can leave the peels on! When we use the slow cooker method for this pear butter, the long, gentle cooking time breaks down the pear skin entirely. Skin contains a lot of pectin and structure, but when cooked down for 8 hours, it softens enough to blend seamlessly into the puree. Not peeling saves you so much time, and honestly, you miss zero flavor or texture benefit! It’s the simplest step toward making a truly quick pear preserve.
How does this compare to apple butter?
That’s a great point of comparison since people often think of spiced fruit butter as interchangeable! While they share that wonderful warm spice profile—cinnamon, cloves, the works—the fruit itself is very different. Pears have a more delicate, floral sweetness compared to the slightly tarter, earthier flavor of apples. Texture-wise, pears tend to break down into a silkier, almost custard-like consistency when cooked for a long time, which is why this pear butter is often noticeably smoother than apple butter, even when using the same no pectin fruit butter method.
If you are trying to replicate that very dense, almost fudge-like texture you sometimes find in old-fashioned Amish pear butter recipes, you might need to reduce this butter slightly longer on the stovetop at the end, but I find the natural silkiness of the pear shines brightest when it’s just perfectly smooth.
Estimated Nutritional Profile for This Simple Fruit Spread Recipe
I always like to give you an idea of what you’re looking at nutritionally, though remember these details are always estimates! Since this simple fruit spread recipe relies on mostly fruit, brown sugar, and maple syrup, the numbers are going to reflect that natural sweetness. I’ve pulled the best averages based on the ingredients used in this batch of pear butter. Having this information handy makes it easy to decide if this fits into your healthy weekly meal planning or if you want to save it just for topping special weekend pancakes.
It’s important to note that because this recipe is entirely fruit-based and we aren’t adding any oils or dairy, it comes out naturally low in both fat and cholesterol. In fact, it’s completely vegan and dairy-free, which is a lovely bonus for everyone!
- Serving Size: About 1/4 cup
- Calories: 140
- Total Fat: 0.1g (Saturated Fat: 0g)
- Cholesterol: 0mg
- Sodium: A very low 2mg
- Total Carbohydrates: 36g
- Dietary Fiber: 3g
- Total Sugars: 32g (mostly from the fruit and added sweeteners)
- Protein: 0.3g
See? Not bad at all for such a rich, comforting flavor! That fiber content is fantastic, coming straight from those lovely pears we cooked down. This is the kind of treat that feels indulgent but is genuinely made from whole, seasonal ingredients. If you are canning this pear butter, these values apply per serving after the recipe is processed and stored correctly.
PrintEasy Slow Cooker Spiced Pear Butter with Canning Instructions
Create rich, thick, homemade pear butter using your slow cooker or Instant Pot. This simple, spiced fruit butter recipe is perfect for fall preservation, holiday food gifts, or topping your morning toast.
- Prep Time: 20 min
- Cook Time: 8 hours
- Total Time: 8 hours 20 min
- Yield: About 5 half-pint jars 1x
- Category: Preserves
- Method: Slow Cooking and Canning
- Cuisine: American
- Diet: Vegan
Ingredients
- 4 lbs ripe pears (no need to peel)
- 1 cup packed brown sugar
- 1/2 cup maple syrup
- 1 tablespoon ground cinnamon
- 1/2 teaspoon ground cloves
- 1/4 teaspoon ground nutmeg
- 1 teaspoon vanilla extract
- 1/4 cup water
Instructions
- Wash the pears well. Core the pears and cut them into rough chunks; you do not need to peel them for this slow cooker method.
- Place the pear chunks, brown sugar, maple syrup, cinnamon, cloves, nutmeg, and water into the basin of your slow cooker.
- Cover the slow cooker and cook on low for 6 to 8 hours, or on high for 3 to 4 hours, until the pears are very soft.
- Carefully transfer the cooked pear mixture to a blender or use an immersion blender directly in the slow cooker. Blend until the mixture is completely smooth.
- If you prefer a thicker butter, return the puree to the slow cooker (or transfer to a large pot for stovetop reduction). Stir in the vanilla extract.
- Cook uncovered on low in the slow cooker, or simmer on medium-low on the stove, stirring occasionally, for 1 to 2 hours until the butter has thickened to your liking.
- For canning: Ladle the hot pear butter into sterilized half-pint canning jars, leaving 1/4 inch headspace. Wipe rims clean, apply lids and bands. Process in a boiling water bath canner for 10 minutes, adjusting for altitude.
- For immediate use: Cool the pear butter completely before transferring it to airtight containers for refrigerator storage.
Notes
- This recipe works well in an Instant Pot using the ‘Slow Cook’ setting, or by cooking the pears on high pressure for 15 minutes followed by a natural release, then simmering to reduce.
- For a deeper flavor, substitute 1/4 cup of the brown sugar with bourbon when making Maple Bourbon Pear Butter.
- This simple fruit spread recipe is naturally vegan and dairy-free.
- For a no-pectin fruit butter, the long cooking time concentrates the natural fruit sugars, creating the thick texture.
Nutrition
- Serving Size: 1/4 cup
- Calories: 140
- Sugar: 32
- Sodium: 2
- Fat: 0.1
- Saturated Fat: 0
- Unsaturated Fat: 0
- Trans Fat: 0
- Carbohydrates: 36
- Fiber: 3
- Protein: 0.3
- Cholesterol: 0