
Does the thought of yet another frantic Tuesday night dinner leave you utterly exhausted? I know that feeling well. Before I fully embraced the home kitchen, my evenings were a blur of chopping, sautéing, and—the worst part—facing a mountain of dishes. That is precisely why I adore recipes that embody what I call ‘approachable elegance.’ This Hawaiian chicken sheet pan recipe is the poster child for that philosophy. It transports you straight to a tropical island with its sweet, tangy glaze and vibrant pineapple, yet it requires almost no effort and keeps your cleanup contained to a single piece of parchment paper. As you explore how I bring stories to life in my recipes, you can read more about my philosophy over at the About Page. It’s truly my go-to when I want sophisticated flavor without the stress.
- Why This Hawaiian Chicken Sheet Pan is Your New Weeknight Hero (E-E-A-T)
- Gathering Ingredients for Your Hawaiian Chicken Sheet Pan Dinner
- Step-by-Step Instructions for the Perfect Hawaiian Chicken Sheet Pan
- Tips for Success with Your Hawaiian Chicken Sheet Pan
- Ingredient Notes and Substitutions for Hawaiian Chicken Dinner Ideas
- Serving Suggestions for Your Quick Chicken Recipes
- Storage and Reheating Instructions for One Pan Chicken Meals
- Frequently Asked Questions About Hawaiian Chicken Sheet Pan Cooking
- Understanding the Flavor Profile of This Tropical Dish
- Estimated Nutritional Data for Your Hawaiian Chicken Sheet Pan
- Share Your Hawaiian Chicken Sheet Pan Creations
Why This Hawaiian Chicken Sheet Pan is Your New Weeknight Hero (E-E-A-T)
When I first developed this recipe, I had one goal: make it feel like a vacation dinner without spending more than 30 minutes (prep included!) actively working. And boy, did this Hawaiian chicken sheet pan deliver. It’s the ultimate solution for those nights when you need something easy but refuse to compromise on flavor.
Here’s why I trust this recipe completely for busy evenings:
- It’s Truly Fast: We are aiming for less than 30 minutes total hands-on time, making it ideal for a quick turnaround. You can find other speedy favorites in my collection of Quick Chicken Recipes.
- Cleanup Vanishes: Because we are using a lined sheet pan, cleanup is a dream. Toss the paper, and you’re basically done—no scrubbing baked-on teriyaki sauce!
- Flavor Payoff: The combination of sweet pineapple, savory chicken, and that tangy glaze hits all the right notes. It’s sophisticated tropical flavor achieved with utter simplicity.

Gathering Ingredients for Your Hawaiian Chicken Sheet Pan Dinner
This recipe shines because the ingredient list seems complex, but it’s actually just four main components coming together beautifully! Before we jump into the roasting, let’s talk about pulling everything together for this Hawaiian chicken sheet pan. I always encourage you to lay everything out first—it makes the process feel more calm, much like a little cooking station you’d find in a Mediterranean kitchen. If you’re navigating around wheat, just swap out the soy sauce for tamari; it keeps that deep, savory color we want! When you’re ready for a different kind of satisfying chicken dish later, I have a wonderful chicken and rice casserole that uses similar savory notes.
For the Hawaiian Chicken Sheet Pan Glaze
The magic happens right here in this sauce. You just need a small bowl to whisk these components until they are silky smooth. Don’t worry about the cornstarch slurry yet; we’ll tackle that right before we use the glaze. Keep that small whisk handy!
- Low-sodium soy sauce (or tamari for gluten-free needs!)
- Brown sugar or maple syrup—this builds that gorgeous caramelization.
- A touch of ketchup for body and tang.
- Rice vinegar for brightness.
- Ground ginger and garlic powder—our essential aromatics.
- A pinch of red pepper flakes if you like a little warmth!
The Chicken and Produce Components
For the vegetables, use what looks best at the market! I love using red and green peppers because the color contrast is stunning on the final platter. Make sure your chicken is cut uniformly—about 1 inch—so it cooks evenly alongside the peppers. Before anything touches the pan, toss your seasoned chicken pieces separately with just a touch of vegetable oil. I do this to ensure none of the sauce clings to the bowl later and everything gets coated evenly on the pan itself.
- Boneless, skinless chicken breasts or thighs, cut into 1-inch pieces.
- One large red bell pepper and one large green bell pepper, cut into 1-inch pieces.
- Pineapple chunks—fresh or canned, just make sure canned ones are well drained!
Step-by-Step Instructions for the Perfect Hawaiian Chicken Sheet Pan
Now for the fun part! Since this is a Hawaiian chicken sheet pan dinner, we are going to strategically stage the ingredients to ensure everything cooks perfectly—the chicken needs a head start before the vegetables join the party. This method guarantees juicy chicken and tender-crisp peppers. Remember, every recipe should bring you joy, not stress, so follow these steps closely, and you’ll have a gorgeous meal ready in about 35 minutes total. For more of these straightforward assembly-line dinners, check out my tips for One Pan Chicken Meals.
Preparing the Pan and Initial Roast
First things first: crank that oven up to 400 degrees F. Line your largest baking sheet with parchment paper. Trust me, this paper is your best friend for low cleanup! Now, toss those cut chicken pieces with just a tablespoon of oil. Spread them out evenly on the pan in a single layer—this is key for getting a nice little sear instead of steaming them. We are going to put just the chicken in first and let it roast on its own for 10 minutes. This gives the protein the advantage it needs.
Adding Vegetables and Glazing the Hawaiian Chicken Sheet Pan
After those first 10 minutes, carefully pull the pan out. Now, gently push all that warm chicken towards one side. Take your peppers and pineapple chunks and spread them across the empty space. Take about half of your beautiful glaze mixture and brush it generously over the chicken pieces only. We save the rest of the sauce! Pop the pan back into the oven. Let that cook for another 8 to 10 minutes. You are looking for the chicken to hit 165 degrees F internally.

Finishing the Glaze and Serving the Hawaiian Chicken Sheet Pan
This next bit is what separates a good glaze from a fantastic one. While the pan finishes roasting, pour the rest of your glaze into a small saucepan on the stove. Whisk in that cornstarch slurry we prepared earlier and bring it just to a simmer until it thickens up slightly—maybe just a minute. You must take this thickened sauce *off* the heat immediately. Once the sheet pan is out of the oven, drizzle that wonderfully sticky, thick glaze right over the chicken and veggies, give it a gentle toss right there on the pan, and garnish with fresh green onions. Perfection!

Tips for Success with Your Hawaiian Chicken Sheet Pan
Even with a simple recipe like this hawaiian chicken sheet pan, a few little insights can take your dinner from great to absolutely unforgettable. Because we are blending juicy fruit with protein, technique really matters here to prevent anything from getting soggy or burnt. I’ve learned these tricks over countless times making this dish when I need a fast, flavorful meal. My goal is always maximum caramelization with zero mush!
Here are the little secrets that ensure gorgeous results every time you make this:
- Don’t Crowd the Pan: This is the golden rule for any sheet pan chicken recipes using the oven. Make sure your chicken pieces aren’t stacked on top of each other during that initial 10-minute roast. If they touch too much, the moisture gets trapped, and you end up steaming the chicken instead of roasting it. We want that lovely golden edge!
- The Pineapple Drying Trick: If you are using canned pineapple (which is totally fine for these easy weeknight dinners!), make sure you drain it incredibly well. Patting the chunks lightly with a paper towel before they hit the pan helps draw out excess liquid. Too much liquid will steam the chicken and prevent that delicious glaze from setting properly.
- Glazing Timing is Everything: Notice how we only apply *half* the glaze before the second round of baking? That’s intentional. If you dunk everything in sauce right away, the sugar burns long before the chicken is cooked through. Applying half early develops deep flavor, and applying the thickened final sauce right at the end keeps the flavor bright and prevents scorching. For more juicy chicken ideas, you can check out my Melt in Your Mouth Chicken Recipe, which uses similar glaze principles.
- High Heat is Your Friend: Keeping the oven hot at 400°F ensures everything browns nicely and cooks quickly, fitting that under-30-minute timeline. It helps sear the outside of the chicken and caramelize the sugars in the glaze before the interior overcooks.
Ingredient Notes and Substitutions for Hawaiian Chicken Dinner Ideas
One of the best parts about putting together great one pan chicken meals is knowing you can adjust a few things based on what you have in the pantry without upsetting the whole tropical vibe. This Hawaiian chicken sheet pan is quite forgiving, which is perfect when you are aiming for simplicity! I like to think of it as a flexible canvas for delicious flavors.
Let’s talk about making tweaks, because I know everyone has certain preferences or needs when cooking for their family. If you’re looking for something perhaps a little richer, or maybe avoiding gluten, this section is for you. And if you’ve ever wondered about making other wonderful chicken dishes, perhaps you’d enjoy looking at my recipe for French Onion Chicken sometime soon!
Here are the common questions I get about swapping things out in this recipe:
- Thighs vs. Breasts: You absolutely can use chicken thighs here—and honestly, I sometimes prefer them because they stay incredibly juicy! If you use thighs, just keep a closer eye on the internal temperature. They might need 2 or 3 minutes longer than the breasts to cook all the way through, but that extra fat content helps them soak up the glaze beautifully.
- Fresh vs. Canned Pineapple: Both work wonderfully, but they behave slightly differently. Fresh pineapple has more structure and browns a bit better. Canned pineapple releases more moisture, so make sure you drain it extremely well, as noted above, otherwise you risk steaming your chicken.
- Sweetener Choices: I specified brown sugar for that deep molasses background, but if you are using maple syrup instead—which is a lovely option—you might find that the glaze thickens just a hair slower. It’s a delicious alternative, though!
- Gluten-Free Swaps: If you need a gluten-free meal, simply ensure you are using tamari instead of traditional soy sauce in the glaze. It brings that necessary salty, umami depth without any wheat.
Serving Suggestions for Your Quick Chicken Recipes
Once that gorgeous Hawaiian chicken sheet pan comes out of the oven, glistening with its sticky, savory glaze, you’ll need something perfect underneath to soak it all up! The tropical flavors are so vibrant that they pair wonderfully with something simple and clean.
For a truly complete meal, I highly recommend serving this right over fluffy white rice or light quinoa. It catches every drop of that delicious sauce. If you prefer something with a bit more crunch to contrast the sweetness, a simple, bright salad is the perfect accompaniment. In fact, my recipe for Creamy & Crunchy Coleslaw offers that perfect cool, acidic contrast to the warm, sticky chicken. It wraps up the entire meal beautifully!
Storage and Reheating Instructions for One Pan Chicken Meals
I always plan for leftovers when I make a big batch of something wonderful like this Hawaiian chicken sheet pan, primarily because it makes packing lunch for the next day so effortless! Since we are aiming for low-stress cooking, we should also aim for low-stress storage and reheating, right?
If you are saving this as part of your meal prep, I highly recommend separating the main components if you can. You can find some great guidance on how I approach this in my dedicated post on Simple Chicken Meal Prep.
Here is my routine after the pan has cooled down:
- Keep the Sauce Separate: This is the most important tip for textures! The glaze we thickened on the stove tends to soak right into the chicken and vegetables if stored together overnight. If you can, store the remaining glaze separately in a small airtight container. This keeps the chicken and peppers from getting overly soft when refrigerated.
- Storage Containers: Store the chicken and veggies in a shallow, airtight container. They should keep beautifully for about three to four days in the refrigerator.
- Reheating Tips: When you are ready to eat your leftovers, I suggest microwaving the chicken and peppers first until just warmed through. Then, drizzle a tiny bit of that reserved sauce over the top before eating. If you don’t have leftover sauce, a small splash of teriyaki or even a squeeze of fresh pineapple juice works wonders to bring back the moisture.
Frequently Asked Questions About Hawaiian Chicken Sheet Pan Cooking
It’s natural to have a few questions when you’re trying a new one pan chicken meal, especially when you are looking to keep things fast and flavorful for your family. We want this to be a reliable recipe in your rotation, perhaps even one of your favorite tropical dinner ideas! I’ve gathered the questions readers ask most often about ensuring this Hawaiian chicken sheet pan comes out perfectly every time.
We try to answer every curiosity, but if you have something else on your mind, please let me know! If you ever need a completely different kind of comforting chicken dish, my Chicken Gnocchi Soup is another absolute winner for a cozy night in.
Can I use chicken thighs instead of breasts in this Hawaiian chicken sheet pan?
Oh, absolutely! I encourage it sometimes for extra richness. Chicken thighs are more forgiving than breasts when roasted. If you switch to thighs, you might need to add an extra 3 to 5 minutes to the total cooking time. Since thighs can take a moment longer to reach that safe 165 degrees F internally, just keep a close eye on them during that last roasting period. They hold up so well to that sticky glaze!
How can I make this recipe a Healthy Sheet Pan Meal?
That’s an excellent question, especially if you are tracking macros or watching sugar intake. You can easily transform this into a Healthy Sheet Pan Meal without sacrificing the tropical flavor. My top tip is to use chicken breasts, as they are typically leaner. Then, reduce the brown sugar in the glaze by one tablespoon—you won’t miss it that much because the pineapple brings so much sweetness!
Also, be generous with your vegetables! If you swap out some of the chicken for extra bell peppers, broccoli florets, or even some zucchini spears, you boost your fiber and reduce the overall calorie density of the meal significantly. It stays super flavorful!
Understanding the Flavor Profile of This Tropical Dish
What truly elevates this dish beyond just ‘chicken and peppers’ is the artful balance in the glaze. We are creating a classic tropical flavor profile here. Think about how the deep savoriness from the soy sauce grounds the intense sweetness of the caramelized pineapple and brown sugar. The rice vinegar then cuts through that richness with a necessary, bright acidity.
This sweet-and-sour dance is central to memorable tropical dinner ideas. It’s layered cooking without any difficult techniques. When you serve this, you aren’t just serving dinner; you’re serving a bright little escape from the everyday routine. If you enjoy mastering these types of flavor combinations, come explore more of my culinary thoughts on the main Blog Page!

Estimated Nutritional Data for Your Hawaiian Chicken Sheet Pan
I always want you to feel informed about what you are creating in your kitchen, and while tracking every single macro isn’t always the point when cooking for joy, knowing the general profile is helpful! Since we are using lean chicken and focusing heavily on vegetables and fruit, this Hawaiian chicken sheet pan lands right in a lovely spot for a satisfying but relatively light meal when served without excess rice.
Please remember, what you see here is an educated estimate based on the core ingredients listed in the recipe above—the exact brand of soy sauce or the thickness of your glaze will shift these numbers slightly. This data is meant to guide you, not stress you out!
- Serving Size: 1 serving (without rice)
- Calories: 320
- Sugar: 18g
- Sodium: 650mg (Yes, this is flavor, but watch your intake!)
- Fat: 8g
- Saturated Fat: 2g
- Carbohydrates: 25g
- Protein: 35g (A fantastic, high-protein finish to a quick dinner!)
We aim for this to be a light-to-moderate meal, letting that 35 grams of protein truly satisfy you, while the sugar content is primarily from the fruit and the small amount of brown sugar needed to build that essential caramelized glaze. It’s a great balance for a flavorful weeknight dish!
Share Your Hawaiian Chicken Sheet Pan Creations
There you have it—a tropical escape ready in less than 35 minutes with almost zero scrubbing involved! When you’ve folded up that sweet and savory chicken, peppers, and pineapple onto your plate, I truly hope it feels like a triumph over the usual weeknight rush. That’s the story I want to hear!
I pour my heart into making sure these recipes stand up to real life in a busy home kitchen, and seeing your success is the best encouragement I could ask for. So please, once you’ve enjoyed your Hawaiian chicken sheet pan, come right back here and let me know how it went.
Did the glaze stick perfectly? Did your family love the flavor punch? Leave a star rating right below the recipe card—it helps other home cooks trust the process! And if you want to send along a photo or share a little note about how this meal saved your Tuesday, feel free to reach out through my Contact Page. I cherish reading your stories just as much as I love telling my own in the kitchen. Happy cooking, my friend!
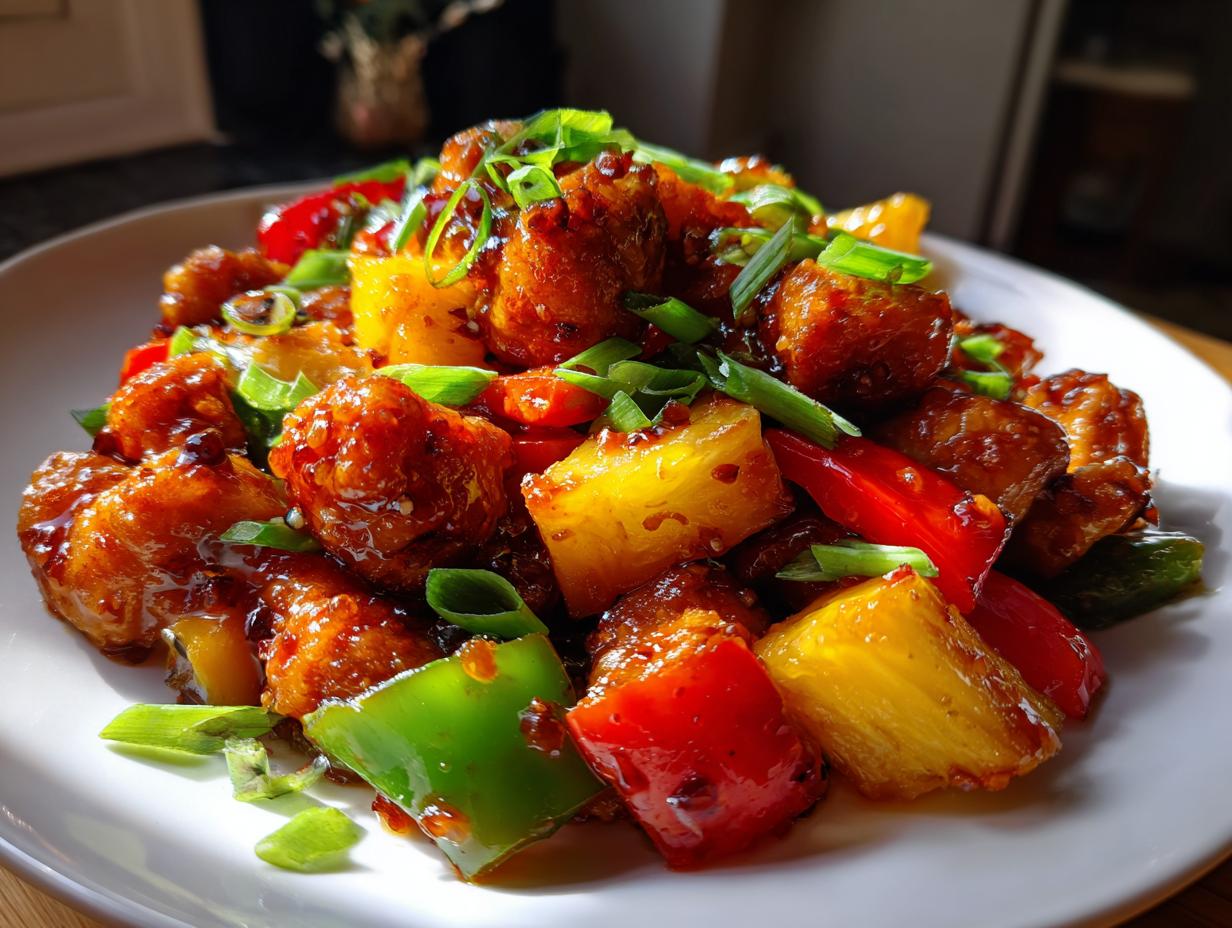
PrintHawaiian Chicken Sheet Pan Dinner with Pineapple and Peppers

Create a flavorful Hawaiian chicken sheet pan meal that comes together quickly. This recipe delivers juicy chicken, sweet pineapple, and colorful vegetables with minimal cleanup, making it perfect for easy weeknight dinners.
- Prep Time: 15 min
- Cook Time: 20 min
- Total Time: 35 min
- Yield: 4 servings 1x
- Category: Dinner
- Method: Baking
- Cuisine: American/Tropical
- Diet: Low Fat
Ingredients
- 1.5 lbs boneless, skinless chicken breasts or thighs, cut into 1-inch pieces
- 1 large red bell pepper, cut into 1-inch pieces
- 1 large green bell pepper, cut into 1-inch pieces
- 1 cup fresh or canned (drained) pineapple chunks
- 1/4 cup low-sodium soy sauce or tamari (for Gluten Free)
- 1/4 cup brown sugar or maple syrup
- 2 tablespoons ketchup
- 1 tablespoon rice vinegar
- 1 teaspoon ground ginger
- 1/2 teaspoon garlic powder
- 1/4 teaspoon red pepper flakes (optional)
- 1 tablespoon cornstarch mixed with 2 tablespoons cold water (slurry)
- 1 tablespoon vegetable oil
- Green onions, sliced, for garnish
- Cooked rice or quinoa, for serving (optional)
Instructions
- Preheat your oven to 400 degrees F (200 degrees C). Line a large rimmed baking sheet with parchment paper for easy cleanup.
- In a small bowl, whisk together the soy sauce, brown sugar, ketchup, rice vinegar, ginger, garlic powder, and red pepper flakes to create the glaze.
- In a separate small bowl, whisk the cornstarch and cold water to create a slurry. Set aside.
- In a large bowl, toss the chicken pieces with the vegetable oil. Spread the chicken in a single layer on the prepared sheet pan.
- Roast the chicken for 10 minutes.
- While the chicken roasts, toss the bell peppers and pineapple chunks together in the bowl you used for the chicken.
- After 10 minutes, remove the pan from the oven. Push the chicken to one side of the pan. Add the peppers and pineapple to the other side.
- Brush half of the prepared glaze over the chicken pieces.
- Return the pan to the oven and roast for another 8 to 10 minutes, or until the chicken is cooked through (internal temperature of 165 degrees F).
- While the pan is in the oven for the second time, pour the remaining glaze into a small saucepan. Bring to a simmer over medium heat. Whisk in the cornstarch slurry and cook for 1 minute until the sauce thickens slightly. Remove from heat.
- Remove the sheet pan from the oven. Drizzle the thickened sauce over the chicken, peppers, and pineapple. Toss gently on the pan to coat everything.
- Garnish with sliced green onions. Serve immediately over rice or quinoa, if desired.
Notes
- For a healthier option, use chicken breast and reduce the brown sugar by one tablespoon.
- This recipe works well for simple meal prep; store components separately if you plan to reheat later.
- If you prefer a tangier flavor, add one teaspoon of Dijon mustard to the glaze mixture.
Nutrition
- Serving Size: 1 serving (without rice)
- Calories: 320
- Sugar: 18g
- Sodium: 650mg
- Fat: 8g
- Saturated Fat: 2g
- Unsaturated Fat: 6g
- Trans Fat: 0g
- Carbohydrates: 25g
- Fiber: 2g
- Protein: 35g
- Cholesterol: 95mg