
There is nothing quite like the smell of fresh bread filling the house on a slow morning, right? For me, that comforting aroma is deeply tied to finding ease in the kitchen, even when making something that seems complicated. That’s why I’m thrilled to share what I truly believe is the **Best Easy Homemade English Muffins with Perfect Nooks and Crannies**. Forget shaking those little plastic bags of dry, uniform rounds from the store; baking **homemade English muffins** from scratch delivers superior texture and flavor without a ton of fuss. This recipe is reliable, approachable, and proves that bakery-style perfection is absolutely achievable right here on your stovetop and in your oven. I developed this version because simple, reliable pleasures are what truly nourish the soul. Come join me and let’s unfold this story together!
- Why These Are the Best Homemade English Muffins Recipe
- Gathering Ingredients for Your Homemade English Muffins
- Step-by-Step Instructions for Easy Homemade English Muffins
- Ingredient Notes and Substitutions for Your English Muffins
- Serving Suggestions: English Muffin Breakfast Ideas
- Storage and Reheating Homemade English Muffins
- Troubleshooting Common Homemade English Muffins Issues
- Frequently Asked Questions About Making English Muffins
- Share Your Homemade English Muffins Creations
Why These Are the Best Homemade English Muffins Recipe
When you try these, you’ll immediately taste the difference—fresh is always better! These aren’t just great; they are the best because they conquer the biggest hurdles store-bought versions present. They are soft, they have that incredible open structure, and honestly, they taste like real, happy breakfast food.
- They give you the undeniable, airy texture you crave—pure **Bakery Style English Muffins at Home**.
- The flavor is just richer than anything you find on the shelf. Think **Fluffy Homemade Bread** but flattened and waiting for butter.
- You barely have to work! This is truly a **No Knead English Muffins** recipe, which means less time massaging dough and more time planning your toppings.
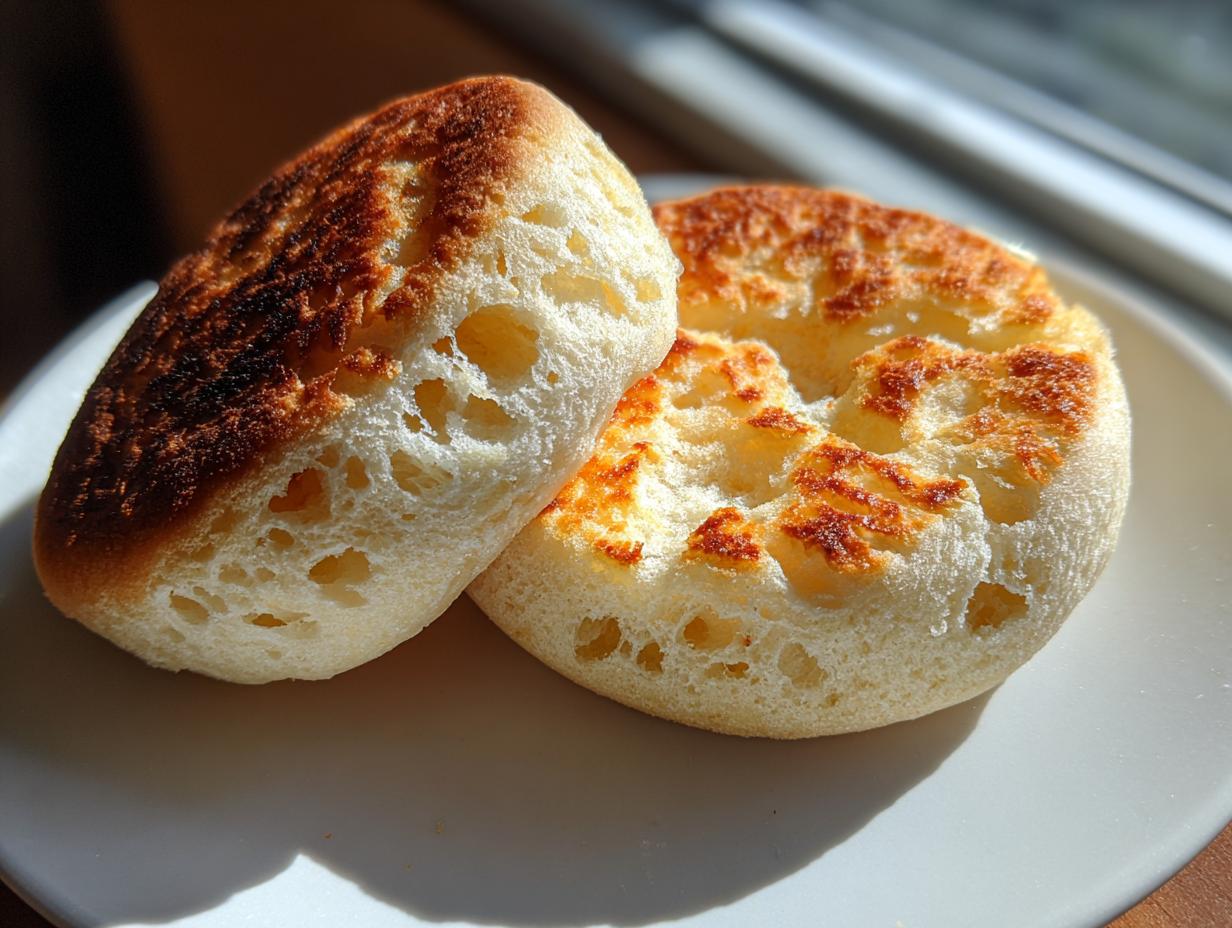
Achieving Perfect English Muffins with Nooks and Crannies
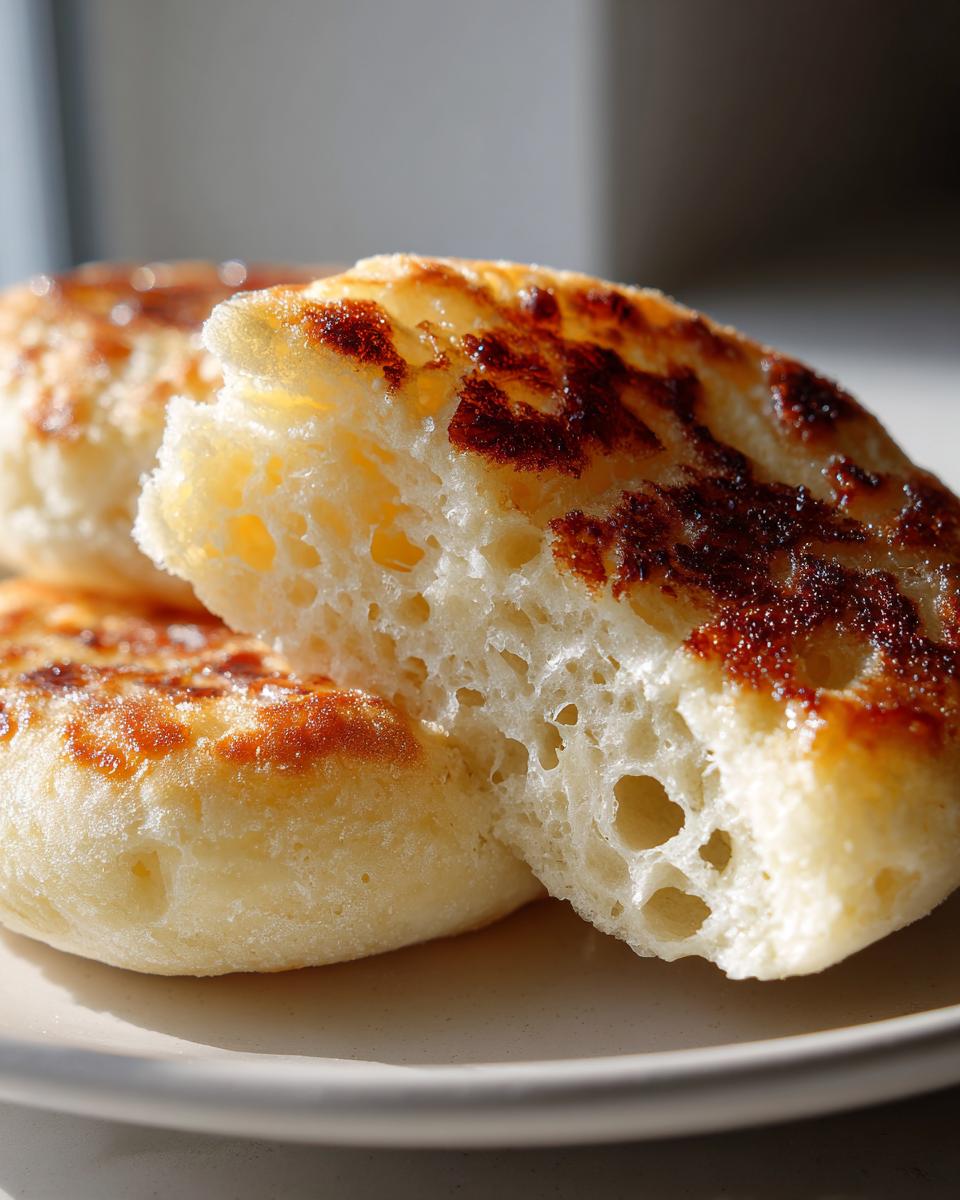
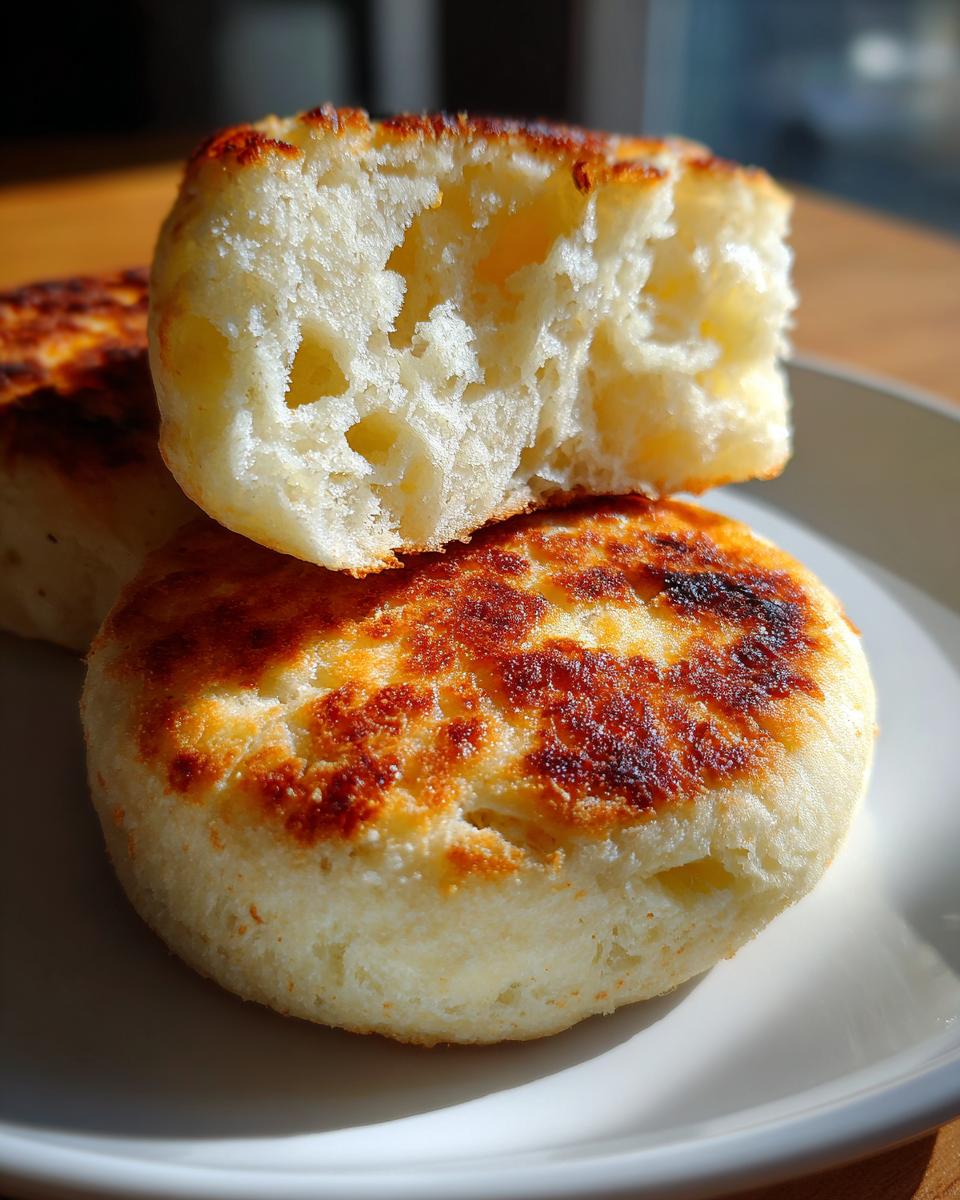
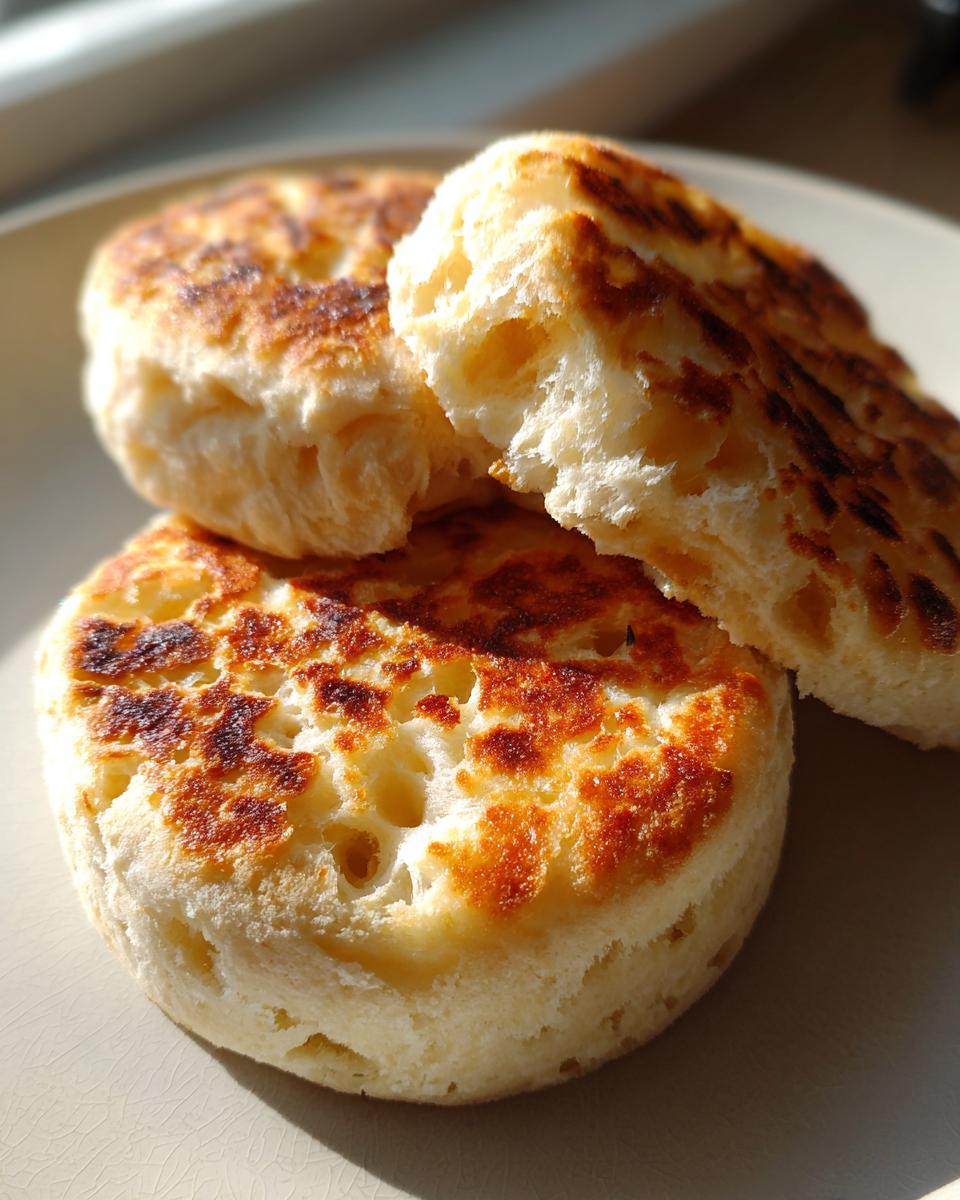
Everyone asks me how to get those famous holes, those glorious little pockets that catch melted butter perfectly. Here’s the secret I learned: it’s not about kneading! Kneading builds strong gluten strands that pull tight, which is great for crusty loaves but disastrous for nooks. We use a very wet, sticky batter and rely on the combination of yeast and baking soda. The baking soda gives you that initial burst of lift in the heat, creating those air pockets before the yeast jumps in afterwards. Gentle handling after the rise is everything.
Tips for Quick Breakfast Baking Success
Even with the rising time, this falls squarely into my “Quick Breakfast Baking” category because your hands are only active for about 20 minutes total. That’s the beauty of it! You mix it, walk away, and come back to perfect dough readiness. The key to keeping it quick is sticking to the rising times listed—don’t rush the dough! It’s doing the heavy lifting for us, making this an ideal recipe for busy mornings when you want something special.
Gathering Ingredients for Your Homemade English Muffins
Like any beautiful thing, the final product relies totally on the quality of the raw materials we start with. These **homemade English muffins** use simple ingredients, so let’s make sure they are just right for the absolute best results. Please take special care with the temperature of your milk—this is where the yeast wakes up!
Here is absolutely everything you’ll need to gather for this batch:
- In a large bowl, whisk together 2 cups of All-Purpose Flour, 1 tablespoon of Granulated Sugar, 1 teaspoon of Baking Soda, and 1 teaspoon of Salt.
- In a separate little bowl, gently combine 1 cup of Milk that is warm (about 105°F to 115°F—test it first!), 1 large Egg, and 2 tablespoons of Unsalted Butter that you’ve melted until smooth. You want the butter incorporated but not hot!
- Activate the yeast: Add 1 teaspoon of Active Dry Yeast to that milk mixture and just let that sit for about 5 minutes till it looks a little bubbly.
- Keep extra flour or some good quality cornmeal handy for dusting the surface later.
When you bake from scratch, using real butter truly matters; it gives these muffins a richness you just don’t get otherwise. If you are looking for more ideas for weekend baking, take a peek at my favorite brunch recipes!
Step-by-Step Instructions for Easy Homemade English Muffins
Alright, let’s get these beautiful rounds made! Following the instructions precisely here is key to getting that airy interior everyone loves in their **homemade English muffins**. Remember, since this is a no-knead method, we are relying on patience more than elbow grease. Once you have your ingredients ready, the process moves quite sweetly along. You can sneak in a peek at my latest recipes over on the Unfold Recipes blog while the dough is resting!
Mixing the Batter and First Rise for Homemade English Muffins
First, take that wet mixture we prepared—the warm milk with the yeast—and pour it right into your dry ingredients. Mix it gently, maybe with a sturdy wooden spoon, only until everything is just combined. I mean it, just combined! You’ll notice immediately that you don’t have ‘dough’ in the traditional sense; you have a super thick, sticky, almost pancake-like batter. When I first made this, I thought I’d messed up because it was so wet, but trust me, this sticky consistency is exactly what creates those perfect internal airways! Cover that bowl up tight and find a warm spot for it to rest for a full hour. Watching it puff up is pure magic, I promise.
Cutting and Proofing the Rounds
Once the batter has relaxed and risen nicely, lightly dust your counter with flour or cornmeal—cornmeal gives a better texture on the base, in my opinion! Scrape the batter out. It will deflate a bit, and that’s fine. Gently pat or roll it out to about half an inch thick. Now, for the most important moment: use your 3-inch cutter, and when you press down to cut the rounds, press straight down and lift straight up. Do not, under any circumstances, twist the cutter! Twisting seals those edges shut, and we need sharp, clean edges to encourage that beautiful vertical rise and those famous nooks and crannies.
Cooking: Mastering Stovetop English Muffins
Heat up your biggest cast-iron skillet or griddle over medium-low heat. And I mean medium-low. This might seem slow, but if the heat is too high, the outside gets dark brown—almost burnt—long before the center has a chance to cook through. You cook these **stovetop English muffins** dry; no oil, no butter in the pan. Lay your proofed rounds on the hot surface and let them cook slowly for about 6 to 8 minutes per side until they are visibly golden. They won’t feel totally done yet, just nicely colored.
Finishing the Homemade English Muffins in the Oven
Since we can’t keep them on the stove all day, we finish them up in the oven to make sure they are cooked all the way through while keeping that perfect soft crumb. Transfer those golden rounds onto a baking sheet and slide them into a preheated 375°F oven. They only need about 8 to 10 more minutes in there. This dual cooking method ensures you get the crusty exterior from the skillet and the perfectly cooked, melt-in-your-mouth center.

Ingredient Notes and Substitutions for Your English Muffins
When you are aiming for something truly special, like the perfect **homemade English muffins**, sometimes the ingredients list can look a little intimidating. Don’t you worry! I want you to feel confident substituting if you need to, though I always encourage sticking close to the recipe for the first go-around. Getting the right chemistry is what allows us to skip the kneading and still get that amazing fluffiness.
Flour Choice for Fluffy Homemade Bread Texture
For this particular recipe, I insist on All-Purpose flour. Why? Because we want a delicate crumb—we want softness, not aggressive chewiness. Bread flour has a much higher protein content, which creates long, strong gluten strands when mixed. While that’s wonderful for a big rustic loaf, it works against the open, airy texture we are trying to achieve here. The whole point of these English muffins is that lovely, tender quality, making the AP flour the perfect foil for our wet batter trick. If you only have bread flour on hand, you can definitely use it, but be extra gentle when mixing, as it will develop gluten faster, and you might lose just a hair of that signature softness.
Sourdough English Muffins Recipe Variations (Optional)
I know many of you are deep into the world of sourdough, and I get requests all the time for a **Sourdough English Muffins Recipe** variation! It’s lovely, isn’t it? The slight tang really elevates the final product. If you want to play around with your discard, which is that hungry starter waiting to be fed, you can certainly swap out about half of the flour and milk volume with your active, recently fed discard. You might need to adjust your yeast slightly, as the acidity from the sourdough can sometimes slow down the commercial yeast. It takes a bit of finesse, but if you’re comfortable with sourdough, give it a try next time! It turns a great muffin into an even more complex, flavorful one.
Serving Suggestions: English Muffin Breakfast Ideas
Now that you have achieved what I consider the absolute best **homemade English muffins**, the final and arguably most fun step is deciding how to eat them! While a thick layer of melting salted butter is heavenly, there are so many fantastic **English Muffin Breakfast Ideas** to explore. My favorites always lean toward savory. Toast one lightly, smear it with a little herbed cream cheese, and top it with a perfectly fried egg. If you are looking to build a truly decadent breakfast sandwich, you might also want to try poaching your eggs—it makes all the difference! For something completely different for lunch, these muffins are divine paired with a robust soup, like my creamy Chicken Gnocchi Soup.
Storage and Reheating Homemade English Muffins
The only downside to making your own incredible **homemade English muffins** is realizing you might have too many! But honestly, they are even great the next day, provided you store them correctly. We want to keep that lovely, soft interior intact while protecting the crisp exterior we worked so hard to achieve on the griddle. Do not slice them until you are ready to eat them, or they will dry out faster!
If you plan on eating them within two days, just store them at room temperature in a large zip-top bag or tightly wrapped in foil. If life gets busy, these freeze beautifully. You can wrap them individually in plastic wrap, then place them all into a heavy-duty freezer bag. They should last a good three months this way without any flavor loss.
Reheating is where the magic happens again! If they are room temperature, just pop them onto a cutting board and split them open with a fork—remember, a fork always! Then, toast them. You can use a regular toaster slot, but for the absolute best texture that mimics that original stovetop heat, I recommend crisping them face-down in a dry skillet over medium heat for just a minute per side after toasting. That little bit of extra heat reactivates the outer texture but leaves the inside wonderfully pillowy soft.
Troubleshooting Common Homemade English Muffins Issues
Even when we follow the recipe precisely, sometimes baking throws us a curveball, doesn’t it? Don’t panic if your first batch of **homemade English muffins** doesn’t look picture-perfect! Baking is all about learning to read the dough, and these little guys are very communicative if you know what signs to look for. I’ve learned a few tricks over the years fixing my own mistakes, so let’s troubleshoot together!
If your English muffins came out looking a little sad, see if one of these common culprits is the issue:
- Problem: The muffins are flat and dense, more like pancakes than bread. This is almost always a sign of over-handling after the first rise. Remember I said the batter is thick and sticky? That wet batter needs to be gently scraped out—not punched down or aggressively re-kneaded. If you deflate those air bubbles, they can’t rise up vertically on the griddle. It’s also sometimes a sign the milk wasn’t quite warm enough to wake up the yeast properly, so the first rise wasn’t as powerful as it should have been. Next time, double-check that milk temperature!
- Problem: The exterior is deeply brown or even burnt, but the middle feels gummy. Ah, this is the classic heat issue when we cook these **stovetop English muffins**. The temperature on your skillet was too high! You are pan-frying them, essentially, and if the heat is aggressive, the outside sets up like a shell before the heat can gently penetrate the center. You need medium-low heat; patience is your greatest tool here. They should take a good 7 or 8 minutes per side to develop color slowly.
- Problem: There are absolutely no nooks and crannies! Just a smooth, solid texture. If you cut them and they look like biscuits, you likely twisted your cutter when portioning the dough rounds. When you twist, you effectively seal the dough edges together, preventing that slight separation and upward lift we are after. Remember: press firmly straight down and lift straight up, leaving those edges clean. That clean edge is what allows the steam to generate those beautiful internal tunnels.
See? Nothing is ruined! It just means you made a perfectly tasty, if slightly unconventional, fluffy bread round instead of an English muffin. Sometimes those “mistakes” make the best base for a hearty breakfast sandwich anyway!
Frequently Asked Questions About Making English Muffins
When you dive into baking something classic like this, questions always pop up. People often want reassurance that they’ve done it right or need clarification on small steps that make a huge difference in the final texture. I compiled a few of the most common queries I receive about this **homemade English muffins** method. I hope these help you feel absolutely confident as you serve up your perfect breakfast rounds!
Can I skip the oven step when making homemade English muffins?
You absolutely *can* skip the oven step, and many traditional or purely stovetop methods do just that, but I highly recommend you don’t for this specific recipe. Think about what we are doing: we are pan-frying them on medium-low heat to get that beautiful golden crust and to set the structure. However, because they are relatively thick and we cook them gently, the inside often stays just a bit soft or even slightly doughy right in the very center. Finishing them in the oven at 375°F melts away that raw texture and fully cooks the center through without burning the outside that we already perfectly browned on the skillet. If you skip it, they will still be delicious, but baking provides that professional reassurance that they’re fully cooked! For more great tips on **how to make English muffins** just like the experts, check out this resource over here.
What is the best way to split homemade English muffins?
This is perhaps as important as the cooking method itself if you are serious about maximizing those beautiful internal textures! You must avoid using a regular knife. When you slice an English muffin with a flat knife blade, you are essentially sawing right through all those delicate air channels and tunnels—you are cutting off your nooks and crannies! The traditional and correct way to split them is with a fork. Simply hold the muffin in your hand and gently poke the fork tines around the circumference where you want to split it. Then, gently pull the halves apart. This action tears the cooked structure along its natural fault lines, exposing every single glorious little hole we worked so hard to create. This is non-negotiable for the perfect toasted experience!
Share Your Homemade English Muffins Creations
And there you have it! We’ve taken simple pantry staples—flour, milk, yeast—and turned them into these glorious, airy, bakery-quality **homemade English muffins**. Doesn’t it feel amazing to create something this comforting completely from scratch? I truly hope this recipe becomes one of your go-to weekend projects.
I pour so much care and testing into every single recipe here on Unfold Recipes, and when you try them, I absolutely adore seeing your results! Whether you’re making a stack for a huge family brunch or just treating yourself to that perfect toasted round smothered in jam, please don’t be shy about sharing your experience.
Drop a comment below and let me know how they turned out. Did you manage to get massive nooks and crannies? Which topping did you favor? A quick star rating lets other home cooks know that this recipe is reliable and worth the effort. For any specific questions that weren’t covered, feel free to reach out to me directly via my contact page here.
Happy, fluffy breakfast baking, my friends. I can’t wait to hear all about your latest creation!
PrintThe Best Easy Homemade English Muffins with Perfect Nooks and Crannies

Create bakery-style English muffins at home using this simple, no-knead recipe. Achieve the classic, airy texture with distinct nooks and crannies perfect for toasting and buttering.
- Prep Time: 20 min
- Cook Time: 35 min
- Total Time: 1 hour 55 min
- Yield: About 10 muffins 1x
- Category: Breakfast
- Method: Skillet Cooking and Baking
- Cuisine: American
- Diet: Vegetarian
Ingredients
- 2 cups All-Purpose Flour
- 1 tablespoon Granulated Sugar
- 1 teaspoon Baking Soda
- 1 teaspoon Salt
- 1 teaspoon Active Dry Yeast
- 1 cup Milk, warm (about 105°F to 115°F)
- 1 large Egg
- 2 tablespoons Unsalted Butter, melted
- Extra flour or cornmeal for dusting
Instructions
- In a large bowl, whisk together the flour, sugar, baking soda, and salt.
- In a separate bowl, combine the warm milk, egg, and melted butter. Whisk gently.
- Add the yeast to the milk mixture and let it sit for 5 minutes until slightly foamy.
- Pour the wet ingredients into the dry ingredients. Mix with a wooden spoon until just combined. The batter will be thick and sticky; do not overmix. This is a no-knead recipe.
- Cover the bowl with plastic wrap and let the batter rest in a warm place for 1 hour, or until it has nearly doubled in size.
- Lightly dust a clean surface with flour or cornmeal. Scrape the batter onto the surface. Gently pat or roll the dough to about 1/2 inch thickness.
- Use a 3-inch round cutter (or a glass rim) to cut out the muffins. Do not twist the cutter; press straight down to maintain the edges, which helps create the characteristic sides.
- Lightly dust a baking sheet with cornmeal. Place the cut rounds onto the sheet, leaving space between them. Cover loosely and let them proof for 30 minutes.
- Heat a large, dry cast-iron skillet or griddle over medium-low heat. You do not need oil or butter for this step.
- Carefully place the proofed muffins onto the hot, dry skillet. Cook for 6 to 8 minutes per side until golden brown. The internal temperature will not be fully cooked yet.
- Transfer the partially cooked muffins to a baking sheet. Bake in a preheated oven at 375°F (190°C) for 8 to 10 minutes to finish cooking the center.
- Remove from the oven and cool on a wire rack. To open the nooks and crannies, split them open with a fork rather than slicing with a knife. Toast before serving.
Notes
- For the best nooks and crannies, avoid twisting the cutter when shaping the dough. Press down firmly and lift straight up.
- Cooking on low heat is key; if the heat is too high, the outside will burn before the inside cooks through.
- Serve these homemade English muffins toasted with butter, jam, or use them to build a breakfast sandwich.
Nutrition
- Serving Size: 1 muffin
- Calories: 180
- Sugar: 2
- Sodium: 250
- Fat: 5
- Saturated Fat: 3
- Unsaturated Fat: 2
- Trans Fat: 0
- Carbohydrates: 30
- Fiber: 1
- Protein: 6
- Cholesterol: 30