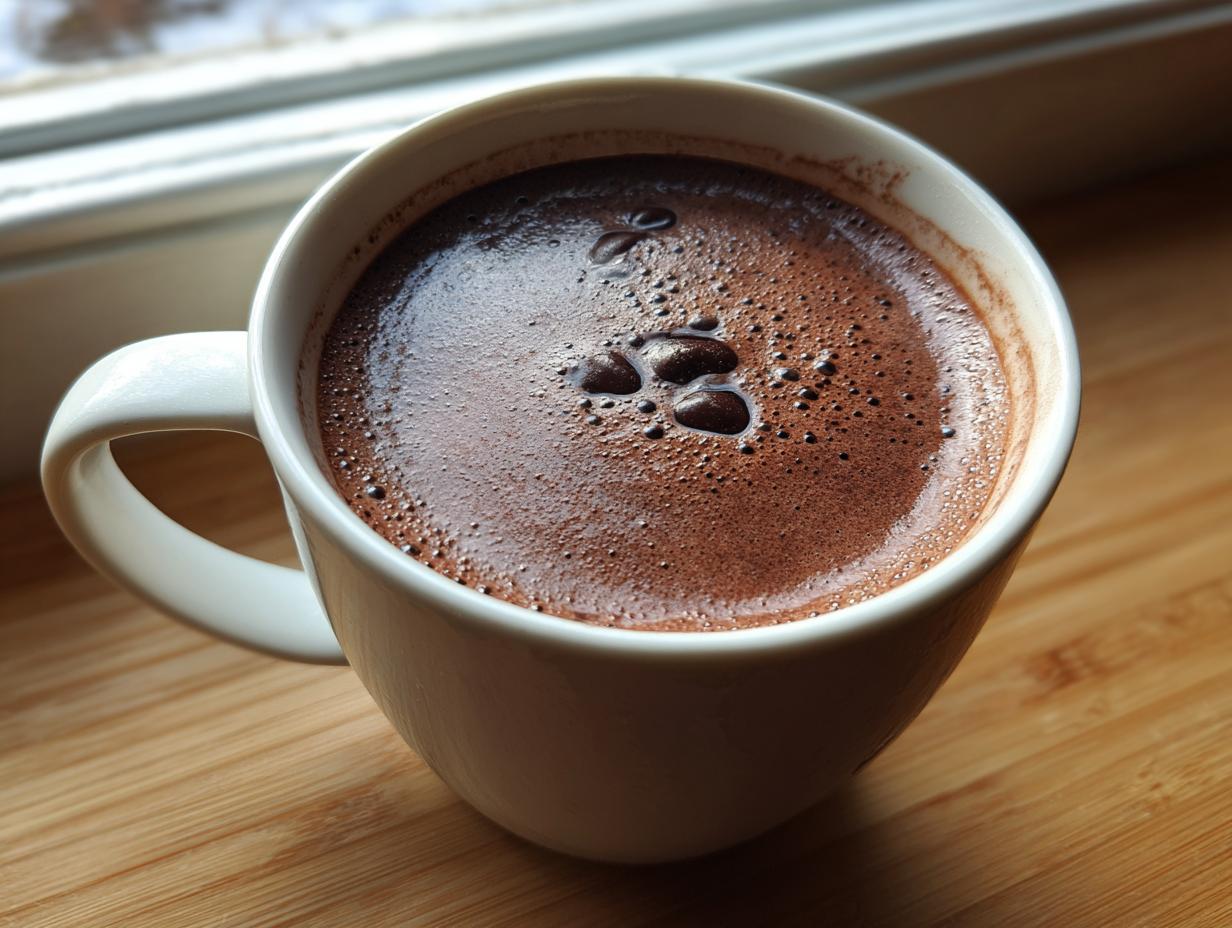

Oh, you know those dreadful little instant packets we all relied on as kids? The ones that turn into watery, dusty brown liquid if you dare look at them too long? I remember grabbing those on rushed mornings, but they just never satisfied that deep, cozy craving. Now, as a home cook, I insist on something truly decadent. That’s why mastering a fantastic homemade hot cocoa that is incredibly rich and creamy hot chocolate became a must for my winter repertoire. It’s about creating that comforting chocolate drink experience from scratch, right on the stovetop. This simple recipe delivers such incredible depth—it’s my go-to way to share a taste of warmth and connection, which, as you know, is everything to me.

- Why This is the Best Homemade Hot Cocoa Recipe You Will Ever Make
- Gathering Ingredients for Your Homemade Hot Cocoa
- Quick Stovetop Instructions for Perfect Homemade Hot Cocoa
- Customizing Your Easy Homemade Hot Cocoa Recipe
- Making Homemade Cocoa Mix Home for Gifting
- Tips for Success When Making Homemade Hot Cocoa
- Storage and Reheating Instructions for Homemade Hot Cocoa
- Frequently Asked Questions About Homemade Hot Cocoa
- Share Your Comforting Chocolate Drink Experience
Why This is the Best Homemade Hot Cocoa Recipe You Will Ever Make
If you’re tired of beverages that taste more like flavored milk than actual dessert, you’ve come to the right spot! We are ditching those instant packets for good. This recipe lets you create a truly decadent hot cocoa that feels luxurious but takes less than 15 minutes. I honestly believe this is the best homemade cocoa from scratch you will ever try. It rivals even the coziest winter warm drinks I’ve ever had, and trust me, I’m very picky about my comfort drinks!
- Achieves a velvety, smooth mouthfeel that mass-produced versions just can’t match.
- Zero preservatives—you control every single wonderful ingredient!
- This is a proper, hot chocolate without packets experience, using high-quality cocoa and real chocolate; it’s an instant upgrade for your tea breaks too!
Key Attributes of Our Rich and Creamy Hot Chocolate
The texture is everything here, isn’t it? We build that rich and creamy factor in two ways: by using both granulated sugar *and* dark brown sugar, which adds subtle caramel depth, and by incorporating actual bittersweet chocolate. Melting that finely chopped chocolate right at the end is my secret weapon for a luxurious, deeply satisfying finish. It moves the drink from ‘nice’ to ‘unforgettable.’

Gathering Ingredients for Your Homemade Hot Cocoa
When making a truly special drink, the quality of your ingredients matters so much. Forget those complicated shopping lists; this homemade hot cocoa relies on simple pantry staples elevated by a couple of rich additions. You’ll notice we are using two types of sugar—that’s part of the flavor magic! Make sure you measure the cocoa powder carefully, as it acts as the foundation.
- 4 cups whole milk (or preferred milk—see notes below!)
- 1/2 cup unsweetened cocoa powder
- 1/2 cup granulated sugar
- 1/4 cup packed light brown sugar
- 1/4 teaspoon salt
- 1 teaspoon vanilla extract
- 2 ounces bittersweet chocolate, finely chopped (this is optional but highly recommended!)
Ingredient Notes and Substitutions for Homemade Hot Cocoa
If you want that truly rich and creamy hot chocolate look, I always suggest using whole milk. It just coats the tongue beautifully. If you need a substitute, oat milk or high-fat canned coconut milk work surprisingly well, though you might need to adjust the sweetness slightly. Now, about texture: if you prefer an almost pudding-like thickness, whisk in 1 tablespoon of cornstarch right with your dry ingredients before you add the liquid. Trust me, that little bit of starch thickens the drink beautifully without affecting the flavor one bit!
Quick Stovetop Instructions for Perfect Homemade Hot Cocoa
This is where the magic happens, and it happens fast! We’re aiming for a totally smooth, velvety sip, which means zero boiling; we just want it steaming hot. This whole process—from the initial whisk to the final pour—takes about 12 minutes total, making it the perfect quick stovetop hot chocolate for when that sudden chill hits. The key, as I tell everyone, is constant movement with your whisk.
- Combine the milk, cocoa powder, granulated sugar, brown sugar, and salt in a medium saucepan.
- Place the saucepan over medium heat. Whisk the mixture constantly until the sugars dissolve and the mixture is smooth. Do not let it boil.
- Continue heating and whisking until the mixture is hot, about 5 to 7 minutes.
- If using, remove the saucepan from the heat and stir in the finely chopped bittersweet chocolate until it melts completely, creating a richer texture.
- Stir in the vanilla extract.
- Pour the homemade hot cocoa into mugs immediately. Serve with your favorite toppings.
Remember to check out my chai spice sugar cookies—they are the absolute best companion for this drink!
Achieving Decadent Richness: Melting the Chocolate
Step number four is critical if you want that “wow” factor. You absolutely must take the pan off the heat before adding the chopped bittersweet chocolate. If you try to melt it while sitting right on the burner, you risk burning the delicate solids in the chocolate, which can make the whole batch taste bitter or grainy. By stirring it in *after* you remove the pan, the residual heat gently melts the chocolate perfectly, giving your homemade hot cocoa that gorgeous, silky body we are aiming for. It truly creates that famous texture you see in the best cafés!
If you want to read more about achieving decadent drinks, you might find this rich and creamy cocoa guide helpful too!
Customizing Your Easy Homemade Hot Cocoa Recipe
One of the best parts about ditching the boxes is getting to play! This easy homemade hot cocoa recipe is a wonderful canvas, and you can really tailor it to whatever mood you’re in. Do you need an extra spark on a gloomy afternoon, or are you looking for something perfectly festive for the holidays? It’s so simple to tweak the flavor profile right before you serve it. Think of it as the easiest way to create your own signature comforting chocolate drink.
For those days when you want to really indulge, I recommend adding a tiny hint of something extra during the final vanilla stir. A delicate pinch of cinnamon goes beautifully with the dark chocolate, or if you’re feeling bold, just a drop or two of peppermint extract turns this into a stunning winter treat. You can even swirl in a splash of orange liqueur if you’re making this for adults later in the evening; it cuts through the richness so nicely!
Ideas for Toppings on Your Homemade Hot Cocoa
You simply can’t have a truly decadent hot cocoa without a beautiful crowning flourish, right? These toppings take your homemade creation from a simple drink to an elegant centerpiece for a cozy moment.
- Fresh Whipped Cream: Skip the pressurized cans! Whipping heavy cream with a touch of powdered sugar creates a cloud of pure goodness that slowly melts into the drink. For a fancy touch, try my recipe for whipped hot chocolate!
- Homemade Marshmallows: If you’ve never made your own marshmallows, you are in for a treat. They are chewy, soft, and dissolve perfectly, unlike the rubbery store-bought kind.
- Chocolate Shavings: Use a vegetable peeler on a good quality dark chocolate bar for delicate little curls to sprinkle on top. It looks so polished!
- A Dusting of Spice: A final, light sifting of high-quality Dutch-process cocoa or even finely ground espresso powder adds aroma and visual appeal.

When you’re customizing, remember that the goal is elegance paired with ease. If you need inspiration for making your drink even better than store-bought versions, take a look at what my friends are doing over at Small Town Scratch—they always have such wonderful, approachable ideas!
Making Homemade Cocoa Mix Home for Gifting
Not every comforting moment needs to happen immediately, right? Sometimes you want that perfect, rich chocolate flavor ready to go, especially when you’re thinking about hostess gifts or teacher appreciation. Learning to make hot cocoa mix at home is a game-changer! It frees you up to simply add hot milk or water whenever a craving strikes. Plus, a pretty jar of homemade cocoa mix makes the most thoughtful little present.
To create a shelf-stable version—so you can actually gift hot cocoa mix—you need to focus purely on the dry ingredients from our main recipe. You want a good ratio of sweeteners to cocoa. So, for one large jar, I generally combine about 2 cups of powdered sugar (I like to use powdered for mixes because it dissolves faster), about 3/4 cup of your unsweetened cocoa powder, and a healthy pinch of salt. Mix that blend really, really well; lumps are the enemy of a good dry mix!
When you package it up—maybe in a cute mason jar with a nice ribbon—you can include a little tag with instructions. Tell them they need about 3 tablespoons of the mix per cup of hot milk. Adding that note makes it feel so much more polished and approachable. It’s a wonderful way to share the joy of our homemade hot cocoa long after the snow melts. Thinking ahead like this is just smart home cooking, and you can find my favorite way to package treats, like my caramel popcorn, in my gifting guide!
For really detailed measurements on keeping the mix perfectly fine and dry for months, I really love the guidance over at Scotch & Scones. Their approach to pantry staples is wonderful.
Tips for Success When Making Homemade Hot Cocoa
Now that you have the basic stovetop recipe down, let’s talk about scaling up and nailing that texture every single time. Even the best recipes need a little nudging sometimes, right? If you are hosting a crowd or just know you are going to want leftovers for easy weekday sipping, these foolproof tips will elevate your homemade hot cocoa game and reinforce that rich, smooth factor.
Remember that cornstarch trick I mentioned? If you want that ultimate velvety feel, I highly suggest adding it. Whisk about one tablespoon of cornstarch into your dry ingredients before the milk goes in. It thickens beautifully without making the chocolate taste starchy. Don’t skip this if you want a truly memorable, decadent sip!
And for larger parties, forget hovering over a small pot! Set up a slow cooker hot cocoa station. Just combine all the basic ingredients—skip the vanilla and the actual chocolate chunks for now—and let it gently heat on low for two hours, stirring every 30 minutes. You can keep it warm all evening! Add the vanilla and the good chocolate right before serving. It’s the easiest way to serve a crowd the best comforting chocolate drink imaginable. For more crowd-pleasing ideas, check out how I handle a big batch when making my slow cooker pot roast!
If you’re looking for external inspiration on the slow cooker method, Crock Cozy has a wonderful guide for keeping that cocoa perfectly tempered for hours!
Storage and Reheating Instructions for Homemade Hot Cocoa
When you make something this delicious, you’ll definitely want leftovers! Since this homemade hot cocoa is made with real milk and real chocolate, we have to treat it a little differently than those shelf-stable mixes. Don’t stress, though; storing and reheating is incredibly straightforward, and we want to make sure you protect that lovely creamy texture we worked so hard to achieve.
For storage, simply pour any unfinished hot chocolate into an airtight container. It keeps beautifully in the refrigerator for up to three days. I’ve found that the flavor actually deepens slightly overnight, which is rather lovely for a quick treat the next morning!
Reheating requires a gentle touch if you want to maintain that smooth body. Do not, under any circumstances, try to microwave a whole pot of it—it gets patchy! Instead, pour the amount you want into a small saucepan. Place it over very low heat. You need to whisk it constantly, just like when you first made it, until it’s steaming hot again. Keep your eyes on it; it gets hot faster the second time around because all those lovely sugars and fats are already dissolved.
If you notice it seems *slightly* thinner than when you first made it (this can sometimes happen with certain kinds of milk), don’t worry! Just whisk in an extra tiny splash of milk or, for a small batch, a quarter teaspoon of cornstarch mixed with a teaspoon of cold water. That will bring that beautiful velvet back instantly. Enjoy that second cup!
Frequently Asked Questions About Homemade Hot Cocoa
I get so many wonderful questions every time I share this recipe, which I love! It just shows how much you all crave a better way to enjoy those cozy moments. Here are some of the most common queries I hear regarding how to achieve the best homemade cocoa from scratch. Don’t hesitate if you have another question—that’s what we’re here for!
Can I make this homemade hot cocoa recipe vegan?
Absolutely, yes! Making this recipe friendly for everyone is easy. The main swap, of course, is your milk; simply use your favorite plant-based milk. Oat milk and soy milk tend to yield the best creaminess, similar to whole dairy milk. For the chocolate, you must ensure the 2 ounces of bittersweet melting chocolate you add are dairy-free. Many high-quality dark chocolates are naturally dairy-free, but always check the label for butterfat or milk solids!
What is the secret to making this rich and creamy hot chocolate?
If you only take away two things from this entire post, let them be these secrets to that gorgeous texture! First, it’s adding those 2 ounces of finely chopped bittersweet chocolate right after you take the saucepan off the heat. That melts in to create a real chocolate base instead of just relying on powder. Second, don’t forget the optional tip about the cornstarch! Whisking just one tablespoon of cornstarch in with the dry ingredients creates a beautiful, thickened body without making it taste gummy. That combination provides the ultimate rich and creamy hot chocolate.

On the topic of perfecting recipes, perhaps you’ll enjoy adapting these principles when you make my pumpkin coffee cake recipe; technique is everything!
Can I use water instead of milk for this homemade hot cocoa?
Well, you *can*, but I really wouldn’t recommend it if you are seeking that luxurious, decadent hot cocoa experience we talked about. Using water creates a thin, watery beverage that tastes much more like hot chocolate syrup than a true homemade drink. If you absolutely must use water, I strongly suggest doubling the amount of chopped chocolate *and* using the cornstarch trick to give it some body. But for the best results, stick to milk or a creamy alternative!
How quickly can I make this easy homemade hot cocoa recipe?
I call this my 10-minute wonder! If you have your ingredients ready, the easy homemade hot cocoa recipe should take you only about 5 minutes to whisk together on the stovetop until hot, plus the extra minute or two for the chocolate to melt. It’s one of the fastest ways to get a superior comforting chocolate drink when you need it most. It’s perfect for a quick afternoon treat!
Share Your Comforting Chocolate Drink Experience
Now that you have the tools to ditch those dusty, disappointing packets forever, I truly hope you give this homemade hot cocoa a try the next time you need a little warmth in your mug. There is such joy in creating something this deliciously simple right on your own stovetop. It’s an act of self-care, really!
I would absolutely love to hear about your experience bringing this rich and creamy hot chocolate into your home. Did you try the cornstarch trick for extra velvetiness? Did you add a dash of cinnamon or perhaps a homemade marshmallow cloud on top? Please come back, leave a comment below, and let me know how it tasted. Knowing that this recipe brings a moment of true comfort to your day is what inspires me to keep sharing these stories and culinary creations from my kitchen to yours.
For more warmth and inspiration throughout the year, don’t forget to check out all the other recipes waiting for you on the main Unfold Recipes blog page. Happy sipping!
PrintRich and Creamy Homemade Hot Cocoa: Ditch the Packets

Learn how to make truly decadent homemade hot cocoa on your stovetop. This easy recipe delivers a rich, smooth, and comforting chocolate drink that tastes far better than any store-bought mix.
- Prep Time: 5 min
- Cook Time: 7 min
- Total Time: 12 min
- Yield: 4 servings 1x
- Category: Beverage
- Method: Stovetop
- Cuisine: American
- Diet: Vegetarian
Ingredients
- 4 cups whole milk (or preferred milk)
- 1/2 cup unsweetened cocoa powder
- 1/2 cup granulated sugar
- 1/4 cup packed light brown sugar
- 1/4 teaspoon salt
- 1 teaspoon vanilla extract
- 2 ounces bittersweet chocolate, finely chopped (optional, for extra richness)
Instructions
- Combine the milk, cocoa powder, granulated sugar, brown sugar, and salt in a medium saucepan.
- Place the saucepan over medium heat. Whisk the mixture constantly until the sugars dissolve and the mixture is smooth. Do not let it boil.
- Continue heating and whisking until the mixture is hot, about 5 to 7 minutes.
- If using, remove the saucepan from the heat and stir in the finely chopped bittersweet chocolate until it melts completely, creating a richer texture.
- Stir in the vanilla extract.
- Pour the homemade hot cocoa into mugs immediately. Serve with your favorite toppings.
Notes
- For a thicker, more decadent texture, whisk in 1 tablespoon of cornstarch with the dry ingredients before adding the milk.
- Customize your drink by adding a pinch of cinnamon or a drop of peppermint extract with the vanilla.
- Top with fresh whipped cream or homemade marshmallows for the ultimate comforting chocolate drink experience.
- To make a large batch for a gathering, use the slow cooker method: combine all ingredients (except vanilla) in the crockpot on low for 2 hours, stirring occasionally. Add vanilla before serving.
Nutrition
- Serving Size: 1 cup
- Calories: 250
- Sugar: 35g
- Sodium: 150mg
- Fat: 8g
- Saturated Fat: 5g
- Unsaturated Fat: 3g
- Trans Fat: 0g
- Carbohydrates: 40g
- Fiber: 4g
- Protein: 8g
- Cholesterol: 20mg