

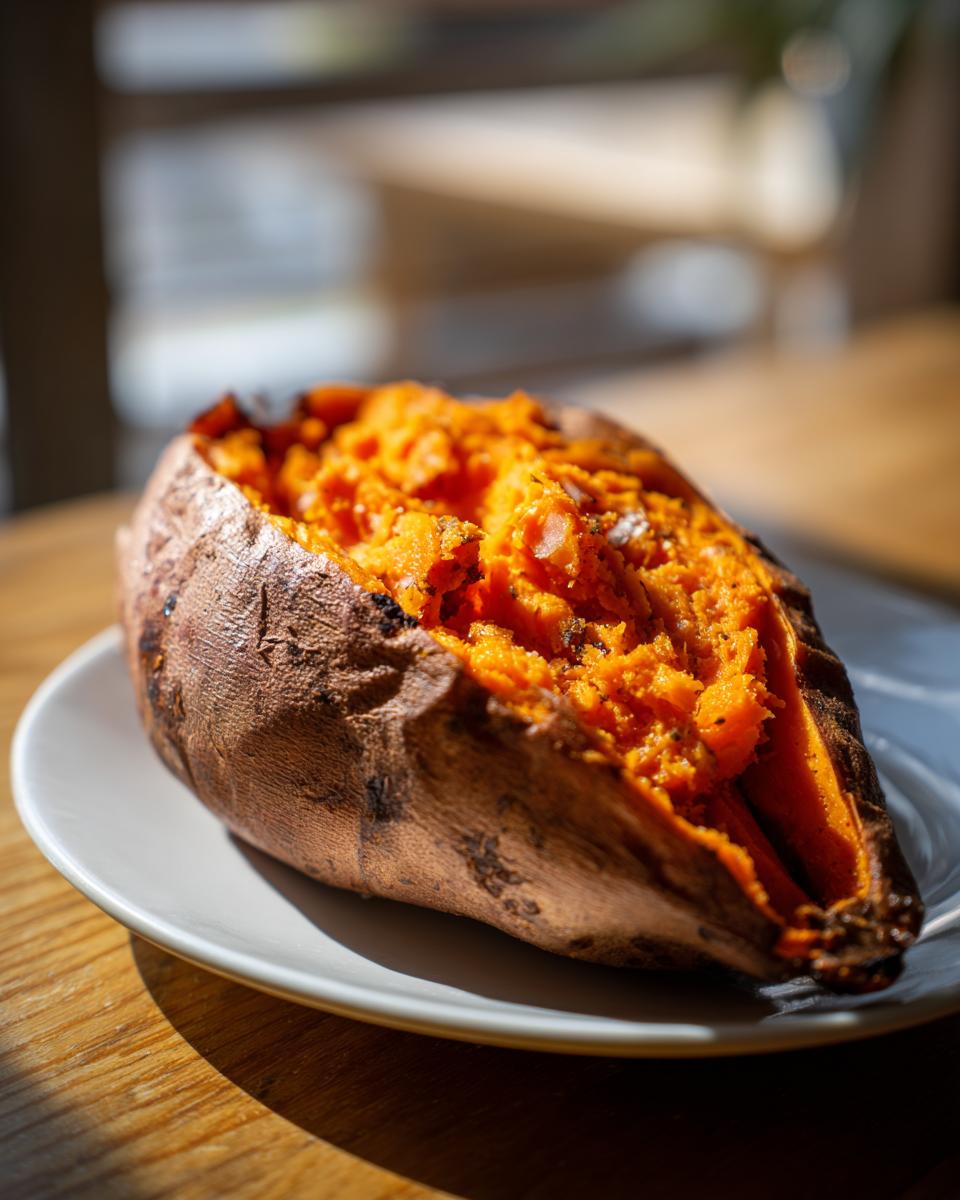
Oh, the humble sweet potato! It seems so simple, right? But honestly, getting that perfect contrast—a skin that crackles just a little when you press it, giving way to the most unbelievably fluffy, sweet interior—that’s where so many people go wrong. I’m here to whisk away any frustration because I’ve cracked the code. This foolproof oven method guarantees you a melt-in-your-mouth, **baked sweet potato** with a beautifully caramelized, crispy skin every single time. You see, true approachable elegance in the kitchen starts with mastering the staples, and mastering the baked sweet potato is the foundation for so many delicious fall and holiday dishes!
- Why This is the Perfect Baked Sweet Potato Method (E-E-A-T)
- Ingredients for Your Ultimate Baked Sweet Potato
- How to Prepare the Perfect Baked Sweet Potato in the Oven
- Tips for Success When Making a Baked Sweet Potato
- Making Meal Prep Sweet Potatoes: Storage and Reheating
- Serving Suggestions for Your Baked Sweet Potato Side Dish
- Frequently Asked Questions About How to Bake Sweet Potatoes
- Pairing Your Baked Sweet Potato with Other Dishes
- Sharing Your Perfect Baked Sweet Potato Creation
Why This is the Perfect Baked Sweet Potato Method (E-E-A-T)
I put this easy oven sweet potato recipe through the wringer before I’d ever put it on this blog. When I promise you the perfect baked sweet potato, I mean it! The secret really lies in how the potato interacts with the heat. We are skipping the foil wrap entirely because the foil traps steam. And what does steam do? It steams the skin, leaving you with a soft, floppy texture. No thank you!
By rubbing the potato with just a touch of oil and salt and placing it directly onto the center rack, we let the dry, high heat of the oven do its job. This is how you force all that wonderful moisture inward, creating that amazing, fluffy sweet potato inside we all crave. This method is reliable, I promise, and it brings out the natural caramelization beautifully.

Achieving a Crispy Skin Baked Sweet Potato
If you want skin that snaps, ditch the foil. That shiny aluminum packet is just going to bake the skin right into submission, making it rubbery. By letting the potato sit naked on the rack, the olive oil and coarse salt we rub on the outside help create a slight barrier. The direct heat then crisps up that salty skin while the inside steams itself perfectly. It’s science, but it feels like magic!
If you’re ever curious about the science behind other baking projects, you can always explore more of my tips over on the recipe blog, but for sweet potatoes, this is the only way to go!
Ingredients for Your Ultimate Baked Sweet Potato
When we talk about simplicity, this list right here is proof! You don’t need a pantry full of fancy things to get the very best results. To make four of these beauties—which takes just about 5 minutes of prep time before they head into the oven for 50 minutes—you only need four main items. Remember, these exact measurements are what give you that wonderful, tender baked vegetable result we’re aiming for.
- 4 medium sweet potatoes, scrubbed spotless!
- 1 tablespoon olive oil (this is non-negotiable!)
- 1 teaspoon coarse salt
- 1/2 teaspoon black pepper
Ingredient Notes and Substitutions for Baked Sweet Potato
Choosing the right potato matters way more than you think. Skip those giant ones; they always cook unevenly and end up dry in spots. I always stick to medium-sized potatoes because they fit beautifully on the oven rack and cook through perfectly in that 45 to 60-minute window. And please, don’t try to swap the olive oil for cooking spray here, okay? That oil coating is what helps dry the skin out and create that gorgeous, almost caramelized layer. If you are absolutely out of coarse salt, standard table salt works, but use a little less, as it’s much saltier by volume.
How to Prepare the Perfect Baked Sweet Potato in the Oven
Alright, let’s get down to business. If you’re following along, you’re about to master the easy oven sweet potato recipe that will replace every other messy method you’ve tried. Everything starts with heat control, so crank that oven up! Preheat it to 400 degrees Fahrenheit. I know some people go hotter, but trust me, 400°F gives us time to develop that fluffy interior before the outside burns.
Next step is super important, so listen up! Take a sturdy fork—not one of those flimsy ones—I need you to aggressively prick each sweet potato. Seriously, poke it multiple times all over its surface. If you skip this step, the steam builds up and you risk a very sad, exploding potato situation. Oops! We want those vents so the internal steam can escape gently.

- Take those scrubbed potatoes and rub them down completely with the olive oil. Don’t be shy; you want a thin, even coat.
- Sprinkle them generously with that coarse salt and pepper. This is what helps the skin get that incredible texture.
- Place them right on the center oven rack. No baking sheet needed! We need zero interference between the heat and the skin.
Now, they just cook! Once they are done, you’ll slice them open lengthwise. Take a fork and gently fluff up that steaming orange flesh until it looks like a cloud. Then, head right over to my side dishes collection for pairing ideas, because these potatoes are begging to be served!
Sweet Potato Baking Time and Temperature Guide
Figuring out the exact sweet potato baking time and temperature can be tricky because no two sweet potatoes are exactly the same size, right? We set the temperature at 400 degrees Fahrenheit, which is our magic number for crispy skin and tender centers. For medium-sized potatoes, which I highly recommend, plan on about 45 to 60 minutes. Larger ones might creep closer to 70 minutes. The best test isn’t the clock, though—it’s the fork. If your fork slides into the middle with absolutely no resistance at all, they are ready. If you feel any hard spots, just let them hang out for an extra 5 to 10 minutes!
Tips for Success When Making a Baked Sweet Potato
Even though this is a simple recipe, the little details make the difference between a good sweet potato and a truly spectacular one—that perfect, tender baked vegetable experience! I have a few extra tricks up my sleeve that take this beyond just throwing a potato in the oven. These are the things I do every single time to ensure success, especially if I’m making them for company.
First, let’s talk about cooling down. Once they come out of the oven, don’t let them just sit there on the counter cooling down naturally. While they are still piping hot, slice them barely open—just enough to vent—and let them sit on an open cooling rack or even a wire trivet for about five minutes before you try to fluff them. This lets the last bit of excess internal steam escape without immediately softening that beautiful crispy skin we worked so hard to create. It’s a small pause that makes a huge difference.
Second, for the fluffiest interior flesh, you absolutely must use a fork to fluff *while it’s hot*. The texture of the starch changes as it cools, and if you wait even ten minutes, it gets gummi and dense instead of light and airy. You need to break up those fibers while the natural sugars are still hot and yielding. Seriously, grab your butter and salt and get ready to serve right away!
And one final pro tip—and this is something I learned from my culinary school days—if you are serving these particularly large ones that took almost an hour, after you take them out and pierce them, you can give them a little squish right at the ends. Don’t smash them flat, just a gentle press to break up some of the internal structure. This helps expose the flesh to cooler air, allowing it to fluff up immediately for that cloud-like texture. If you’re looking for more inspiration on baking without stress, check out my recipe for pumpkin dump cake; it’s all about maximizing flavor with minimal fuss!
Making Meal Prep Sweet Potatoes: Storage and Reheating
I love that so many of you are using this recipe for meal prep sweet potatoes! It makes those busy weeknights so much smoother when you have a healthy side dish ready to go. The key here is storage effectiveness. If you bake the potatoes whole, just as the recipe directs—skin and all—they keep really well in the fridge for up to four days. Just make sure you let them cool down completely before you seal them up in an airtight container or a zip-top bag. Don’t try to store them warm; that traps moisture and defeats our entire purpose of having a crispy skin!
When it’s time to reheat them, you have two options, but one is definitely superior for texture. If you’re in a gigantic rush, the microwave works, but be warned: it will soften that skin right up. If you want that glorious crispy skin and fluffy interior back, you need the oven or even an air fryer!
Pop the whole potato back into a 375-degree oven for about 10 to 15 minutes, or until it’s heated all the way through. If you really want to revive that crispness, pop it directly on the rack like we did initially. It’s minimal effort for maximum payoff!
Serving Suggestions for Your Baked Sweet Potato Side Dish
See, a perfectly cooked baked sweet potato is so much more than just a side! It’s a canvas, really. Once you nail the texture, you can go sweet, you can go savory, or you can dive headfirst into creating some truly spectacular healthy stuffed sweet potato ideas for dinner. Because this is such a clean and reliable base, it pairs well with everything from rich roasts to simple greens. You’ll find that this becomes your go-to sweet potato side dish all year long.
If you’re looking for something fresh to balance out a heavy meal, try serving these right alongside a bright seasonal salad—maybe something like my fall harvest salad. The earthiness of the sweet potato just sings next to crisp apples and sharp vinaigrette.
Elevating Your Baked Sweet Potato with Caramelized Toppings
If you want to lean into that natural sweetness and really emphasize that lovely caramelized exterior we worked so hard for, you must try cinnamon butter. It sounds basic, but trust me on this: take some softened butter, mix in a heavy dash of cinnamon and maybe just a tiny drizzle of maple syrup or honey, and let it melt right into the hot fluffiness. Wow! It’s ridiculously good, warm, and comforting.
But don’t stop at sweet if you don’t want to! For savory twists that still play up the caramel notes, try topping half of your potatoes with a bit of crumbled goat cheese and some fresh rosemary or chives. The tangy cheese melting into that sweet, soft orange flesh is just divine. If you want to go all out for a proper meal, you can load them up with pulled pork or even black beans and avocado. The options are endless once you have that perfect base!
Frequently Asked Questions About How to Bake Sweet Potatoes
I know sometimes watching me go on about olive oil ratios might make you think, but what if I need things faster? Or what if I don’t have time for the whole rigamarole? Don’t worry, I get it! We all have those nights where we need a quick, tender baked vegetable on the table, and I’ve gathered the most common questions I get about this absolute staple side dish.
Should I wrap my baked sweet potato in foil?
This is the number one question, and my answer is a firm no—if you want that crispy skin! Wrapping it in foil traps all the moisture inside, which basically steams the potato. You end up with a soft, slightly rubbery skin and an interior that’s creamy, sure, but it won’t have that glorious fluffy texture we are chasing here. If you prefer a softer skin, though, go ahead and wrap it loosely right before it goes in the oven; just know you’re sacrificing the crispness!
Can I microwave sweet potatoes instead of baking them?
Oh, absolutely you can if you are crunched for time! Microwaving is the fastest way to cook a potato, hands down. It works perfectly fine for the inner flesh, giving you that soft center fast. Honestly, I use this trick if I’m making sweet potato mash later or if I plan on turning them into one of those healthy stuffed sweet potato ideas where the skin isn’t the star. But, and this is a big but, the microwave does nothing for the skin. If you want crisp skin, you must use the oven method we just discussed.
What is the best temperature for a baked sweet potato?
For the ideal balance of skin crispness and interior fluffiness, stick to 400 degrees Fahrenheit. I find that anything much lower and it takes forever to get that skin nicely textured. Anything significantly higher, like 425°F or 450°F, and the exterior risks burning before the center is fully cooked, leaving you with a dry ring around a hot middle. 400°F gives you that perfect sweet spot for that perfect baked sweet potato!
How do I ensure I get a fluffy sweet potato inside?
It’s truly a combination of things! First, the pricking—that lets steam escape so the flesh dries out slightly inside, making it light. Second, don’t overcook it! The second you take it out, cut it open and fluff that flesh vigorously with a fork right away. If you wait for it to cool down even a tiny bit, that starch tightens up, and you lose the fluff. The whole point of this how to bake sweet potatoes lesson is that the inside should look almost whipped when you’re done!
Can this seasoning work for regular white potatoes?
You know, I love a good experiment! The olive oil, salt, and pepper combination works wonderfully on Russets or Yukon Golds too, especially if you’re aiming for that crispy skin texture. The only difference is that regular potatoes have much more starch and less natural sugar, so you won’t get the caramelized edges you see on the sweet potato. But yes, use this technique anytime you want a crispy-skinned baked potato side dish!
Pairing Your Baked Sweet Potato with Other Dishes
Now that you have mastered this incredibly easy base—the perfectly fluffy and slightly salty baked sweet potato—the fun really begins! Half the battle of hosting or even just planning weeknight dinners is knowing what goes well next to that star side dish. You don’t want everything to taste the same, so we need variety in texture and flavor. This simple preparation means it works beautifully whether you are planning for a massive spread of holiday side dish recipes or just need an easy vegetable pairing for Tuesday night.
Because my style centers on approachable elegance, I always look for pairings that offer balance. If your main course is rich—say, a slow-roasted pork shoulder—you need something acidic or bright to cut through the fat. If you’re starting to think about your larger meal planning strategy for the week, remember that these potatoes are fantastic anchors for almost any protein.
For a simple, comforting weeknight feel, I often serve these alongside my chicken gnocchi soup. It’s a great contrast: creamy, savory soup next to the sweet, fluffy potato. If you want more inspiration on timing out a full menu, I always peek at other reliable roasting guides, like this one on how to bake sweet potatoes, just to sanity-check my timing when scaling up for a crowd.
When it comes to using these for the holidays, consider them the slightly healthier, cooler cousin to the traditional sweet potato casserole. They shine next to roasted turkey or ham. Just a little drizzle of honey on the potato and you’re done! Effortless, truly.
Elevating Your Baked Sweet Potato with Caramelized Toppings
We talked briefly about toppings, but I want to focus here on how to layer flavors so you get that beautiful caramelized hit right when you take a bite. That salty, crispy skin really sets the stage for toppings that enhance the sweetness without overpowering it.
The absolute winner is always a compound butter. Just whip up softened butter with a pinch of brown sugar, a dash of cinnamon, and a tiny bit of vanilla. Scoop a small dollop right on top of the steaming hot flesh. As it melts, it pools down into the crevices, creating a little pocket of warm, gooey goodness that tastes exactly like autumn.

If you want to push the savory side while keeping that sweet note, try goat cheese, crumbled bacon, and a sprinkle of fresh thyme. The saltiness of the bacon and the tang of the cheese contrast so perfectly with the inherent sweetness of the potato. It turns a simple baked sweet potato into something you’d be proud to serve at any gathering!
Sharing Your Perfect Baked Sweet Potato Creation
Well, there you have it! We’ve gone from a plain, firm vegetable washed under the sink to achieving the fluffiest, most perfectly seasoned baked sweet potato you’ve ever made at home. Doesn’t that feel great? As a home cook who believes food should tell a story, I truly hope this recipe becomes a great chapter in your own kitchen narrative!
I always want to hear about how you made this recipe your own. Did you stick strictly to the salt and pepper, or did you try one of those savory cheese combinations? I put so much heart into testing this foolproof method, but the real joy is seeing you all succeed!
Please take a moment and let me know what you loved most about achieving that crispy skin and tender interior. Leave a rating right here on the recipe card—it helps other cooks feel confident trying it out! And if you feel inspired, don’t hesitate to reach out with questions or suggestions through my contact page. Happy baking, friends! I’m already looking forward to hearing about the amazing toppings you chose for your next batch!
PrintThe Ultimate Fluffy Baked Sweet Potato: Foolproof Oven Method (Crispy Skin Guaranteed)

Learn the simple, no-fuss method to bake sweet potatoes in the oven for a perfectly fluffy interior and caramelized, crispy skin. This recipe is a reliable side dish for weeknight dinners or holiday meals.
- Prep Time: 5 min
- Cook Time: 50 min
- Total Time: 55 min
- Yield: 4 servings 1x
- Category: Side Dish
- Method: Baking
- Cuisine: American
- Diet: Vegetarian
Ingredients
- 4 medium sweet potatoes, scrubbed clean
- 1 tablespoon olive oil
- 1 teaspoon coarse salt
- 1/2 teaspoon black pepper
Instructions
- Preheat your oven to 400 degrees Fahrenheit (200 degrees Celsius).
- Prick each sweet potato several times deeply all over with a fork. This allows steam to escape.
- Rub the entire surface of each potato with olive oil.
- Sprinkle the potatoes evenly with coarse salt and black pepper.
- Place the seasoned potatoes directly onto the center oven rack. Do not use foil for the crispiest skin.
- Bake for 45 to 60 minutes, depending on the size of the potatoes. Larger potatoes require more time.
- The potatoes are done when the skin is slightly wrinkled and crispy, and you can easily pierce the center with a fork.
- Remove from the oven. Slice open lengthwise and fluff the inside flesh with a fork. Serve immediately with your preferred toppings.
Notes
- For meal prep, bake the potatoes ahead of time. Store them whole in the refrigerator for up to 4 days. Reheat in the oven or microwave.
- If you prefer a softer skin, you may wrap the potatoes loosely in foil before baking. This will increase the cook time slightly.
- Toppings ideas include cinnamon butter, a drizzle of honey, Greek yogurt, or savory additions like goat cheese and chives.
- This simple preparation makes it a great base for healthy stuffed sweet potato ideas.
Nutrition
- Serving Size: 1 medium potato
- Calories: 180
- Sugar: 13
- Sodium: 230
- Fat: 5
- Saturated Fat: 1
- Unsaturated Fat: 4
- Trans Fat: 0
- Carbohydrates: 35
- Fiber: 6
- Protein: 3
- Cholesterol: 0