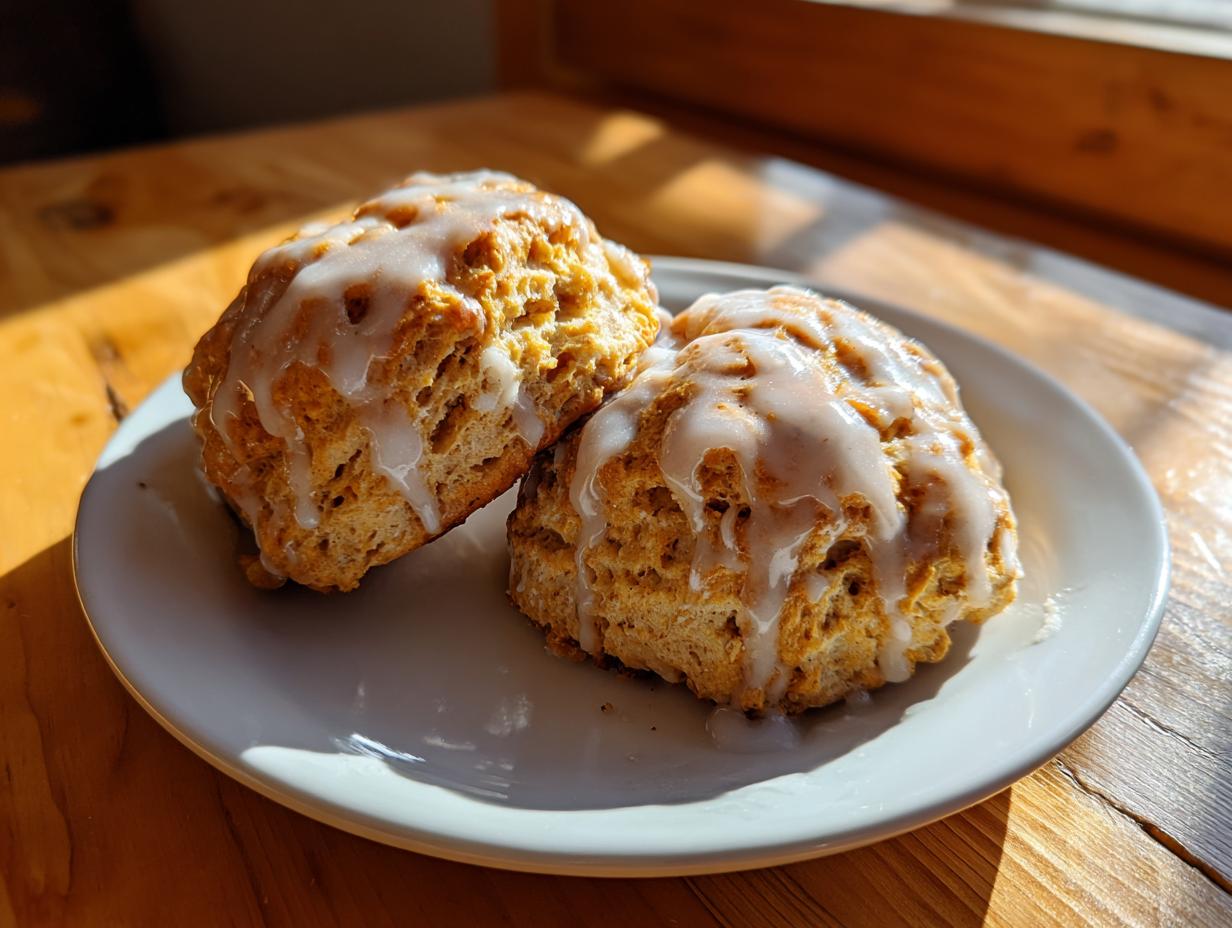

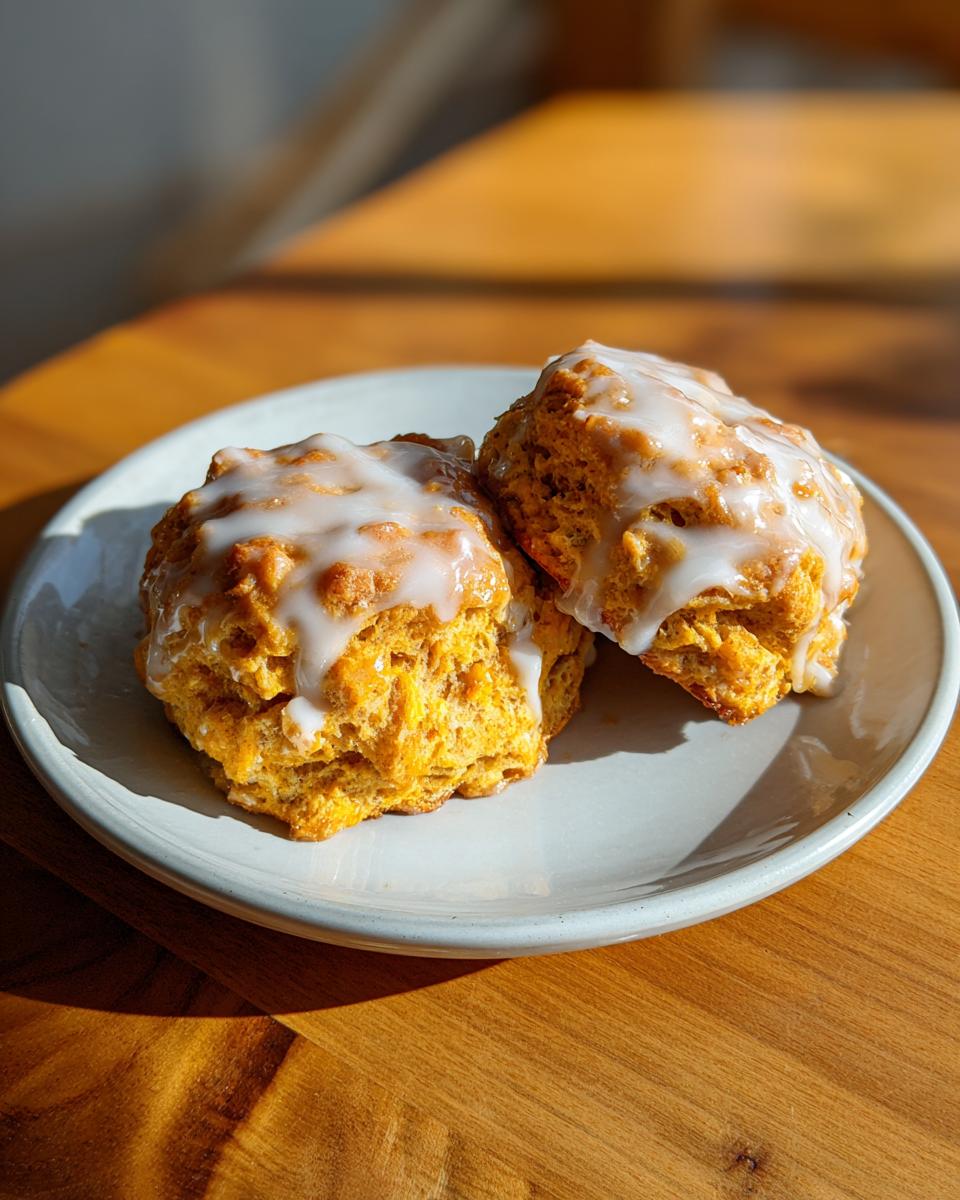
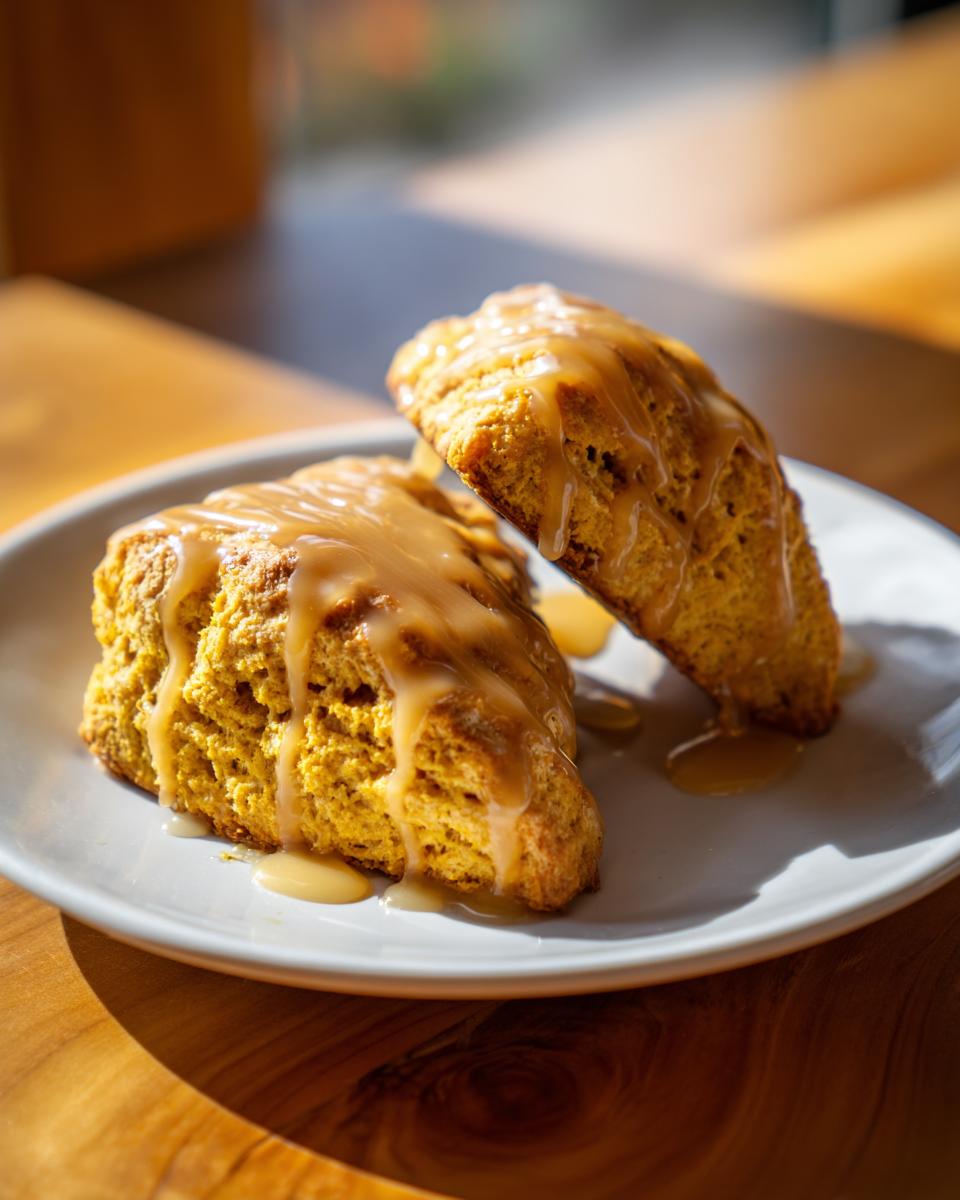
Oh, hello there! Can you just *feel* it? That crisp autumn air, the leaves turning those gorgeous shades of red and gold? It just makes me want to wrap myself in a cozy sweater and bake something warm and wonderful. And for me, nothing screams fall quite like these incredible pumpkin scones with maple glaze. Seriously, they taste just like the ones from your favorite coffee shop, but even better because *you* made them! I remember the first time I tried to make them, hoping to capture that coffee shop magic, and let me tell you, the smell that filled my kitchen was pure autumn bliss. They’re everything you want: tender, flaky, packed with that lovely pumpkin spice flavor, and finished with a sweet, glossy maple glaze. Trust me, this recipe is going to be your new fall favorite!
- Why You'll Love These Pumpkin Scones with Maple Glaze
- Gather Your Ingredients for Perfect Pumpkin Scones with Maple Glaze
- Mastering the Art of Pumpkin Scones with Maple Glaze: Step-by-Step
- Tips for Achieving Bakery-Quality Pumpkin Scones with Maple Glaze
- Variations and Serving Suggestions for Your Pumpkin Scones
- Storing and Freezing Your Pumpkin Scones with Maple Glaze
- Frequently Asked Questions About Pumpkin Scones
- Estimated Nutritional Information
- Share Your Cozy Fall Baking Creations!
Why You’ll Love These Pumpkin Scones with Maple Glaze
Get ready to fall in love with these! They’re:
- Perfectly Tender & Flaky: Seriously, the texture is spot-on, just like the best coffee shop copycat scones you’ve ever had.
- Bursting with Fall Flavor: That lovely pumpkin and spice combo is pure autumn in every bite.
- So Easy to Make: Even if you’re new to scones, this recipe is super straightforward.
- Cozy Fall Baking Perfection: They’re ideal for a relaxing weekend or as part of your thanksgiving brunch ideas.
- Visually Delightful: They totally nail that gorgeous autumn pastry aesthetic!
Gather Your Ingredients for Perfect Pumpkin Scones with Maple Glaze
Alright, let’s get down to business with what you’ll need to make these amazing pumpkin scones with maple glaze. Having everything prepped and ready makes the whole baking process so much smoother, trust me!
For the scones themselves, we’re going to start with:
- 2 cups of all-purpose flour – this is our sturdy base.
- 1/4 cup of granulated sugar, just to give them a touch of sweetness.
- 2 teaspoons of baking powder, which is our secret to getting them nice and puffy!
- Get your spice rack ready! We need 1/2 teaspoon of cinnamon, 1/4 teaspoon of nutmeg, and another 1/4 teaspoon of ginger. Don’t forget that crucial 1/4 teaspoon of salt to balance everything out.
- Now for the magic ingredients: 1/2 cup (that’s one stick) of nice, COLD unsalted butter, cut into little cubes. Keeping it cold is super important for flaky scones, so don’t skip this!
- We need 1/2 cup of pumpkin puree – make sure it’s just plain pumpkin puree, NOT pumpkin pie filling. That stuff has extra sugar and spices we don’t need here.
- 1/4 cup of heavy cream – this adds such a lovely richness.
- One large egg, for binding everything together.
- And finally, 1 teaspoon of vanilla extract to round out all those warm flavors.
And for that glorious, glossy maple glaze:
- 1 cup of powdered sugar – sift it if you can, it makes for a smoother glaze.
- 2 tablespoons of real maple syrup. Use the good stuff, it makes all the difference!
- 1 to 2 tablespoons of milk or extra cream, depending on how thick you like your glaze. We’ll add this bit by bit until it’s just right for drizzling.
Mastering the Art of Pumpkin Scones with Maple Glaze: Step-by-Step
Okay, so now that we’ve got all our goodies gathered, let’s get down to the fun part: making these incredible pumpkin scones with maple glaze! It’s really not as tricky as it might sound, and I promise, the results are so worth it. We’ll break it all down so you can get that perfect, tender crumb every single time. If you loved my fluffy pumpkin pancakes, you’re going to adore these scones even more!
Preparing the Scone Dough for Optimal Texture
First things first, preheat your oven to a nice 400°F (200°C). While that’s warming up, line a baking sheet with parchment paper. This is seriously a game-changer for easy cleanup and making sure those precious scones don’t stick!
In a big bowl, whisk together your flour, sugar, baking powder, those warm spices (cinnamon, nutmeg, ginger!), and salt. Give it a good stir so everything is evenly distributed. Now, take your super-duper cold butter cubes and toss them in. I like to use my fingertips or a pastry blender for this, and you want to work the butter into the flour until it looks like coarse crumbs with a few little pea-sized bits of butter still hanging out. Those little butter pockets are essential for those flaky layers, so don’t go crazy trying to make it all disappear! This is key to remembering
In a separate smaller bowl, whisk together the pumpkin puree, heavy cream, that egg, and the vanilla. Then, pour all those lovely wet ingredients into your crummy dry ingredients. Use a fork to gently mix everything until it *just* comes together. Seriously, just until there are no dry spots left. The dough will look pretty shaggy and messy, and that’s exactly what we want! Overmixing here is the fastest way to tough scones, so resist the urge!
Shaping and Baking Your Pumpkin Scones
Turn that shaggy dough out onto a lightly floured surface. Pat it gently into a round shape, about 3/4 of an inch thick. Don’t knead it like bread; we’re just bringing it together. Think of it more like persuading it into shape. Then, use a sharp knife or a bench scraper to cut that round into 8 wedges, just like slicing a pizza. You want to get that perfect coffee shop copycat look, right?
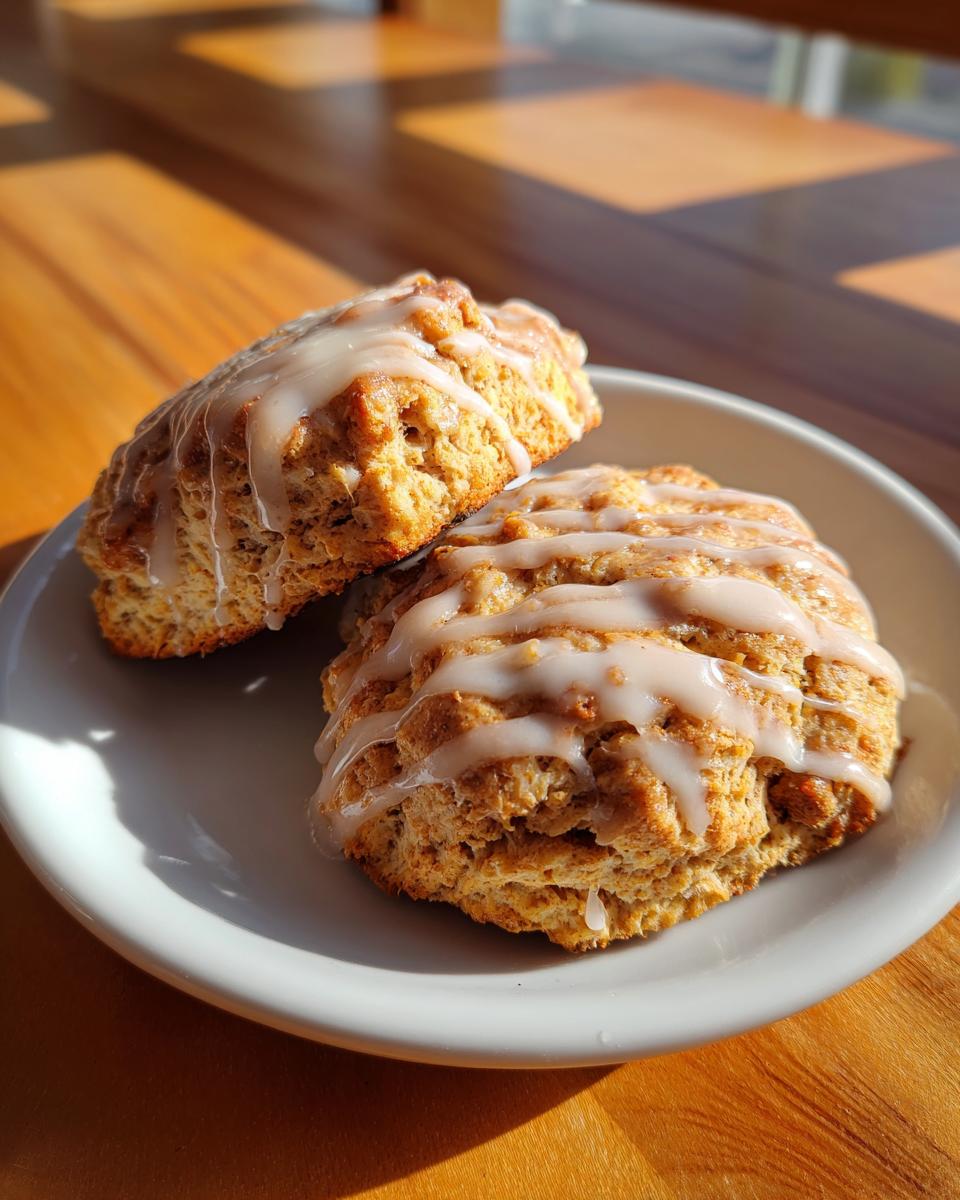
Carefully place your scone wedges onto that prepared baking sheet, leaving a little bit of space between each one. Pop them into your preheated oven and bake for about 15 to 18 minutes. You’re looking for them to be lightly golden brown on top and cooked through. They’ll smell absolutely divine! Once they’re done, let them cool on the baking sheet for a few minutes before carefully transferring them to a wire rack to cool down completely. You *have* to let them cool before glazing, otherwise, as you can imagine, it’ll just melt right off!
Crafting the Perfect Maple Glaze for Scones
While our scones are cooling, let’s whip up that dreamy maple glaze. It’s super simple! Grab a medium bowl and whisk together the powdered sugar and the maple syrup. Start with that. It’ll probably look quite thick, and that’s okay!
Now, add your milk or cream, starting with just one tablespoon. Whisk it in until it’s smooth. If it’s still too thick for your liking, add another tablespoon, a little bit at a time, whisking after each addition. You’re aiming for a glaze that’s thick enough to coat the back of a spoon but thin enough to drizzle nicely over the scones. Getting the maple glaze for scones ratio just right is all about adding that liquid slowly! Once it’s the perfect drizzling consistency, you’re ready to go!
Tips for Achieving Bakery-Quality Pumpkin Scones with Maple Glaze
You know, I’ve learned a few tricks over the years that really make a difference when it comes to getting these pumpkin scones with maple glaze just right – that perfect coffee-shop texture that’s hard to beat. It’s all about a few key techniques that I’ve picked up, even from working on my moist pumpkin bread recipe. Let’s dive into the secrets!
Cold Ingredients are Key for Flaky Pumpkin Scones
Seriously, this is non-negotiable! Make sure your butter is *ice cold* right from the fridge, and even chilling your heavy cream and egg for a bit doesn’t hurt. When that cold butter hits the hot oven, it melts and creates steam pockets, which is exactly what gives you those glorious, flaky layers. If your butter is even a little soft, you just won’t get that same lift and tenderness. It’s like magic, but science!
The Art of Minimal Dough Handling
This is another big one! Scone dough is a bit delicate. When you mix in the wet ingredients, stop *as soon as* it’s just combined. You want a shaggy dough, not a smooth ball. And when you bring it together to shape it, be gentle! Overworking the dough, or too much kneading, develops the gluten too much, and that’s what turns your tender scones into tough little rocks. We’re going for fluffy and tender, not chewy!
Variations and Serving Suggestions for Your Pumpkin Scones
These pumpkin scones with maple glaze are pretty darn perfect as they are, but you know me, I love to play around a bit! If you’re feeling adventurous, or just want to switch things up, there are tons of fun ways to make them your own. Think of it as adding your own little touch of autumn magic to the cozy fall baking vibe.
Want a little crunch? Try adding about 1/2 cup of chopped pecans or walnuts right into the dough with the dry ingredients. They bake up beautifully and give you a nice contrast in texture. If you’re a big fan of spices, you could even amp up the cinnamon a bit, or add a pinch of cloves for extra warmth. For a real twist, maybe try adding a tablespoon of pumpkin pie spice to the dry ingredients instead of individual spices – instant flavor boost! They remind me a little of my pumpkin spice cake, but in scone form!
And serving them? Oh, they’re best warm, of course! They are absolutely divine with a hot cup of coffee or a creamy latte. They also make a wonderful addition to a Thanksgiving brunch spread, or just a lovely treat to enjoy with a cup of tea while you’re admiring the autumn pastry aesthetic. Honestly, they pair perfectly with a warm drink, much like my pumpkin snickerdoodle cookies do. They’re perfect any time you need a little taste of fall!
Storing and Freezing Your Pumpkin Scones with Maple Glaze
So, you’ve made these incredible pumpkin scones with maple glaze, and maybe, just *maybe*, you have a few leftovers. Or perhaps you’re like me and like to have a batch ready to go for a spontaneous craving! Luckily, they store and freeze like a dream. This is where the “make-ahead magic” really happens, especially if you want to freeze scones before baking and have them ready whenever the mood strikes.
For leftovers, just pop your cooled, glazed scones into an airtight container. They’ll stay nice and fresh at room temperature for a couple of days. But for longer storage? Freezing is your best friend! You can freeze the unbaked, cut scone wedges on a baking sheet until they’re firm, then transfer them to a freezer-safe bag or container. They’ll keep beautifully for up to a month. When you’re ready for a scone, just pop those frozen beauties straight into the oven (you might need an extra minute or two of baking time), and you’ll have warm, delicious scones in no time!
Frequently Asked Questions About Pumpkin Scones
Okay, let’s chat about some things you might be wondering about these yummy pumpkin scones with maple glaze. It’s always good to have a few extra tips tucked away, right?
Can I make pumpkin scones without pumpkin puree?
So, I really recommend sticking with pumpkin puree! It’s what gives these scones their moisture and that lovely tender texture. Using pumpkin pie filling won’t work because it has extra sugars and spices. If you absolutely can’t find pumpkin puree, you could *try* using another smooth vegetable puree like sweet potato or butternut squash, but the flavor will be different!
Why are my pumpkin scones dry?
Oh no, dry scones are the worst! Usually, this happens for a couple of reasons. One, overmixing the dough. Remember, we want it shaggy and only just combined to keep it tender. Two, baking them for too long. Keep an eye on them; they should be lightly golden, not dark brown. And make sure your butter is super cold when you start!
How do I get a glossy maple glaze?
Achieving that perfect glossy drizzle is all about the consistency! You want to add your liquid (milk or cream) to the powdered sugar and maple syrup very slowly, little by little. Whisk it smooth after each addition. If you add too much liquid at once, it’ll become too thin. Aim for a glaze that flows easily but isn’t watery. It should coat the back of a spoon nicely!
What is the ‘pumpkin scone calories’ count?
Good question! Based on our recipe, we estimate each scone has about 350 calories. Keep in mind that this can vary a little depending on the exact brands of ingredients you use and how generously you drizzle that delicious glaze!
Estimated Nutritional Information
Just to give you a general idea, here are the estimated nutritional details for one of these lovely pumpkin scones with maple glaze. It’s always good to have a ballpark, right? Keep in mind these are estimates and can shift a bit depending on the exact brands you use and how much of that yummy glaze you decide to drizzle on. But overall, they’re a wonderfully satisfying treat for any fall day!
Share Your Cozy Fall Baking Creations!
I absolutely LOVE seeing what you all create in your kitchens! If you’ve tried these pumpkin scones with maple glaze, or even if you’ve added your own special twist, please share your magic! Leave a comment down below, tell me how they turned out, and don’t forget to rate the recipe if you loved them. Seeing your photos on social media makes my day – tag me so I can admire your beautiful fall bakes! For more about my baking adventures, check out my about page!
PrintPumpkin Scones with Maple Glaze
Make tender, flaky pumpkin scones with a glossy maple glaze, similar to coffee shop favorites. This recipe includes tips for achieving the perfect texture and a balanced glaze.
- Prep Time: 20 min
- Cook Time: 18 min
- Total Time: 38 min
- Yield: 8 scones 1x
- Category: Dessert
- Method: Baking
- Cuisine: American
- Diet: Vegetarian
Ingredients
- 2 cups all-purpose flour
- 1/4 cup granulated sugar
- 2 teaspoons baking powder
- 1/2 teaspoon ground cinnamon
- 1/4 teaspoon ground nutmeg
- 1/4 teaspoon ground ginger
- 1/4 teaspoon salt
- 1/2 cup (1 stick) cold unsalted butter, cut into small cubes
- 1/2 cup pumpkin puree (not pie filling)
- 1/4 cup heavy cream
- 1 large egg
- 1 teaspoon vanilla extract
- For the Maple Glaze:
- 1 cup powdered sugar
- 2 tablespoons maple syrup
- 1–2 tablespoons milk or cream
Instructions
- Preheat your oven to 400°F (200°C). Line a baking sheet with parchment paper.
- In a large bowl, whisk together the flour, granulated sugar, baking powder, cinnamon, nutmeg, ginger, and salt.
- Cut the cold butter into the dry ingredients using a pastry blender or your fingertips until the mixture resembles coarse crumbs with some pea-sized pieces of butter remaining.
- In a separate small bowl, whisk together the pumpkin puree, heavy cream, egg, and vanilla extract.
- Pour the wet ingredients into the dry ingredients. Mix with a fork until just combined. Do not overmix; the dough will be shaggy.
- Turn the dough out onto a lightly floured surface. Gently bring the dough together and pat it into a 3/4-inch thick round.
- Cut the round into 8 wedges using a knife or bench scraper.
- Place the wedges onto the prepared baking sheet, spacing them slightly apart.
- Bake for 15-18 minutes, or until the scones are lightly golden brown and cooked through.
- Let the scones cool on the baking sheet for a few minutes before transferring them to a wire rack to cool completely.
- Prepare the glaze: In a medium bowl, whisk together the powdered sugar and maple syrup. Add milk or cream, one tablespoon at a time, until you reach your desired drizzling consistency.
- Drizzle the glaze over the cooled scones. Let the glaze set before serving.
Notes
- For tender scones, ensure your butter is very cold and avoid overworking the dough.
- You can freeze the unbaked scones on a baking sheet until firm, then transfer them to a freezer bag for up to 1 month. Bake from frozen, adding a few extra minutes to the baking time.
- Store leftover scones in an airtight container at room temperature for up to 2 days.
Nutrition
- Serving Size: 1 scone
- Calories: 350
- Sugar: 25g
- Sodium: 200mg
- Fat: 18g
- Saturated Fat: 11g
- Unsaturated Fat: 7g
- Trans Fat: 0g
- Carbohydrates: 45g
- Fiber: 2g
- Protein: 4g
- Cholesterol: 60mg