
I adore a great dessert mashup, don’t you? Taking two beloved classics and weaving them together is where the real magic happens in the kitchen. Think about it: the bright, comforting spice of a snickerdoodle cookie meeting the cool, decadent embrace of a classic cheesecake. That combination is simply irresistible, especially when the holidays roll around! For those of you new here, you can always read more about my culinary journey and why I believe food tells such important stories over on my About Page.
For me, this particular fusion feels extra special because it reminds me of my mother’s California kitchen meeting my father’s soulful dessert traditions. This Ultimate Creamy Snickerdoodle Cheesecake manages to be both elegant enough for a stunning table centerpiece and comforting enough for a cozy night in. We aren’t just making dessert here; we are unfolding a brand new family story built around cinnamon and cream cheese. Trust me, once you taste this rich, velvety wedge, you’ll understand why it has become a staple in my home.
- Why This Homemade Snickerdoodle Cheesecake Recipe is a Showstopper
- Gathering Ingredients for Your Snickerdoodle Cheesecake
- Step-by-Step Instructions for the Best Cheesecake Baking
- Tips for Success with Your Snickerdoodle Cheesecake Recipe
- Storage and Reheating Instructions for Your Spiced Cheesecake
- Serving Suggestions for This Decadent Cheesecake Ideas
- Frequently Asked Questions About Snickerdoodle Cheesecake
- Estimated Nutritional Data for Your Creamy Snickerdoodle Dessert
- Share Your Snickerdoodle Cheesecake Creations
Why This Homemade Snickerdoodle Cheesecake Recipe is a Showstopper
When I first decided to tackle this dessert, I knew it had to be more than just good—it needed to be spectacular. This snickerdoodle cheesecake isn’t just another sweet treat; it’s designed to anchor your holiday table. If you’re looking for truly showstopper desserts that taste as incredible as they look, this is your recipe. We combine the comforting spices everyone loves with the luxurious texture of perfectly baked cheesecake. You can find some of my other favorite impressive desserts over in my main Desserts library.
The Perfect Blend: Snickerdoodle Cookie Fusion
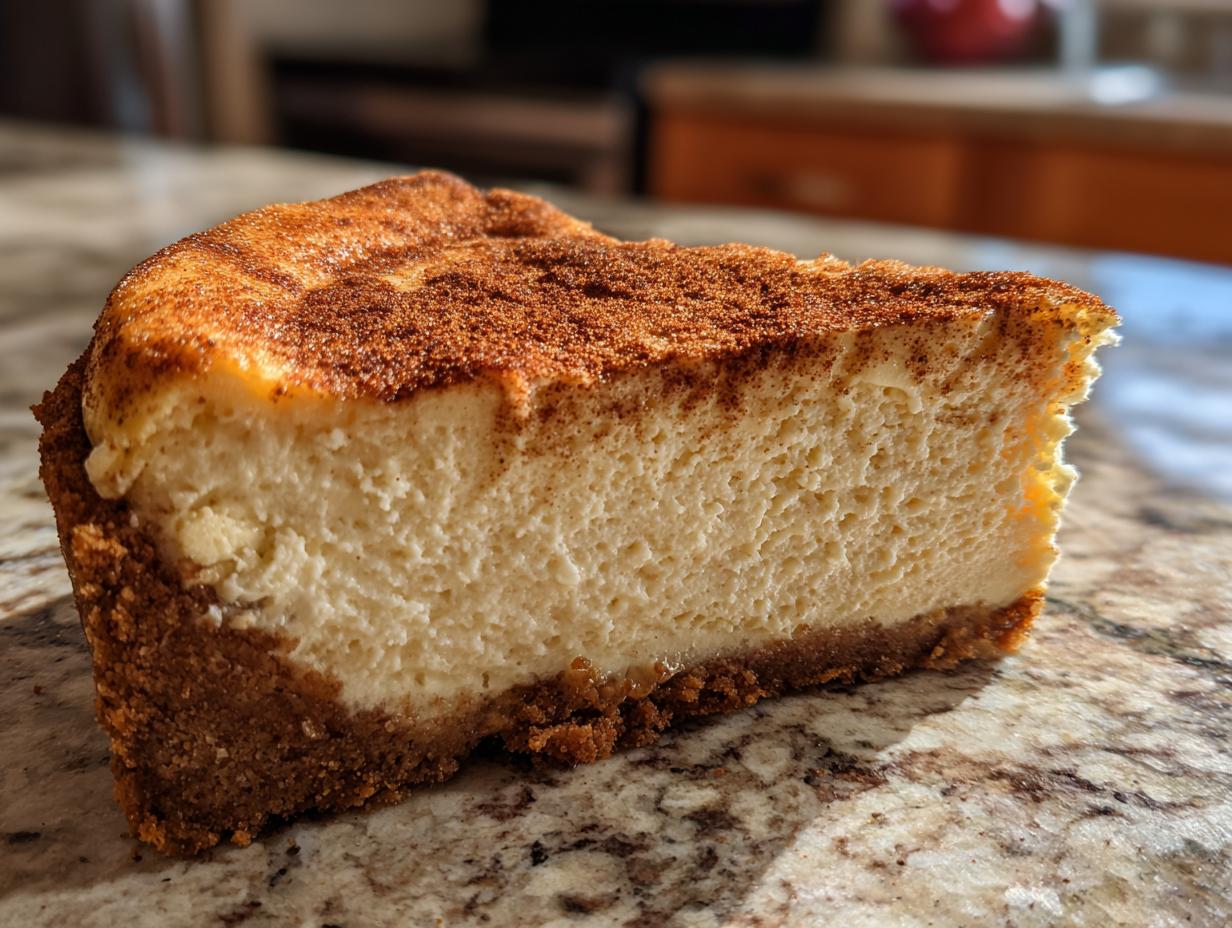
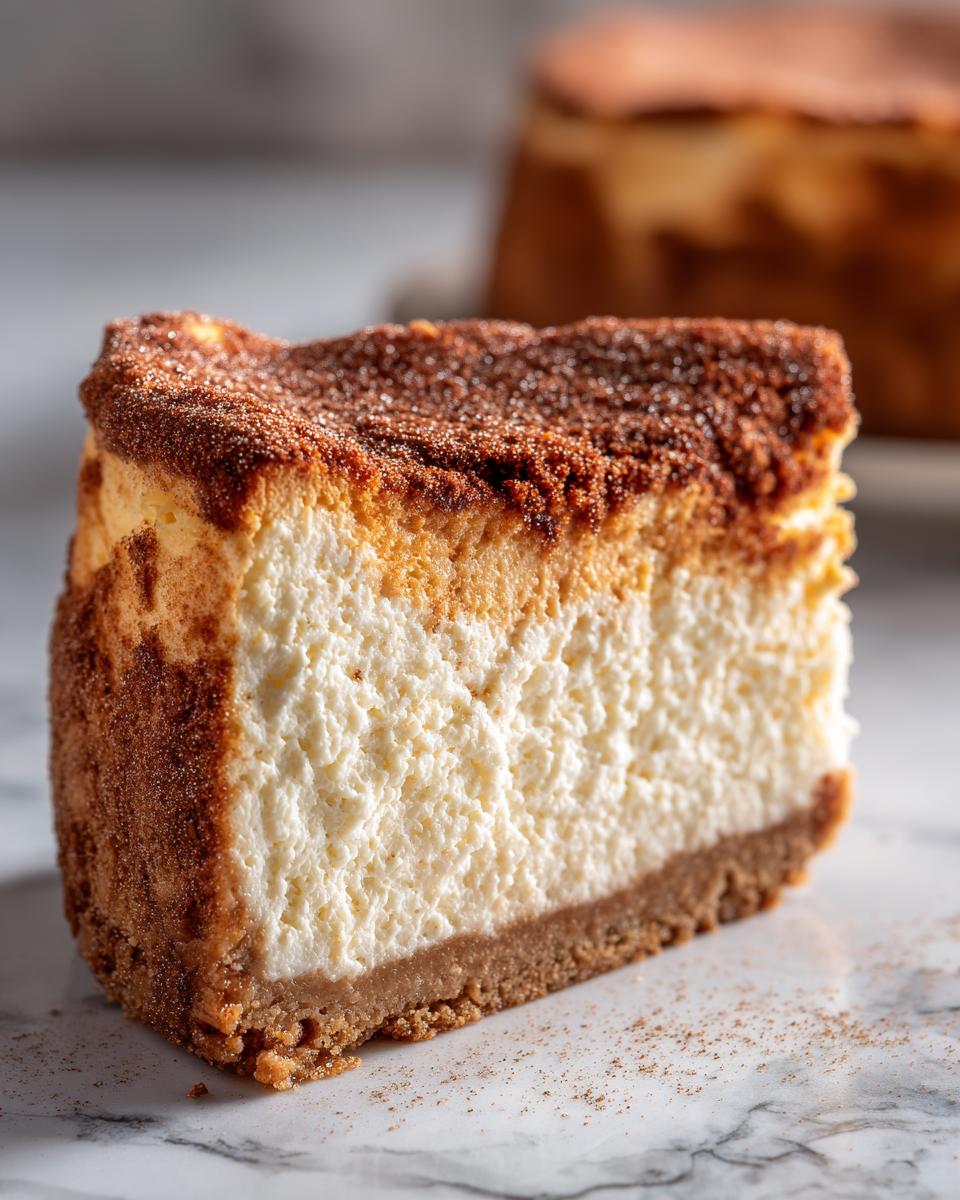
What makes this creation so special is how deeply we integrate that snickerdoodle warmth. It’s not just a sprinkle on top! We get the signature cinnamon-sugar vibe going right in the buttery graham cracker crust. Then, we carry that warm spice right up into the rich cheesecake filling itself. It’s a layered flavor experience that truly honors both parent recipes.
Achieving That Creamy Snickerdoodle Dessert Texture
Texture is everything with cheesecake, right? Nobody wants grainy or lumpy! That’s why I insist on two things: letting your cream cheese get wonderfully soft—truly room temperature—and keeping your mixer speed down low when adding the eggs. These small steps ensure you get that incredibly velvety cheesecake filling that melts in your mouth every single time.
Gathering Ingredients for Your Snickerdoodle Cheesecake
You can’t achieve that incredible flavor payoff without starting with excellent ingredients, and for this beloved snickerdoodle cheesecake recipe, having everything ready makes the assembly smooth sailing. I always lay everything out on the counter before I even turn on the mixer—it’s my little secret for stress-free baking! If you’re making my favorite pumpkin cheesecake right after this, make sure you check that ingredient list too, because it’s just as satisfying as this creamy beauty over at my post on pumpkin cheesecake; but for now, let’s grab what we need for this cinnamon dream.
For the Buttery Cinnamon Crust
This crust needs to pack that perfect buttery crunch to support the filling. You’ll need:
- 1 1/2 cups graham cracker crumbs
- 1/4 cup granulated sugar
- 1/2 teaspoon ground cinnamon
- 6 tablespoons unsalted butter, melted
For the Velvety Cheesecake Filling
Here is where we focus on achieving that luxurious, velvety cheesecake filling. Remember what I said about temperature? These items must be ready!
- 3 (8 ounce) packages cream cheese, softened
- 1 1/2 cups granulated sugar
- 1/4 cup all-purpose flour
- 2 teaspoons ground cinnamon
- 1 teaspoon vanilla extract
- 1/4 teaspoon salt
- 4 large eggs, room temperature
- 1/2 cup sour cream
- 1/4 cup heavy cream
For the Cinnamon Sugar Topping
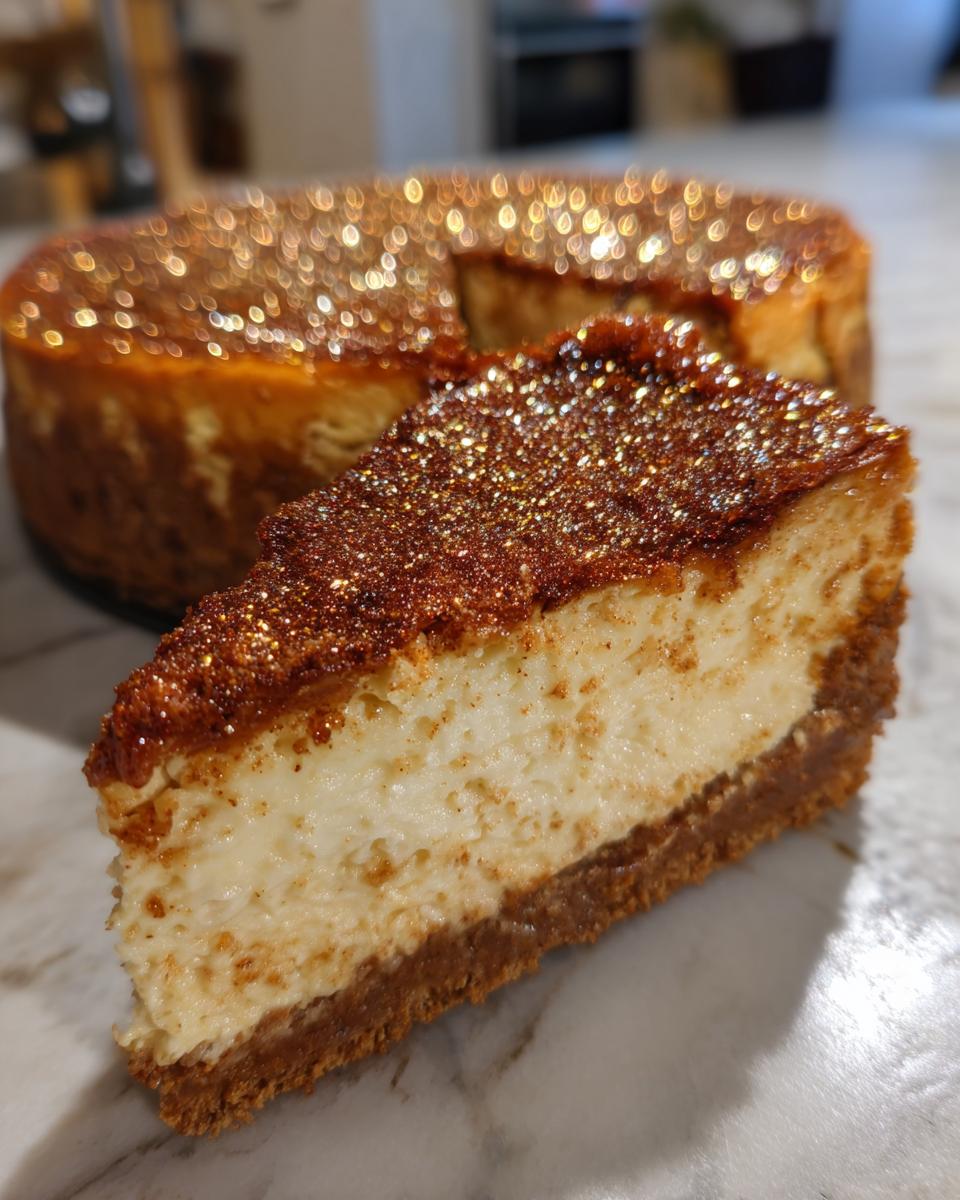
This finishing touch really pulls the snickerdoodle flavor home, so make sure you pre-mix it!
- 1/2 cup cinnamon sugar topping mixture (which is 1/4 cup sugar mixed with 1 tablespoon cinnamon)
Step-by-Step Instructions for the Best Cheesecake Baking
Alright, this is where we put our trust in the process! Making a cheesecake that’s perfectly creamy and crack-free is all about technique, not luck. If you want a truly reliable result every single time, pay close attention to the cooling process—it’s one of those famous cheesecake baking secrets. For a more detailed look at my overall approach to achieving that perfect texture without stress, check out my guide to crack-free cheesecake; but for our snickerdoodle cheesecake, follow these steps precisely.
Preparing the Pan and Baking the Buttery Cinnamon Crust
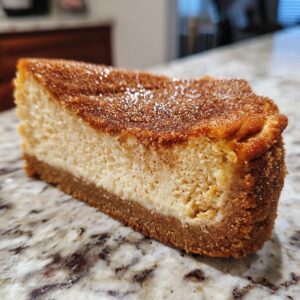
First thing: Preheat your oven to 325 degrees Fahrenheit. Get a 9-inch springform pan ready. You absolutely must wrap the outside bottom and sides tightly with heavy-duty aluminum foil; this protects the crust when we introduce the water bath later on. Now, for the crust, mix up your graham cracker crumbs, sugar, and cinnamon, then pour in that melted butter and mix it all until it’s crumbly but holds together. Press it down super firmly on the bottom of the prepared pan. Bake that buttery base for 10 quick minutes. Once it’s done, pull it out and let it cool just a little bit while you work on the filling.
Creating the Creamy Snickerdoodle Cheesecake Filling
In a large bowl, start with the softened cream cheese and beat it until it’s beautifully smooth—no lumps allowed! Then, slowly start beating in the main sugar, flour, the rest of the cinnamon, vanilla, and salt. Remember what I emphasized? We mix this until it’s *just* combined. Next, add your eggs one by one, mixing only on low speed; you want each egg just barely incorporated before adding the next. Overmixing the eggs is the quickest way to introduce air that will crack your beautiful surface! Finish by gently folding in the sour cream and heavy cream until you have a smooth, luscious batter.

Baking the Snickerdoodle Cheesecake with a Water Bath
Now for the gentle bake! Place that foil-wrapped springform pan inside a larger roasting pan. Carefully pour very hot water into the roasting pan until it comes about halfway up the sides of your springform pan. This water bath creates gentle steam, which is crucial for even cooking. Bake this baby for 60 to 75 minutes. You’re looking for edges that look set, but the very center should still have a little wiggle—that slight jiggle means it’s cooking perfectly. Here’s the big secret for no cracks: Turn the oven OFF, crack the door open just a hair, and let the cheesecake cool inside the oven for a full hour. This slow transition prevents sudden temperature shock, which is what causes cracking.
Tips for Success with Your Snickerdoodle Cheesecake Recipe
When you’re aiming for the absolute best cheesecake baking results, sometimes the little details make all the difference between a good dessert and a showstopper. These tips come directly from my notes after testing this snickerdoodle cheesecake recipe dozens of times. We want that luxurious texture, and these habits guarantee it! If you’re curious about my overall process for baking, I share more general methodology over on my blog.
Temperature Control for Velvety Cheesecake Filling
I cannot stress this enough: don’t rush the softening process for your cream cheese and eggs! If the cream cheese is cold, you’ll inevitably end up with lumps that you can’t beat out, even with a powerful mixer. Likewise, cold eggs shock the batter. Room temperature ingredients emulsify beautifully, leading directly to that incredibly smooth, velvety cheesecake filling we are aiming for. Just plan ahead by taking them out an hour or two before you start mixing.
Adapting the Snickerdoodle Cheesecake for Bars
What if you need to serve a crowd, or maybe you just prefer something easier to grab? This recipe transitions beautifully into bars! Instead of your 9-inch springform pan, just press the crust mixture firmly into a standard 9×13 inch baking dish. You definitely need that parchment paper lining if you do this, letting it hang over the edges—that’s your handle to lift them out later! Because the pan is shallower, you might need to knock 5 to 10 minutes off the bake time, so just start checking for that slight jiggle a little sooner.

Storage and Reheating Instructions for Your Spiced Cheesecake
Once you’ve managed the tricky balancing act of baking and chilling, how you store your beautiful spiced cheesecake matters immensely. The absolute minimum chill time for this snickerdoodle cheesecake is six hours, but honestly? Overnight is where the flavor sets up perfectly. Cover it loosely with plastic wrap once it’s completely cooled on the counter—don’t wrap it tightly while it’s warm, or you’ll encourage condensation!
Store leftovers in the refrigerator. It keeps beautifully for about four to five days. Now, reheating cheesecake isn’t really something we do—it loses that perfect, cool, dense texture we worked so hard for! It’s best enjoyed straight from the fridge, perhaps with an extra light dusting of cinnamon sugar on the plate.
Serving Suggestions for This Decadent Cheesecake Ideas
We’ve made this stunning dessert, and now it’s time to present it! This snickerdoodle cheesecake really shines when treated like the centerpiece it is—especially when you’re featuring it among your best Holiday Cheesecake Recipes. Because the cinnamon is so warm and inviting, I love pairing it with something bright.
It cuts through the richness beautifully if you serve it alongside a piping hot cup of coffee or maybe a warm glass of mulled cider—I have a wonderfully simple recipe for mulled cider you might want to check out! For garnish, a light dusting of extra cinnamon sugar is truly all you need. Sometimes, a few thinly sliced, crisp apples on the side can offer a lovely, fresh contrast to this decadent cheesecake idea.
Frequently Asked Questions About Snickerdoodle Cheesecake
It’s always smart to think through the tricky spots before you even turn on the oven! Cheesecake baking always brings up a few common concerns, especially when we are working with fusion flavors like this snickerdoodle cheesecake. I gathered answers for the most common questions I get through my contact form to make sure your experience results in perfection.
Can I make a No Bake Snickerdoodle Cheesecake instead?
That’s a great question regarding a no bake snickerdoodle cheesecake! While I absolutely love a chilled, easy dessert now and then, this specific recipe relies on eggs and flour to achieve that signature dense, rich bite. For a truly no-bake version, you’d need to swap out the cream cheese for a base stabilized with things like gelatin or whipped stabilizer. It’s a completely different beast, my dear! This recipe is specifically built around that gentle, slow bake to set the filling just right.
How do I prevent my snickerdoodle cheesecake from cracking?
Ah, the dreaded crack! If you take away only one thing from this whole guide, let it be this: the water bath and the slow cool-down are your best friends for any best cheesecake baking adventure. Always use that roaring hot water bath during the bake—it keeps the humidity up so the top doesn’t dry out and pull apart. Then, once the baking time is up, turn the oven off, prop the door open slightly, and let that cake acclimate for a solid hour. That gradual temperature drop is the magic trick to keeping your top smooth and beautiful!
What is the best way to get a strong cinnamon flavor in the filling?
To really amplify that beloved snickerdoodle spice in your cinnamon cheesecake dessert, the key is quality and incorporation. Use the freshest ground cinnamon you can find—stale spices just won’t cut it! Secondly, make sure you are scraping down the sides of your bowl well when mixing in the dry ingredients (the 2 teaspoons of cinnamon). We want that flavor distributed evenly throughout the whole creamy snickerdoodle dessert batter so you get that spiced note in every single bite, not just on the edges.
Estimated Nutritional Data for Your Creamy Snickerdoodle Dessert
Now, I know for us home cooks, we really bake for love and not for counting every single gram, but it’s always good to have a general idea of what we’re serving up! Keep in mind that the final count for this rich creamy snickerdoodle dessert can vary quite a bit depending on the exact brand of cream cheese or sugar you use. These figures below are only estimates for one generous slice, so enjoy it without too much worry!
- Serving Size: 1 slice
- Calories: 450
- Sugar: 35g
- Fat: 30g
- Protein: 7g
If you’re tracking dietary needs, remember that homemade desserts always taste best when you focus on the joy you create, not just the numbers!
Share Your Snickerdoodle Cheesecake Creations
Honestly, this is my favorite part of sharing a recipe—seeing the beautiful work you all do in your own kitchens! This snickerdoodle cheesecake is meant to be shared, whether it’s the star of your holiday table or just a treat for a quiet Sunday.
I truly hope this recipe brings some extra warmth and spice to your home. Did you stick to my method for the water bath? Did you find that the flavor improved even more on day two? Don’t keep those lovely creations to yourself!
If you loved this marriage between cookie and cake, please leave a star rating below so other home cooks know it’s worth making. And if you managed to snap a photo of your finished, beautiful cinnamon cheesecake dessert, I would absolutely adore seeing it! You can tag me over on social media, or if you have any lingering questions, feel free to reach out through my contact page.
While you are here, you absolutely have to watch this quick visual guide to see just how creamy this dessert can get. Sometimes seeing the texture makes all the difference, check out this video to see the texture in action!
PrintUltimate Creamy Snickerdoodle Cheesecake
Create a showstopper dessert by combining the warm, spiced flavor of snickerdoodle cookies with a rich, velvety cheesecake. This recipe features a buttery cinnamon crust and a creamy filling, perfect for holiday gatherings.
- Prep Time: 25 min
- Cook Time: 75 min
- Total Time: 1 hour 40 min
- Yield: 12 servings 1x
- Category: Dessert
- Method: Baking
- Cuisine: American
- Diet: Vegetarian
Ingredients
- 1 1/2 cups graham cracker crumbs
- 1/4 cup granulated sugar
- 1/2 teaspoon ground cinnamon
- 6 tablespoons unsalted butter, melted
- 3 (8 ounce) packages cream cheese, softened
- 1 1/2 cups granulated sugar
- 1/4 cup all-purpose flour
- 2 teaspoons ground cinnamon
- 1 teaspoon vanilla extract
- 1/4 teaspoon salt
- 4 large eggs, room temperature
- 1/2 cup sour cream
- 1/4 cup heavy cream
- 1/2 cup cinnamon sugar topping mixture (1/4 cup sugar, 1 tablespoon cinnamon)
Instructions
- Preheat your oven to 325 degrees Fahrenheit. Prepare a 9-inch springform pan by wrapping the outside bottom with heavy-duty aluminum foil to prepare for a water bath.
- Make the crust: In a medium bowl, combine the graham cracker crumbs, 1/4 cup sugar, and 1/2 teaspoon cinnamon. Pour in the melted butter and mix until the crumbs are evenly moistened. Press the mixture firmly into the bottom of the prepared springform pan. Bake the crust for 10 minutes. Remove from the oven and set aside to cool slightly.
- Make the cheesecake filling: In a large bowl, use an electric mixer to beat the softened cream cheese until smooth. Gradually beat in the 1 1/2 cups sugar, flour, 2 teaspoons cinnamon, vanilla extract, and salt until just combined. Scrape down the sides of the bowl.
- Add the eggs one at a time, mixing on low speed after each addition until just incorporated. Do not overmix. Gently mix in the sour cream and heavy cream until the batter is smooth.
- Pour the cheesecake filling over the cooled crust. Gently tap the pan on the counter a few times to release any large air bubbles.
- Prepare the water bath: Place the foil-wrapped springform pan into a larger roasting pan. Carefully pour hot water into the roasting pan until the water reaches halfway up the sides of the springform pan.
- Bake for 60 to 75 minutes. The edges should look set, but the center should still have a slight jiggle.
- Turn off the oven, crack the oven door open slightly, and let the cheesecake cool inside the oven for 1 hour. This slow cooling helps prevent cracking.
- Remove the cheesecake from the water bath and let it cool completely on a wire rack. Once cool, cover and refrigerate for at least 6 hours, or preferably overnight.
- Before serving, sprinkle the top evenly with the cinnamon sugar topping mixture. Carefully remove the sides of the springform pan. Slice and serve your creamy snickerdoodle dessert.
Notes
- For the best texture, ensure your cream cheese and eggs are at room temperature before starting the filling.
- If you prefer cheesecake bars, press the crust into a 9×13 inch baking dish and adjust baking time slightly.
- To achieve a truly velvety cheesecake filling, mix the ingredients on low speed and stop mixing as soon as they are combined.
Nutrition
- Serving Size: 1 slice
- Calories: 450
- Sugar: 35g
- Sodium: 280mg
- Fat: 30g
- Saturated Fat: 18g
- Unsaturated Fat: 12g
- Trans Fat: 0.5g
- Carbohydrates: 40g
- Fiber: 1g
- Protein: 7g
- Cholesterol: 110mg