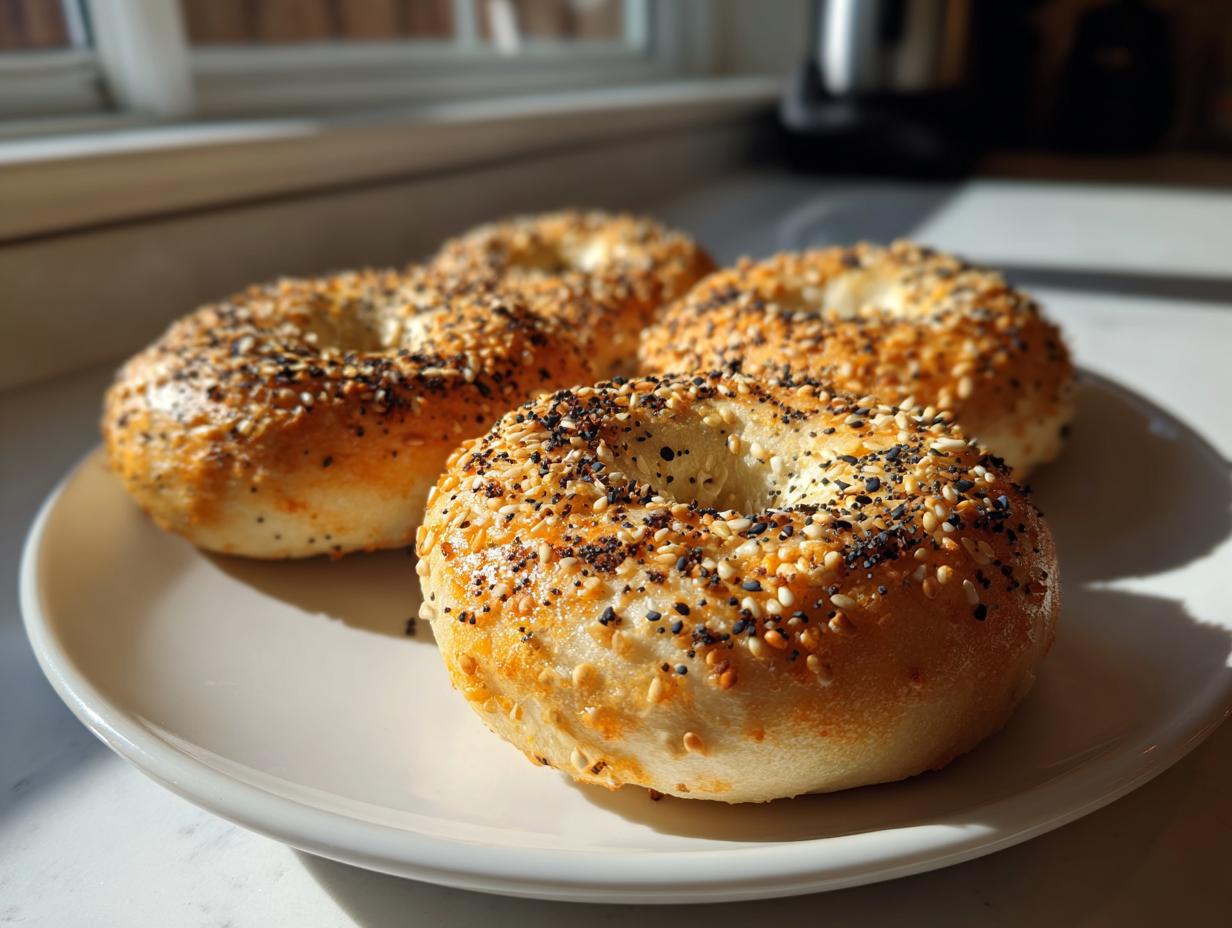

Don’t you just hate seeing that jar of unfed starter staring back at you? We all have that moment where we look at the sourdough discard and cringe a little, knowing it’s just going straight into the bin. Well, grab that jar, because I’ve developed a truly stunning recipe that transforms kitchen waste into absolute gold: New York Style Sourdough Discard Bagels. After my time in culinary schools focusing on technique, I always strive toward approachable elegance, and these bagels nail that balance. They look incredibly professional—crispy crust, gorgeously chewy interior—but they use materials you already have on hand. This recipe is the perfect way to honor your starter, reduce waste, and enjoy authentic, bakery-quality results right on your kitchen counter. You can read more about my baking philosophy on my About Page.
I designed this process to be straightforward, focusing on the key steps that give you that classic texture without needing an overnight rest most of the time. It’s simply the most satisfying way to use up your sourdough discard.
- Why These Sourdough Discard Bagels Are Your New Go-To Recipe
- Gathering Ingredients for Perfect Sourdough Discard Bagels
- How to Make Sourdough Discard Bagels: Step-by-Step Instructions
- Tips for the Best Sourdough Discard Bagels Every Time
- Variations: Beyond Basic Sourdough Discard Bagels
- Serving Suggestions for Your Sourdough Discard Breakfast Ideas
- Storage and Reheating for Homemade Sourdough Discard Bagels
- Frequently Asked Questions about Baking with Sourdough Discard
- Nutritional Estimate for Sourdough Discard Bagels
- Share Your Sourdough Discard Bagels Creations
Why These Sourdough Discard Bagels Are Your New Go-To Recipe
Honestly, when I show people these loaves, they never believe they started as something I was about to throw away. These aren’t just ‘okay’ bagels; they are the real deal, and they are surprisingly quick to make. Forget the guilt over throwing away starter—this sourdough discard bagels recipe turns that leftover into something spectacular.
- Waste Reduction Meets Incredible Flavor: That unfed sourdough discard brings a subtle tang we all love—that signature sourdough flavor—without committing your entire day to fermentation. Since we aren’t waiting overnight, we get serious flavor development in just a few hours. It’s efficient baking that tastes like you spent all day on it!
- Achieving the Authentic New York Style Sourdough Bagels Texture: If you want that amazing, satisfying chew, you cannot skip the boil. That quick dip in the baking soda bath locks in the structure immediately, giving you that crisp exterior and soft, springy interior. And here’s a little trick for you: adding a tiny bit of instant yeast makes these quick sourdough discard bagels possible on a busy morning!
Because of these unique factors, these easy sourdough discard bagels are perfect for anyone who wants that artisanal bite without the commitment of a slow, traditional bake. You get the best of both worlds!
Waste Reduction Meets Incredible Flavor
Using unfed discard is brilliant here. It provides the flavor complexity you crave from sourdough—that whisper of sourness that balances the honey—but because we aren’t relying on it for all our lift (we can use a pinch of commercial yeast!), we skip the long proofing process. It’s flavorful, accessible, and seriously reduces what ends up in your trash can.
Achieving the Authentic New York Style Sourdough Bagels Texture
Listen to me: the boiling step is vital for chewy sourdough bagels discard. It sounds strange, but boiling them for just 30 seconds per side sets that beautiful crust structure. If you are in a hurry, I allow a tiny bit of instant yeast in the dough, which allows us to call these some of the best quick sourdough discard bagels you’ll ever make.
Gathering Ingredients for Perfect Sourdough Discard Bagels
Now that you’re excited to bake, let’s look at what you need for this sourdough discard bagels recipe. The beauty of this recipe is its simplicity, but precision matters a lot when we are aiming for that New York quality right at home. Don’t substitute the bread flour, please! Its high protein content is what gives us the strong structure needed to hold up against boiling and baking.
I’ve broken down the ingredients into the dough itself and the essential boiling liquid. Trust me on the details here; they make a huge difference in the final texture.
Essential Dough Components
- 400 g bread flour (this is non-negotiable for texture!)
- 100 g sourdough discard (it must be unfed for this quick method)
- 240 ml warm water (around 105°F is perfect)
- 1 tablespoon honey or malt syrup (malt gives a richer color)
- 1 teaspoon instant yeast (this is optional, but helps speed things up!)
- 10 g fine salt
- 1 tablespoon olive oil
The Boiling Bath: Key to Chewy Sourdough Bagels Discard
This part is where the magic happens for that incredible chew, so make sure your pot is wide enough!
- For Boiling:
- 10 cups very hot water
- 2 tablespoons baking soda (This is your secret weapon for that glossy finish!)
- 1 tablespoon malt syrup
And of course, grab your favorite topping—I always reach for the classic everything bagel seasoning, but you can use poppy seeds or plain salt if you prefer.
How to Make Sourdough Discard Bagels: Step-by-Step Instructions
This is where the magic really happens! Mastering how to make sourdough discard bagels boils down to respecting the dough—it’s resilient, but it needs a little direction. While I love sharing deep dives into baking science over on the main Unfold Recipes Blog, here, we are keeping things focused and efficient so you get those gorgeous, chewy results fast.
Mixing and Kneading Your Sourdough Discard Bagels Dough
First, get everything into your biggest mixing bowl—the flour, the discard, your warm water, honey, salt, optional yeast, and the olive oil. Mix everything gently until you just see a shaggy dough form, meaning there are no dry patches of flour hanging around anymore. Don’t over-mix at this stage! Now, turn that messy blob out onto your counter. You need to knead this for a solid 8 to 10 minutes, getting your whole arm into it. You’re looking for a dough that feels smooth, tight, and incredibly elastic when you poke it.
Quick Proofing for Easy Sourdough Discard Bagels
Traditional sourdough often demands all day, but we are skipping that marathon here! Lightly oil a clean bowl, pop your kneaded dough inside, cover it with plastic wrap or a damp towel, and let it rest at room temperature for just 1 to 2 hours. It should puff up nicely, but it won’t double like a standard yeast bread. Now, a quick tip from my kitchen notes: if you *do* have a few extra hours, you can place the shaped bagels (before boiling) in the fridge overnight—this cold proofing really deepens that sourdough flavor!
Shaping Your Homemade Sourdough Discard Bagels
Once rested, divide that dough into 8 equal pieces; you can use a kitchen scale for real precision, but eyeballing it works too! Roll each piece firmly between your palms until you have a tight little ball. This next bit is crucial: take your thumb and poke a clean hole right in the center of the ball. Now, gently stretch that hole open! You want the opening to be about 1.5 inches wide when you’re done. Why so big? Because they shrink during boiling! Place the shaped beauties on parchment paper and let them chill out—covered loosely—for another 30 minutes to firm up again.
The Essential Boil for Perfect Sourdough Discard Everything Bagels
Time to turn up the heat! Bring that wide pot of water to a true, rolling boil. Whisk in your 2 tablespoons of baking soda and the malt syrup. When it’s bubbling furiously, carefully slide 2 or 3 bagels in at a time—don’t crowd the pot! Boil them for exactly 30 seconds on one side, then flip them over using a slotted spoon and boil the other side for 30 seconds. This is literally the only way to lock in that signature chew! Pull them out, let any excess water drip off, and place them back on the parchment. Now is the best time to generously sprinkle on that sourdough discard everything bagel seasoning!
Baking Your Chewy Sourdough Bagels Discard
Get that oven hot: preheat it to 425°F (220°C). Before they go in, I recommend brushing the tops with a quick egg wash—just one egg whisked with a splash of water—to help them brown beautifully. Bake them until they are a deep, gorgeous golden brown, which usually takes between 20 to 25 minutes. Make sure you remember to rotate the baking sheet halfway through, maybe around the 12-minute mark, so the tops bake evenly. Let them cool completely on a wire rack before you dare slice into that delicious, chewy sourdough bagel discard!
Tips for the Best Sourdough Discard Bagels Every Time
I’ve certainly had a few batches turn out less than picture-perfect when I began experimenting with these sourdough discard bagels, so let me save you some trouble! Getting that true bakery quality, especially when relying on discard, requires paying attention to a few small details. If you follow these tips, you’ll be on your way to declaring this your best sourdough discard bagel recipe yet.
Troubleshooting Flat Sourdough Discard Bagels
If your bagels come out looking a little sad and flat, it usually comes down to two things. First, check your kneading! You need that dough to be seriously smooth and elastic so it can hold the air you incorporate. Second, remember how I stressed stretching that hole open wide? If that hole is too small before boiling, the dough will puff up in the oven and eat its own center, resulting in a puffy, dense little hockey puck instead of a proper bagel ring.
Mastering the Boil for New York Style Sourdough Bagels Use Discard
When you get to the boiling step, you must maintain a good, strong, rolling boil—don’t let it drop to a mere simmer once you start dropping the dough in. If the water isn’t hot enough, the outside won’t set fast enough, and your beautiful bagel will soak up water and turn gummy instead of chewy. Also, take the time to use a pot wide enough so you don’t have to cram the bagels together; they need room to flip easily. For more baking know-how, feel free to browse my advice on other sourdough adventures!
Variations: Beyond Basic Sourdough Discard Bagels
The base recipe we’ve made is fantastic, but honestly, once you nail that technique for homemade sourdough discard bagels, you start wanting to play! These bagels are so versatile. I love taking standard recipes and giving them a little twist to keep baking exciting. It’s all about building those beautiful flavor profiles we crave in the morning.
Creating Sourdough Discard Everything Bagels
We already topped them with that incredible seasoning after boiling, but for the ultimate experience, why not mix some of that flavor right into the dough? After the initial kneading, just fold in about 1 tablespoon of everything bagel seasoning along with your salt. It gives you little pops of garlic and onion throughout the crumb. It’s a game-changer for your sourdough discard everything bagels!
No Yeast Sourdough Bagel Recipe Adaptation
If you are strictly avoiding commercial yeast, you absolutely can make these doughs work, though they won’t be quite as quick—that’s the trade-off for completely baking with sourdough discard alone. If you omit that 1 teaspoon of optional yeast, you need to give the dough a much longer rest time after kneading. I suggest letting it sit somewhere warm for 4 to 6 hours, or you can do what I mentioned before and cold proof it in the fridge overnight. This allows that natural tang in the discard to develop the lift you need. You can read about another fantastic sourdough variation using discard here.
Serving Suggestions for Your Sourdough Discard Breakfast Ideas
Now that you’ve done the hard work and created these perfect bagels, we have to serve them properly! These aren’t just for slathering with basic jam. To fit the spirit of approachable elegance we strive for here, try pairing your sourdough discard breakfast ideas with something truly lovely. A thick spread of high-quality, plain cream cheese is always a winner. For a real brunch moment, slice one open, toast it until crisp, and top it with creamy smoked salmon and maybe a sprig of fresh dill. It just elevates the whole experience! See more ideas for hosting on my Brunch Category Page.
Storage and Reheating for Homemade Sourdough Discard Bagels
Nothing beats a fresh bagel, right out of the oven, but let’s be realistic—most of us can’t eat eight amazing homemade sourdough discard bagels in one sitting! Since these are made without heavy preservatives found in store-bought loaves, we need to be smart about how we store them to keep that wonderful chew intact.
For the best experience, you absolutely need to eat these the day you bake them. Seriously, they are perfection warm from the cooling rack. However, if you have leftovers, don’t just toss them in a plastic bag on the counter; they’ll get rubbery quickly!
For short-term storage (1 to 2 days), keep them at room temperature. You must store them tightly wrapped in a paper bag first, and then place that bag inside a sealed, zip-top bag or an airtight container. This keeps the interior soft without letting too much outside moisture make the crust soggy. The fridge is usually the enemy of bread texture—it tends to make them stale faster—so I only advise refrigerating them if you live somewhere very humid.
Reheating for That Fresh-Baked Chewy Sourdough Sensation
When you’re ready to enjoy one of your stored bagels, the reheating step is essential to bring back that original crust. Skip the microwave entirely unless you enjoy chewy rubber! The best method, hands down, is slicing the bagel in half and briefly toasting it. If they are a day old, I swear by giving them a quick spritz of water directly on the cut faces right before they go into the toaster. That little bit of steam helps rehydrate the crumb just enough as the outside crisps up again.
If you made a huge batch and want them to last longer, slice your sourdough discard bagels immediately after they come down to room temperature and place them on a baking sheet. Pop that sheet straight into the freezer until the bagels are rock hard. Then, transfer them to a freezer-safe bag. When you want one, you can toast it straight from frozen—it takes a couple of minutes longer, but the texture is surprisingly close to fresh!
Frequently Asked Questions about Baking with Sourdough Discard
I know diving into a new method can bring up some hurdles, especially when we are talking about transforming something like used starter into something as structured as a classic bagel. Don’t worry! I’ve pulled together the questions I get most often regarding this sourdough discard bagels recipe. If you follow these little pointers, you’ll find success every time you bake!
Can I use active, bubbly sourdough starter instead of discard in this sourdough discard bagels recipe?
That’s a great question, and yes, you totally can! Active starter is often wetter and more hydrated than standard, unfed discard. If you decide to swap your 100g of discard for an equal amount of that bubbly, recently fed starter, you will need to cut back on the water in the main dough by about 20 to 30 grams. It’s just to keep the dough handling correctly; we want it elastic, not sticky. This works beautifully if you want a slightly tangier flavor in your homemade sourdough discard bagels!
What is the difference between these and traditional sourdough bagels?
The biggest difference is time, darling! Traditional sourdough bagels live and die by the long, slow fermentation process—sometimes overnight in the fridge—to develop deep sourness and structure from the wild yeast. These sourdough discard bagels are much more streamlined. We use a little bit of commercial yeast (which is optional!) alongside the discard, allowing us to skip that long wait. The discard still gives us that wonderful underlying flavor depth, but the overall process is much quicker, making them some of the most appealing easy sourdough discard bagels for weeknight baking.
How long do homemade sourdough discard bagels stay fresh?
Oh, I wish they lasted forever! Because we aren’t loading these up with preservatives, they are honestly at their absolute peak on the day you bake them. If you manage to have any leftovers, they are still wonderful for up to two days when stored wrapped tightly at room temperature. If you know you won’t get to them by day three, please, slice them up right away and toss them into the freezer. Freezing is the best way to keep that beautiful, chewy sourdough bagel discard texture preserved for later enjoyment. If you have any other questions about adjusting my recipes, please don’t hesitate to reach out through my Contact Page!
Nutritional Estimate for Sourdough Discard Bagels
As home bakers, we focus first on flavor and texture, but it’s nice to have a general idea of what we’re enjoying! Since we are using simple, wholesome ingredients for these sourdough discard bagels, they are wonderfully satisfying without being overly heavy. I want to be completely transparent with you about the numbers here.
Please remember that these figures are just an estimate. Because ingredient brands vary—especially the flour protein content—your final count might look a little different. This overview is based on eight equal servings per batch of the basic sourdough discard tutorial recipe:
- Serving Size: 1 bagel
- Calories: 260
- Protein: 9 g
- Fat: 1.5 g (with only 0.3 g saturated fat)
- Carbohydrates: 53 g
- Fiber: 2 g
- Sugar: 3 g
- Sodium: 350 mg
- Cholesterol: 0 mg
I always feel better about eating something homemade when I know exactly what went into it, and these baking with sourdough discard results are certainly reassuring! They are a much better choice than many commercially produced options, especially when you control the salt levels yourself.
Share Your Sourdough Discard Bagels Creations
Honestly, seeing your finished products is the absolute best part of sharing these recipes with you! When you tackle a specialized bake like these easy sourdough discard bagels, I want to know how it went. Did you achieve that perfect New York style chew? Did the hole stay open during the boil? Don’t keep those beautiful breakfast creations to yourself!
Please, take a moment to rate the recipe using the star system below. Your feedback helps future bakers feel confident trying this recipe, and it helps me continue developing recipes that are both accessible and elegant. I truly cherish reading your comments; they make creating this content so worthwhile.
If you snapped a picture of your stunning, golden-brown sourdough discard bagels—especially if you tried the everything seasoning version—I would absolutely love to see it! Tag me on social media; I always aim to share reader successes on my stories. Knowing that my recipes are unfolding beautiful food memories in your home kitchen brings me so much joy. If you have questions about technique or need some personalized help troubleshooting, you can always reach out via my Contact Page. Happy baking!
PrintNew York Style Sourdough Discard Bagels

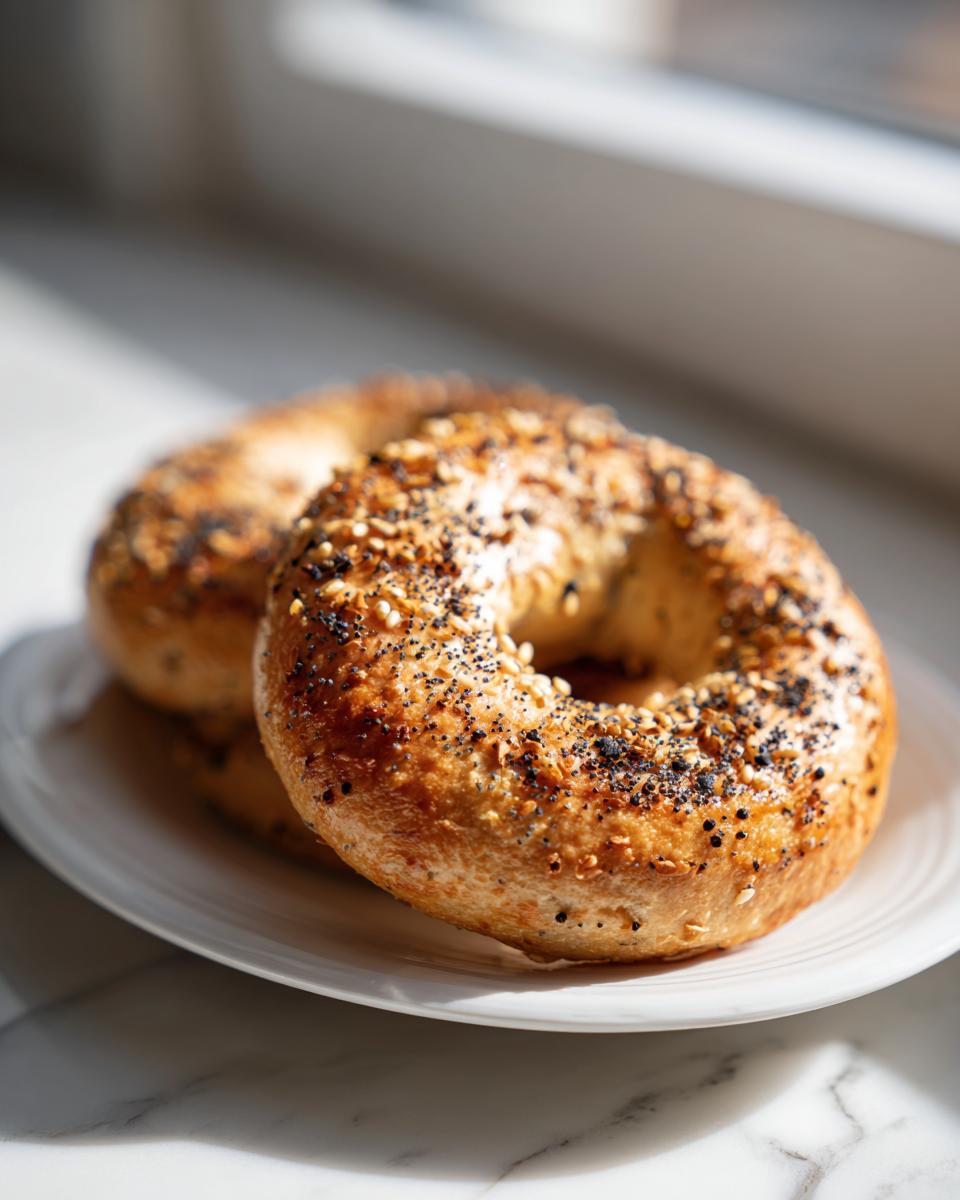
Make these chewy, authentic New York Style Sourdough Discard Bagels. This recipe uses your unfed starter discard to create bagels with a crispy crust and soft interior, perfect for breakfast.
- Prep Time: 30 min
- Cook Time: 25 min
- Total Time: 2 hours 25 min
- Yield: 8 servings 1x
- Category: Breakfast
- Method: Boiling and Baking
- Cuisine: American
- Diet: Vegetarian
Ingredients
- 400 g bread flour
- 100 g sourdough discard (unfed)
- 240 ml warm water
- 1 tablespoon honey or malt syrup
- 1 teaspoon instant yeast (optional)
- 10 g fine salt
- 1 tablespoon olive oil
- For Boiling: 10 cups water, 2 tablespoons baking soda, 1 tablespoon malt syrup
- For Topping: Everything bagel seasoning
Instructions
- In a large bowl, mix the bread flour, sourdough discard, warm water, honey or malt syrup, optional yeast, salt, and olive oil until a shaggy dough forms.
- Turn the dough onto a lightly floured surface and knead for 8 to 10 minutes until the dough is smooth and elastic.
- Place the dough in a lightly oiled bowl, cover, and let it rest at room temperature for 1 to 2 hours, or until slightly puffy. This recipe skips the long fermentation for a quicker result.
- Divide the dough into 8 equal pieces. Roll each piece into a ball, then poke a hole through the center with your thumb. Gently stretch the hole to about 1.5 inches wide.
- Place the shaped bagels on a parchment-lined baking sheet. Cover loosely and let them rest at room temperature for 30 minutes.
- Preheat your oven to 425°F (220°C). Prepare the boiling water: In a wide pot, combine 10 cups of water, 2 tablespoons of baking soda, and 1 tablespoon of malt syrup. Bring to a rolling boil.
- Carefully drop 2 or 3 bagels at a time into the boiling water. Boil for 30 seconds on each side. This step creates the classic chewy texture.
- Remove the bagels with a slotted spoon and place them back on the parchment-lined baking sheet.
- Brush the tops of the bagels with a little water or egg wash, then generously sprinkle with everything bagel seasoning.
- Bake for 20 to 25 minutes, rotating the sheet halfway through, until the bagels are deep golden brown and firm to the touch.
- Cool completely on a wire rack before slicing.
Notes
- If you prefer a longer, more complex flavor, you can let the shaped bagels rest in the refrigerator overnight after shaping (cold proofing).
- For a glossier crust, use an egg wash (1 egg whisked with 1 tablespoon water) instead of just water before seasoning.
- This recipe works well with unfed sourdough discard, making it a great way to use up leftovers.
Nutrition
- Serving Size: 1 bagel
- Calories: 260
- Sugar: 3
- Sodium: 350
- Fat: 1.5
- Saturated Fat: 0.3
- Unsaturated Fat: 1.2
- Trans Fat: 0
- Carbohydrates: 53
- Fiber: 2
- Protein: 9
- Cholesterol: 0