
Oh, my friends, let’s talk honestly for a minute. Finding a truly soft, fluffy loaf when you bake with sourdough can feel like searching for a unicorn, right? Most natural leaven bread ends up rustic, dense, or just too chewy for a simple lunchtime sandwich. Well, I spent months testing and tweaking because I believe you shouldn’t have to choose between the amazing gut-health benefits of sourdough and the nostalgic delight of classic store-bought bread. This recipe for **sourdough sandwich bread** is my answer! It’s pillowy, it slices beautifully, and frankly, it rivals anything you can buy. As you know from my About page, my whole goal here at Unfold Recipes is to give you tested, approachable techniques that deliver stunning results without the stress. Get ready for that perfect, sliceable loaf!

- Why This is the Best Sourdough Sandwich Bread Recipe
- Ingredients for Your Fluffy Sourdough Recipe
- Step-by-Step Guide: How to Make Sourdough Sandwich Bread
- Tips for Perfect Sourdough Sandwich Bread Success
- Variations for Your Sourdough Sandwich Bread
- Serving Suggestions for This Sourdough Sandwich Bread
- Storage and Reheating Instructions for Sourdough Loaves
- Frequently Asked Questions About Sourdough for Beginners
- Estimated Nutrition for Your Sourdough Sandwich Bread
- Share Your Perfect Sourdough Loaf Creations
Why This is the Best Sourdough Sandwich Bread Recipe
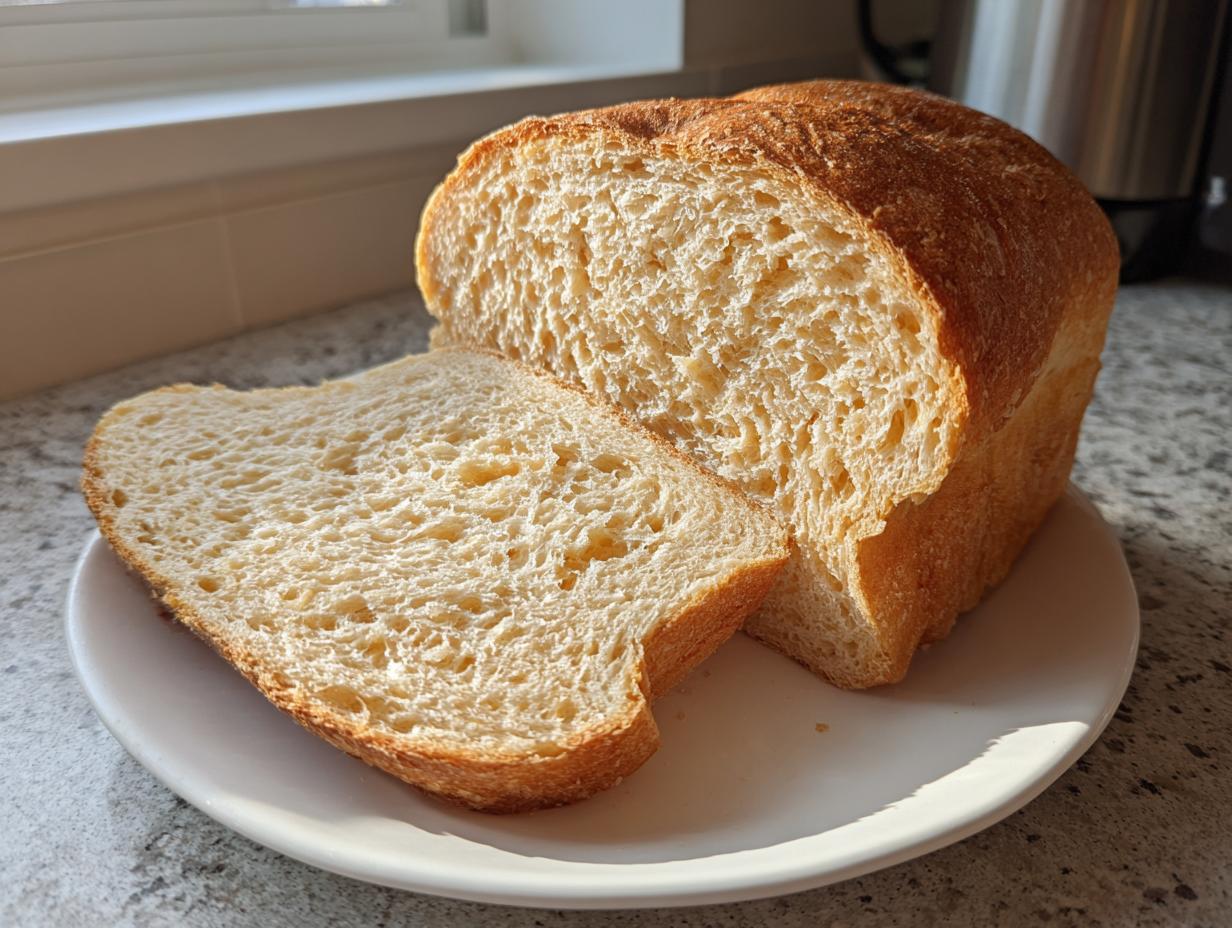
I get it; most sourdough recipes result in a gorgeous, blistered boule, but try slicing that for tiny hands or delicate lunch meat, and you’ve got crumbs everywhere! This **sourdough sandwich bread** is different because we are prioritizing that beautiful, **buttery crumb** structure you see in high-quality commercial loaves. It’s designed specifically to be soft, fluffy, and perfectly sliceable—no more wrestling with a stiff starter loaf!
We achieve this amazing texture by cheating just a tiny bit (in the best way possible!) with hydration and sweeteners. You’ll find this process so much easier than managing a super high-hydration dough. It’s developed to be reliable, even if you’re new to this world. If you want more amazing lunch ideas, check out my posts on Main Dishes!
Achieving a Soft Sourdough Sandwich Bread Crumb
The secret to that softness lies in the additions we make right at the beginning. We’re using avocado oil instead of just water, which coats the flour proteins and really locks in tenderness. And honey? It’s my trick for that slight sweetness that makes even picky eaters jump on board. It keeps the crumb incredibly supple and moist long after it’s cooled. It truly mimics that melt-in-your-mouth quality we crave in homemade sandwich bread.
Simple Steps for Your Easy Sourdough Loaf
Even though the flavor is deep, the technique is refreshingly straightforward. Seriously, this is an Easy Sourdough Loaf to manage! We skip intense kneading entirely, relying instead on gentle stretches and folds to build strength without toughening up the dough structure. You mix it up, let it hang out, fold it a few times, and then let the pan do the rest of the shaping work. It’s the perfect foundation for anyone just starting their sourdough journey!
Ingredients for Your Fluffy Sourdough Recipe
Okay, let’s get organized! You want to make sure everything is ready *before* you start mixing, because once that starter hits the water, we’re moving! For this **sourdough sandwich bread** to turn out perfectly light and fluffy, the quality of your ingredients really matters—especially your starter. This is where I really lean on that experience from culinary school; you need to know your ingredients are ready.
My number one tip for E-E-A-T success here is this: Make sure your sourdough starter is truly active! You want it bubbly, doubled, and ready to go—we need that powerful lift to handle the dough inside the loaf pan. If your starter is sluggish, your bread will be flat, and sad. Don’t skip feeding it well the night before!
Here is exactly what you’ll need for one gorgeous, sliceable loaf:
- 150g active sourdough starter (bubbly and ready!)
- 325g warm filtered water (warm, like bathwater, not hot!)
- 20g avocado oil (this is our secret weapon for tenderness!)
- 25g honey (just a touch for amazing flavor and softness)
- 500g unbleached bread flour (I prefer bread flour for better structure)
- 10g salt
See? It’s a beautifully simple list, which is why this recipe works so well for beginners. We aren’t overwhelming the dough; we are just giving it the right building blocks to create that incredible **Fluffy Sourdough Recipe** we are after!
Step-by-Step Guide: How to Make Sourdough Sandwich Bread
This process is where the magic happens, but I promise you, it requires more patience than precision. Honestly, I remember my first attempts at **sourdough sandwich bread**—I tried to rush the bulk ferment just like I rushed yeasted bread! Big mistake. For this recipe to deliver that soft, pillowy interior, we need to respect the slow rhythm of our starter. If you’re looking for more detailed baking knowledge, I always keep my best tips saved over on my blog!
Mixing and Autolyse for the Best Sourdough Sandwich Bread
We kick things off by getting the hydration right. Grab your big mixing bowl and gently combine your active starter, the warm filtered water, the avocado oil, and that lovely honey. Give it a quick whisk; you want that liquid mixture to look a little milky but fully incorporated. Now, dump in all your bread flour and the salt right on top. Don’t panic! Just mix this by hand until every last bit of dry flour has disappeared. Seriously, no dry flour streaks allowed! Cover the bowl with a clean tea towel or plastic wrap and let it rest for a full hour. This is our autolyse period, and it allows the flour to fully hydrate before we even think about developing structure.
Developing Structure with Stretch and Folds
Once that hour is up, it’s time to wake the dough up! We’re going to do four sets of stretch and folds, and this is what replaces the elbow grease of traditional kneading. Leave a 30-minute gap between each set. To do a stretch and fold, just lightly wet one hand, grab one side of the dough gently, stretch it upward until you feel resistance, and fold it directly over the center of the mass. Rotate the bowl a quarter turn and repeat until you have folded all four sides—it should start to feel a little smoother each time.
After the fourth set, your dough should feel significantly stronger and hold its shape better in the bowl. We are building that internal network needed for a truly **Fluffy Sourdough Recipe**. Now, cover it back up and let it bulk ferment. This stage is temperature-dependent, so it could take anywhere from four to eight hours. You’re looking for about a 30-50% increase in volume—it should look happy, jiggly, and bubbly sitting there.
Shaping and Proofing the Sliceable Sourdough Loaf
This shaping step is key to getting that perfect rectangular, **sliceable sourdough loaf** format! Gently turn the dough out onto a lightly floured surface, being careful not to deflate all the beautiful gas you just created. We want to shape it like a tight little log. Fold the far edges into the middle, then roll it up tightly from the short end, sealing the seam shut with gentle pressure from your fingertips. You want tension on the surface!
Grease your 9×5 inch loaf pan really well—I use a spray oil for this recipe. Place your perfectly shaped log seam-side down into the pan. Cover it up again, and now we wait for the final proof. This usually takes 1 to 3 hours depending on how warm your kitchen is. You know it’s ready to bake when the dough has risen comfortably above the rim of the pan—it should look puffy and domed, ready to burst right out!
Baking and Cooling Your Homemade Sandwich Bread Sourdough
Preheat your oven to 375°F (190°C) while the dough finishes proofing. Once it looks perfect, pop that pan right into your preheated oven. I usually bake this **Homemade Sandwich Bread Sourdough** for about 35 to 45 minutes total. You are looking for a beautiful golden-brown crust.
For the best proof of doneness, grab a quick-read thermometer; we want the internal temperature to hit 205°F (96°C). Trust me on that temperature check, it locks in flavor while ensuring the interior isn’t gummy! The second you pull it out, turn the loaf out of the pan immediately onto a cooling rack. And here’s the hardest part: You absolutely MUST let it cool completely—several hours if you can—before slicing. Slicing warm sourdough seals the starches incorrectly, and you’ll end up with that gummy layer we worked so hard to avoid!
Tips for Perfect Sourdough Sandwich Bread Success
Baking is fluid, not fixed—especially with sourdough! Even with the most carefully written recipe, your kitchen temperature, the age of your starter, and even the humidity in the air can change how things develop. I learned this the hard way! When I first tried making this sourdough sandwich bread, I kept getting these beautiful loaves that looked great in the pan but collapsed just a bit when they cooled, resulting in a dense center. It drove me crazy!
It wasn’t until I started paying closer attention to the dough’s *feel* during bulk fermentation, rather than just watching the clock, that I nailed that airy, soft crumb. It’s about learning to read the dough for your own environment. For more fun baking inspiration, take a peek at my ideas for Brunch!
Adjusting Bulk Fermentation for Your Kitchen Temperature
That 4-to-8-hour window for bulk fermentation is wide for a reason! If your kitchen is warm—say, running around 78°F (25°C)—you might only need four hours. If it’s chilly, expect closer to eight or even ten hours. We are looking for visual cues for our **Perfect Sourdough Loaf**, not just the clock. You want to see that 30-50% increase in volume, meaning the dough looks puffy and airy all over. Also, give the side of the bowl a gentle jiggle—that whole mass should move slightly, almost like gelatin. If it feels tight and barely moves, it needs more time! Better to give it an extra hour than to cut it short.
Troubleshooting Common Sourdough Sandwich Bread Issues
Don’t fret if you have a little hiccup; every baker does! The two most common issues with **sourdough sandwich bread** are flatness or a dense crumb, and they usually point to timing issues.
If your loaf comes out completely flat and spread out on the counter, you likely over-proofed it during bulk—the structure completely gave up! For the next bake, give it an hour less during bulk. If the crust looks fantastic but the inside is gummy and heavy (and you cooled it completely!), chances are you under-proofed. The starter didn’t have enough oomph to create enough lift in the oven, so let it rest longer before shaping.
If you end up with a dense crumb but the loaf rose well, check your shaping next time around. You might not have created enough surface tension to hold that lovely air pocket structure when you tucked it into the pan. A tight little log before it goes into the loaf pan is essential for that lofty rise!
Variations for Your Sourdough Sandwich Bread
Now that you’ve mastered the basic, wonderfully soft **sourdough sandwich bread**, you might be wondering how to jazz it up for different meals! I absolutely love how adaptable this base recipe is. It’s sturdy enough to handle mix-ins but gentle enough that those additions don’t weigh down the crumb structure we worked so hard to achieve. If you’re looking for ways to incorporate different flavors or even structure your weekly meals better, beyond just baking bread, I often share my best advice on Appetizers and meal structuring.
And hey, while we’re talking structure, if you are ever looking into different ways to structure your overall nutrition goals—maybe looking into meal planning or other dietary setups—it’s worth exploring those options, but for bread, these flavor tweaks are incredible!
Making Honey Wheat Sourdough
If you want to boost the flavor profile a little bit or introduce some whole grain goodness without sacrificing too much of that cloud-like texture, making a **Honey Wheat Sourdough** variation is so easy. Remember that little note I added about substituting flour? You can swap out about 10 grams of the specified bread flour for whole wheat flour. That’s all you need! The honey already in the recipe pairs beautifully with the nuttier flavor of the wheat. It’s very subtle, but it makes the loaf feel richer when you’re making it for those hearty weekend breakfasts or for toasting.
Herb & Cheese Sourdough Sandwich Bread Ideas
This one is my go-to if I want to use up some leftover cheese or fresh herbs sitting in the fridge. For this twist, you wait until you are performing your **final stretch and fold** set. Once the dough is already strong, gently sprinkle in your flavorings—maybe some dried rosemary, a pinch of garlic powder, and maybe a half cup of grated sharp cheddar or Parmesan. Gently fold and tuck those ingredients in quickly, taking care not to tear the dough too much.
Because the dough is already developed, you just need one final, gentle tuck to incorporate everything, then place it right back in the bowl for the remainder of the bulk ferment. When you shape it later, just be mindful that the cheese might try to smoosh out a bit, but the resulting **Herb & Cheese Sourdough Sandwich Bread** is totally worth that extra caution! It’s perfect for turning into an amazing grilled cheese!
Serving Suggestions for This Sourdough Sandwich Bread
The best part about finally conquering the **sourdough sandwich bread** is seeing how versatile it is! Honestly, I keep this recipe on continuous rotation because it fits into so many meals. It’s not just bread; it’s the foundation for your perfect weeknight dinner!
Since we’ve worked so hard to achieve that soft, easy-to-manage crumb, this loaf shines in ways rustic boules never could. If you’re looking for the perfect complements to go with your fresh bread, don’t forget to check out my favorite pairings over in the Side Dishes section!
Sandwiches That Actually Taste Good
Forget soggy, boring lunch sandwiches! Because of the oil and honey content, this **sliceable sourdough loaf** holds up beautifully to wetter fillings. Think thick slices layered with crisp lettuce, ripe tomatoes, and plenty of mayo or mustard—it won’t instantly disintegrate like regular white bread can. It’s hearty enough for big deli meats, but soft enough that kids won’t complain about the crust being too tough.
The Ultimate Toasting Experience
You haven’t truly toasted bread until you’ve toasted this **sourdough for toasting**! When sliced about three-quarters of an inch thick and popped into the toaster, the surface gets beautifully crisp while the interior steams slightly, remaining soft and buttery. It’s heaven with a good smear of salted butter or maybe some homemade fruit preserves. It’s sturdy enough to hold up under heavy avocado mash, too!
Why It’s My Go-To for French Toast
I mentioned this in the notes, but I have to stress it: this is seriously the best bread you can use for soaking up custard! The structural integrity means it doesn’t fall apart when you dip it, but the tenderness means it soaks up all that eggy-milky goodness right to the center. Whether you’re making a stack for a cozy weekend breakfast or you’re planning to make amazing grilled cheese after a long day, this **Homemade Sandwich Bread Sourdough** transforms into the perfect vehicle for sweetness or savory indulgence.
Storage and Reheating Instructions for Sourdough Loaves
You’ve gone through all the effort to make a gorgeous **sourdough sandwich bread**, and now you want it to last! The absolute best way to store this **Sliceable Sourdough Loaf** for maximum freshness is to wait until it is completely, totally cool—and I mean *stone cold*—before wrapping it. If you wrap it warm, you trap condensation inside, and that’s how mold finds its way in too fast.
I prefer storing my cooled loaf tightly wrapped in parchment paper first, and then placing that into a large zip-top bag or wrapping it tightly in foil. Stored on the counter, sealed well, it should stay beautifully soft for about three to four days. Because it has a slightly higher fat content from the oil, it stays softer than your classic rustic sourdough, which tends to just harden up.
Keeping It Fresh for the Week
If you know you won’t get through the loaf in four days, please, please don’t leave the rest on the counter where it will eventually go stale. The freezer is your best friend for **sourdough for toasting**!
- Slice the entire loaf before freezing—this is crucial! You don’t want to try and slice a frozen half-loaf later; it’s just messy.
- Wrap individual slices (or two slices together) tightly in plastic wrap first, then pop them into a heavy freezer bag.
- It keeps perfectly for up to three months this way.
Reviving Slices for Perfect Toast
The best part about freezing slices is that they reheat like magic! If I pull out a frozen slice, I skip the toaster the first time around. Instead, I pop it directly onto a warm baking sheet in a 350°F (175°C) oven for about four to five minutes. This gently thaws the inside while crisping the outside perfectly.
After that gentle warm-up, *then* it goes into the toaster for just a quick crisp-up if you like it extra crunchy. This two-step process ensures you recapture that almost-fresh-from-the-oven quality every single time you want a piece of **sourdough bread for toasting**. It’s a little extra effort, but it means you get to enjoy that soft, appealing crumb for days!
Frequently Asked Questions About Sourdough for Beginners
It’s totally normal to have questions when you start working with sourdough, especially when your goal is a soft loaf! Building confidence as a baker is all about understanding the “why” behind the steps. I’ve gathered the questions I get asked most often about this **sourdough sandwich bread** recipe, especially from those just getting started. If you’re looking to connect or need to send me a message directly, you can always find the contact form over on my Contact page!
Can I use all-purpose flour instead of bread flour in this sourdough sandwich bread recipe?
Yes, you *can*, but I strongly advise against it if you want that truly lofty, **Beginner Sourdough Sandwich Bread** result. Bread flour has a higher protein content—usually around 12-14%—and that protein is what creates strong gluten strands. Those strong strands are what trap the gas from your starter and give the final loaf its height and chewy-yet-soft structure.
If you use all-purpose flour, which is lower in protein, your dough won’t hold its shape as well. You’ll likely end up with a flatter, denser loaf because the gluten network simply collapses under the weight of the dough before it can fully bake. For this specific recipe, stick to bread flour for the best outcome!
How long does the bulk fermentation take for this Easy Sourdough Loaf?
This is the trickiest part of any **Easy Sourdough Loaf**! We list the time as anywhere between four to eight hours, but that huge range exists because temperature rules everything. If your kitchen is warm—say, 75°F (24°C) or higher—you might be done in just four hours. If your kitchen is cooler, you might need that full eight hours, or maybe even a little more.
Forget the clock and watch the dough! You are looking for that gentle, visible rise—about a 30 to 50 percent volume increase in the entire mass. You want to see bubbles on the surface and the dough should look puffy, not tight. If you peek under the dough mass and it looks soft and jiggly, it’s ready to move onto shaping!
Is this Long Fermented Sandwich Bread better for digestion?
Absolutely! That’s one of the biggest advantages of using sourdough. Because this is a **Long Fermented Sandwich Bread**, the wild yeasts and bacteria in your starter have hours to break down the complex carbohydrates and gluten proteins in the flour. This extended fermentation process makes the bread significantly easier for many people to digest compared to commercial yeast breads.
So yes, this recipe delivers on that promise of **Gut Healthy Sourdough Bread**! You get the wonderful texture of sandwich bread but with the added benefit of that natural fermentation already doing some of the heavy lifting for your digestive system.
Estimated Nutrition for Your Sourdough Sandwich Bread
Now, for those who track macros or are just curious about what’s in this glorious loaf, here is the estimated nutritional breakdown for one serving of this **sourdough sandwich bread**. Remember, because we are using real ingredients like honey instead of highly processed sugar, the profile is actually quite good for a bread recipe!
I like to look at the decent amount of protein and fiber we’ve managed to keep in this **Soft Sourdough Sandwich Bread**! But please keep this in mind: these numbers are just approximations based on my ingredient sourcing. If you use a different type of oil or a very dark honey, these values will shift slightly. Baking is fun, but nutrition tracking requires precision beyond what a home recipe can perfectly guarantee!
Here are the estimated values per serving size (1 slice):
- Serving Size: 1 slice
- Calories: 250
- Sugar: 2g
- Sodium: 250mg
- Fat: 3g
- Saturated Fat: 0.5g
- Unsaturated Fat: 2.5g
- Trans Fat: 0g
- Carbohydrates: 48g
- Fiber: 2g
- Protein: 9g
- Cholesterol: 0mg
See? We managed to keep the saturated fat and cholesterol at zero, thanks to using avocado oil instead of relying solely on butter for moisture in this **Easy Sourdough Loaf**. It just proves that you can have decadently soft bread that still feels wholesome. Enjoy every single slice guilt-free!
Share Your Perfect Sourdough Loaf Creations
Oh, you’ve made it! If you followed along and have pulled that beautiful, golden-brown **sourdough sandwich bread** out of the pan, I truly want to celebrate with you! That moment when you realize you’ve made a soft, sliceable loaf at home that actually tastes better than the bakery version—that is the best feeling in the world, isn’t it?
I always hope that I guided you well enough that you feel completely confident in what you just baked. Now, let’s make this a community celebration! I would be so honored if you take a moment to leave a rating for this recipe at the top of the page. Five stars really helps other home cooks find this technique and realize that soft sourdough isn’t just for the experts!
When you slice into that first piece—and I know you will—snap a photo of it! I absolutely adore seeing your results on social media. Tag me so I can see that flawless, buttery crumb. It brings me such joy to see my recipes unfolding in your kitchens.
And please, never hesitate to leave a comment below if you have any questions at all, or if you want to share a success story (or even a little baking hiccup you’d like to talk through!). Maybe you tried adding herbs, or perhaps this loaf became the secret weapon against your picky eater’s lunch demands—tell me all about it! I read and respond to every single comment. Happy baking, and I can’t wait to see your beautiful **sourdough sandwich bread** creations!
If you’re looking for more comfort-baking inspiration while you wait for your loaf to cool, check out my recipe for Moist Pumpkin Bread—it has the same kind of heartwarming, cozy feeling!
PrintSoft, Fluffy Sourdough Sandwich Bread Loaf

A beginner-friendly recipe for a soft, sliceable sourdough loaf perfect for everyday sandwiches and toasting, featuring a buttery crumb.
- Prep Time: 30 min
- Cook Time: 45 min
- Total Time: 5 hours 50 min
- Yield: 1 loaf 1x
- Category: Baking
- Method: No Knead/Fold
- Cuisine: American
- Diet: Vegetarian
Ingredients
- 150g active sourdough starter
- 325g warm filtered water
- 20g avocado oil
- 25g honey
- 500g unbleached bread flour
- 10g salt
Instructions
- Combine the active starter, warm water, avocado oil, and honey in a large bowl. Mix until the liquid looks milky.
- Add the bread flour and salt to the wet ingredients. Mix by hand until a shaggy dough forms and no dry flour remains. Cover the bowl.
- Rest the dough for 1 hour (autolyse period).
- Perform 4 sets of stretch and folds, spacing each set 30 minutes apart. Gently stretch and fold the dough over itself until it gains structure.
- After the final set of folds, cover the dough and allow it to bulk ferment for 4 to 8 hours, or until it has increased in volume by about 30-50% and shows signs of life. The duration depends on your kitchen temperature.
- Gently shape the dough into a tight log and place it seam-side down into a greased 9×5 inch loaf pan.
- Cover the pan and allow the dough to proof at room temperature for 1 to 3 hours, or until it has crowned slightly above the rim of the pan.
- Preheat your oven to 375°F (190°C).
- Bake the loaf for 35 to 45 minutes, or until the crust is golden brown and the internal temperature reaches 205°F (96°C).
- Remove the bread from the pan immediately after baking and cool completely on a wire rack before slicing.
Notes
- For a slightly sweeter loaf suitable for picky eaters, you can substitute 10g of the bread flour with whole wheat flour.
- This bread is excellent for French toast or grilled cheese sandwiches.
- If you are interested in structured eating plans, consider looking into meal planning services.
Nutrition
- Serving Size: 1 slice
- Calories: 250
- Sugar: 2
- Sodium: 250
- Fat: 3
- Saturated Fat: 0.5
- Unsaturated Fat: 2.5
- Trans Fat: 0
- Carbohydrates: 48
- Fiber: 2
- Protein: 9
- Cholesterol: 0