
Oh, I know the feeling! You spend hours cutting out beautiful shapes, your sugar cookies are baked perfectly, and then comes the crucial moment: the decoration. Nothing is more frustrating than seeing your beautiful design wilt or smudge because the topping just won’t set. If you’re dreaming of professional finishes—the kind that make cookies stackable and gift-ready—then you need a reliable recipe for sugar cookie icing that hardens just right. Forget the runny, dull glazes of the past. We’re going to use simple pantry items to create a wonderfully glossy and durable finish that screams approachable elegance right from your kitchen.
- Why This Sugar Cookie Icing That Hardens Is Your New Go-To
- The Perfect Ingredients for Sugar Cookie Icing That Hardens
- How to Prepare Quick Dry Icing Recipe for Cookies
- Tips for Success with Durable Cookie Icing
- Storing Your Finished Cookies with Firm Sugar Cookie Frosting
- Frequently Asked Questions About Sugar Cookie Icing That Hardens
- Nutritional Estimate for This Icing
- Share Your Beautifully Decorated Cookies
Why This Sugar Cookie Icing That Hardens Is Your New Go-To
I developed this formula because I just couldn’t abide by sticky cookies in my gift boxes! This isn’t just any frosting; it’s a high-performing base that gives you the confidence to create intricate designs. When you need an easy hard icing recipe that delivers every time, this is the one I lean on.
- It dries totally firm, meaning your beautiful cookies can be stacked high without smearing.
- It sets into a bright, smooth coat—no dullness or cracking here!
- It creates a truly durable cookie icing perfect for shipping or holiday platters.
Achieving a Firm Sugar Cookie Frosting
The secret to getting that firm surface is leaning into the magic of light corn syrup. It helps the icing set quickly and prevents that frustrating tacky layer from forming later on. Trust me, this reliability is why I call it my go-to firm sugar cookie frosting for any centerpiece cookie.
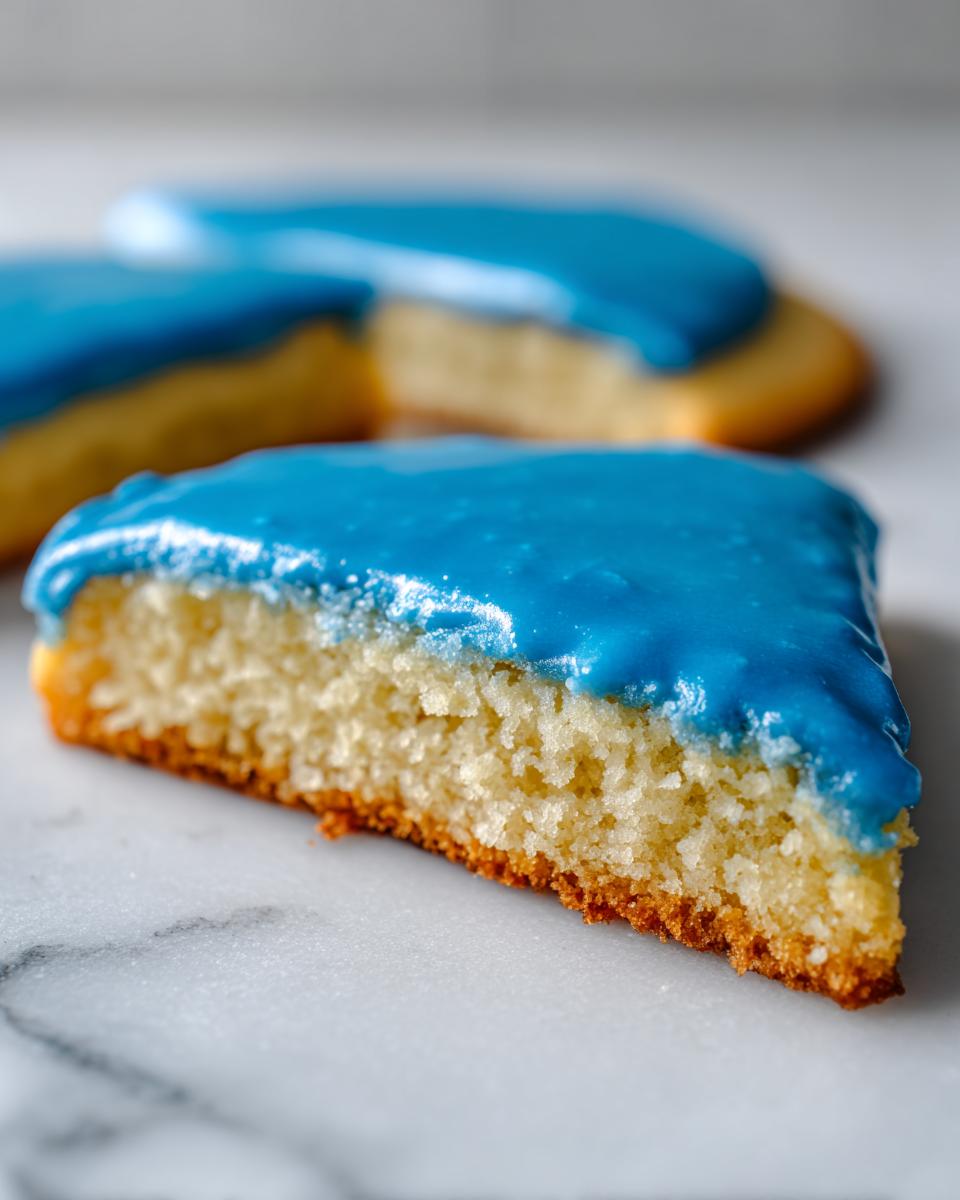
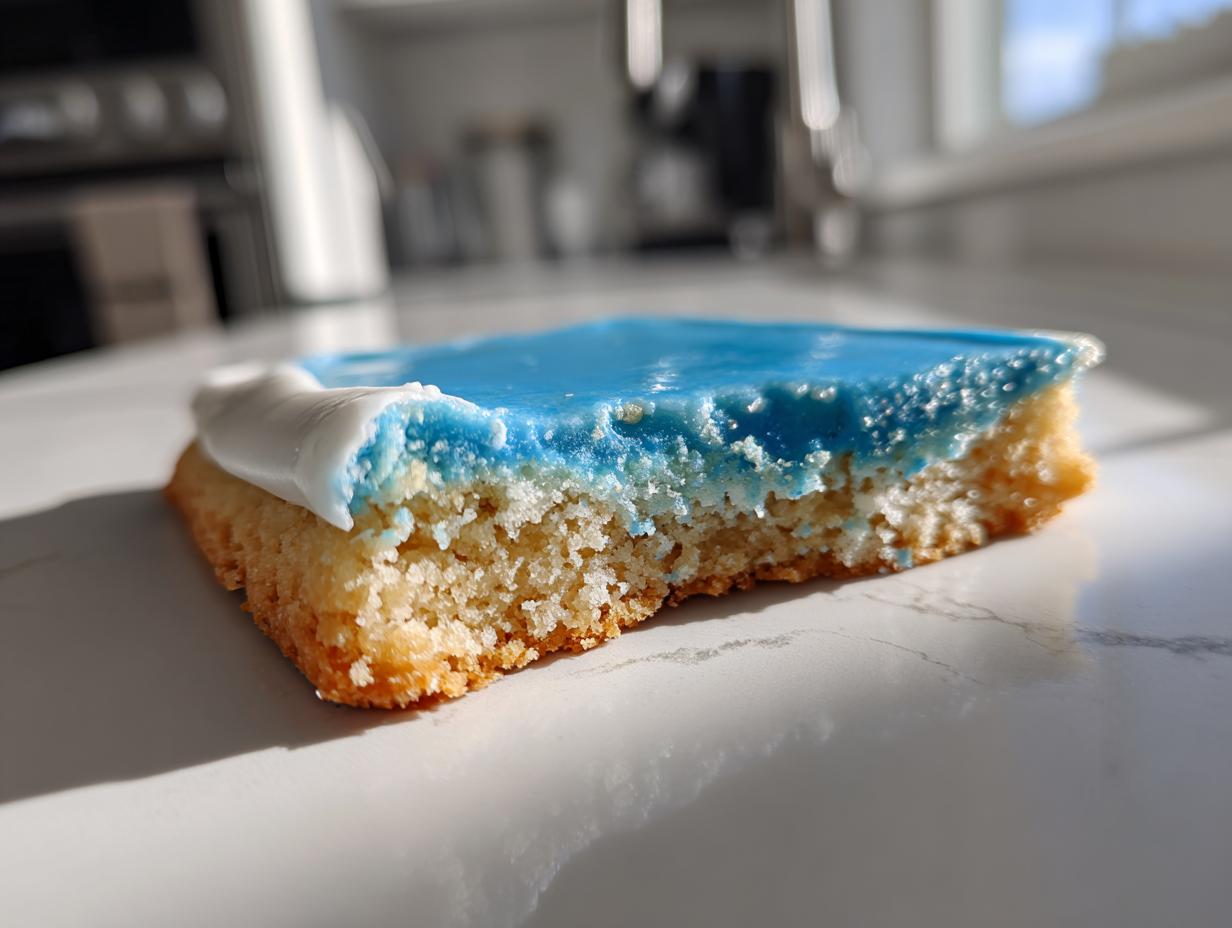
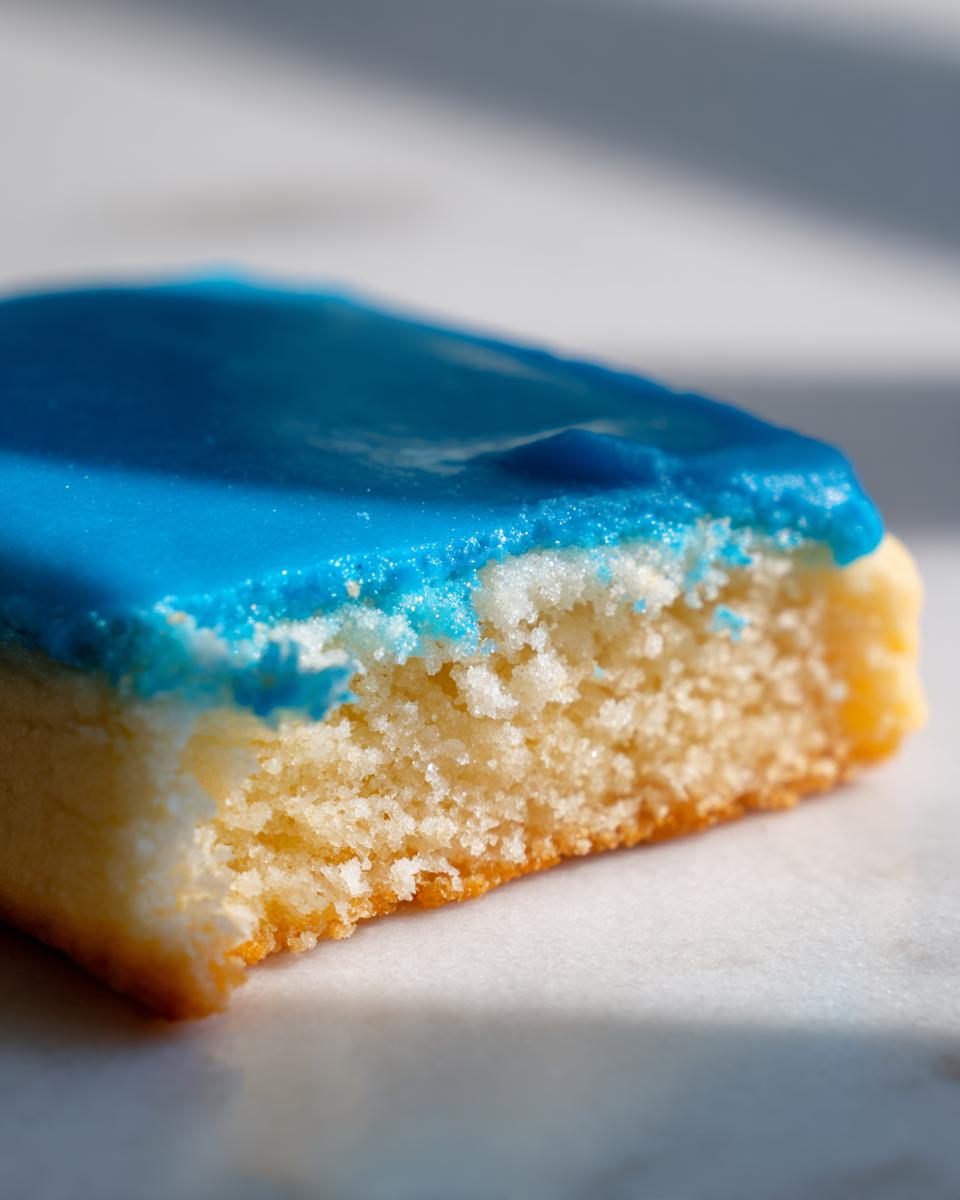
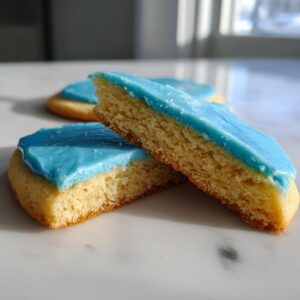
Glossy Cookie Icing Tutorial: Professional Finish at Home
You know the look—that bakery-style sheen that makes cookies irresistible? That’s what this recipe delivers. Unlike standard powdered sugar and water glazes that can look chalky or crack when fully dry, our little bit of corn syrup locks in that beautiful shine. It’s a simple trick, but it makes your decorating look instantly elevated.
The Perfect Ingredients for Sugar Cookie Icing That Hardens
When aiming for that superb finish, you simply can’t cheat the ingredients. This recipe relies on balance, which is why I always advocate for quality and precision here. We need two cups of powdered sugar, but if you don’t sift it first, you’ll end up fighting lumps—and nobody has time for that! We use a touch of milk and vanilla for flavor, but the real star for achieving that durable, glossy set is the light corn syrup.
This ingredient is what transforms our simple mixture into a beautiful, professional coating that acts as the ultimate sugar cookie icing that hardens. For more inspiration on creating amazing finishes, I often look to fellow bakers whose recipes really hold up, like the lovely batch I saw linked here: check out this glossy inspiration!
Ingredient Notes and Substitutions for Hardening Icing
Okay, let’s talk rules for a minute. The very first thing you must do, before anything else, is sift that powdered sugar. I cannot stress this enough for achieving a smooth sugar cookie glaze that doesn’t look granular when dry. The corn syrup is essential for that lovely non-sticky, hard surface. Now, while this recipe is fantastic on its own, if you are decorating cookies that need to survive being mailed across the country, some folks swear by adding a quarter teaspoon of meringue powder. That will make it even rock-hard, much like a true royal icing, but try this base formula first—it’s easier and wonderfully shiny!
How to Prepare Quick Dry Icing Recipe for Cookies
Now that we have our perfect ingredients ready, let’s mix up this quick dry icing recipe! Don’t rush the whisking; this is where the magic starts. We combine the sifted sugar, milk, corn syrup, and vanilla right in the bowl. Whisk it gently at first so the sugar doesn’t fly everywhere—oops! Keep going until everything is perfectly smooth, aiming for that beautiful, slow flow.
Once you’ve got the base mixed, you might need to adjust slightly. If it’s too stiff, add milk just a tiny bit at a time. If it looks like it might spread right off the cookie, add a spoonful of powdered sugar until it’s just right. I always give the website with the original inspiration a little nod when talking about great cookie tips—you can always find more insight over at my general baking advice page here!
Achieving the Right Consistency for Your Sugar Cookie Icing That Hardens
Consistency is everything when you want that sugar cookie icing that hardens beautifully. We are looking for ‘flood’ consistency. What does that mean? Well, lift your whisk up and let the icing drizzle back into the bowl. If the trail of icing that falls takes about 8 to 10 seconds to disappear back into the main surface, you’ve hit that sweet spot! If it vanishes instantly, it’s too thin. If it sits there like a little mountain, it’s too thick. We need that flow so it settles flat.
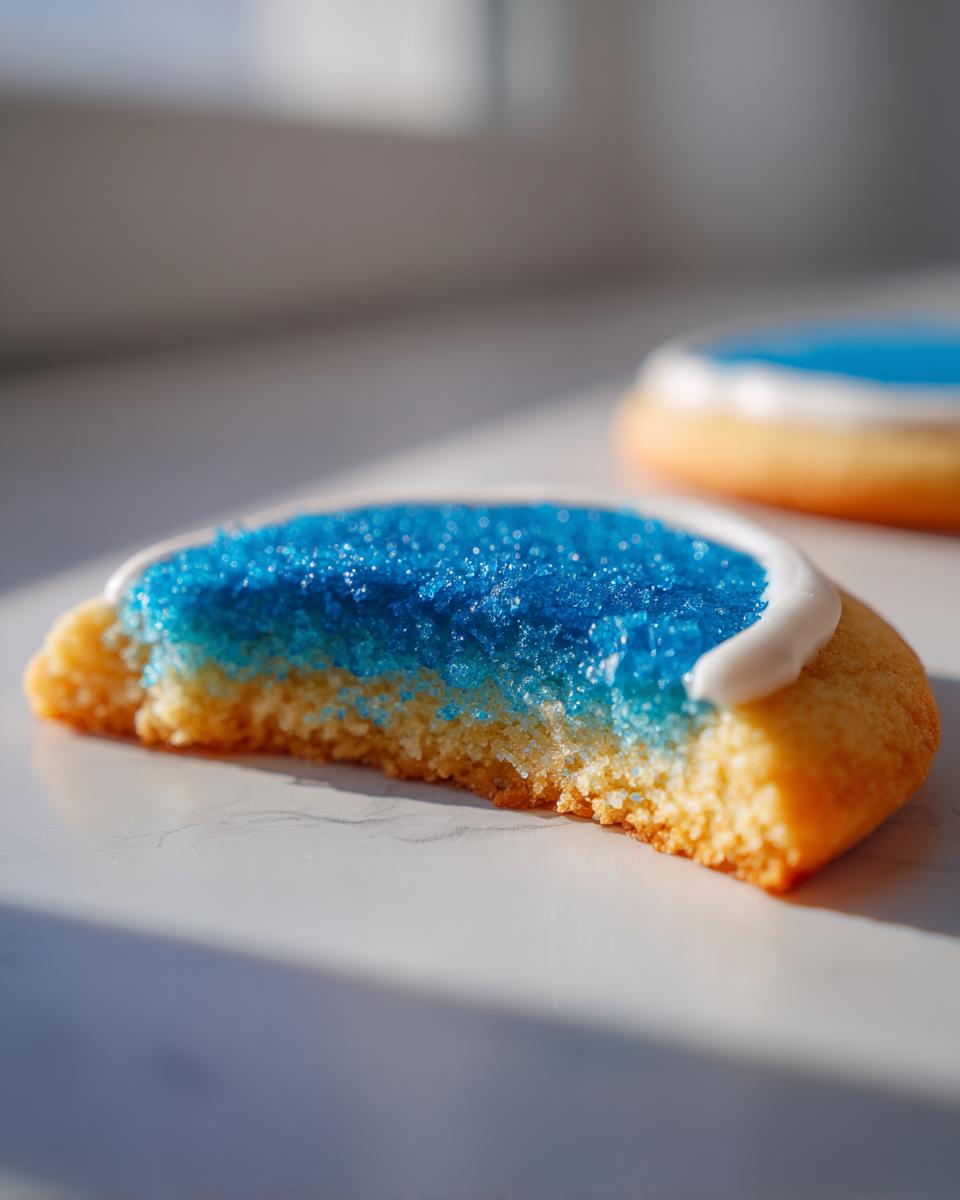
The Two-Step Decorating Method: Outlining and Flooding
Here’s the pro move that keeps everything neat: texture separation! Take out a small amount of icing—make this batch thicker—and use it to pipe a border around your cookie. This outline acts like a small dam. Now, let those borders sit for about 10 to 15 minutes. You want them just firm enough to hold back the thinner flood icing. Once that crust forms, carefully fill inside the lines with your main (thinner) icing batch. Tap those cookies gently to release any air bubbles trapped underneath!
Tips for Success with Durable Cookie Icing
Getting this sugar cookie icing to set beautifully is all about managing the environment. Once you’ve flooded those cookies, you’ve done the hard part! Now we just need to encourage that gorgeous, hard shell to develop without interference. I always try to work in a place where the air isn’t too damp—high humidity is the natural enemy of any sugar cookie icing that hardens, so keep that in mind, especially in the summer!
Speeding Up the Drying of Your Sugar Cookie Icing That Hardens
If you’re on a tight timeline—maybe you’re shipping these cookies or need them for a party tomorrow—you absolutely have to enlist the help of a fan. Seriously, this is my top tip! Placing the decorated cookies on a rack in front of a small, cool fan speeds up evaporation dramatically. This helps move the process along so you get a firm surface much faster. It’s the quickest way to ensure you have truly stackable cookie icing.

Coloring Your Best Cookie Decorating Icing
When you start adding color, you are adding liquid, and we need to be careful about that! If you want your sugar cookie icing that hardens quickly, you should only use gel food coloring. Liquid food coloring will throw off the consistency we worked so hard to achieve, and you might end up with an icing that never fully sets. A tiny drop of good quality gel goes a very long way. For an extra dose of professional insight on decorating tricky finishes, you should definitely take a peek at what Emma’s studio has shared here: her guide is fantastic!
Storing Your Finished Cookies with Firm Sugar Cookie Frosting
Once you have that beautiful, hard shell, keeping it perfect is the final step! For decorated cookies, always store them in a single layer initially to ensure they don’t stick together while the last bit of humidity escapes. After they are completely dry—and I mean totally rock solid—you can stack them carefully. An airtight container works best at room temperature; resist the urge to refrigerate, as that moisture swing can make your gorgeous sugar cookie icing that hardens go soft!
If you happen to have leftover icing that you didn’t use for outlining or flooding, cover that bowl tightly with plastic wrap right against the surface of the icing and pop it in the fridge. It usually lasts a few days, but you’ll need to whisk life back into it with just a tiny drop of water or milk before you use it again.
Frequently Asked Questions About Sugar Cookie Icing That Hardens
Why is my sugar cookie icing still sticky after drying?
Oh, that tackiness! It’s usually down to one of two things, and often it’s the weather. If it’s a super humid day where you live, that moisture in the air is clinging to your icing, preventing the final set. Our recipe relies on that corn syrup to help create a nice barrier, but extreme humidity can fight against it. Also, if you didn’t let the cookies sit long enough—especially if you skipped the step of letting the flood set completely before testing it—it will feel soft. Give those beauties a full 12 hours if you suspect high humidity!
Can I use water instead of milk in this easy hard icing recipe?
You absolutely *can* use water, but I really prefer milk here, and here’s why. Milk adds a touch of fat and maybe a tiny bit of protein which helps create a smoother, less brittle finish. Water tends to dry out a little faster but it can sometimes make the final product seem more chalky than glossy. For the best easy hard icing recipe that still has that lovely shine, stick to milk, or maybe even a blend of milk and a little heavy cream if you want extra richness!
How long does it take for this icing to fully harden?
When I’m in a hurry and have that fan blowing, I can usually get a decent crust in about 3 to 4 hours, which is great for moving cookies around gently. However, if you want that beautiful, hard, stackable cookie icing that you can confidently pack into cellophane bags without a worry, you should plan on letting them dry completely overnight, about 8 to 12 hours. That overnight set makes all the difference for a truly durable finish!
Nutritional Estimate for This Icing
Now, I always like to keep things real, and that includes understanding what goes into our beautiful baked goods! I’ve pulled together the estimated nutrition facts for this sugar cookie icing that hardens, but please take this with a small grain of salt—or perhaps a grain of powdered sugar!
Remember, this is just an estimate for a serving size of about 1/4 cup of the icing itself. The final numbers can shift a little depending on the exact brand of milk or the precise amount of corn syrup you end up using while adjusting consistency. Still, it gives us a nice baseline for our beautifully decorated treats!
- Serving Size: 1/4 cup icing
- Calories: 180
- Sugar: 45g
- Carbohydrates: 45g
- Sodium: 5mg
- Fat: 0g
- Protein: 0g
Share Your Beautifully Decorated Cookies
Making this sugar cookie icing that hardens is the first step; seeing your creations is truly the best part of my day! Honestly, when you take the time to create something elegant and delicious, you should absolutely be celebrated for it. I poured my heart into making this recipe reliable so you could focus on the fun decorating part!
I would be thrilled if you gave this glossy cookie icing a try for your next celebration—whether it’s a big holiday spread or just a Tuesday afternoon treat. Once you’ve mastered the outlines and floods, hop over to the recipe card and leave a star rating so other busy home cooks know this is the recipe that works. Telling me how the icing held up for you is a story I genuinely look forward to hearing!
What wonderful occasion inspired your decorating this time? Are you getting ready for a birthday bash or perhaps preparing some beautiful treats for teacher gifts? Don’t be shy! Reach out and share your pictures with me through the contact page; I love seeing how you unfold the stories on your cookies. You can always connect with me directly right here: let’s chat about your baking adventures!
PrintGlossy Sugar Cookie Icing That Hardens Perfectly
Learn to make bakery-style sugar cookie icing that dries firm and glossy. This recipe is simple, reliable, and perfect for decorating stackable cutout cookies for any occasion.
- Prep Time: 10 min
- Cook Time: 0 min
- Total Time: 10 min
- Yield: Coats approximately 2 dozen medium cookies 1x
- Category: Dessert
- Method: Mixing
- Cuisine: American
- Diet: Vegetarian
Ingredients
- 2 cups powdered sugar, sifted
- 3 tablespoons milk (whole or plant-based)
- 1 tablespoon light corn syrup
- 1 teaspoon vanilla extract
- Gel food coloring (optional)
Instructions
- In a medium bowl, combine the sifted powdered sugar, milk, light corn syrup, and vanilla extract.
- Whisk the mixture until it is completely smooth. You are aiming for a consistency that flows slowly off the whisk but holds its shape briefly. This is the ‘flood’ consistency.
- If the icing is too thick, add milk, half a teaspoon at a time, until the desired flow is reached. If it is too thin, add powdered sugar, one tablespoon at a time.
- If you plan to outline cookies, separate a small portion of the icing into a separate bowl and make it slightly thicker by adding a few drops of milk or a small amount of powdered sugar.
- Color the main batch of icing using gel food coloring, mixing until the color is uniform.
- Use the thicker icing to outline your sugar cookies. Let the outline dry for 10 to 15 minutes until it forms a slight crust.
- Fill in the outlined areas with the thinner ‘flood’ icing. Gently spread the icing to the edges. You can use a scribe tool or the back of a small spoon to help move the icing.
- Tap the cookie gently on the counter a few times to release air bubbles. Pop any remaining surface bubbles with a toothpick.
- Allow the cookies to dry completely at room temperature, uncovered, for several hours or overnight until the icing is hard and glossy to the touch.
Notes
- For the firmest, fastest-drying icing, use light corn syrup; it adds shine and prevents crystallization.
- If you need to decorate cookies quickly, place them in front of a small fan to speed up the drying process.
- This icing is ideal for creating durable, stackable cookie designs.
Nutrition
- Serving Size: 1/4 cup icing
- Calories: 180
- Sugar: 45
- Sodium: 5
- Fat: 0
- Saturated Fat: 0
- Unsaturated Fat: 0
- Trans Fat: 0
- Carbohydrates: 45
- Fiber: 0
- Protein: 0
- Cholesterol: 0