
There is absolutely nothing in the world that smells quite like a freshly baked pie cooling on the counter. It’s the scent of comfort, of gathering, of tradition wrapped up in cinnamon and caramelized sugar. For me, perfecting the apple pie recipe became part of bridging my own background—taking the rustic, soul-satisfying desserts I loved and elevating them with the elegant techniques I learned in culinary school. This recipe for The Best Homemade Classic Apple Pie with Flaky Double Crust isn’t fussy; it’s simply approachable elegance designed to become a cornerstone of your home traditions, just as it has mine. It truly is a celebration when this comes out of the oven.
- Why This Classic Apple Pie Recipe is a Keeper (E-E-A-T)
- Gathering Ingredients for Your Apple Pie Recipe
- How to Make the Flaky Pie Crust for Your Apple Pie Recipe
- Assembling the Perfectly Spiced Apples: The Best Apple Pie Filling
- Step-by-Step Assembly: Creating Your Apple Lattice Pie
- Baking Tips for the Ultimate Apple Pie Recipe: Avoiding Common Pitfalls
- Serving Suggestions for This Homemade Apple Pie Recipe
- Storage and Reheating Instructions for Leftover Apple Pie
- Frequently Asked Questions About Making the Best Apple Pie Filling
Why This Classic Apple Pie Recipe is a Keeper (E-E-A-T)
Baking is all about trust, and I want you to feel completely confident when you set out to make this pie. Seriously, ditch any apprehension you have about making pie completely from scratch. This specific Classic Apple Pie shines precisely because it addresses the major headaches home bakers run into.
Here’s why I know this recipe belongs in your rotation, time after time:
- It delivers that shatteringly flaky pie crust every single time, thanks to cold handling.
- The filling is packed with perfectly spiced, tender apples—never mushy!
- We use a few tricks to guarantee you avoid that dreaded soggy bottom, giving you that bakery-level finish. Trust me, this one is reliable.
Buttery Pie Crust Secrets for a Flaky Pie
If you want that gorgeous lift and those delicate layers, you have to respect the butter! The secret to amazing texture lies entirely in temperature management. My number one rule for the Buttery Pie Crust Secrets for a Flaky Pie is that everything—the butter, your water, even your bowl—should be aggressively cold. When those icy chunks of fat hit the hot oven, they create steam pockets that visually separate your dough layers. Resist the urge to warm your ingredients up; cold equals flaky!
Gathering Ingredients for Your Apple Pie Recipe
Let’s get our mise en place ready! Having everything measured out before we even touch the flour makes this much more relaxing, which is crucial for pie making. This detailed list ensures you have everything from the foundation of that signature **flaky pie crust** to the spices that make the filling sing. I’ve broken it down so you can see exactly what goes into the dough versus what builds the stunning **Best Apple Pie Filling**.
For the Dough, remember two sticks of unsalted butter—it must be very cold and cubed! For the actual fruit layer, we need a mix of apples to get that perfect texture profile. If you ever find yourself with extra apples later this season, you absolutely must check out my recipe for slow cooker apple butter; it’s divine!
- 2 1/2 cups all-purpose flour
- 1 teaspoon salt
- 1 cup (2 sticks) unsalted butter, very cold and cubed
- 1/2 cup ice water, plus more if needed
For the Filling and Finish:
- 6 large Granny Smith apples, peeled, cored, and sliced 1/4-inch thick
- 2 large Honeycrisp apples, peeled, cored, and sliced 1/4-inch thick
- 3/4 cup granulated sugar
- 1/4 cup packed light brown sugar
- 1 teaspoon ground cinnamon
- 1/4 teaspoon ground nutmeg
- 1/8 teaspoon ground allspice
- 2 tablespoons all-purpose flour
- 1 tablespoon lemon juice
- 1 tablespoon unsalted butter, cut into small pieces
- 1 large egg, beaten with 1 teaspoon water (for egg wash)
- 1 tablespoon coarse sugar for sprinkling
Ingredient Notes and Apple Selection for Best Apple Pie Filling
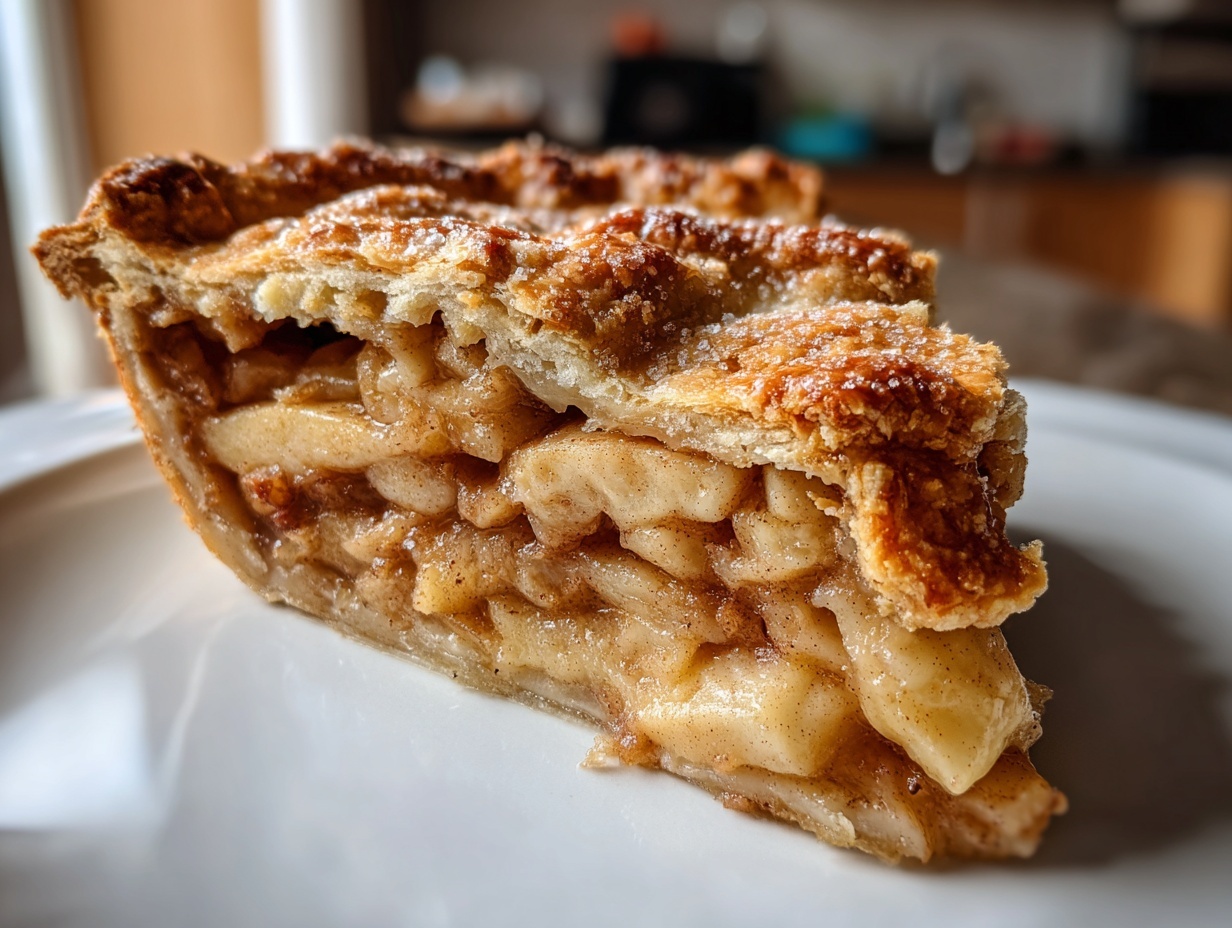
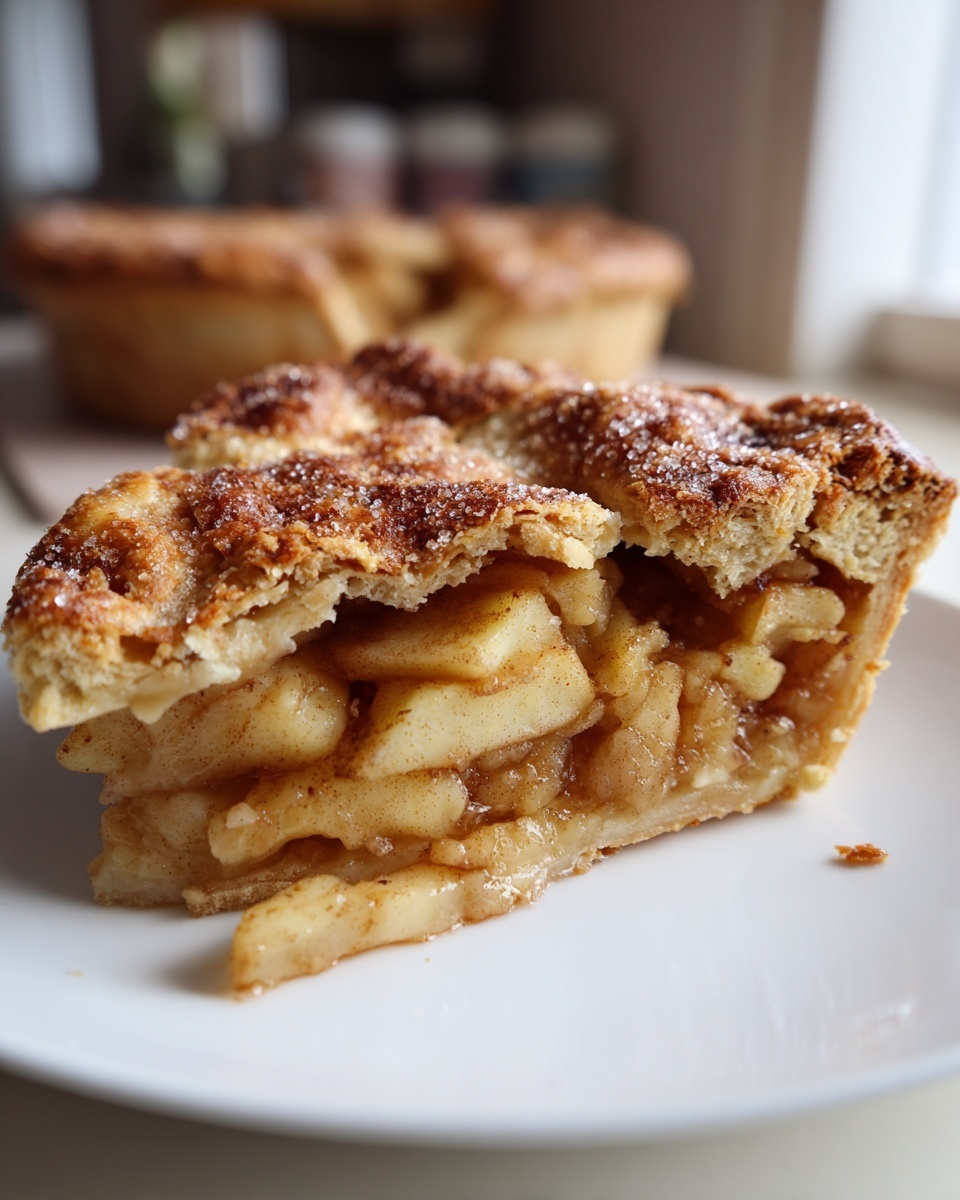
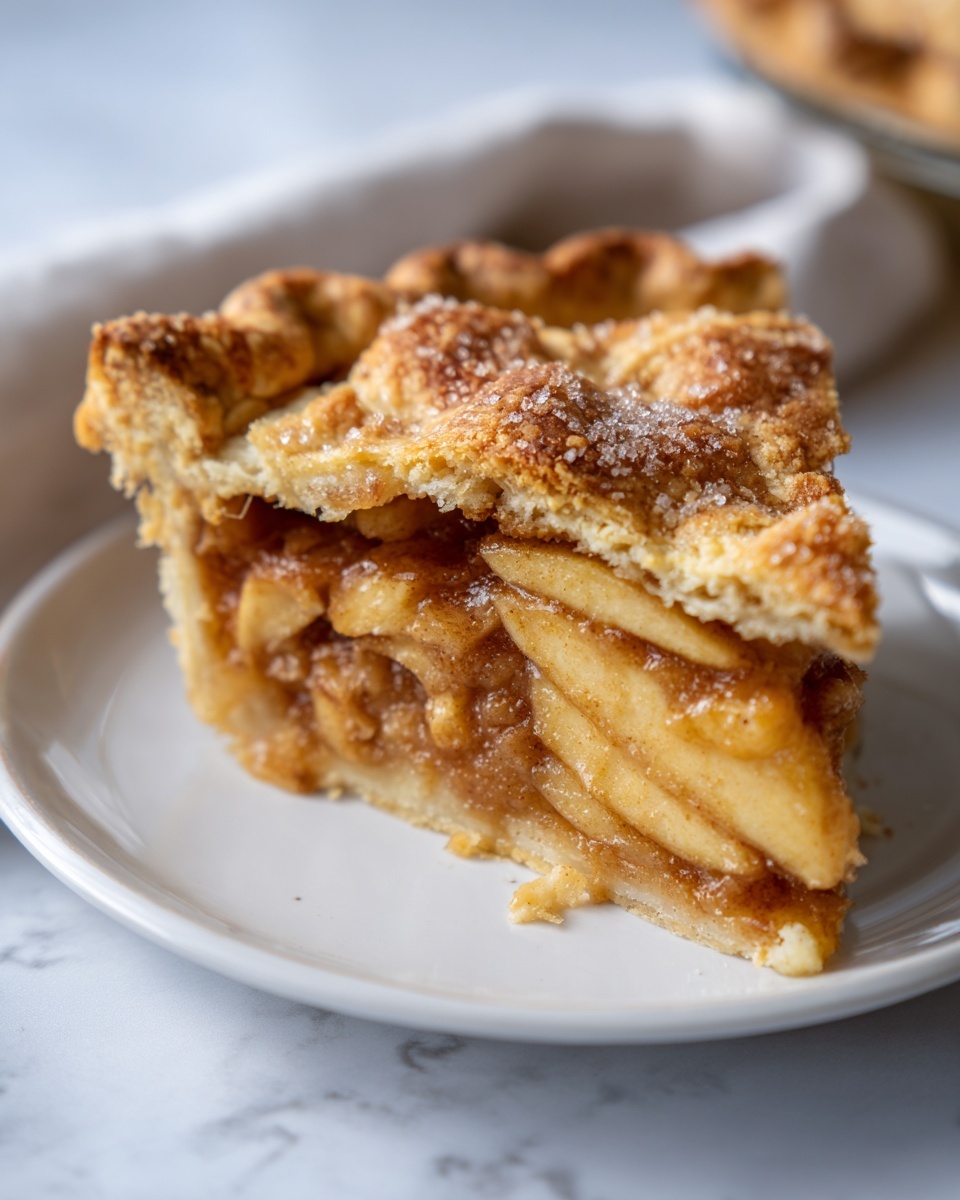
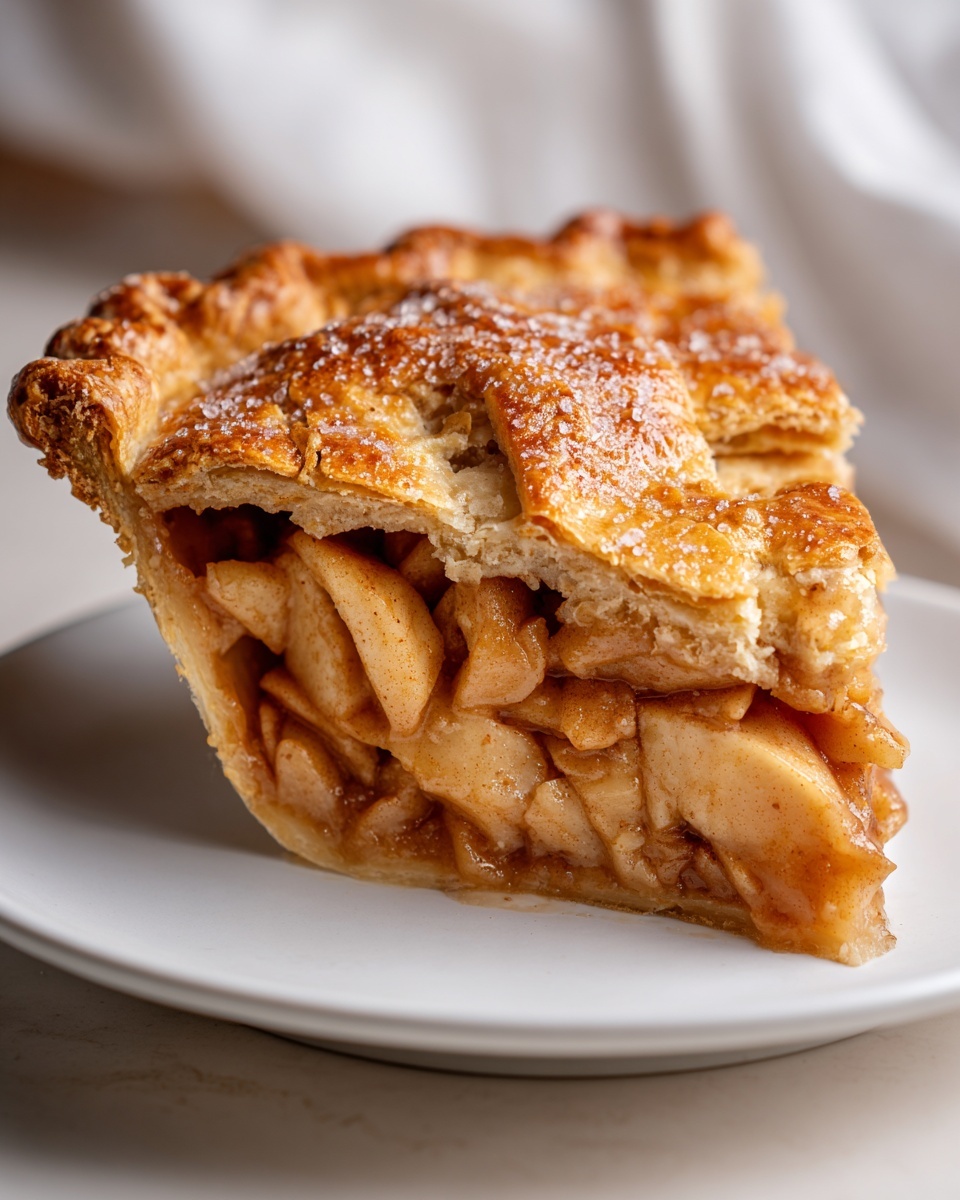
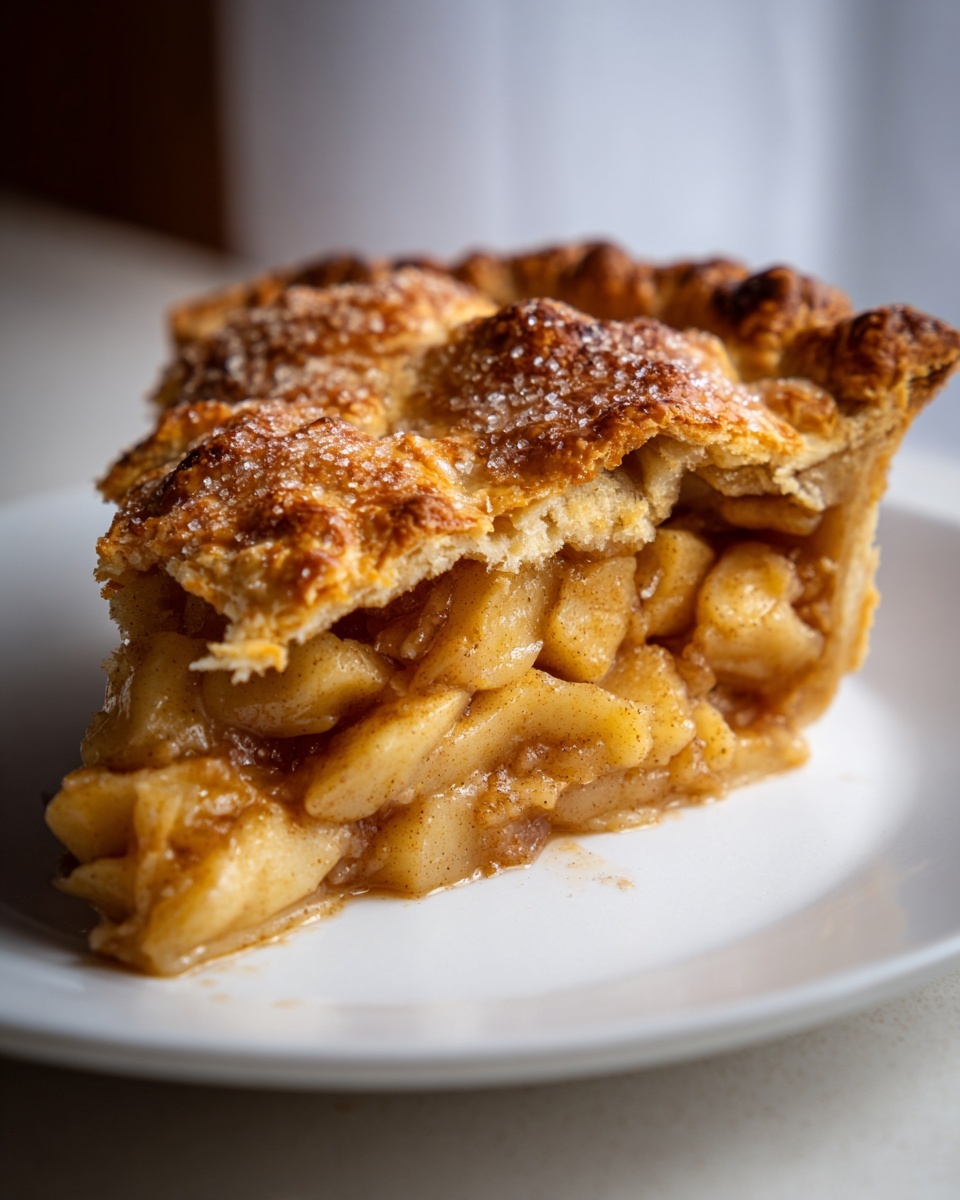
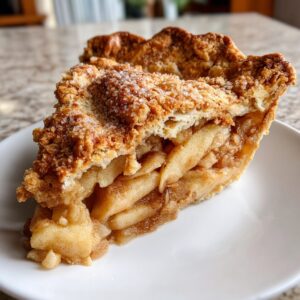
The choice of apples is foundational! I insisted on using both Granny Smith for that essential tartness and firmness, paired with Honeycrisp for their sweetness and slightly softer bite. This hybrid approach gives you a flavorful, **tender apple filling** that never turns to applesauce. Don’t skip the spices either. That trio of cinnamon, nutmeg, and allspice really elevates this from a simple dessert to a true **Cinnamon Apple Dessert**. The little bit of flour mixed in helps thicken those glorious juices.
How to Make the Flaky Pie Crust for Your Apple Pie Recipe
Alright, let’s dive into the foundation of this masterpiece—the dough! Making a truly **flaky pie crust** from scratch for your apple pie recipe takes patience, but it’s so worth skipping the stabilizers found in store-bought versions. Remember rule number one: cold, cold, cold! In your mixing bowl, whisk the flour and salt together. Now for the butter cubes; use a pastry blender or your fingertips to work that butter into the flour. You’re looking for a texture breakup that creates coarse crumbs, but you absolutely need visible, pea-sized chunks of butter scattered throughout. Those are your flavor balloons, so don’t overwork it!
Next, we slowly introduce the ice water, just a tablespoon at a time, gently bringing it together. Stop mixing the second the dough forms; if you’re fighting it by kneading, you’ve already gone too far. Divide your resulting dough into two equal disks, wrap them tightly, and get them into the fridge for at least one full hour. Chilling is non-negotiable; it lets the gluten relax and keeps the fats rock-solid for that incredible layer separation later on. This prep work is the key to a stunning double crust! If you want even more detail on the dough process, be sure to check out my guide to an easy butter pie crust recipe.
Assembling the Perfectly Spiced Apples: The Best Apple Pie Filling
Now that our dough is chilling happily, we can focus on the heart of the pie: those glorious, aromatic apples! Step three is all about bringing those sliced Granny Smith and Honeycrisp beauties together with the sugars and spices. You want to use spices generously here—that cinnamon, nutmeg, and allspice blend is what makes this feel like an Old Fashioned Apple Pie.
In a big bowl, pour in your apples and sprinkle over the sugars, flour, and spices. Here’s my gentle Southern tip: Use your very clean hands or a large rubber spatula to *toss* the mixture, don’t stir it aggressively. We want those slices coated evenly, but we don’t want to bruise the fruit into mush before it even sees the oven. Bruised apples are sad apples!
Don’t forget the lemon juice! It’s essential for two reasons: it keeps those pale apple slices from oxidizing and turning brown while the dough chills, and it adds a tiny pop of brightness that cuts through all that comforting sweetness. Once coated, this **Best Apple Pie Filling** is ready to meet the bottom crust of your apple pie recipe.
Speaking of assembly, when you bring out your chilled bottom crust, pour that vibrant fruit mixture right in. You’ll want to nestle those 1 tablespoon pieces of butter right on top of the apples before you cover it—it melts down and enriches the sauce beautifully. Once that’s settled, we move on to sealing up your pie!
If you’re looking for another simple fruit dessert for your fall baking, you might enjoy my recipe for Apple Dump Cake. But for now, the focus is on that perfectly sealed pie!
Step-by-Step Assembly: Creating Your Apple Lattice Pie
Okay, friends, the filling is mixed, the dough is rested, and now we get to the fun part! Bring that chilled bottom crust out to its 9-inch pie plate. You want about a one-inch overhang so we have material to work with for the seal. Don’t forget that lovely little dotting of butter over the apples we just mentioned—it’s a tiny step that adds volumes of rich flavor to your final apple pie recipe.
Now for the top! Sometimes I crave the classic beauty of a full crust with steam vents, but honestly, nothing beats the airy texture of a homemade Apple Lattice Pie. To create a basic lattice, you just slice your second dough disk into even strips—aim for about 3/4 of an inch wide. Weave those strips over the filling. Lay half the strips parallel across the pie, then fold back every other strip to weave the perpendicular ones across. It sounds fancy, but it’s totally manageable!
Once you’ve got your pattern set, trim the ends of those strips to match those of the bottom crust. Then, take a moment to really seal the deal. Fold the top edge underneath the bottom edge, pressing firmly, and then use your thumb and forefinger to crimp all the way around. This beautiful seal is what keeps all those spectacular juices locked inside while your apple pie recipe bakes. For extra encouragement on mastering the lattice, take a peek at the inspiring techniques other home cooks are using over on Pinterest, like this perfect example here. After sealing, give the whole thing a quick 15-minute chill before it heads into the heat! If you ever want to move on to fried desserts later, my apple fritters use similar flavor profiles.
Baking Tips for the Ultimate Apple Pie Recipe: Avoiding Common Pitfalls
We’ve assembled it, we’ve chilled it, and now it’s time for the magic moment! Baking this apple pie recipe correctly is where we prevent all those common disappointments, like pale crusts or watery filling. Our process starts hot and finishes slow. Preheat your oven to 400 degrees Fahrenheit and place the pie on a sturdy baking sheet—this sheet is your first defense against drips, keeping your oven clean! Bake it at that high heat for the first 20 minutes.
Then, reduce the temperature down to 375 degrees for the remaining 40 to 50 minutes. If you notice those beautiful edges starting to brown too fast—and they often do because of that buttery crust—gently drape some aluminum foil over the rim. It acts like a little hat, protecting the edges while the center finishes bubbling. And here is the massive secret from my notes: To fight the dreaded soggy bottom, place your baking sheet on the very lowest rack for those initial 20 minutes at 400 degrees! That direct heat crisps the bottom crust perfectly. Don’t even think about slicing it right away, though. You must let your gorgeous apple pie recipe cool for a solid 3 hours. That cooling process is essential for the filling to set properly.
For some more inspiration on how to achieve a perfect bake every time, I loved reading through this guide on achieving that golden finish. When you’re done baking, you can find tips for another cozy fall treat in my apple crisp recipe!
Serving Suggestions for This Homemade Apple Pie Recipe
Now for the best part: enjoyment! Honestly, this Homemade Apple Pie Recipe is fantastic as is, warm from the cooling rack, but it truly sings when paired with something rich. For a classic, melt-in-your-mouth experience, you can’t beat a generous scoop of high-quality vanilla bean ice cream melting over that spiced filling. If you are serving it in the fall for cozy evenings, I often pair a slice of this luscious dessert with a sharp slice of cheddar cheese—it sounds wild, but the salty tang beautifully cuts through the sweetness!
This pie is definitely a star when it comes to fulfilling those cozy Fall Baking Ideas or anchoring your spread of favorites during the busier holidays. When you make this perfect apple pie recipe, you’re making memories, so serve it up warmly! If you’re hosting a larger meal, you can find a wonderful seasonal pairing by checking out my fall harvest salad recipe to balance out all that wonderful richness.
Storage and Reheating Instructions for Leftover Apple Pie
Patience required again, even for leftovers! Since this apple pie recipe has a rich, moist filling, you can leave it covered on the counter for up to two days if your kitchen isn’t too warm. If you need it to last longer, wrap the whole pie well and refrigerate it for up to four days. To bring back that crispness, never microwave a whole slice! Instead, I reheat individual servings in a 350 degree oven or toaster oven until warmed through. That gets the crust crisp again, just like magic. Feel free to use those leftovers later next to some of my apple butter!
Frequently Asked Questions About Making the Best Apple Pie Filling
I always get so many questions when people try this apple pie recipe for the first time! It’s natural to want to tweak things, especially when you are aiming for that perfect texture. Here are some of the most common worries I hear from bakers aiming for the title of Best Homemade Apple Pie maker.
Can I use a store-bought crust instead of making it from scratch?
Oh, absolutely! While I adore teaching the techniques for a true **flaky pie crust**, life gets busy. Using a high-quality, all-butter store-bought crust or two pre-made shells will save you about 45 minutes of prep time. Just make sure you use a 9-inch size! If you opt for convenience there, focus extra attention on making your **Best Apple Pie Filling** spectacular, because that’s where all the flavor lives.
What if I want a crumble topping instead of a double crust?
That’s a wonderful idea if you’re leaning towards a Dutch Apple Pie Crumb Topping! If you do this, you won’t need the egg wash or the top dough disk. Simply prepare all the filling, place it in the bottom crust, and then sprinkle that buttery topping evenly over the fruit. Since the topping is looser than a full crust, you might need to bake it slightly lower, around 375 degrees, for the same amount of time until the crumble is deeply golden.
Is skipping the dough chilling time going to ruin my pie?
It really hurts the texture, unfortunately. Chilling the dough is crucial for an easy apple pie that looks professional. If you skip the hour or more of chilling time after making the dough, the butter heats up, incorporates too much into the flour, and you end up with a tough, dense crust rather than those beautiful flaky layers. It’s worth waiting for, I promise! If you’re interested in another simple, comforting dessert that captures that fall spirit, you could try my apple cider donuts recipe.
For more inspiration on making the *easiest* yet most impressive pies, I always love seeing what others are doing on Pinterest, like this pin covering irresistibly simple apple pie ideas.
PrintThe Best Homemade Classic Apple Pie with Flaky Double Crust
This classic apple pie recipe creates a comforting, cinnamon-spiced dessert with a buttery, flaky crust and tender apple filling. Achieve bakery-level results at home with simple techniques.
- Prep Time: 45 min
- Cook Time: 70 min
- Total Time: 135 min
- Yield: 8 servings 1x
- Category: Dessert
- Method: Baking
- Cuisine: American
- Diet: Vegetarian
Ingredients
- 2 1/2 cups all-purpose flour
- 1 teaspoon salt
- 1 cup (2 sticks) unsalted butter, very cold and cubed
- 1/2 cup ice water, plus more if needed
- 6 large Granny Smith apples, peeled, cored, and sliced 1/4-inch thick
- 2 large Honeycrisp apples, peeled, cored, and sliced 1/4-inch thick
- 3/4 cup granulated sugar
- 1/4 cup packed light brown sugar
- 1 teaspoon ground cinnamon
- 1/4 teaspoon ground nutmeg
- 1/8 teaspoon ground allspice
- 2 tablespoons all-purpose flour
- 1 tablespoon lemon juice
- 1 tablespoon unsalted butter, cut into small pieces
- 1 large egg, beaten with 1 teaspoon water (for egg wash)
- 1 tablespoon coarse sugar for sprinkling
Instructions
- Prepare the Pie Dough: In a large bowl, whisk together the flour and salt. Cut in the cold, cubed butter using a pastry blender or your fingers until the mixture resembles coarse crumbs with some pea-sized pieces of butter remaining.
- Gradually add the ice water, one tablespoon at a time, mixing until the dough just comes together. Do not overmix. Divide the dough in half, form each half into a disk, wrap in plastic, and chill for at least 1 hour.
- Prepare the Apple Filling: In a large bowl, gently toss the sliced apples with the granulated sugar, brown sugar, cinnamon, nutmeg, allspice, 2 tablespoons of flour, and lemon juice until the apples are evenly coated.
- Assemble the Bottom Crust: On a lightly floured surface, roll out one disk of dough into a 12-inch circle. Carefully transfer the dough to a 9-inch pie plate. Trim the edges, leaving a 1-inch overhang. Place the plate in the refrigerator while you prepare the top crust.
- Add the Filling: Pour the apple mixture into the chilled bottom crust. Dot the top of the apples with the small pieces of butter.
- Create the Top Crust: Roll out the second disk of dough. You can cut strips for a lattice top or place the whole circle over the filling. If using a full top crust, cut several slits in the top to allow steam to escape.
- Seal and Crimp: Trim the top crust overhang to match the bottom. Fold the top edge under the bottom edge and crimp the edges decoratively to seal the pie.
- Chill and Bake: Brush the top crust with the egg wash and sprinkle with coarse sugar. Chill the assembled pie for 15 minutes before baking. Preheat your oven to 400 degrees Fahrenheit (200 degrees Celsius).
- Bake: Place the pie on a baking sheet (to catch drips). Bake at 400 degrees Fahrenheit for 20 minutes. Reduce the oven temperature to 375 degrees Fahrenheit (190 degrees Celsius) and continue baking for another 40 to 50 minutes, or until the crust is golden brown and the filling is bubbling. If the edges brown too quickly, cover them loosely with foil.
- Cool: Let the pie cool on a wire rack for at least 3 hours before slicing. This allows the filling to set properly.
Notes
- For the flakiest crust, keep all your butter and water extremely cold.
- Use a mix of tart and sweet apples, like Granny Smith and Honeycrisp, for the best texture and flavor balance.
- To prevent a soggy bottom, place the pie on the lowest rack for the first 20 minutes of baking to ensure the bottom crust cooks thoroughly.
Nutrition
- Serving Size: 1 slice
- Calories: 450
- Sugar: 35g
- Sodium: 250mg
- Fat: 25g
- Saturated Fat: 15g
- Unsaturated Fat: 10g
- Trans Fat: 0g
- Carbohydrates: 58g
- Fiber: 4g
- Protein: 5g
- Cholesterol: 60mg