
There is nothing quite like the aroma of a pie cooling on the counter, especially when that pie is built on pure nostalgia. For me, the ultimate expression of comfort and celebration has always been a spectacular, utterly dependable homemade apple pie. It’s the centerpiece of so many memories, yet so many home cooks shy away from the crust, right?
Well, I want to change that for you. This recipe is my deep dive—the result of balancing flavor profiles using formal training blended with a storyteller’s desire to make things approachable. Forget intimidating techniques! This is the guide to achieving what I call the **best classic homemade apple pie**, featuring a crust so flaky and buttery it borders on miraculous, wrapped around a filling that sings with perfect sweet-tart balance. We are going to master baking from scratch together, making this impressive dessert surprisingly easy.
- Why This Homemade Apple Pie Recipe is Your New Favorite
- Gathering Ingredients for Your Homemade Apple Pie
- Step-by-Step Instructions for Your Classic Apple Pie Recipe
- Tips for Success Making Your Homemade Apple Pie
- Serving Suggestions for Your Apple Pie for Beginners
- Storage & Reheating Instructions for Homemade Apple Pie
- Frequently Asked Questions About This Classic Apple Pie Recipe
- Nutritional Information for the Best Classic Homemade Apple Pie
- Share Your Homemade Apple Pie Story
Why This Homemade Apple Pie Recipe is Your New Favorite
When you commit to baking from scratch, you deserve a recipe that rewards you, every single time. This isn’t just *another* apple pie; it’s the one designed to eliminate guesswork and deliver that show-stopping result you dream about. I’ve tested this endlessly so you can focus on the joy of serving something truly wonderful.
- It uses an all-butter crust that shatters beautifully when cut—pure comfort food baking!
- The filling balances tartness and sweetness perfectly, avoiding that cloying, overly sweet taste many pies suffer from.
- It’s designed to be intuitive, making it the perfect blueprint for beginners aiming for an impressive holiday baking treat.
Achieving the Perfect Flaky Pie Crust Tutorial
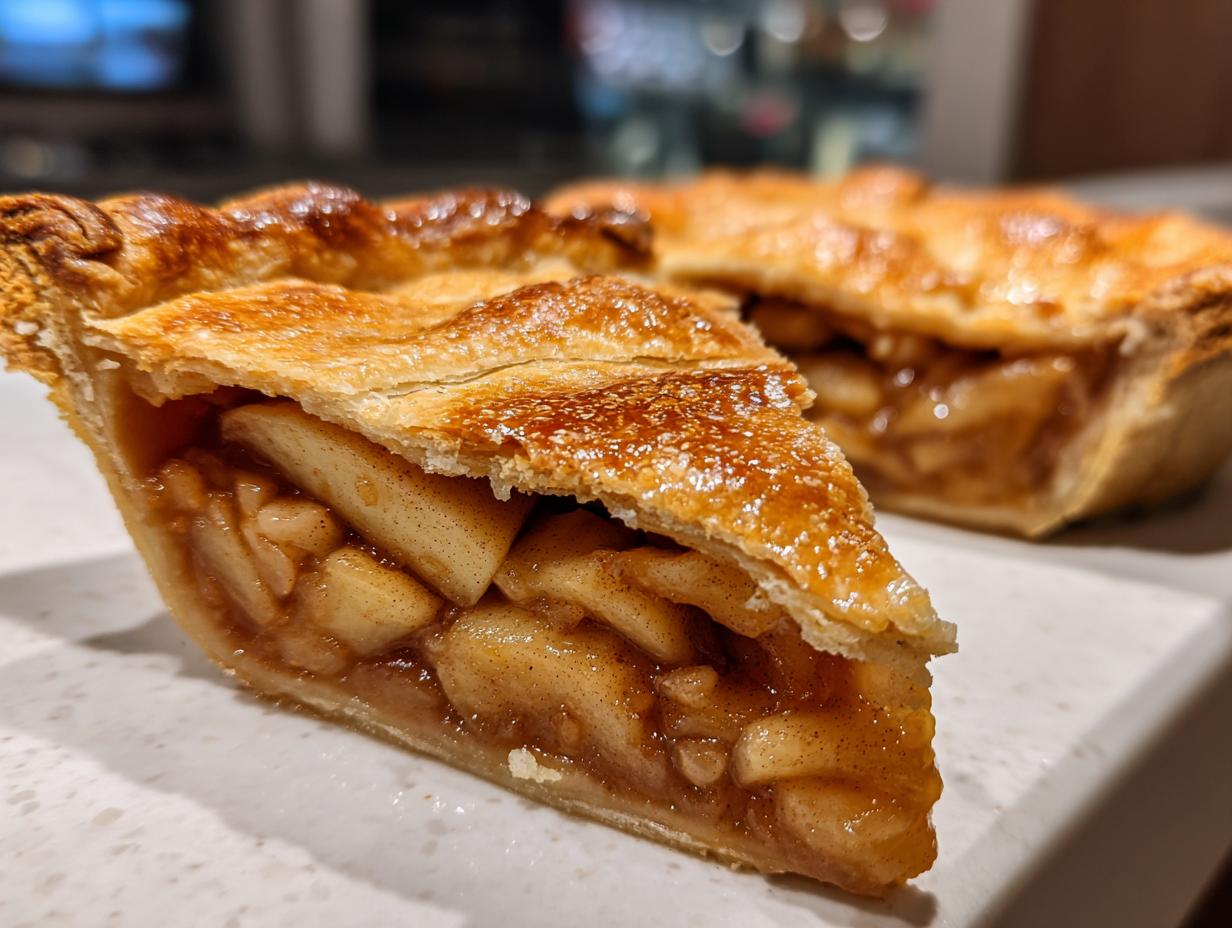
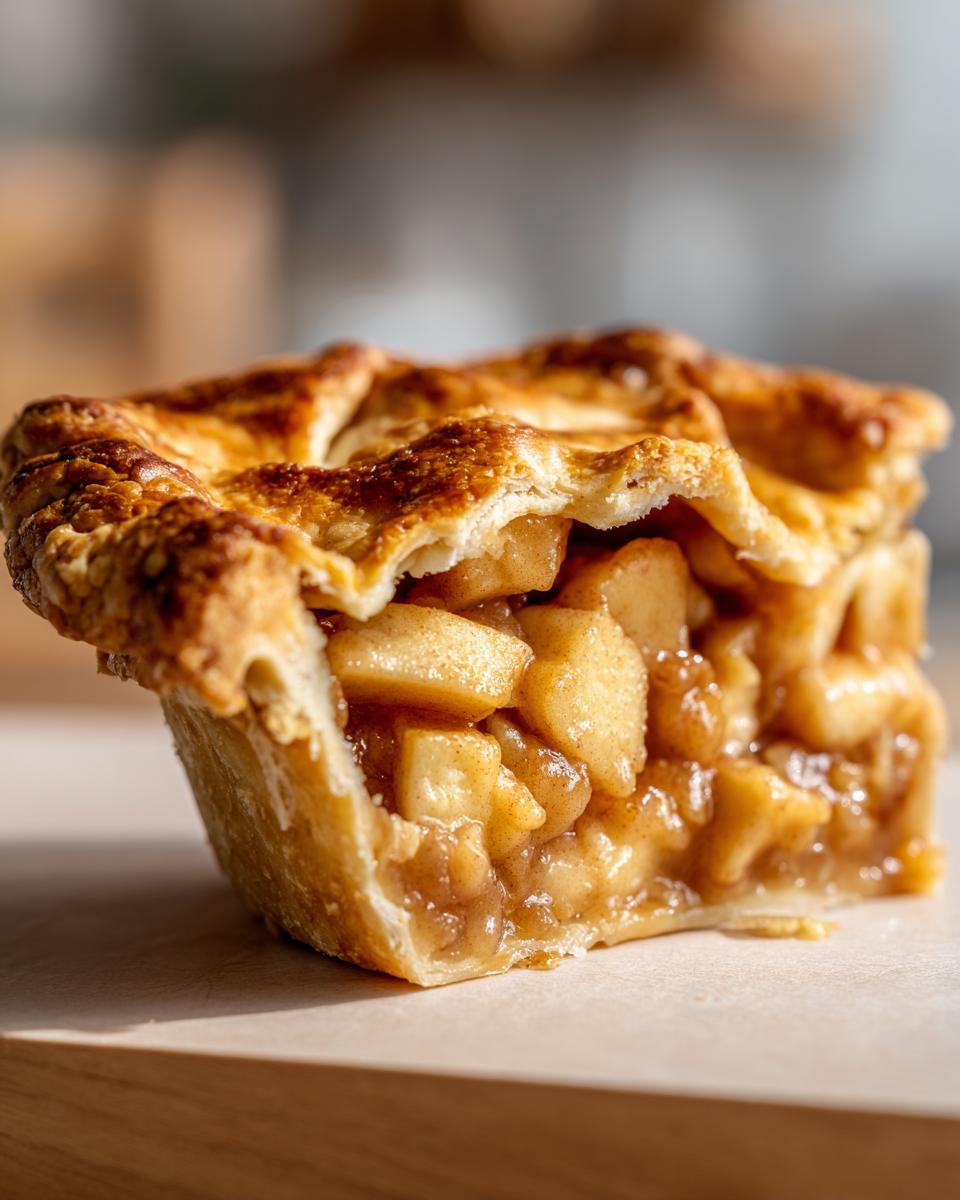
The secret to that envy-inducing texture? Keeping everything frigid! This flaky pie crust tutorial relies completely on using ice-cold butter cut into the flour just right. Those visible pea-sized pieces of butter melt in the oven, creating steam pockets that literally lift the dough into those delicate, buttery layers. Trust me, your next homemade apple pie demands this technique.
The Best Apple Pie Filling: Sweet and Tart Balance
We don’t mess around with the apples here. I combine the crisp tartness of Granny Smith apples with the sweetness of Honeycrisp. This mix prevents the filling from turning into apple sauce. Tossed with just the right amount of sugar and fragrant cinnamon spiced dessert flavors, you get that perfect bite—not too sweet, immensely flavorful. This is the definition of a sweet tart apple pie experience.

Gathering Ingredients for Your Homemade Apple Pie
Like any good story, you need the right characters to make this pie sing! For this ultimate slice of comfort, we are sticking really close to classic methods, especially when it comes to that gorgeous, buttery crust recipe. Everything needs to look simple on paper, but pay close attention to the details—like how cold that butter needs to be! We want layers, not lumps, so precise measuring here goes a long way toward making this pie truly spectacular.
For the Buttery Crust Recipe
This is the foundation of our whole endeavor. Remember, we are aiming for flaky perfection here, which means using the coldest ingredients possible. Don’t substitute! This amount makes both the bottom and top crusts for your standard 9-inch plate.
- 2 1/2 cups all-purpose flour
- 1 teaspoon salt
- 1 cup (2 sticks) unsalted butter, very cold and cut into small cubes
- 1/2 cup ice water, plus more if needed
For the Cinnamon Spiced Dessert Filling
This combination of apples ensures we get that beautiful, complex flavor that just screams autumnal goodness. The touch of flour helps thicken the juices so we don’t end up with a soupy mess when we cut into the finished pie.
- 6 large Granny Smith apples, peeled, cored, and sliced 1/4 inch thick
- 2 large Honeycrisp apples, peeled, cored, and sliced 1/4 inch thick
- 3/4 cup granulated sugar
- 1/4 cup packed light brown sugar
- 1/4 cup all-purpose flour
- 1 teaspoon ground cinnamon
- 1/4 teaspoon ground nutmeg
- 1 tablespoon lemon juice
- 1 large egg, beaten with 1 teaspoon water (for egg wash—don’t forget this!)
Step-by-Step Instructions for Your Classic Apple Pie Recipe
If you’ve followed along, you have your dough chilling and your apples mingling in a bowl—isn’t that satisfying? Now we put it all together! This process is wonderfully methodical. I always find that when I focus on one step at a time, the complexity just melts away. Remember, this is your chance to really practice those keys to success we talked about. Get ready to see that gorgeous, flaky crust come to life!
Making the Flaky Pie Crust Tutorial from Scratch
Let’s start with the dough, which should be nicely chilled now. On a lightly floured surface, roll out one disk into that beautiful 12-inch circle—don’t overwork it! Gently transfer that into your 9-inch pie plate. Trim the edges, leaving about an inch hanging over the side for now. This technique keeps the baking from scratch process smooth. That dough needs that minimum one-hour chill to ensure those flaky layers, so if you skipped that, pause now!
Preparing the Best Apple Pie Filling
This is where the aroma starts! You want to combine those sliced Granny Smith and Honeycrisp apples with the sugars, flour, cinnamon, nutmeg, and lemon juice. The critical part here is deciding how to toss them. Use your hands if you can, but toss very gently! We want everything coated evenly without brutally smashing the apples; bruised fruit makes for a mushy filling later on.

Assembling the Double Crust Apple Pie
Now, roll out your second dough disk. This is going over the top of all those beautiful apples. Lay it straight over the filling, trim the overhang to match the base crust, and pinch the edges together firmly to seal—this is how we create a sturdy double crust apple pie. Don’t forget to cut several generous slits right in the center! Those vents let the steam escape, preventing a soggy bottom and keeping your crust structure perfect.
Baking and Cooling the Homemade Apple Pie
Preheat that oven to 425°F and have a baking sheet ready underneath to catch any glorious drips. Bake hard for 15 minutes, then immediately drop the heat down to 375°F and continue for another 40 to 50 minutes until you see thick bubbling juices. If those edges start looking too dark, drape a little foil over them loosely. Here’s the hardest part: you must let it cool for a solid three hours! This setting time is non-negotiable for a firm slice.

Tips for Success Making Your Homemade Apple Pie
You’ve mastered the technique, but a great baker always knows the little tricks that elevate a dish from good to unforgettable. This pie is meant to be an old fashioned pie recipe standout, so let’s dive into the final details that guarantee success on your first—or tenth—try.
Keeping Ingredients Cold for Perfect Homemade Apple Pie
I cannot stress this enough: cold, cold, cold for the crust! I once got ambitious and skipped putting my butter back in the freezer after grating it. Big mistake. When I got to baking, the butter melted instantly into the flour, and instead of flaky layers, I ended up with a soft, sandy texture that just crumbled apart. Truly disappointing when you’re aiming for that iconic flaky texture! Keep your butter cubed, and if your kitchen is warm, stick those cubes back in the freezer for 10 minutes before you start.
Variations: Making an Old Fashioned Pie Recipe with Crumb Topping
Although my heart belongs to the classic double-crust version, I know some of you feel deep in your soul that apple pie requires a streusel topping. And who am I to argue with comfort? If you want to switch it up, just follow the notes: skip the top crust entirely. Instead, mix 1 cup flour, 1/2 cup brown sugar, 1/2 cup cold butter, and 1/2 teaspoon cinnamon until crumbly. Sprinkle this generously over your apples before baking. It turns it into a gorgeous Dutch apple pie while still honoring that buttery base.
Serving Suggestions for Your Apple Pie for Beginners
Now that you’ve successfully brought this amazing homemade apple pie out of the oven, let’s talk about the perfect accompaniment! For those of you making this dessert for the first time, remember that contrast makes everything better. A piping hot slice paired with something cold is heavenly. A simple scoop of high-quality vanilla bean ice cream melts perfectly into those cinnamon-spiced juices, making it feel instantly special.
But if you want to lean into that cozy autumn vibe, drizzle just a touch of homemade caramel sauce over the top. You can check out my recipe for caramel apples recipe; it works wonders drizzled over warm apple pie too!
Storage & Reheating Instructions for Homemade Apple Pie
This beautiful homemade apple pie is just as delicious the next day, assuming you have any left! Since this uses an all-butter crust and fresh fruit filling, storage is important—but easy. Once completely cooled (and I mean truly cool, after those three hours!), you can keep it covered loosely on the counter for up to two days. If your kitchen is really warm, or if you need it to last longer, pop it into the fridge. Be sure to cover it well to keep the crust from getting soggy!
Now, for reheating a slice—this is how you make it taste freshly baked again. Forget the microwave! I always reheat a single slice on a baking sheet in a 350°F oven for about 10 minutes. That little blast of dry heat crisps up the crust perfectly, warming the filling just enough. Heaven!
Frequently Asked Questions About This Classic Apple Pie Recipe
I know when you’re tackling a classic recipe like this, questions pop up! That’s totally normal, especially when you want that show-stopping result. Think of these FAQs as little extra tips from my kitchen to yours, ensuring this amazing winter warm desserts staple comes out perfectly every time you decide to make an easy homemade dessert.
Can I make the dough for this homemade apple pie ahead of time?
Oh yes, that’s my favorite shortcut! You can absolutely make the crust dough disks, wrap them tightly in plastic wrap, and keep them chilled in the refrigerator for up to three days. If you need longer, they freeze beautifully for about three months. Just thaw them in the fridge overnight before rolling them out.
What are the best apples besides Granny Smith for this recipe?
If you can’t find enough Granny Smiths, or just want to mix it up, I would reach for Jonagold or Braeburn. Both hold up incredibly well during that long bake time and offer that wonderful crisp texture and necessary tartness so your filling doesn’t turn to mush. That blend is key to keeping this recipe looking sharp!
How do I prevent the bottom crust from getting soggy when making this easy homemade dessert?
This is the eternal pie struggle! My best trick, besides making sure your filling isn’t too liquidy, is to use a glass or ceramic pie plate. Heat transfers more evenly through them than metal. Also, when you put the pie on the baking sheet for the initial high-heat bake, it helps radiate heat up into the base. Don’t skip that initial 15 minutes at 425°F!
Nutritional Information for the Best Classic Homemade Apple Pie
I always find that focusing too much on numbers can take the joy out of baking, but for those of you who track your eating, I wanted to provide an estimate for this incredible treat. Remember, since this recipe involves fresh fruit and an all-butter crust, these figures are estimates based on my ingredient choices and standard portioning.
- Serving Size: 1 slice
- Calories: 450
- Sugar: 35g
- Sodium: 250mg
- Fat: 25g
- Carbohydrates: 58g
- Protein: 5g
Please keep in mind that this is a guide! If you use a different type of flour or sugar, the numbers will shift. Enjoy this magnificent slice of comfort!
Share Your Homemade Apple Pie Story
And just like that, we’ve come to the end of baking the most wonderful dessert. Finishing this **homemade apple pie** is rewarding, but the real joy comes from sharing it, doesn’t it? That is what food is all about—connection and telling our own little stories through flavor.
I truly hope this recipe gives you the confidence to create an absolutely stunning dessert. If you followed along and achieved that flaky-beyond-belief crust and perfectly spiced filling, please come back and tell me all about it! Did you serve it with bourbon whipped cream or the sharp cheddar I mentioned? Leaving a rating or review helps other home cooks feel brave enough to try baking from scratch.
If you share a picture of your gorgeous creation on social media, please tag me! I adore seeing your beautiful results showcased on your own kitchens counters. Let’s keep unfolding these delicious stories together. Happy baking, and I can’t wait to chat with you over in the comments section linked below by visiting my blog!
PrintThe Best Classic Homemade Apple Pie with Flaky All-Butter Crust

Create the ultimate comfort dessert with this recipe for a classic homemade apple pie. You will achieve a perfectly flaky, buttery crust from scratch and a sweet-tart filling balanced with cinnamon and nutmeg.
- Prep Time: 45 min
- Cook Time: 65 min
- Total Time: 110 min
- Yield: 8 servings 1x
- Category: Dessert
- Method: Baking
- Cuisine: American
- Diet: Vegetarian
Ingredients
- 2 1/2 cups all-purpose flour
- 1 teaspoon salt
- 1 cup (2 sticks) unsalted butter, very cold and cut into small cubes
- 1/2 cup ice water, plus more if needed
- 6 large Granny Smith apples, peeled, cored, and sliced 1/4 inch thick
- 2 large Honeycrisp apples, peeled, cored, and sliced 1/4 inch thick
- 3/4 cup granulated sugar
- 1/4 cup packed light brown sugar
- 1/4 cup all-purpose flour
- 1 teaspoon ground cinnamon
- 1/4 teaspoon ground nutmeg
- 1 tablespoon lemon juice
- 1 large egg, beaten with 1 teaspoon water (for egg wash)
Instructions
- Prepare the Crust: In a large bowl, whisk together the 2 1/2 cups flour and 1 teaspoon salt. Cut in the cold butter using a pastry blender or your fingers until the mixture resembles coarse crumbs with some pea-sized pieces of butter remaining.
- Gradually add the ice water, one tablespoon at a time, mixing until the dough just comes together. Do not overmix. Divide the dough in half, flatten each half into a disk, wrap in plastic wrap, and chill for at least 1 hour.
- Prepare the Filling: In a large bowl, combine the sliced Granny Smith and Honeycrisp apples. Add the granulated sugar, brown sugar, 1/4 cup flour, cinnamon, nutmeg, and lemon juice. Toss gently until the apples are evenly coated.
- Assemble the Pie: On a lightly floured surface, roll out one disk of dough into a 12-inch circle. Carefully transfer the dough to a 9-inch pie plate. Trim the edges, leaving a 1-inch overhang.
- Pour the apple filling into the crust. Dot the top of the filling with a few small pieces of leftover butter if desired for richness.
- Roll out the second disk of dough for the top crust. Place it over the filling. Trim the top crust overhang to match the bottom. Crimp the edges to seal the pie. Cut several slits in the top crust to allow steam to escape.
- Brush the top crust evenly with the egg wash. Sprinkle lightly with coarse sugar for texture.
- Bake: Preheat your oven to 425°F (220°C). Place the pie on a baking sheet to catch any drips. Bake for 15 minutes at 425°F.
- Reduce the oven temperature to 375°F (190°C). Continue baking for 40 to 50 minutes more, or until the crust is golden brown and the filling is bubbling thickly. If the edges brown too quickly, cover them loosely with foil.
- Cool: Let the homemade apple pie cool on a wire rack for at least 3 hours before slicing. This allows the filling to set properly.
Notes
- For the flakiest crust, keep your butter and water as cold as possible throughout the mixing process.
- Using a mix of tart apples (like Granny Smith) and sweeter apples (like Honeycrisp) creates the best flavor balance for your apple pie filling.
- If you prefer a Dutch apple pie, substitute the top crust with a simple streusel topping made from 1 cup flour, 1/2 cup brown sugar, 1/2 cup cold butter, and 1/2 teaspoon cinnamon mixed until crumbly.
Nutrition
- Serving Size: 1 slice
- Calories: 450
- Sugar: 35g
- Sodium: 250mg
- Fat: 25g
- Saturated Fat: 15g
- Unsaturated Fat: 10g
- Trans Fat: 0g
- Carbohydrates: 58g
- Fiber: 3g
- Protein: 5g
- Cholesterol: 60mg