

There’s a quiet magic in a truly perfect cookie, isn’t there? Not one of those crumbly, just-okay things, but a cookie so rich and tender it seems to melt before you even fully chew it. That’s what I chased when developing this recipe. My culinary journey has always been about finding that beautiful balance—sophisticated flavor without the fuss—and these family-focused traditions led me straight to this moment.
I want to share my Classic Melt-in-Your-Mouth Danish Style butter cookies with you now. They capture that authentic, deeply buttery flavor we all associate with the best tea time treats. Think of this as simple elegance baked into a delicate bite. If you admire recipes built on quality ingredients and tried-and-true technique, you’ve absolutely found your new favorite. Let’s unfold this story together!
- Why This is the Best Classic butter cookies Recipe
- Ingredients for Your Classic butter cookies Recipe
- Simple Steps to Make Easy Homemade butter cookies
- Baking Your Tender butter cookies to Perfection
- Tips for Making Authentic Danish butter cookie Recipe Results
- Serving Suggestions for Your butter cookies
- Storage and Making butter cookies for Gifting
- Frequently Asked Questions About butter cookies
- Share Your butter cookies Baking Story
Why This is the Best Classic butter cookies Recipe
What sets these Classic butter cookies Recipe apart is honestly texture. So many recipes yield something that fractures when you look at it wrong! My core belief, informed by my training, is that true elegance in baking comes from a sublime mouthfeel. These are genuinely Tender Butter Cookies; they break apart tenderly, almost dissolving on your tongue—just like a perfect Shortbread Style Cookie.
I remember trying to perfect a shortbread-style base for my father once; he insisted that if a cookie wasn’t rich enough to warrant a serious cup of coffee or tea, it wasn’t worth making. These definitely meet his standard! For more elegant dessert inspiration, feel free to browse the site!
Achieving the Perfect Melt In Your Mouth Cookies Texture
The melt-in-your-mouth sensation isn’t an accident; it’s engineered! It happens because we use a specific ratio of powdered sugar to granulated sugar, which inhibits gluten development, keeping them soft. Plus, the mandatory chilling time is key. Seriously, don’t skip chilling the dough! It ensures those delicate piped shapes don’t flatten into brittle disks when they hit the oven, guaranteeing that famously tender center.
Ingredients for Your Classic butter cookies Recipe
Precision matters here because we are demanding perfection from simple components. Because these are such focused butter cookies, every measurement needs to be spot on to hit that Rich Buttery Dessert quality. I’ve listed exactly what you need below—pay close attention to the butter needing to be truly softened, not melted! This recipe relies on the quality of these few items to pull off a stunning result. For more baking insights, check out the Unfold Recipes blog.
- 1 cup unsalted butter, softened (A must!)
- 1/2 cup granulated sugar
- 1/4 cup powdered sugar (This helps the texture immensely)
- 1 teaspoon vanilla extract
- 1/4 teaspoon almond extract (Don’t skip the almond; it adds depth!)
- 2 cups all-purpose flour
- 1/4 teaspoon salt
Simple Steps to Make Easy Homemade butter cookies
Okay, now for the fun part: assembling these Easy Homemade butter cookies! While these cookies taste incredibly sophisticated, the actual mixing process is delightfully straightforward. We are focusing on building that rich, tender base without introducing any unnecessary toughness into the dough. It’s all about what I call ‘effortless elegance’ in the mixing bowl. If you’re looking for ideas for decorating later, check out my post on easy cookie icing!
Creaming Butter and Sugars for Rich Buttery Dessert Base
This is where the structure is born, so pay attention! You absolutely must beat your softened butter with both the granulated and powdered sugars until it becomes visibly light and fluffy—think pale yellow, almost white, and airy. If you rush this step for your cookie dough, you miss out on trapping the air needed for that signature, delicate structure. It’s worth the extra minute of mixing!
Forming and Chilling the butter cookies Dough
Next, once the flour mix is incorporated just until a soft dough forms, you move to shaping. I love using a piping bag with a star tip for that classic look, but if you prefer a simpler cut, just press it into logs; it yields a beautiful shortbread style cookie. Crucially, once shaped onto the parchment-lined sheets, everything goes straight into the fridge for at least thirty minutes. Chilling solidifies that high butter content, which stops the cookies from melting into puddles during the bake—ensuring we keep those beautiful, defined edges.

Baking Your Tender butter cookies to Perfection
Once they’ve chilled and are holding their shape beautifully, it’s time for the oven—and honestly, this is the moment where you have to hover a little! We’re aiming for 350°F (175°C). Because these are such rich, buttery desserts, they go from baked perfection to scorched surprisingly fast. You’ll bake them for about 10 to 14 minutes, but really, you are watching for the edges to just catch a whisper of gold. Seriously, pull them when they look *barely* done!
Don’t even think about moving them right away! Let them rest on that warm baking sheet for five full minutes. This resting period allows them to set up enough so they don’t crumble when you try to move them over to the wire rack to cool completely. That gentle transition is the secret to keeping those tender butter cookies intact!

Tips for Making Authentic Danish butter cookie Recipe Results
You know I’m passionate about results that feel both professional and deeply personal. When you are aiming for that truly authentic Danish butter cookie Recipe flavor, the technique is important, but the quality of what goes in matters even more. These cookies don’t have many ingredients hiding behind fancy flavorings; it’s all about the butter!
If you get the texture wrong—too spread out or too hard—it isn’t worth the effort. My advice focuses on two non-negotiable areas: ingredient selection and temperature control. If you have questions after trying this, don’t hesitate to reach out via my contact page!
Ingredient Spotlight: Why High-Quality Butter Matters for butter cookies
For these, you absolutely must use good unsalted butter. Since there is so much of it, the quality dictates the final taste of your rich buttery dessert. I strongly recommend using one with a higher fat percentage if you can find it. Low-quality butter often contains more water, which, when baked, leads to those cookies that spread too much and lose their beautiful, delicate structure. We want flavor, not water content!
Serving Suggestions for Your butter cookies
These delightful butter cookies are just too elegant to enjoy alone! While they are definitely a rich buttery dessert on their own, they truly shine when paired thoughtfully. I designed them to be classic Tea Time Cookies because they have that perfect balance of sweetness and buttery depth that sings next to a hot beverage. They are fantastic for a simple afternoon break or when you have friends over for a relaxed gathering.
You’ve done the work to create a stunning, artisanal cookie; now let’s set the scene for enjoying them! For more simple, elegant recipes that pair well with sweet moments, take a look at my side dishes and entertaining ideas.
Pairing butter cookies with the Perfect Drink
When I serve these, I always keep the drinks classic. A small, strong espresso offers a wonderful, bitter contrast to the cookie’s sweetness. Alternatively, a light, high-quality black tea—like an Earl Grey or Darjeeling—is just perfect. The tannins in the tea cut through the richness of the butter beautifully, cleansing the palate for the next tender bite.
Storage and Making butter cookies for Gifting
One of the best things about making these butter cookies is that they are totally resilient! They are fantastic for making ahead, which is such a relief when you’re busy baking for the holidays or preparing for a party. Since these are relatively dry, shortbread-style cookies, their shelf life is pretty good, but we want to keep that beautiful tenderness we worked so hard for.
For keeping them fresh at home, you store them in a truly airtight container at room temperature. Resist the urge to put them in the fridge; moisture is the enemy of that melt-in-your-mouth finish! They hold up beautifully for about a week, though honestly, they rarely last that long in my house!
If you’re planning on Butter Cookies for Gifting—which you absolutely should, they look so elegant piped into rosettes—make sure they are completely cool before packing them. I like to use decorative tins layered with parchment or wax paper between the layers. This prevents any potential sticking and keeps that crisp edge intact. Don’t overload the tin; a single, well-arranged layer shows off that beautiful piped star work better than piling them high. For some great ideas on pairing these treats with savory starters, check out my appetizers collection!

Frequently Asked Questions About butter cookies
Baking is all about experimentation, but sometimes you just need confirmation on the classics! I’ve gathered some questions I get asked most often about making these Classic butter cookies Recipe truly successful. Don’t hesitate to reach out via my contact page if you have another query that pops up while you’re baking!
Can I use a cookie scoop instead of piping for these butter cookies?
You absolutely can! If you skip the piping bag, you are leaning more toward a Buttery Shortbread Treat style. Using a scoop will give you soft, round, **tender butter cookies**. They won’t have the detailed star shape, but the rich, buttery flavor remains exactly the same, which is wonderful!
What happens if I skip chilling the dough?
Oh, if you skip chilling, you are asking for a completely different cookie experience! You’ll end up with thinner, widely spread cookies with much crispier edges—less like a Danish rosette and more like a thin cookie from a vintage tin. Chilling is essential for those defined, thick edges we want in a classic rosette!
How can I make these cookies crisper instead of melt-in-your-mouth soft?
To lean them toward a crispier texture, you can follow two paths! First, bake them for two minutes longer until the edges are deeply golden, not just light. Second, reduce the powdered sugar slightly and increase the granulated sugar a touch. The powdered sugar creates softness; less of it means a more caramelized, crispier snap.
Can I substitute the almond extract?
Yes, you can! While I love the subtle complexity almond extract adds to counter the richness, if you don’t have any on hand, simply use a full teaspoon of vanilla extract total instead of splitting between vanilla and almond. It will still deliver that classic, decadent flavor profile perfect for an afternoon tea time treat.
Share Your butter cookies Baking Story
The best part of creating these recipes isn’t just the moment they come out of my oven; it’s when they land in yours! Baking, for me, has always been about connection—unfolding a memory or creating a new one. I truly hope these butter cookies become a favorite story you tell at your house, whether it’s serving them alongside a sophisticated espresso or boxing them up beautifully for a friend.
Did you find the right stiffness when piping that dough? Did the aroma of rich butter fill your kitchen? I’d love to hear all about your experience! Please rate this recipe below and leave a comment telling me how they turned out. Did you add a special dusting of turbinado sugar? I love seeing how you bring your own elegance to the table!
If you found yourself totally obsessed with this style of treat, you might want to look at some other wonderfully indulgent holiday bakes, like these fantastic Gooey Butter Cookies for comparison. No matter what, keep telling your story, one delicious bite at a time. It’s what we do here at Unfold Recipes!
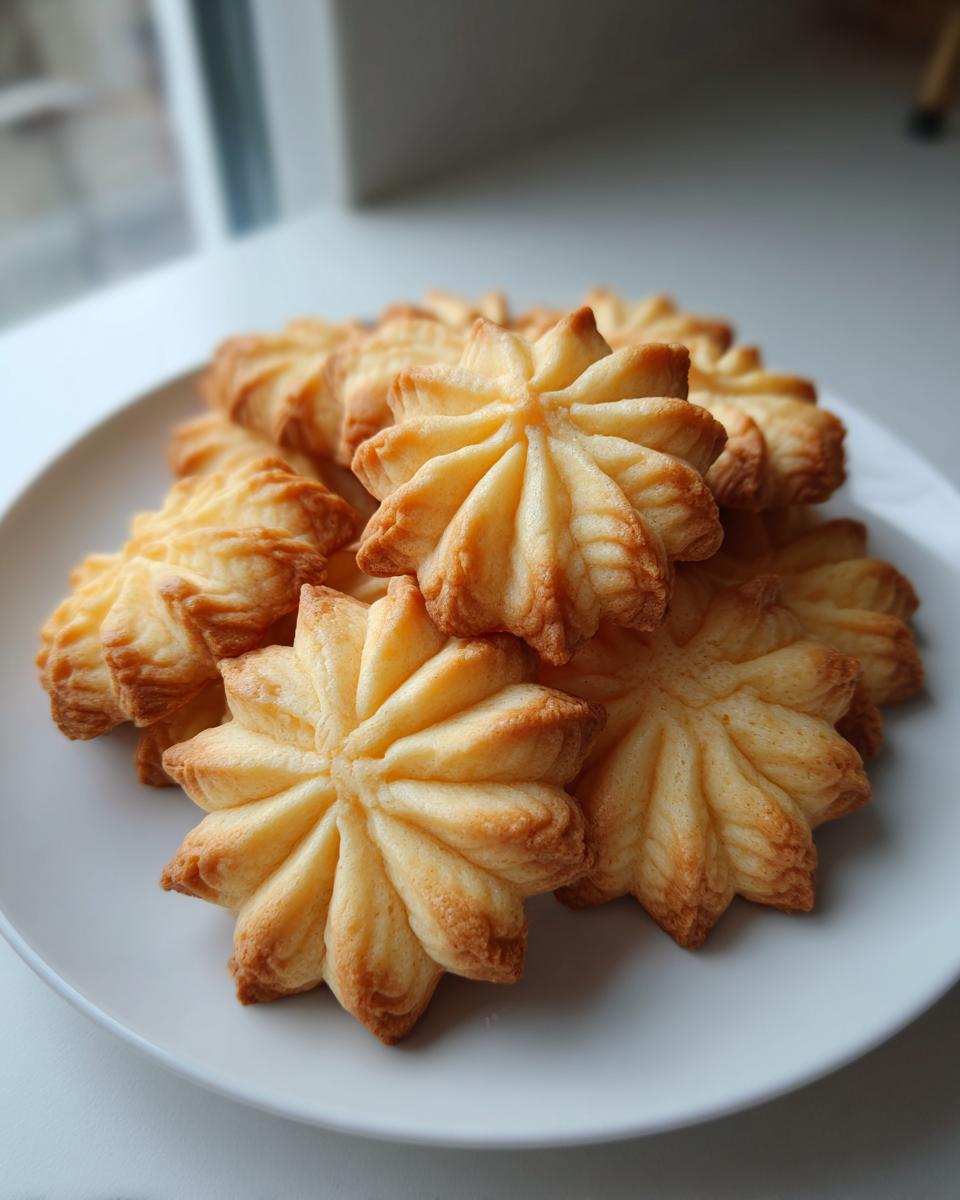
PrintClassic Melt-in-Your-Mouth Danish Style Butter Cookies

Create rich, buttery cookies with a tender texture that dissolves in your mouth. This recipe captures the authentic flavor of classic Danish butter cookies, perfect for tea time or gifting.
- Prep Time: 20 min
- Cook Time: 14 min
- Total Time: 54 min
- Yield: About 3 dozen cookies 1x
- Category: Dessert
- Method: Baking
- Cuisine: Danish
- Diet: Vegetarian
Ingredients
- 1 cup unsalted butter, softened
- 1/2 cup granulated sugar
- 1/4 cup powdered sugar
- 1 teaspoon vanilla extract
- 1/4 teaspoon almond extract
- 2 cups all-purpose flour
- 1/4 teaspoon salt
Instructions
- Beat the softened butter, granulated sugar, and powdered sugar together in a large bowl until the mixture is light and fluffy.
- Mix in the vanilla extract and almond extract until just combined.
- In a separate bowl, whisk together the flour and salt.
- Gradually add the dry ingredients to the wet ingredients, mixing on low speed until a soft dough forms. Do not overmix.
- Transfer the dough to a piping bag fitted with a star tip (like a Wilton 1M) or shape the dough into small logs or rounds if you prefer a shortbread style.
- Place dough onto baking sheets lined with parchment paper, leaving about 2 inches between cookies.
- Chill the cookies on the baking sheet for at least 30 minutes. This step helps the cookies hold their shape.
- Preheat your oven to 350°F (175°C).
- Bake the chilled cookies for 10 to 14 minutes, or until the edges are lightly golden brown. Watch them closely as they brown quickly.
- Let the cookies cool on the baking sheet for 5 minutes before carefully transferring them to a wire rack to cool completely.
Notes
- For the best melt-in-your-mouth texture, use high-quality butter and make sure it is truly softened, not melted.
- If you skip chilling the dough, your cookies will spread more, resulting in thinner, crispier edges.
- You can substitute 1/2 teaspoon of almond extract with an extra 1/2 teaspoon of vanilla extract if you prefer a less pronounced almond flavor.
- These cookies store well in an airtight container at room temperature for up to one week.
Nutrition
- Serving Size: 1 cookie
- Calories: 110
- Sugar: 6
- Sodium: 35
- Fat: 7
- Saturated Fat: 4.5
- Unsaturated Fat: 2.5
- Trans Fat: 0.1
- Carbohydrates: 11
- Fiber: 0.2
- Protein: 1
- Cholesterol: 25