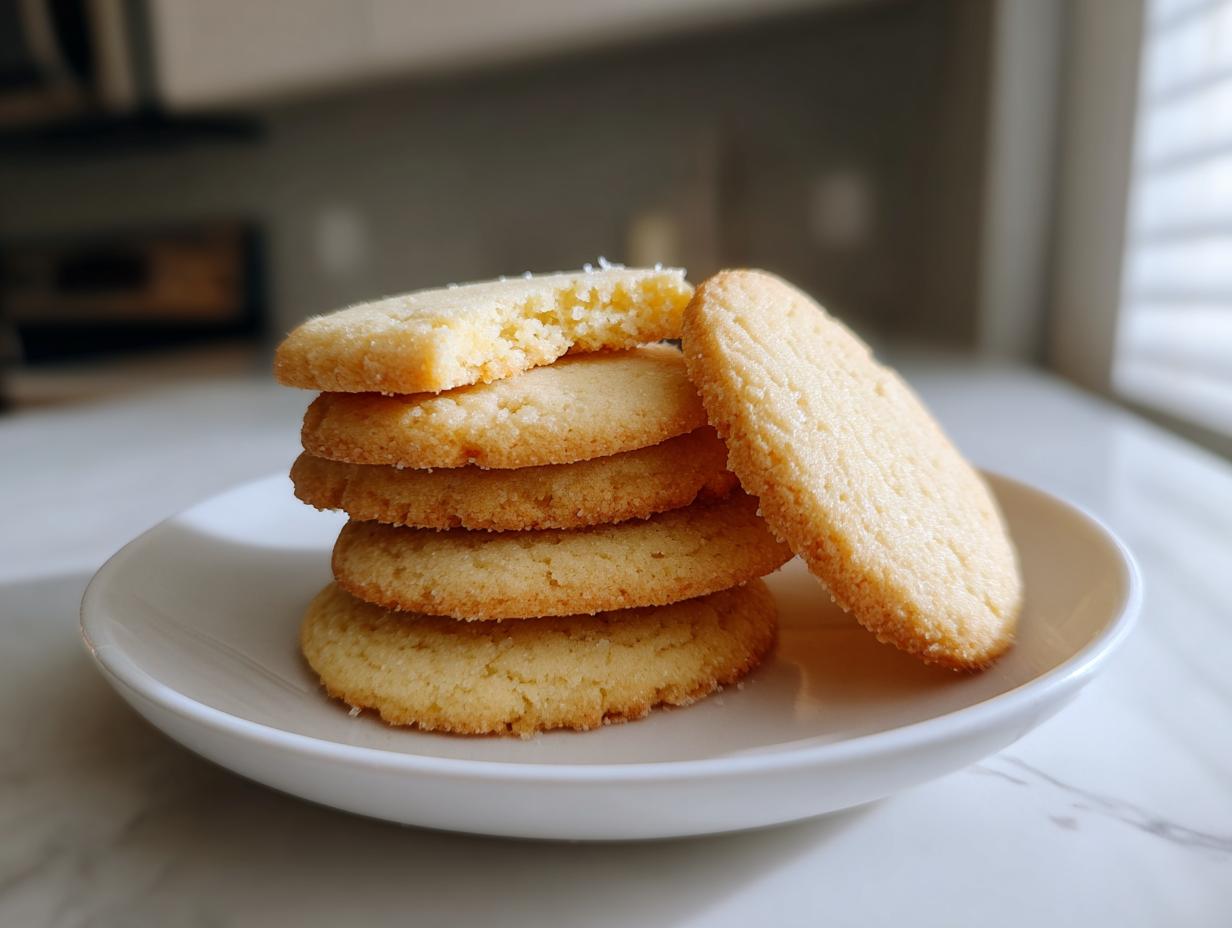

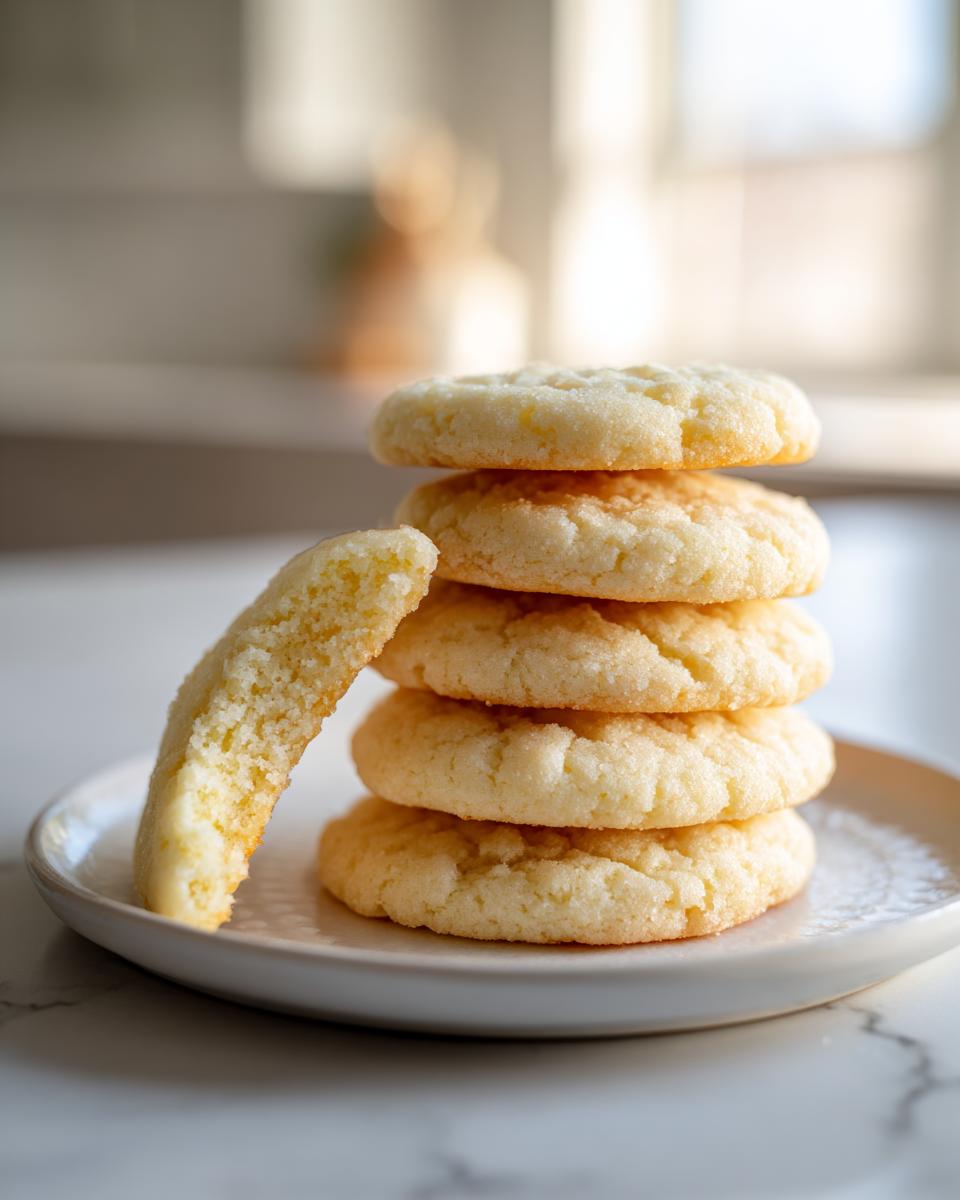
There’s just something about pulling out the cookie cutters for the first time each year that brings back such warm memories, isn’t there? Whether you’re making them for a big holiday spread or just because you need a perfectly sweet afternoon treat, you need a recipe that genuinely works. Forget those sad, puffy cookies that melt into blobs the second they hit the hot pan! I’m sharing what I truly believe is The Ultimate Soft, Chewy Cutout Sugar Cookie Recipe. After my time studying culinary arts and years of testing ingredients in my own kitchen, I promise this recipe delivers that perfect balance: they are wonderfully soft and chewy inside, yet they hold their shape beautifully for decorating. These reliable sugar cookies are the foundation for all your sweetest traditions.
- Why This is the Best Sugar Cookie Recipe You Will Ever Make
- Gathering Ingredients for Your Buttery Sugar Cookie Recipe
- How to Prepare Perfect Cutout Sugar Cookies
- Tips for Decorating Your Holiday Sugar Cookies
- Storage and Keeping Your Homemade Sugar Cookies Fresh
- Troubleshooting Common Issues with Cutout Sugar Cookies
- Frequently Asked Questions About These Sugar Cookies
- Estimated Nutritional Snapshot for Our Sugar Cookies
- Share Your Ultimate Sugar Cookies Creations
Why This is the Best Sugar Cookie Recipe You Will Ever Make
I know, I know—everyone claims to have the “best sugar cookie recipe,” but hear me out. This particular formula is the one I developed specifically because so many recipes fail on one crucial front: they either bake up soft and delicious but spread everywhere, or they hold their shape perfectly but taste like cardboard. Not here! This is my answer to getting bakery-style results at home, making it ideal for all your holiday sugar cookies projects.
Achieving Soft Sugar Cookies Texture
Texture is everything. To get those wonderfully soft sugar cookies recipe results, we rely heavily on the creaming of the butter and sugar. When you whip them together until light and fluffy, you are literally folding air into the dough. That trapped air expands in the oven, giving you a delicate structure rather than a dense brick. Also, please trust me on the timing: we pull these cookies out just as the edges start to turn faintly golden. A minute too long, and poof—chewiness gone!
The Secret to Sugar Cookies That Hold Their Shape
This is where novices often slip up, but this step is truly non-negotiable if you want perfect sugar cookie cutouts. The dough *must* chill. When the dough is cold, the fat (butter) firms up, preventing the shapes from slumping while they bake. Since these are designed to be the best cutout sugar cookies for decorating, that chilling time makes the difference between a perfect star and a sad, melted puddle. It’s worth the wait, I promise!
Gathering Ingredients for Your Buttery Sugar Cookie Recipe
When I set out to create my ultimate buttery sugar cookie recipe, I wanted to ensure it didn’t require some obscure ingredient you can only find online. A truly great homemade cookie should be dependable, utilizing pantry staples you probably already have on hand! These are designed to be easy sugar cookies that deliver maximum flavor payoff for minimum fuss.
But here is the crucial point, and I learned this the hard way in culinary school: regardless of how simple the list is, precise measurement is absolutely vital when making sugar cookies that need to hold a sharp shape. If you measure flour by scooping it directly from the bag, you’re going to end up with too much, and your cookies might come out dry or tough. Please take a moment to read the ingredient list first and measure carefully!
Ingredient Notes and Substitutions
While the list itself is straightforward, the condition of those ingredients matters enormously. First, let’s talk butter. If your recipe calls for softened butter, it means soft enough that it leaves a slight indent when pressed, but it should absolutely not be oily or melted. Melted butter ruins the structure we worked so hard to build during the creaming stage! You can find the full list ready for you to shop for below, but know that the quality of your vanilla extract really does shine through in a cookie this simple. Think of it as the star of the flavor show here. You can check out my favorite contact page if you ever have questions about sourcing ingredients!
How to Prepare Perfect Cutout Sugar Cookies
Alright, this is the part where the magic truly happens! Following the mixing instructions for this roll out sugar cookies recipe requires a little focus, but if you pay attention to the dough’s texture, you’ll see exactly why these sugar cookies come out superior every single time. Remember, we are making beautiful, structured cookies that are still tender, which requires a very specific technique. You can always find more kitchen inspiration and my most recent baking adventures right here on the blog!
Mixing the Dough for Chewy Sugar Cookies
We start by creaming that butter and sugar—think light and fluffy, not just mixed together. Once we add the egg and vanilla, things look liquidy, but don’t worry, the dry stuff brings it all back together! The critical moment is when you introduce the flour mixture. You must add it gradually and stop mixing the very second you see the last streak of flour disappear. Honestly, if you overmix the dough once the flour is in, you start to develop gluten, and that is exactly how you get stiff, crunchy cookies instead of the tender, chewy sugar cookies we are aiming for. Keep that mixer on low!
Chilling and Rolling Out Your Sugar Cookies
Step five is your best friend! Since these are sugar cookies that hold their shape beautifully, we need that dough firm before we cut. Wrap those disks up tight and get them into the fridge for a minimum of one hour—honestly, two is better if you can manage it. When you roll them out, aim for a consistent 1/4 inch thickness across the board. My personal trick? If the dough starts getting sticky on your counter while you’re cutting shapes, don’t panic and add more flour! Just pop the rolled-out dough, cutters and all, back into the chill for 10 minutes. That solves everything.
Baking Tips for Fluffy Sugar Cookies
Your oven should be preheated to 350 degrees F (175 degrees C). These cookies bake quickly because we want them soft. We’re looking for a baking time between 8 and 10 minutes. Don’t expect them to look deeply browned. If you see just the faintest hint of light gold around the edges, they are done. If you wait until they are obviously golden brown, you’ll end up with beautiful shapes, yes, but they won’t have that soft pull we love. For that lovely fluffy sugar cookies quality, err on the side of pulling them slightly early, as they continue cooking on the hot pan for a few minutes after they come out of the heat.
Tips for Decorating Your Holiday Sugar Cookies
Once you have perfected the base—and trust me, once you master these sugar cookies, you’ll be unstoppable—it’s time for the fun part: decorating! This is where these cookies truly shine as the ultimate holiday sugar cookies. Because the structure is so reliable, they are the perfect canvas for whatever icing masterpiece you dream up. This recipe is designed to withstand the weight of a slightly thick royal icing without cracking or dissolving the cookie underneath.
If you’re looking for easy ways to make your decorations look professional, you have to start with the right icing. I always recommend using a sturdy royal icing for clean lines and sharp decoration results. If you haven’t perfected that yet, don’t worry, I have a guide to the easiest cookie icing recipe that hardens beautifully, which cuts down on your overall prep time.
Remember, with Christmas cookie decorating ideas, sometimes less is more. Don’t feel pressured to cover every inch of the cookie! Sometimes, a perfectly piped border and a simple dusting of festive sprinkles on just the edge is plenty elegant. If you are using buttercream, make sure your cookies are completely cool to the room temperature, or the icing is going to melt and slide right off, turning your beautiful cutouts into mushy, sweet puddles.
Storage and Keeping Your Homemade Sugar Cookies Fresh
So, you’ve baked your beautiful batches of homemade sugar cookies, and they are perfectly decorated and cool. Now we have to keep that cloud-like texture for as long as possible! The single most important thing you can do is resist the urge to eat them all in one sitting. I know, it’s hard, but we are protecting that soft texture!
For plain, undecorated cookies, or those decorated only with hard royal icing—the kind that’s fully dry and crystalized—storage is actually quite simple. You must use an airtight container. Once they are completely, totally cooled, nestle them into a large cookie tin or a sturdy plastic container. Make sure you don’t pack them too tightly, or you risk smudging that lovely icing you just finished.
These keep beautifully at room temperature for about five to seven days. Don’t refrigerate them! I cannot stress this enough. Cold air dries out cookies instantly, and that refrigeration moisture turns them hard and crumbly. These buttery sugar cookies do not need to be kept cold.
Now, what about those gorgeous cookies covered in soft buttercream frosting? Buttercream has more moisture and fat, and it doesn’t fare as well sitting out for a week. If you didn’t use royal icing, I recommend sealing those cookies and keeping them somewhere cool—but not the fridge—for up to three days. If you have a big batch leftover, just frost the undecorated ones later! Speaking of keeping things fresh, if you ever have leftover fruit components, you might want to check out my recipe for Apple Dump Cake; it’s a lifesaver for turning odds and ends into dessert!
You want them to stay soft and chewy? Keep the air tightly sealed out, and keep the temperature steady. That’s the whole secret to enjoying these amazing sugar cookies all week long!
Troubleshooting Common Issues with Cutout Sugar Cookies
Even with the absolute best guidance, baking can sometimes throw us a curveball. Don’t you worry if your first batch doesn’t come out looking exactly like they did on my counter! That’s part of the fun of being a home baker. When you’re striving for those flawless, perfect sugar cookie cutouts, most problems come down to temperature or technique. Let’s walk through the main hiccups I see people run into when making cutout sugar cookies so you can fix them easily.
My Cutout Shapes Spread Out While Baking!
Oh, that dreaded puffy look! This is almost always a temperature issue. As I mentioned earlier, for sugar cookies to hold their shape, the fat (butter) needs to be cold when it hits the oven. If your rolled-out dough was too warm, the butter melts too fast, spreading the edges of your cookie before the flour structure has a chance to set. What you can do next time is chill the dough for longer—maybe even two hours—or try rolling the shapes directly on the parchment paper so you aren’t transferring them after they’ve had time to warm up in your hands.
The Dough Cracks or Tears When I Try to Move It
This usually happens when the dough is too cold, or perhaps you tried to skip the chilling phase entirely and then tried rolling it cold anyway. If your dough is cracking severely when rolled out, it’s too stiff. You have two options here. First, let the dough disc sit on the counter for just five minutes; small increments are key. Second, if you skipped chilling and went straight to cutting, the dry dough might be tearing because the butter hasn’t distributed evenly enough yet. You need that chilling time to allow the butter and flour to integrate properly into a cohesive, workable dough for cutout sugar cookies.
My Cookies Are Too Hard, Not Chewy!
If your buttery sugar cookie recipe came out tasting fine but you’re biting into something closer to a cracker, you baked them too long! For truly soft sugar cookies, you must keep an eye on the timer. You are waiting for that pale gold edge, not a deep brown. If they come out of the oven feeling slightly soft in the middle, that’s okay! As they sit on the warm baking sheet for those initial five minutes, they continue to cook and set up perfectly. Pulling them even a minute early guarantees that melt-in-your-mouth texture we are aiming for.
Why Aren’t My Cookies Firing Up Perfectly Flat?
Generally, uneven browning or doming is caused by uneven dough thickness or an oven hot spot. Make sure your dough is rolled out consistently to that 1/4 inch thickness across the entire surface. If you notice one side of your tray is browning faster, gently rotate the baking sheet halfway through the baking time. This simple move helps all the homemade sugar cookies bake evenly and stay flat and gorgeous for decorating!
Frequently Asked Questions About These Sugar Cookies
I always love hearing what you all are wondering about when you bake these at home! Getting these sugar cookies just right is my main goal for you, so let’s tackle a few common questions I get asked a lot.
Can I make this a ‘no chill sugar cookie dough’ recipe?
If you’re in a huge rush, well, I get it! However, for cutout sugar cookies, chilling is truly what gives you the clean, sharp edges you want for decorating. If you try to roll the dough warm, it just won’t cooperate, and you’ll end up with thick, puffy cookies where the shape gets lost. My modification for speed? If you absolutely can’t wait an hour for the dough to chill, try this instead: cut out the shapes as soon as the dough is mixed, place those cutouts onto your parchment-lined baking sheet, and pop the *entire sheet* into the freezer for about 20 minutes. Freezing the cut shapes solidifies the fat right before baking, and that usually does the trick to keep them from spreading! It’s my favorite trick for a quick batch of holiday sugar cookies.
What is the difference between these and ‘vanilla sugar cookies’?
That’s a great question! When home bakers talk about generic vanilla sugar cookies, they are often referring to the soft, drop-style cookies that aren’t meant to be rolled out or decorated. Those recipes usually have a higher liquid, lower flour content, which makes them puff up like little mounds. These are structurally different. While they absolutely have that delicious buttery vanilla flavor you expect, our recipe is engineered with a specific flour-to-fat ratio to ensure they stay relatively low to the ground and firm enough to handle icing. You get that soft center, but you also get beautiful, defined edges—which is why these are the best sugar cookie recipe for decorating!
Can I use margarine instead of butter for these sugar cookies?
Please, please don’t do this unless you absolutely have to! I know butter can sometimes be more expensive, but for a cookie where the butter flavor is so central—as in, this is my signature buttery sugar cookie recipe—you really need the real thing. Margarine (or anything less than 80% milk fat) contains too much water and often stabilizers that aren’t real fat. The water presence makes the dough runny, leading to spreading, and the flavor just isn’t as rich and luxurious. If you use margarine, you are sacrificing the melt-in-your-mouth texture for a cookie that might taste slightly manufactured. Stick to that high-quality butter for success here!
If you’re looking for more simple ideas that don’t require a big grocery run, check out what I’ve been making for weekend brunch over at my brunch section!
Estimated Nutritional Snapshot for Our Sugar Cookies
As much as I wish these delicious buttery sugar cookies were calorie-free, they are a wonderful treat made with quality ingredients like real butter and sugar! Since every ingredient’s exact source and quantity can change things slightly, the totals below are just estimates based on the standard measurements in the recipe above. We need to keep a little bit of that old-fashioned indulgence, after all, especially when baking for the holidays!
Here is a quick peek at the estimated breakdown, based on a serving size of one cookie:
- Serving Size: 1 cookie
- Calories: 180
- Sugar: 15 grams
- Fat: 9 grams (with 5 grams saturated)
Remember, this is just an approximation based on the raw ingredients provided. These values can change if you decide to go heavy on the frosting or use salted versus unsalted butter. Think of these as truly melt-in-your-mouth cookies perfect for satisfying that craving for sweet holiday treats!
Share Your Ultimate Sugar Cookies Creations
Now comes the part where you take over! Creating beautiful azúcar cookies is such a rewarding experience, and what I love most about sharing these recipes is seeing the unique ways you all bring them to life in your kitchens. Did you use classic Christmas silhouettes? Maybe you went for little stars or tried a complex Valentine’s heart shape? I genuinely want to see your decorating triumphs!
If you tried this recipe and found that these are the soft, chewy cookies you’ve been searching for—the kind that never spread and are perfect for rolling out—please leave a rating for me below. Five stars means the world and helps others find this reliable recipe when they’re searching for the absolute best sugar cookie recipe!
Once you’ve decorated your beautiful batches, please snap a photo and share it! Tag me over on social media so I can cheer you on. I love seeing how you interpret these recipes. If you need something rich to balance out all that sweet sugar cookie frosting, later this week I’ll be sharing an incredible recipe for chocolate cupcakes recipe that is phenomenal.
I’m so curious to know: What shape will you cut first when you make your dough?
PrintThe Ultimate Soft, Chewy Cutout Sugar Cookies That Hold Their Shape
This recipe creates buttery sugar cookies that are soft and chewy inside while holding their shape perfectly for cutting and decorating. They are simple to make and ideal for any holiday.
- Prep Time: 25 min
- Cook Time: 10 min
- Total Time: 1 hour 35 min
- Yield: 24 cookies 1x
- Category: Dessert
- Method: Baking
- Cuisine: American
- Diet: Vegetarian
Ingredients
- 2 1/4 cups all-purpose flour
- 1 teaspoon baking powder
- 1/2 teaspoon salt
- 1 cup (2 sticks) unsalted butter, softened
- 1 1/2 cups granulated sugar
- 1 large egg
- 1 teaspoon vanilla extract
Instructions
- In a medium bowl, whisk together the flour, baking powder, and salt. Set this dry mixture aside.
- In a large bowl, use an electric mixer to beat the softened butter and granulated sugar together until the mixture is light and fluffy, about 3 minutes. This step incorporates air for a better texture.
- Beat in the egg and vanilla extract until just combined. Scrape down the sides of the bowl as needed.
- Gradually add the dry ingredient mixture to the wet ingredients, mixing on low speed until the dough just comes together. Do not overmix.
- Divide the dough in half. Flatten each half into a disk, wrap tightly in plastic wrap, and chill in the refrigerator for at least 1 hour. Chilling is key for cookies that hold their shape.
- Preheat your oven to 350 degrees F (175 degrees C). Line baking sheets with parchment paper.
- On a lightly floured surface, roll out one disk of dough to about 1/4 inch thickness. Use your favorite cookie cutters to cut out shapes.
- Carefully transfer the cutouts to the prepared baking sheets, placing them about 1 inch apart.
- Bake for 8 to 10 minutes, or until the edges are lightly golden. For soft sugar cookies, err on the side of slightly underbaking.
- Let the cookies cool on the baking sheet for 5 minutes before moving them to a wire rack to cool completely.
- Decorate with your favorite royal icing or buttercream once fully cooled.
Notes
- For the best cutout results, chill the dough for at least 1 hour, or up to 2 days.
- If the dough softens while cutting, return the cutouts to the refrigerator for 10 minutes before baking.
- To achieve a chewy texture, slightly underbake the cookies; they will firm up as they cool.
- This recipe makes a buttery sugar cookie base perfect for holiday sugar cookies.
Nutrition
- Serving Size: 1 cookie
- Calories: 180
- Sugar: 15
- Sodium: 110
- Fat: 9
- Saturated Fat: 5
- Unsaturated Fat: 4
- Trans Fat: 0
- Carbohydrates: 23
- Fiber: 0
- Protein: 2
- Cholesterol: 30