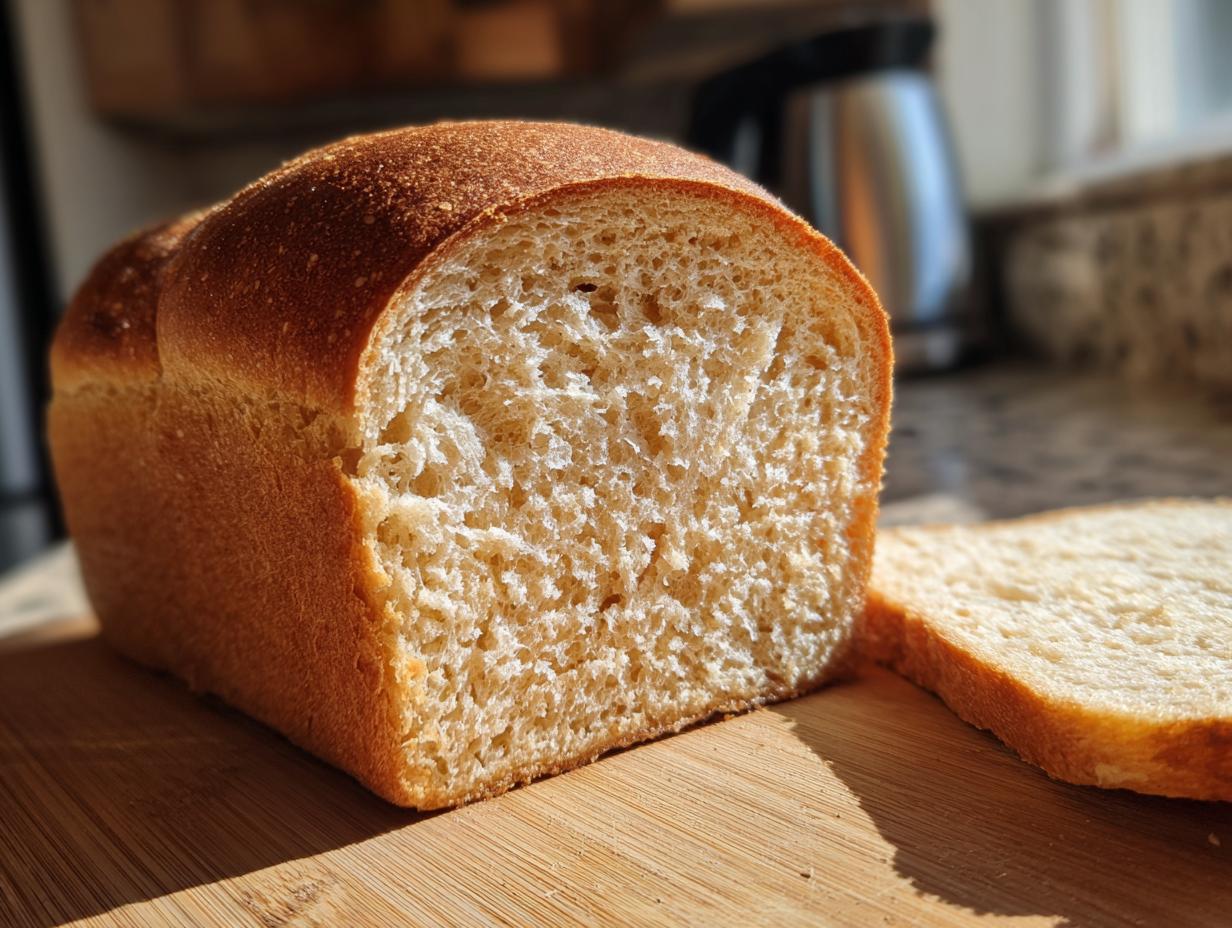

There is simply nothing that compares to the aroma of fresh bread filling your kitchen. It signals comfort, warmth, and gathering. But let’s be honest: getting that soft, pillowy interior with traditional whole wheat flour can feel like chasing a dream. Too often, homemade whole wheat bread turns out heavy or dense, perfect for crumbling but not so much for a delicate family sandwich. Well, I promise you, we’ve cracked the code here at Unfold Recipes! This Honey Whole Wheat Sandwich Bread recipe is my personal triumph—it delivers incredibly soft whole wheat bread that rivals the bakery quality you crave, all while keeping that lovely, wholesome flavor.
For me, finding this balance took quite a bit of testing. I wanted something healthy enough for daily toast but tender enough that it didn’t fight back when you tried to spread butter on it. This specific blend of flours and the gentle sweetness of honey create that perfect, foolproof loaf. I’m Catherine, by the way, and I can’t wait for you to unfold this story in your own oven. You can read a little more about my journey over on the About Page if you’d like!

- Why This Soft Honey Whole Wheat Bread Recipe Works
- Gathering Ingredients for Your Homemade Whole Wheat Bread Recipe
- Step-by-Step Instructions for Easy Whole Wheat Bread
- Tips for Success with Your Honey Whole Wheat Bread
- Ingredient Notes and Substitutions for Whole Wheat Bread
- Serving Suggestions for Your Fluffy Whole Wheat Loaf
- Storage and Reheating Instructions for Homemade Whole Wheat Bread
- Frequently Asked Questions About Making Whole Wheat Bread
- Baking Your Story: Share Your Whole Wheat Bread Results
Why This Soft Honey Whole Wheat Bread Recipe Works
The complaint I hear most often about whole grain baking is density. People want that healthy homemade bread, but they miss the lightness of white bread. This recipe is specifically designed to give you the best of both worlds—a hearty flavor profile without the heavy brick texture you sometimes get when using all whole wheat flour. This makes it the perfect whole wheat sandwich bread for packed lunches!
- Honey isn’t just for flavor; it’s a humectant, meaning it draws moisture into the crumb and keeps the bread soft for days.
- We add just enough all-purpose flour to support the heavier whole wheat, ensuring a beautiful rise.
- The initial addition of melted butter provides richness that mimics traditional enriched sandwich loaves.
If you’re new around here, you can check out more of my insights and testing on the Unfold Recipes Blog!
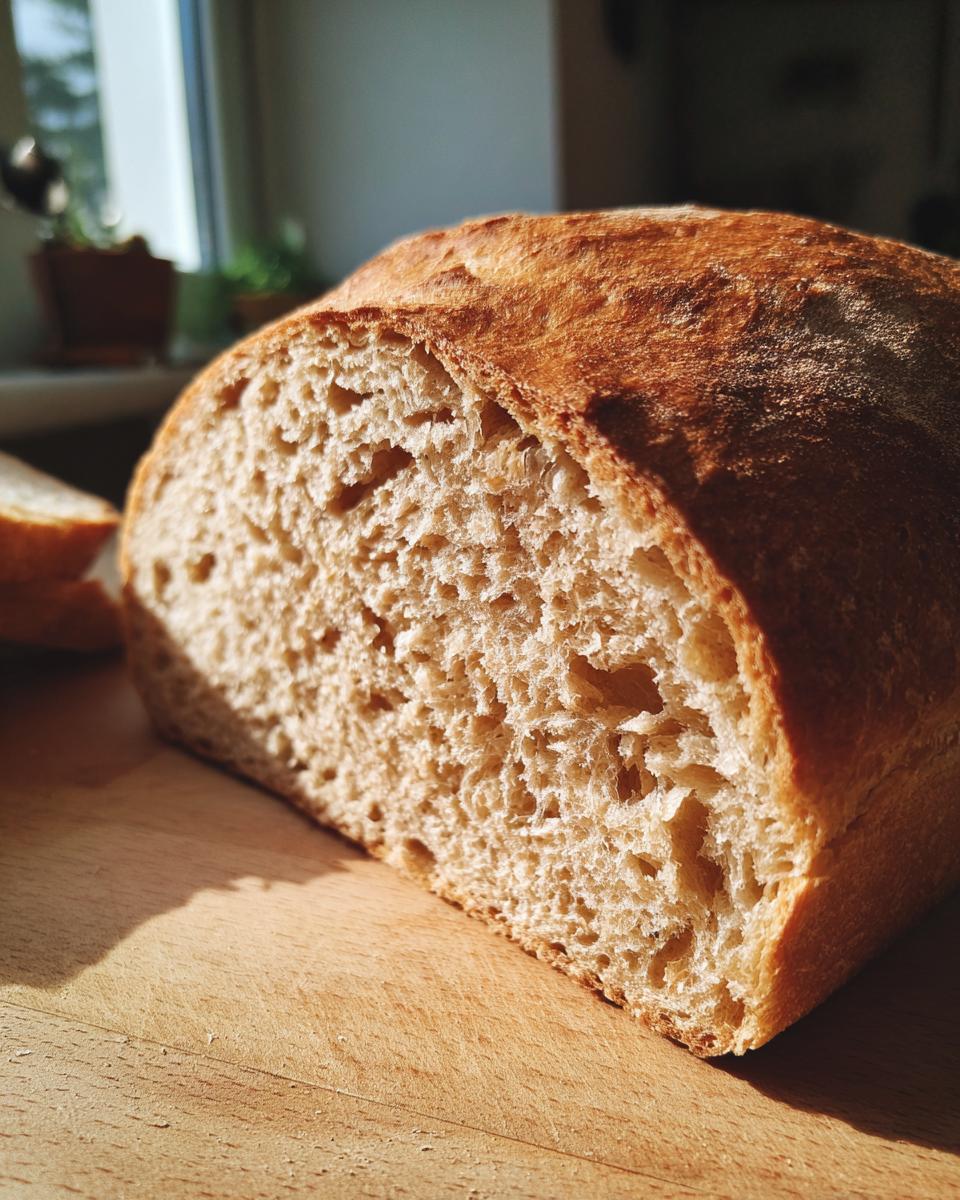
Achieving the Fluffy Whole Wheat Loaf Texture
Getting that cloud-like interior requires a little gluten development; this is key to a fluffy whole wheat loaf. We use a blend of flours for this exact reason. The all-purpose flour steps in to provide structure that 100% whole wheat sometimes struggles with on its own. Plus, don’t rush the kneading! Those 8 to 10 minutes we spend working the dough are non-negotiable for developing the strength needed to trap the gases from the yeast.
Gathering Ingredients for Your Homemade Whole Wheat Bread Recipe
Baking is much like mixing a fine perfume; the exact measurement of each component is absolutely crucial if you want that intended, elegant result. Since we are aiming for a soft texture here—not a rustic, dense field bread—precision matters a lot! Make sure you have everything ready before you even think about waking up your yeast. I always lay everything out on the counter first, just like my mise en place training taught me back in culinary school. It guarantees you won’t accidentally skip the salt or use cold water!
Here’s exactly what you’ll need to create this wholesome loaf. Please pay attention to the details, like ensuring your butter is indeed melted and your water is at that perfect 105°F to 115°F range; anything too cool won’t wake the yeast, and anything too hot will kill it dead!
- 1 cup warm water (aim for that sweet spot between 105°F and 115°F—test it on your wrist!)
- 2 1/4 teaspoons active dry yeast (A standard packet size, usually.)
- 1/4 cup honey (This is our secret weapon for moisture and soft crumb.)
- 1/4 cup unsalted butter, melted (Make sure it cools just slightly after melting.)
- 1 1/2 teaspoons salt (Don’t reduce this; it controls the rise and adds flavor depth.)
- 3 1/2 cups whole wheat flour (This is the star of our healthy homemade bread.)
- 1/2 cup all-purpose flour (This is our little helper for structure and softness.)
- 1 large egg, lightly beaten (Reserved for the egg wash before baking.)
If you’ve ever struggled with other baking projects, perhaps you’ll find the simple, structured approach I use for making fluffy rice pilaf helpful—it uses the same principles of careful measuring!
Step-by-Step Instructions for Easy Whole Wheat Bread
Now that we have our ingredients lined up beautifully, it’s time to get our hands a little dusty! Don’t let the word ‘kneading’ scare you off; for an easy whole wheat bread recipe like this, the process is incredibly satisfying. We are going to build structure slowly, which is how we guarantee that gorgeous, tender crumb when we slice into the finished loaf. Following these steps will help you make whole wheat bread at home that tastes like it came straight from a high-end bakery. If you need a refresher on handling yeast generally, my simple yeast bread recipe guide is a great place to start!
Activating Yeast and Mixing the Dough
First things first: let’s wake up our yeast! Pour that warm water—and remember, we’re aiming carefully for 105°F to 115°F—into a large bowl. Sprinkle the yeast over the top and just let it sit quietly for about five minutes. You are looking for foam here; if it gets bubbly and foamy, that means your yeast is healthy and ready to work its magic. Once you see that cap of foam, stir in your honey, the melted butter, and the salt until it’s all combined.
Kneading and the First Rise for Your Whole Wheat Bread
It’s time for the whole wheat flour! Add the 3 1/2 cups of whole wheat flour slowly, mixing until you have a shaggy, messy dough. Now, turn that mess out onto your clean counter, using some of that reserved all-purpose flour to prevent immediate sticking. Knead with purpose for a solid 8 to 10 minutes. The dough will feel stiff at first, but keep working it! You only add the extra all-purpose flour if the dough is absolutely refusing to come together; remember, too much flour equals a dense loaf!
Once it’s smooth and elastic—it should feel nice and supple—place it gently into a lightly oiled bowl. Cover it up and let it relax in a warm spot for 1 to 1.5 hours. The key sign you’re done is when it has completely doubled in size. Don’t poke it too soon!
Shaping and Final Proofing
Go ahead and gently punch down that risen dough; it’s ready for its final shape. Gently work it into a tight log shape, making sure you don’t deflate all the lovely air bubbles we just created. Tuck that loaf snugly into your greased 9×5 inch pan. Cover it loosely again and let it have its second rest. This final proofing takes less time, usually 30 to 45 minutes. You’ll know it’s perfectly proofed when the dough has reached about 1 inch above the rim of the pan. Preheat that oven to 375°F while it’s resting up!
Tips for Success with Your Honey Whole Wheat Bread
Even with a solid recipe, sometimes the little details make the difference between a good loaf and the absolute best whole wheat bread tutorial you’ve ever followed. These tiny habits, which I picked up both in school and from my mother, are what ensure that beautifully soft crumb every single time. Remember, with whole grain baking, we are trying to coax softness out, not wrestle it into submission!
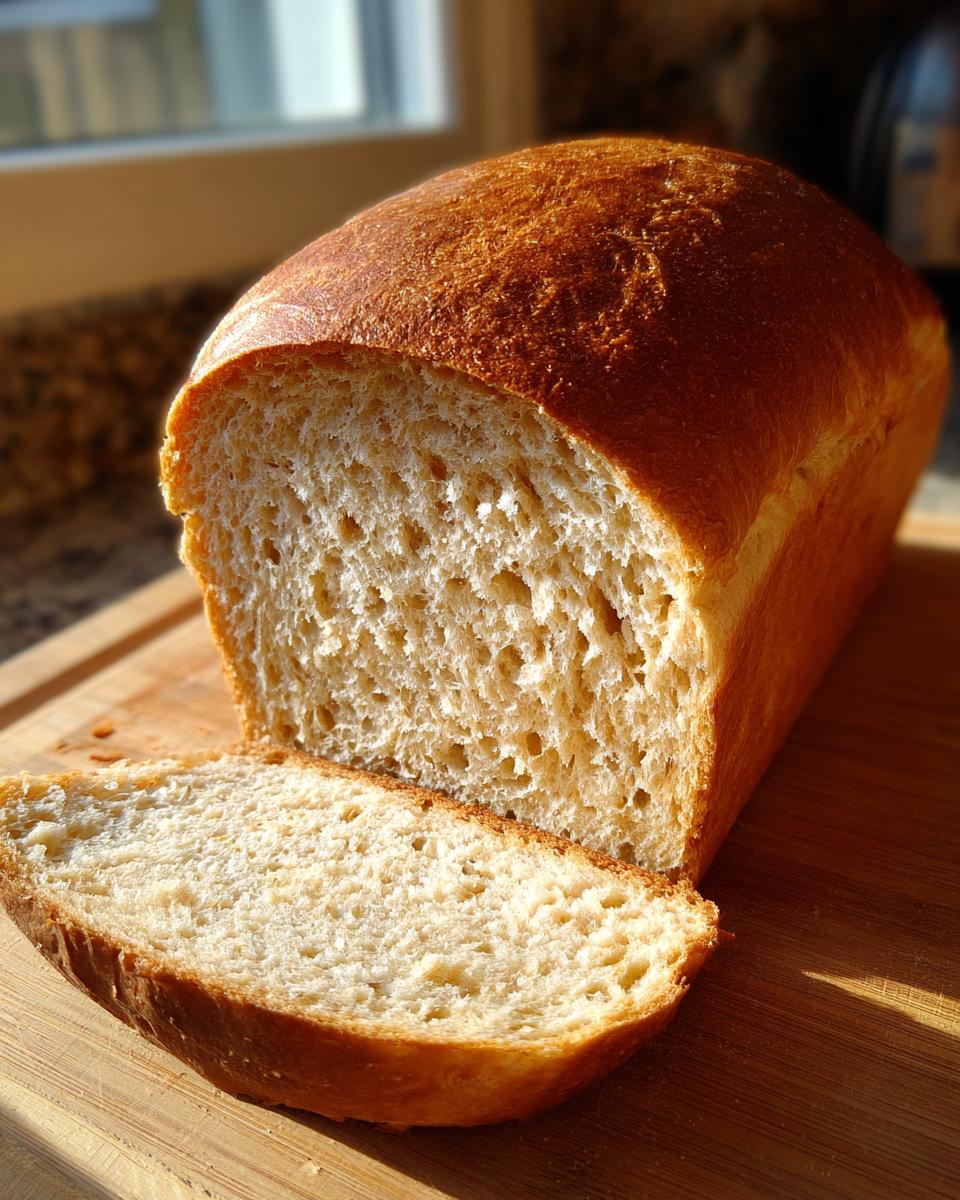
First, if you want an incredibly tender crust—the kind you just want to nibble off immediately—do this trick: As soon as the loaf comes out of the oven, immediately brush the top with about a tablespoon of melted butter. The residual heat melts the butter slightly, and as it cools, it creates this beautiful, supple seal instead of a hard, crackly shell. It’s a simple step, but wow, does it pay off!
Also, don’t stress too much about needing 100 percent whole wheat bread if you are worried about density. That half-cup of all-purpose flour is your friend here; it helps the rise significantly. And finally, the cooling process is just as important as the baking process! Don’t let that loaf sit in the hot metal pan for too long after baking—remove it right away and let it cool completely on a wire rack. Slicing into warm bread releases steam, which is what turns that perfect interior gummy and soft in the wrong way. Patience here means a perfect slice later!
You can find more general baking wisdom and tips over on my Unfold Recipes Blog!
Ingredient Notes and Substitutions for Whole Wheat Bread
I often get questions about the flour blend—why aren’t we going for true 100 percent whole wheat bread? That’s a fair question, especially since we value health! While I love the idea of using only whole wheat flour, if you swap out that last half-cup of all-purpose flour for more whole wheat, your loaf volume *will* decrease, and the crumb will get noticeably denser. Whole wheat bran tends to cut the gluten structure, so we use that small amount of white flour as a structural backbone to ensure we get that tender, sandwich-ready slice. It’s a compromise for the sake of fluffiness!
If you absolutely must use only whole grain, I suggest increasing your liquid slightly, perhaps another tablespoon of water, and definitely don’t skip the kneading time—you need every bit of structure you can get. And on the subject of sweetness, if you’re out of honey or just prefer something else, maple syrup works beautifully as a direct swap for that lovely nutty whole wheat flavor. Agave nectar is another fine option, just remember that these swaps won’t have the exact same level of moisture retention as honey, so keep an eye on your dough texture during the mix!
Serving Suggestions for Your Fluffy Whole Wheat Loaf
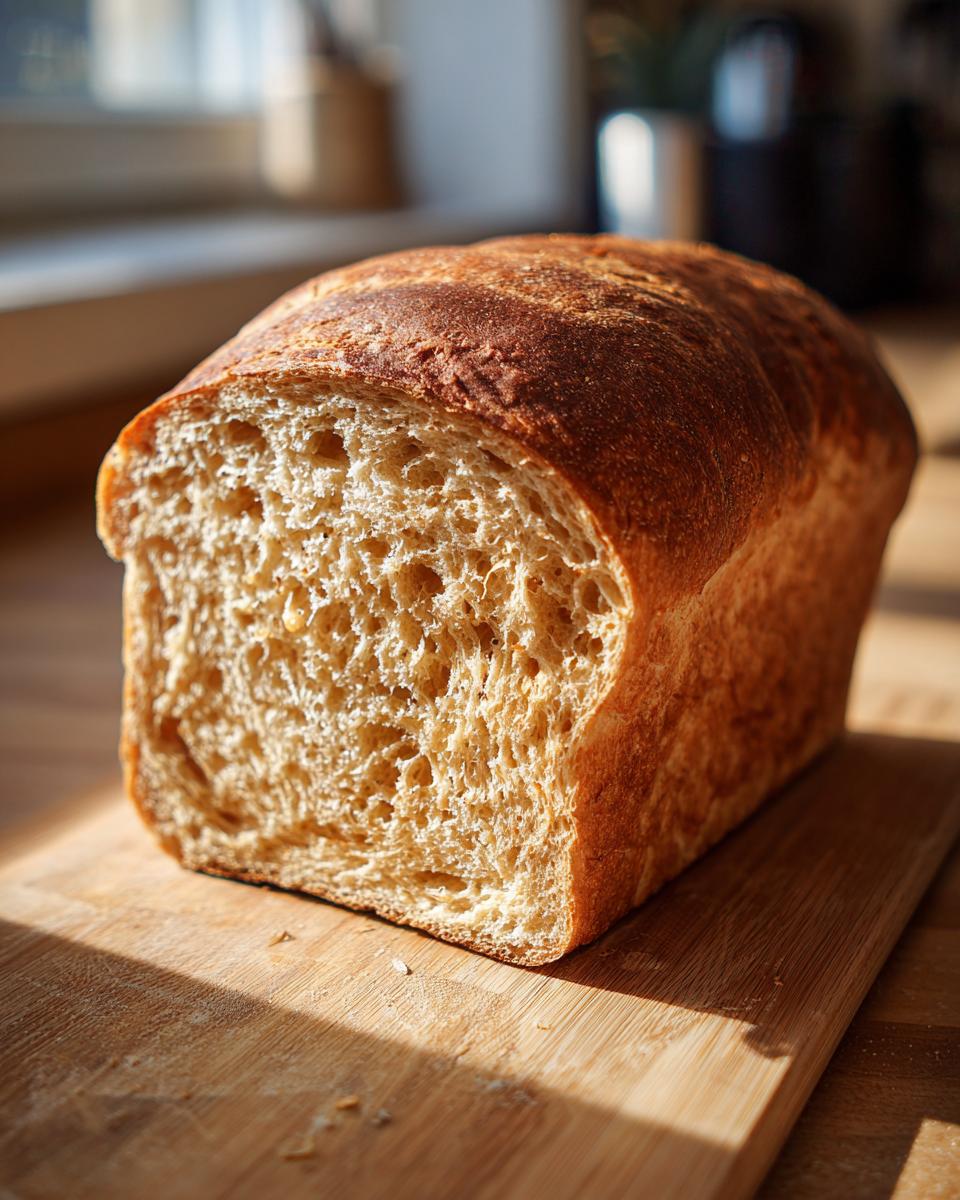
Now that you have this absolutely perfect, wholesome staple sitting on your rack, the real fun begins! While this is undeniably the best whole wheat sandwich bread for packing lunches—it holds up beautifully to turkey, cheese, or even thick layers of avocado—don’t let it just live between two slices! This bread has such a lovely, natural nutty whole wheat flavor that deserves a spotlight of its own.
For breakfast, you must try it toasted. Because it’s so rich thanks to the honey and butter, it develops the most incredible golden-brown crust without drying out internally. A little smear of good quality jam or maybe even my homemade spiced fig butter would simply be heaven.
I also love having a slice or two on hand for dipping. On a chilly evening, there is nothing better than pairing a thick slice of this homemade loaf with something warm and savory. If you’re looking for the perfect companion, you absolutely must try dipping it into my rich French Onion Soup Recipe. The sturdy yet soft crumb soaks up that broth wonderfully without dissolving into mush right away. It’s truly elegant, yet completely simple comfort food!
And seriously, don’t forget the simplest pleasure: a thick slice, still slightly warm, with a generous spread of high-quality salted butter. It’s a true moment of culinary grace. Enjoy every single bite!
Storage and Reheating Instructions for Homemade Whole Wheat Bread
This bread is sturdy enough to last, but honestly? It usually disappears so fast around my house we rarely need long-term storage! However, if you managed to bake a loaf (or two!) that lasts past day one, keeping it fresh is super important to maintain that wonderful soft texture we worked so hard to achieve. Since this is a healthy homemade bread, we don’t have those weird preservatives keeping it soft forever, so we need to be clever about storage.
For short-term storage, like day two or three, just pop it into a clean plastic bag once it is completely, totally cool. And I mean stone-cold! If you seal it while it’s even slightly warm, you trap condensation, and trust me, that’s the fast track to a moldy loaf or a dense, gummy crust. A simple tie of the bag is all you need to keep the air out and the softness in.
Now, if you’ve made a double batch—and you definitely should have, because this is the best whole wheat bread tutorial—freezing is your best friend. This is where the cooling instructions really shine! Once the loaf is completely cooled, take a sharp knife and slice it first. I know it seems like a pain, but slicing before freezing makes *life* so much easier later on. You aren’t trying to saw through a frozen brick!
Wrap the stack of slices tightly in a layer of plastic wrap first, and then slip that whole package into a sturdy freezer bag or an airtight container. This double protection prevents freezer burn beautifully. It keeps perfectly for about three months, easily. When you wake up craving that fresh, nutty whole wheat flavor, just pop a slice right into the toaster straight from the freezer. It comes out tasting almost perfectly fresh-baked. It’s just so simple!
Frequently Asked Questions About Making Whole Wheat Bread
It’s totally normal to have questions pop up when you start venturing into homemade bread, especially with whole grains! Don’t hesitate to reach out; you can always contact me directly if you need specific troubleshooting help through the Contact Page. But here are a few of the things I hear most often from bakers trying to achieve that perfect, soft texture.
Why is my whole wheat bread dense, even with this recipe?
Oh, density is the nemesis of the whole wheat baker! Usually, it comes down to two things: over-flouring or not letting the dough rise long enough. Whole wheat flour soaks up liquid much faster than white flour. If you add too much of that final all-purpose flour during kneading, or if you didn’t let that first rise happen fully, you won’t have captured enough air to keep the loaf light. Make sure your kitchen isn’t too cold for rising, as yeast works best when happy!
Can I skip the honey completely?
You certainly can skip the honey! It offers wonderful moisture retention and a very subtle sweetness that complements the nutty whole wheat flavor. If you skip it, I would suggest replacing it with an equal amount of warm water, or perhaps maple syrup if you want to maintain that slight sweetness foundation. Just remember, skipping the honey means you lose a little insurance against dryness, so keep an eye on your dough texture.
How do I get a great crust without it being too hard on my soft whole wheat sandwich bread?
This is where that finishing touch comes in! You saw my tip, but I’ll reiterate: right when the bread comes out of the oven, brush the top with melted butter. That keeps the crust pliable and soft—perfect for daily use. If you prefer a heartier, more artisan-style crust, you can skip brushing it with butter and use steam in the oven (like placing a pan of hot water on the bottom rack). That steam sets the crust initially, making it crispier!
Can this recipe be made without any white flour for 100 percent whole wheat bread?
Yes, you can absolutely go for 100 percent whole wheat bread! If you substitute the 1/2 cup of all-purpose flour with whole wheat flour, I suggest increasing your warm water by one or two extra tablespoons to compensate for the extra bran absorption. You might also need to knead for an extra minute or two to develop the structure as best you can without that white flour support. Embrace the slightly heartier texture!
Baking Your Story: Share Your Whole Wheat Bread Results
Now that you have the steps to bake this beautiful, wholesome loaf, I truly hope this recipe becomes a cherished part of your own kitchen’s story. Baking isn’t just about following steps; it’s about creating memories—whether it’s the soft scent of honey whole wheat bread drifting through the house on a quiet Saturday morning or slicing that perfect, fluffy slice for someone you love.
I pour my heart and culinary training into making sure these recipes are reliable, but the final touch comes from *you* putting flour on your hands and trusting the process. So please, if you make this amazingly soft whole wheat bread, come back and tell me all about it!
Did it come out as fluffy as you hoped? Does the nutty whole wheat flavor shine through? Drop a comment below and let me know how your loaf turned out. Even better, if you share photos of your fantastic results on social media, tag me so I can see the wonderful bread you’ve created. That interaction—seeing my recipes come to life in kitchens across the country—is what keeps this culinary journey feeling special and connected. I’m so glad you’re here to bake with me!
PrintSoft Honey Whole Wheat Sandwich Bread: Easy Homemade Loaf
Bake a soft, fluffy, and wholesome whole wheat sandwich bread at home. This easy recipe uses honey for a touch of sweetness, resulting in a tender crumb perfect for daily toast or family sandwiches.
- Prep Time: 20 min
- Cook Time: 35 min
- Total Time: 2 hours 5 minutes
- Yield: 1 loaf 1x
- Category: Baking
- Method: Yeast Baking
- Cuisine: American
- Diet: Vegetarian
Ingredients
- 1 cup warm water (105°F to 115°F)
- 2 1/4 teaspoons active dry yeast
- 1/4 cup honey
- 1/4 cup unsalted butter, melted
- 1 1/2 teaspoons salt
- 3 1/2 cups whole wheat flour
- 1/2 cup all-purpose flour (for dusting and final texture adjustment)
- 1 large egg, lightly beaten (for egg wash)
Instructions
- In a large bowl, dissolve the yeast in the warm water. Let it stand for 5 minutes until foamy.
- Stir the honey, melted butter, and salt into the yeast mixture.
- Gradually add the whole wheat flour, mixing until a shaggy dough forms.
- Turn the dough out onto a lightly floured surface using some of the all-purpose flour. Knead for 8 to 10 minutes until the dough is smooth and elastic. Add small amounts of the remaining all-purpose flour only if the dough is too sticky to handle.
- Place the dough in a lightly oiled bowl, turning to coat. Cover the bowl with plastic wrap or a clean towel. Let the dough rise in a warm place for 1 to 1.5 hours, or until doubled in size.
- Gently punch down the risen dough. Shape it into a tight loaf and place it in a greased 9×5 inch loaf pan.
- Cover the pan loosely and let the dough rise again for 30 to 45 minutes, or until it crests about 1 inch above the rim of the pan.
- Preheat your oven to 375°F (190°C). Brush the top of the loaf lightly with the beaten egg wash.
- Bake for 30 to 35 minutes, or until the crust is golden brown and the internal temperature reaches 200°F (93°C).
- Remove the bread from the pan immediately and cool completely on a wire rack before slicing for the best texture.
Notes
- For an even softer crust, brush the top of the loaf with 1 tablespoon of melted butter immediately after removing it from the oven.
- If you prefer a richer flavor, substitute the all-purpose flour with bread flour for the final addition.
- This bread freezes well once fully cooled; slice it first for easy toast portions later.
Nutrition
- Serving Size: 1 slice
- Calories: 135
- Sugar: 3
- Sodium: 220
- Fat: 3
- Saturated Fat: 1.5
- Unsaturated Fat: 1.5
- Trans Fat: 0
- Carbohydrates: 24
- Fiber: 3
- Protein: 5
- Cholesterol: 15