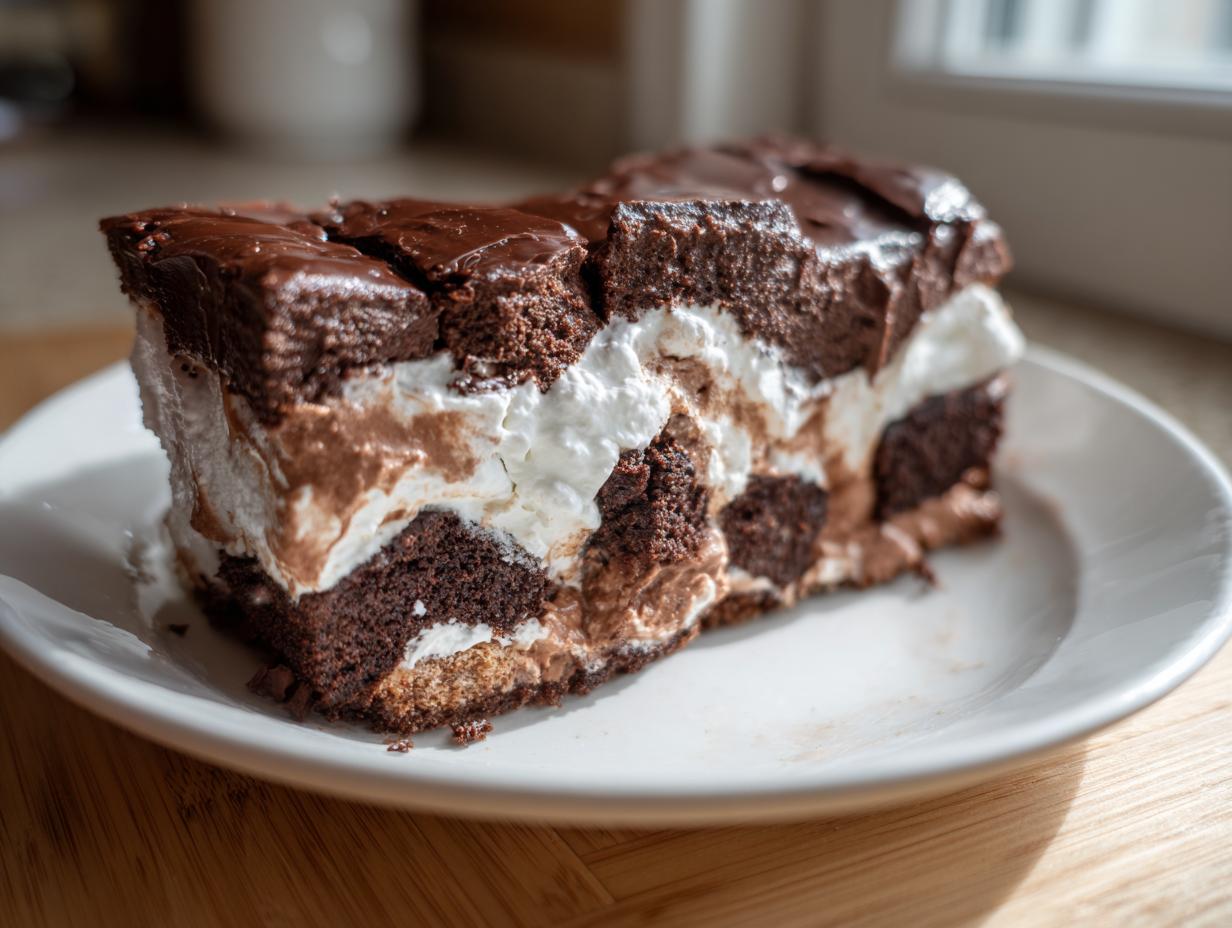

When the weather is warm, or perhaps when you just don’t want the oven heat messing up your kitchen vibes, the last thing you want is a complicated dessert recipe. We all crave something that whispers ‘elegant’ and tastes utterly decadent, yet takes barely any effort on our part, right? That’s where my **brownie refrigerator cake** swoops in to save the day. It’s the ultimate architectural triumph built entirely in a dish, layering fudgy, rich brownies with cool, creamy fillings. This is the kind of chilled chocolate dessert that makes your guests think you spent hours laboring away when really, this beauty only required assembly and time in the fridge. It truly embodies that approachable elegance I love to share here at Unfold Recipes!
- Why This Brownie Refrigerator Cake is Your New Favorite No Bake Brownie Dessert
- Ingredients for the Ultimate Brownie Refrigerator Cake
- Assembling Your Layered Chocolate Cake Refrigerator
- Tips for the Perfect Fudgy Brownie Dessert No Oven Set
- Make Ahead Party Dessert Assembly and Storage for Brownie Refrigerator Cake
- Serving Suggestions for This Creamy Brownie Pudding Cake
- Frequently Asked Questions About Brownie Refrigerator Cake
- Estimated Nutritional Information for This Chilled Chocolate Dessert
- Share Your Brownie Refrigerator Cake Creations
Why This Brownie Refrigerator Cake is Your New Favorite No Bake Brownie Dessert
I can tell you this with absolute certainty: once you make this dessert, you won’t look at standard sheet cake the same way again. It’s all about achieving that ‘wow’ factor with minimal hands-on time, which is why this **brownie refrigerator cake** is so beloved in my kitchen.
- Zero Oven Time: That’s right, we skip the heat entirely. This makes it summer-friendly and perfect when you just need a quick assembly.
- Irresistibly Fudgy Texture: Thanks to the brownies and the creamy layers, you get dense fudge meeting light fluff in every single bite.
- The Ultimate Make Ahead Party Dessert: You build it the day before, and it sets beautifully, freeing up your oven and your schedule for the big event!
- Simple Assembly: Seriously, if you can layer things in a casserole dish, you can master this entirely. It’s the best no bake brownie dessert I know.
Ingredients for the Ultimate Brownie Refrigerator Cake
Gathering these components is half the fun, though I must emphasize that organization is key here! Since this is a no-bake setup, the temperature of your ingredients matters a whole lot. We need everything ready to go before we start layering, especially those brownies!
You’ll need the basic ingredients required to make a standard 9×13 inch pan of brownies from a fudge brownie mix—which, remember, you bake first and then let cool *completely* before cutting into 1-inch squares. Don’t even think about rushing the cooling step; warm brownies melting into creamy pudding is not the texture we are aiming for!
For the creamy layers, have ready:
- 1 cup cold milk
- 1 (3.9 ounce) package instant chocolate pudding mix
- 8 ounces cream cheese, softened perfectly to room temperature
- 1 cup powdered sugar
- 1 teaspoon vanilla extract
- 1 (8 ounce) container frozen whipped topping, thawed completely
- And if you want that extra chocolate flourish on top, keep 1 cup of chocolate chips ready too!
Assembling Your Layered Chocolate Cake Refrigerator
Now for the fun part—putting this impressive layered chocolate cake refrigerator creation together! Since we aren’t focused on baking during this stage, it’s all about gentle stirring and strategic placement. This is where the magic of our **easy dessert assembly** truly shines, building something that looks complicated but is honestly just layering delicious components. You can see how others have put these simple steps together over at this great recipe source!

Baking and Preparing the Brownie Base
First, you’ll bake your brownie mix in that 9×13 pan following the box instructions, though I always suggest pulling them out about two minutes early for that extra fudgy center we crave. Once they’re done, they absolutely must cool down completely—and I mean stone cold. After cooling, slice them neatly into 1-inch squares. If you want them extra decadent, a little underbaking here really pays off later!
Creating the Creamy Pudding and Cream Cheese Layers
While those brownies chill out, get your creamy elements ready. Whisk up that instant chocolate pudding with the cold milk until it starts to thicken up nicely. In a separate bowl, beat that softened cream cheese—if it’s not soft, you’ll get lumps, and we need elegance here—along with your powdered sugar and vanilla until it’s beautifully smooth. Take half of your thawed whipped topping and gently fold it into that cream cheese mixture. Remember, gentle folding is the secret to keeping things light! If you want a masterclass on folding techniques for lighter textures, check out my chocolate cupcake post.
Layering the Brownie Refrigerator Cake
This step requires care! In the largest bowl you have, gently fold together your cooled brownie squares, the prepared chocolate pudding, and that creamy cheese mixture. Here’s vital advice: Do not overmix the brownie squares into the pudding layer if you want defined layers when you slice it! You’re just trying to coat them. Spoon this glorious mixture evenly into a plastic wrap-lined 9×13 dish. Then, spread the remaining half of the thawed whipped topping right over the top as the final layer. This whole process is surprisingly fast!

Tips for the Perfect Fudgy Brownie Dessert No Oven Set
Achieving that ideal texture for our **fudgy brownie dessert no oven** set takes just a little patience in the waiting stage. I know—telling a baker to wait is torture! However, the refrigerator is truly doing the heavy lifting here, binding those creamy layers to the fudgy pieces. If you want the best possible slice, you need a minimum of six hours of chilling time, but honestly, overnight is where this cake sings its praises. This allows the moisture from the pudding to gently soften the brownie edges perfectly.
Lining your 9×13 dish with plastic wrap first is an absolute must! Make sure you leave a generous overhang on two sides—this plastic skirt becomes your lifting handle later so you don’t risk wrecking the beautiful structure when you serve it. It’s a trick I use for almost every dense, chilled dessert!
Also, don’t forget that little note about the bottom layer! I mentioned the graham cracker crust substitution earlier, but here’s the insider tip: if you want it even EASIER, skip baking the brownies entirely. You can press a mixture of graham cracker crumbs and melted butter into the base on the bottom layer instead. That creates a nice crunch below the creamy filling, similar to what I do for my salted caramel brownies. For more assurance on getting that perfect set, check out the detailed steps from my friends over at Cozey Nook!
Make Ahead Party Dessert Assembly and Storage for Brownie Refrigerator Cake
As I mentioned, this dessert truly shines as a **make ahead party dessert**, and that’s because the chilling time isn’t optional—it’s mandatory for structural integrity! For serving the cleanest, most beautiful slices, you really want this cake to chill for at least six hours, but I always aim for a full overnight rest. This extended time lets the pudding and cream cheese layers fully hydrate the brownie pieces, melding all those rich flavors into one cohesive, decadent treat.

When it comes time to serve, that plastic wrap overhang we tucked in earlier becomes your best friend. Carefully lift the entire cake out of the dish first, then peel the wrap away. This helps prevent any sticky edges from clinging to the sides of your serving platter. Please do not try to freeze this recipe! While it keeps beautifully in the fridge, freezing can change that luxurious creamy texture we worked so hard to achieve. Stick to the cool environment, maybe even chilled right up until serving time, just like my Halloween Oreo Balls hold up so wonderfully!
Serving Suggestions for This Creamy Brownie Pudding Cake
Because this **creamy brownie pudding cake** is already quite rich and decadent, you don’t need heavy sides to make it shine. Presentation is where we can really add that touch of *approachable elegance*!
For a stunning presentation, I suggest using a very sharp, hot knife to cut those clean squares—wipe the blade between each cut! You can dust the entire chilled slab lightly with high-quality unsweetened cocoa powder just before bringing it to the table. It gives it that sophisticated, matte finish.

If you want a little flavor contrast, a drizzle of homemade caramel sauce, much like the one I use for my caramel popcorn recipe, goes beautifully. Alternatively, serving a square alongside a small mound of fresh raspberries or a strong cup of espresso really balances the chocolate intensity. It’s simple, but it looks like it belongs on a fancy dessert bar!
Frequently Asked Questions About Brownie Refrigerator Cake
I always get questions after people see photos of this cake, because it just looks too good to be true—especially since it’s a **no bake brownie dessert**! Here are the things I hear most often about assembling this brownie refrigerator cake. For more kitchen advice and inspiration, always feel free to browse my full blog archive!
Can I use homemade brownies instead of a mix for my brownie refrigerator cake?
Oh, absolutely! If you have a favorite homemade fudgy brownie recipe, please use it! That’s often even better than the boxed mix, honestly. The only crucial thing is that whatever brownies you use, they must be completely and totally cooled down before you cut them into those 1-inch squares. If they are even slightly warm, they’ll melt the creamy filling right away, and we’ll lose the defined layers we are trying to create in this layered chocolate cake refrigerator.
How long does this easy icebox cake recipe last in the fridge?
Because we use cream cheese, milk, and whipped topping, this dessert is best consumed when it’s fresh! While it keeps safely in the refrigerator for about three to four days covered tightly, I find the texture is absolutely perfect within the first 24 hours of assembly. That’s when the pudding has just barely softened the brownie pieces enough to make it tender, but it hasn’t gotten too mushy yet. You can see more discussion on the best texture for this type of dessert over at Recipes Smile!
What if I don’t have instant pudding? Can I use cook-and-serve pudding?
Please, please stick to the instant pudding here! This recipe relies on the quick-setting, cold hydration power of instant pudding to hold those layers together. If you try to use cook-and-serve pudding, you’ll have to cook it first, which completely changes the temperature and texture of your delicate filling. It will also introduce too much moisture during the chilling phase, turning this into soup instead of a perfectly set **easy icebox cake recipe**.
Estimated Nutritional Information for This Chilled Chocolate Dessert
It’s important when serving guests—especially when entertaining, which I love to do—to have a general idea of what’s in the food, even if it’s a decadent treat like this **chilled chocolate dessert**! Please remember that these values are my best estimation based on the ingredients listed, and results will naturally vary depending on the specific brands of brownie mix or pudding you choose to use.
- Serving Size: 1 square
- Calories: 380
- Fat: 21g (11g Saturated Fat)
- Carbohydrates: 48g
- Protein: 5g
It’s a rich, satisfying slice, and knowing the numbers just helps you plan the next delightful course for your guests!
Share Your Brownie Refrigerator Cake Creations
I truly put my heart into developing recipes that make entertaining feel effortless and elegant, and this **decadent chilled chocolate treat** is one of my absolute favorites for that very reason. Now that you’ve unwrapped the story behind this **brownie refrigerator cake**, I’m so eager to see what you create!
When you make this, please come back and leave a star rating right here on the recipe card. Your feedback is like a warm hug to me—it tells me I’ve successfully unfolded a great recipe for you! You can see beautiful examples from others over at Celine’s site.
If you share a photo on social media, please do tag me! Seeing your beautifully layered desserts makes my whole week. I love seeing how you serve them at your gatherings or if you added any personal touches. You can always reach out via my contact page if you have any questions while assembling for your next potluck.
It brings me so much joy knowing that a version of this layered dessert can now be part of your kitchen story. Happy chilling, and I can’t wait to hear what you think!
PrintDecadent Brownie Refrigerator Cake: Your No-Bake Layered Delight

Create an impressive, layered chocolate dessert without turning on your oven. This no-bake brownie refrigerator cake combines fudgy brownie pieces with creamy layers of pudding and whipped topping, setting perfectly in the fridge for an easy make-ahead party treat.
- Prep Time: 25 min
- Cook Time: 30 min
- Total Time: 355 min
- Yield: 12 servings 1x
- Category: Dessert
- Method: No-Bake/Chilling
- Cuisine: American
- Diet: Vegetarian
Ingredients
- 1 (18.25 ounce) package fudge brownie mix (plus ingredients to prepare brownies)
- 1 cup cold milk
- 1 (3.9 ounce) package instant chocolate pudding mix
- 8 ounces cream cheese, softened
- 1 cup powdered sugar
- 1 teaspoon vanilla extract
- 1 (8 ounce) container frozen whipped topping, thawed, divided
- 1 cup chocolate chips (optional, for topping)
Instructions
- Prepare the brownies according to package directions using a 9×13 inch pan. Let the brownies cool completely, then cut them into 1-inch squares.
- Prepare the chocolate pudding according to the package directions, using cold milk. Let the pudding set for 5 minutes, then set aside.
- In a separate bowl, beat the softened cream cheese, powdered sugar, and vanilla extract until the mixture is smooth and creamy. Gently fold in half of the thawed whipped topping until just combined.
- In a large bowl, gently fold together the cooled brownie squares, the prepared chocolate pudding, and the cream cheese mixture. Do not overmix; you want distinct layers of brownie visible.
- Line a 9×13 inch baking dish with plastic wrap, leaving an overhang. Spoon the brownie mixture into the prepared dish, spreading it evenly.
- Spread the remaining half of the thawed whipped topping evenly over the top layer. Sprinkle with chocolate chips, if using.
- Cover the dish with the plastic wrap overhang and refrigerate for at least 6 hours, or preferably overnight, to allow the dessert to set firmly.
- When ready to serve, use the plastic wrap overhang to lift the cake from the dish. Cut into squares and serve cold.
Notes
- For a truly fudgy texture, slightly underbake the brownies before cutting them into squares.
- You can substitute graham cracker crumbs mixed with melted butter for the bottom layer if you prefer a crust element in this easy icebox cake recipe.
- This make ahead party dessert tastes best when chilled for a full 12 hours.
Nutrition
- Serving Size: 1 square
- Calories: 380
- Sugar: 35g
- Sodium: 250mg
- Fat: 21g
- Saturated Fat: 11g
- Unsaturated Fat: 10g
- Trans Fat: 0.5g
- Carbohydrates: 48g
- Fiber: 2g
- Protein: 5g
- Cholesterol: 35mg