

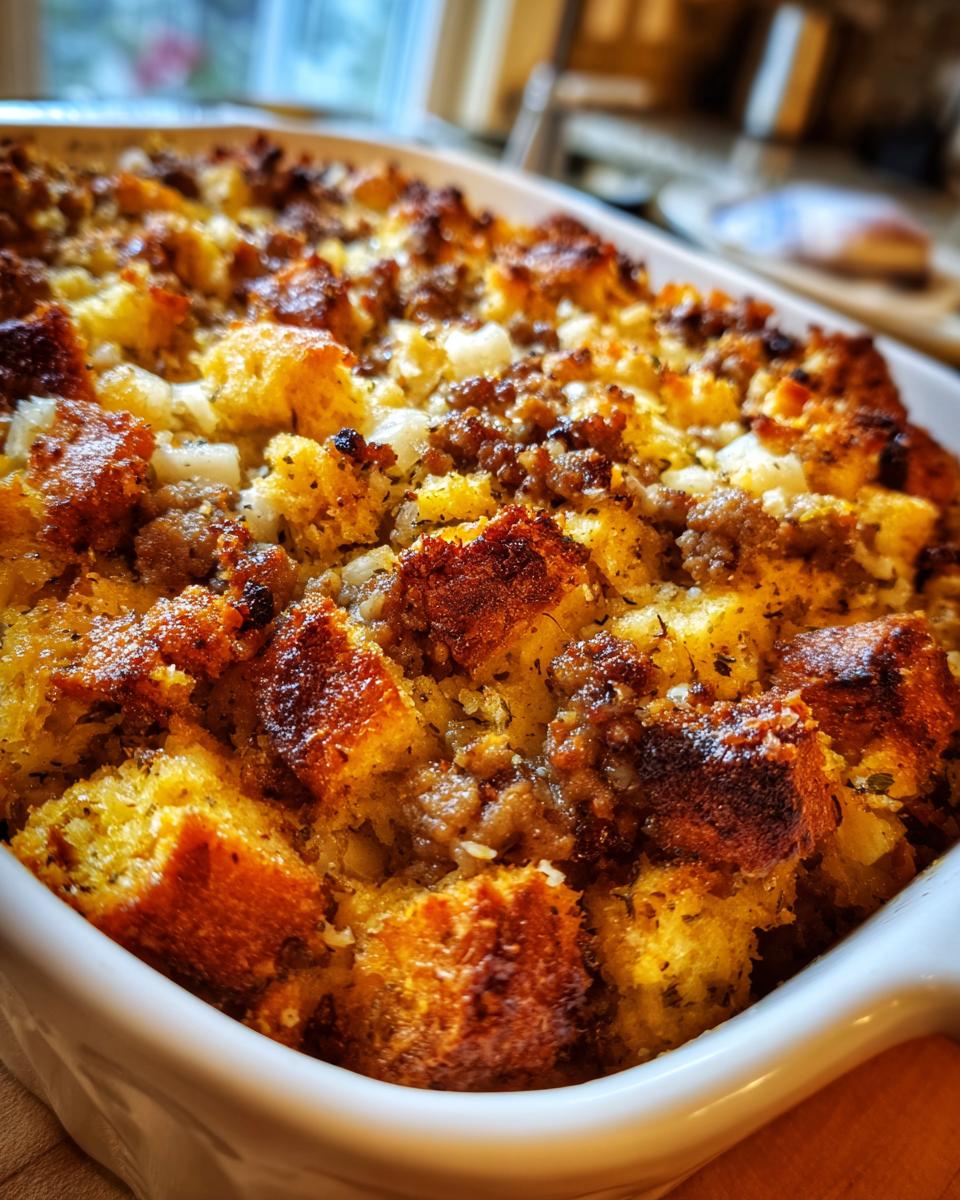
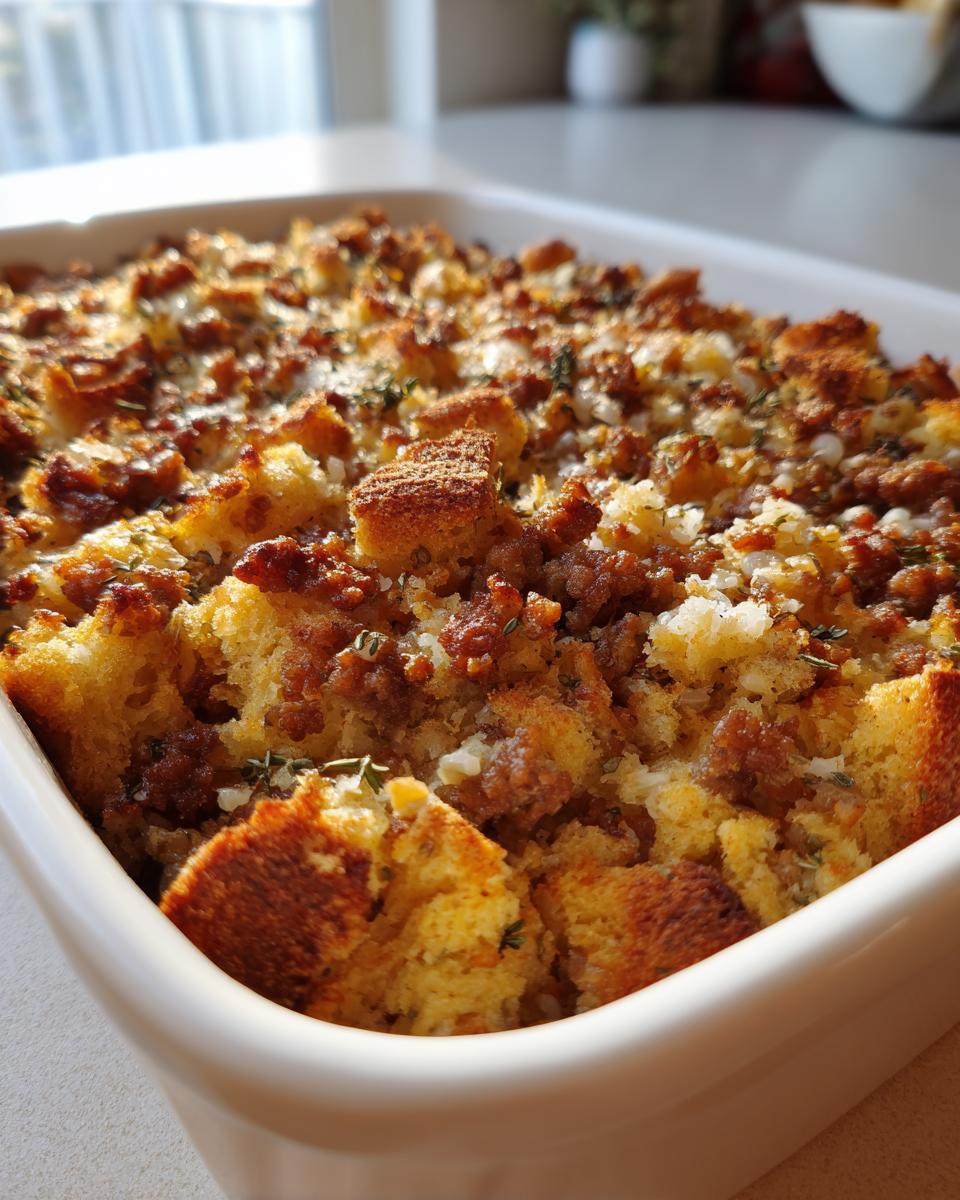
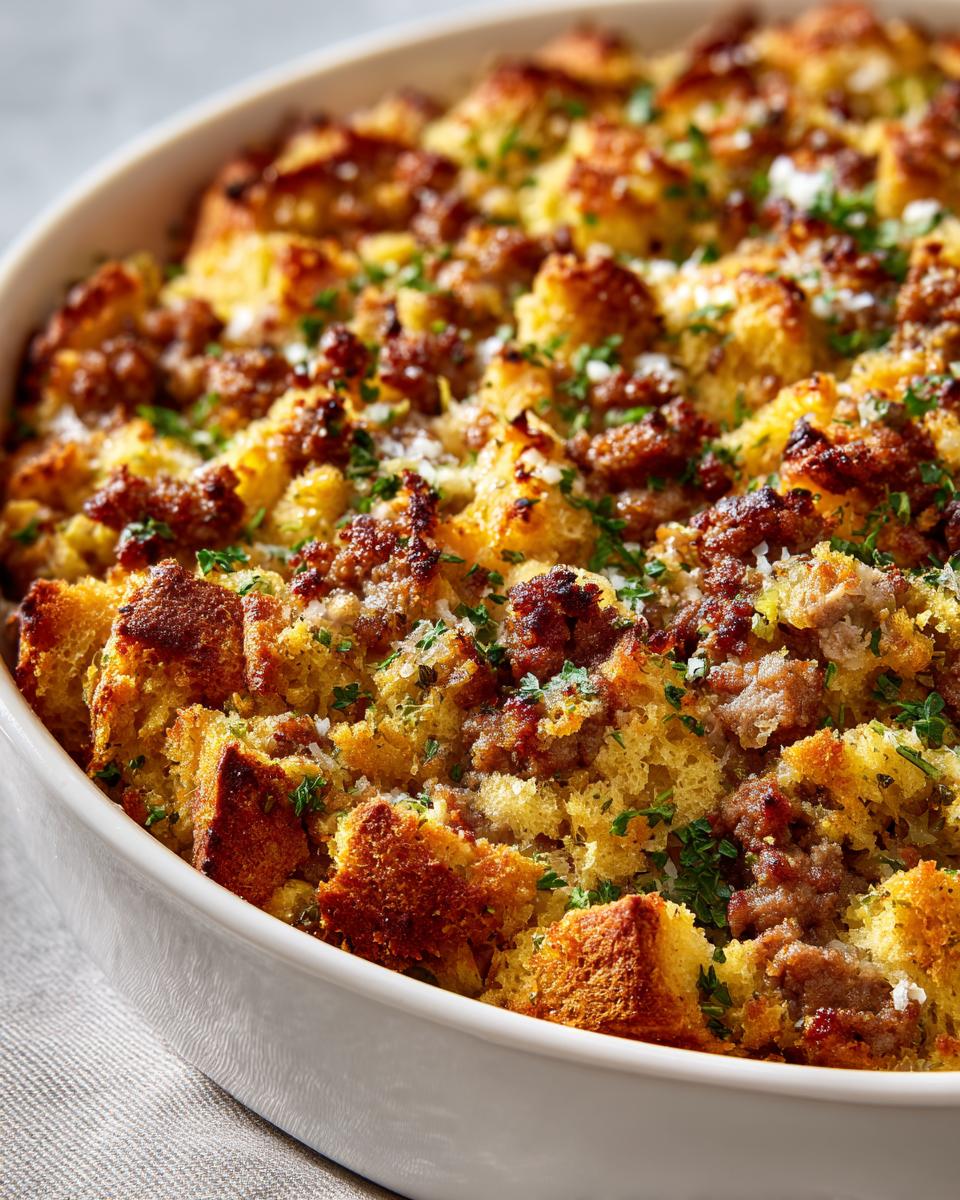
For me, the holidays aren’t truly official until that unmistakable, comforting aroma fills the house—the scent of savory herbs and browned sausage signaling that the centerpiece side dish is underway. This Classic Sausage and Herb Stuffing isn’t just a recipe; it’s the anchor of our celebratory meals, a dish I’ve tested and refined repeatedly to ensure total reliability. After years of hosting dinners, I know you want two things: an interior that stays deeply moist and flavorful, and a top layer that turns beautifully golden and crisp. Trust me, this method delivers that perfect textural contrast every single time we present our grand holiday spread.

- Why This Classic Sausage Stuffing Recipe Works Every Time
- Ingredients for Your Savory Sausage Herb Stuffing
- Essential Equipment for Perfect Sausage Stuffing Preparation
- Step-by-Step Instructions for Classic Sausage Stuffing
- Tips for Making the Best Sausage Stuffing for Turkey
- Serving Suggestions for This Savory Side Dish
- Storage and Reheating Instructions for Leftover Stuffing
- Frequently Asked Questions About Classic Bread Stuffing
- Estimated Nutritional Snapshot
Why This Classic Sausage Stuffing Recipe Works Every Time
When I finally perfected this recipe, it became the one I turn to, no questions asked, for every big dinner. It’s simply dependable. I’ve tailored the levels of fat and liquid so you don’t end up with that dry, crumbly stuff from the corner of the pan. This preparation is designed to be the star alongside your turkey or chicken.
- This is the best stuffing for turkey because it holds up beautifully under the pressure of a busy kitchen.
- It’s packed with savory flavor from the sausage and herbs, making it a standout among savory side dishes.
- The ingredients are balanced to create a dish that appeals to everyone looking for traditional holiday favorites.
Achieving the Perfect Moist and Crispy Stuffing Texture
The secret to that glorious textural difference—you know, the soft center versus the crunchy top—comes down to our egg-to-broth ratio. Too much liquid, and you get mush; too little, and it dries out before the outside browns. This specific blend ensures our **sausage stuffing** stays perfectly tender underneath while gaining that desirable golden crust on top. It’s all about that gentle balance!
Ideal for Holiday Stuffing Recipes: Make Ahead Stuffing Option
Hosting for the holidays is stressful enough! That’s why I developed this specifically to be a reliable make ahead stuffing. You assemble the whole thing the day before, cover it, and shove it in the fridge. Pulling out a ready-to-bake side dish is a game-changer for busy **Thanksgiving side dish ideas** and **Christmas stuffing** prep.
Ingredients for Your Savory Sausage Herb Stuffing
Gathering your supplies is the first magical step. I always lay everything out on the counter before I start—it helps keep me organized when the kitchen gets a little hectic! For this particular savory bake, the quality of the sausage really shines through, so use something you love. Here’s exactly what you need for this rich, comforting dish.
- 1 pound bulk savory pork sausage
- 1 large yellow onion, chopped
- 3 celery stalks, chopped
- 1 tablespoon fresh sage, finely chopped
- 1 teaspoon dried thyme
- 1 teaspoon dried rosemary
- 1/2 teaspoon salt
- 1/4 teaspoon black pepper
- 12 cups dried bread cubes (use a mix of white and sourdough for best texture)
- 2 large eggs, lightly beaten
- 2 1/2 cups chicken or turkey broth
- 1/2 cup (1 stick) unsalted butter, melted
Ingredient Notes and Substitutions for Sausage Stuffing
A few notes from my kitchen to yours! The bread cubes are truly important here. You absolutely want a mix of textures; plain white sandwich bread can sometimes get too soggy, so I highly recommend using half basic white bread that you’ve dried out yourself, and half sourdough or a crusty French loaf. That little bit of tang from the sourdough really brightens up the overall flavor of the **sausage stuffing**.
Regarding the sausage: I typically use a mild or sweet bulk pork sausage, but feel free to grab hot Italian sausage if you like a kick! If, for some reason, you can’t find fresh sage, you can substitute it with about 1 teaspoon of dried rubbed sage, or use a good quality poultry seasoning blend, which usually has sage right in the mix. But honestly, that fresh sage is what makes this dish sing!
Essential Equipment for Perfect Sausage Stuffing Preparation
Look, I’m not one for kitchen clutter, but there are a few pieces of equipment that you really can’t skip when making a holiday side dish this important. Having these items ready makes the active cooking time fly by, which is exactly what we want when the oven is already packed! I always pull these out before I even start chopping vegetables.
For this particular recipe, which yields a good amount for a large meal, you’ll need:
- A large, heavy-bottomed skillet, preferably 10 or 12 inches, for properly browning the sausage and sautéing the onions and celery until they are nice and soft.
- A very large mixing bowl. I mean it—you need space to toss those 12 cups of bread cubes without sending everything flying! Don’t try to skimp on bowl size here; it’s crucial for even incorporation.
- Your 9×13 inch baking dish, lightly greased. If you’re making this ahead of time, make sure you have plastic wrap or foil handy to cover it tightly once assembled.
- A sturdy whisk for blending the eggs and broth in a separate small bowl.
If you have all this ready to go, you’re already ahead of the game for serving up fantastic **holiday stuffing recipes**!
Step-by-Step Instructions for Classic Sausage Stuffing
This is where the magic really happens, and honestly, it’s quite straightforward once you have all your beautiful ingredients ready. Baking time is pretty standard for a 9×13 dish, but remember, we’re aiming for that signature golden, slightly brittle crust, so keep an eye on it toward the end! Remember to preheat your oven to 350°F (175°C) and grease that baking dish well before you begin incorporating anything. We want this ready to go straight into the heat!
- First things first: Get that oven warming up! Preheat your oven to 350°F (175°C). Take your 9×13 inch baking dish and give it a light coating of oil or cooking spray so nothing sticks later.
- Next, we tackle the meat. In that large skillet, you’ll cook the bulk pork sausage over medium heat. Use your spoon to break it up into nice, small crumbles as it browns. Once it’s cooked through and beautiful, you must drain off all that excess grease. Trust me, too much grease will make the base soggy, and we are fighting for crispness!
- Now we add your fresh elements. Toss in the chopped onion and celery right there with the sausage—no need to clean the pan! Sauté everything until those veggies are soft and smell heavenly, usually about 5 to 7 minutes.
- Stir in the fresh sage, thyme, rosemary, salt, and pepper. Let it cook for just a quick minute until you can really smell those herbs waking up. Then, pull the skillet right off the heat source.
- Time to combine things in the big bowl. Dump those 12 cups of dried bread cubes right in there, and then spoon in the cooked sausage and vegetable mixture. Toss it gently; we want the sausage evenly distributed but we aren’t trying to crush the bread yet.
- In a separate bowl, whisk together your two lightly beaten eggs and the chicken or turkey broth until they are nice and combined. This is our binder!
- Carefully pour that wet mixture over the bread and sausage. Use your hands or a large spatula here, tossing everything ever so gently until the bread is coated. Please try not to mash it! We need to keep those air pockets intact.
- Transfer your stuffing mixture into the prepared baking dish. Don’t pack it down hard! Spread it out evenly. Then, the final touch before it bakes: take that melted butter and drizzle it evenly all across the top surface. This is the secret to that amazing crust!
- Bake the dish for 35 to 45 minutes. You are looking for a golden brown, crispy top layer all over. It should be heated right through the middle.
- The hardest part! Let the **sausage stuffing** rest on the counter for a good 10 minutes after it comes out. This lets the internal systems settle down before we scoop it out.
If you are planning ahead, remember that this is a fantastic make ahead stuffing possibility! Just assemble it fully (stopping right before the final bake/butter step) and refrigerate.
Cooking the Sausage and Aromatics for Your Sausage Stuffing
When you’re cooking the sausage, make sure you get a good rendering of the fat. You don’t want mushy, grey sausage; you want nicely browned, flavorful little chunks. That fat you drain off? You don’t need it for this recipe since we use melted butter on top for the crisping, but draining it properly ensures a lighter final texture for our **sausage stuffing**. Once the onions and celery soften and start turning translucent, that’s when you know the foundation of flavor is ready to go!
Assembling and Baking the Moist and Crispy Stuffing
When you mix the liquid with the bread, be patient! Think of it like gently folding laundry, not vigorously stirring paint. We are trying to absorb the moisture without squeezing the life out of the bread cubes. Once it’s in the dish, that drizzle of melted butter on top is non-negotiable for achieving that fantastic, crunchy surface you see in photos of great oven baked stuffing.
Tips for Making the Best Sausage Stuffing for Turkey
Now that you have the core process down, here are a few final thoughts—little nuggets of wisdom I picked up over the years—that elevate this from just good to genuinely incredible, especially when serving it alongside your main roast. These little adjustments ensure that even when you’re juggling a million things for your big holiday meal, this **sausage stuffing** remains flawless.
First, let’s talk about the bread again, because it’s that important. If you can manage it, plan ahead! The absolute best texture comes when your bread cubes have been left out overnight to dry completely. If you’re stuck and need to rush, you can quickly toast them on a baking sheet in the 350°F oven for about 15 to 20 minutes until they feel dry to the touch. They should be stale, not browned!
For those of you using this as a make-ahead stuffing, pay close attention to the temperature adjustment. Since the entire dish is cold when it goes into the oven, you need to account for that chill. I find adding about 10 to 15 minutes to the baking time is perfect. You’ll know it’s done when the center is hot, but don’t be tempted to cover the top with foil too early; we need that beautiful crisping action to happen on that buttered surface!
Also, remember that flavor layering! While the initial sausage cooking infuses flavor into our aromatics, if you ever feel your herbs are a little muted, try gently wilting some of the fresh sage into the melted butter for just thirty seconds before drizzling it over the top. That warmed butter carries the sage aroma right into the crust, making every bite of the **best stuffing for turkey** you’ve ever made even richer.
These are the tiny details that turn a simple bake into a reliable showstopper for your yearly thanksgiving side dish ideas. Happy cooking!
Serving Suggestions for This Savory Side Dish
This stuffing truly anchors any celebratory table, providing that perfect savory counterpoint to richer main courses. Because it’s so flavorful with sausage and herbs, it requires less fussing when it comes to pairing! It’s wonderfully versatile for large family gatherings or even a smaller, elegant dinner party.
Naturally, this is a spectacular match for roasted poultry. If you’re making a big bird for the holidays, this is undeniably the best stuffing for turkey because its herbs stand up beautifully to the savory juices of the meat. The richness of the pork sausage plays so well with the subtle gaminess of the bird.
However, don’t think it’s only for Thanksgiving! This is a marvelous option for a Sunday roast pork loin, too. The salty, herbaceous notes contrast beautifully with the pork’s tenderness. For a cozy feel during the cooler months, I often serve a smaller casserole dish of this alongside slow-cooked pot roast. It fits perfectly into collections of delicious comfort food sides.
If you are hosting a larger crowd and want to offer contrast, consider pairing this rich, bread-based bake with something bright and acidic. I love serving it alongside roasted root vegetables tossed with balsamic vinegar, or even a lighter green salad with a sharp lemon vinaigrette. The slight tang cuts through the richness of the sausage and butter beautifully. It’s all about creating balance on the plate, even with your dinner party side dishes!
Storage and Reheating Instructions for Leftover Stuffing
If you’re anything like me, you actively hope for leftovers of this savory bake. Honestly, the cooled dish is fantastic the next morning, too! Storing and reheating properly is the key to keeping that gorgeous texture—we don’t want to lose that crispy top to fridge steam!
When storing leftovers, make sure the dish has cooled down slightly, but don’t leave it on the counter for more than two hours. Transfer any remaining stuffing into an airtight container. This classic side dish will keep beautifully in the refrigerator for about three to four days. I usually use glass containers because they reheat more evenly later on.
Now, for the crucial reheating tip, because you can’t just microwave a perfect stuffing!
- If you have a small amount, spread it out onto a baking sheet in a thin, single layer.
- Drizzle just a tiny bit of extra chicken broth (or even water) over the top to introduce some steam back into the mixture.
- Pop it into a 350°F oven for about 10 to 15 minutes. This will heat it through while simultaneously reviving that lovely crispness on the exposed surface. If the top isn’t quite crisp enough, you can switch the oven to the broiler for 30 seconds, but watch it like a hawk—broilers work fast!
Reheating it this way brings back the comforting warmth and texture, making those leftovers taste almost as good as they did fresh from the oven. It’s the ultimate easy holiday side solution for the days following the big meal!
Frequently Asked Questions About Classic Bread Stuffing
I know sometimes you have little tweaks you want to make, especially when planning out your massive holiday menu. That’s okay! Kitchen experiments are part of the fun. Here are some of the most common questions I get about this classic bake, hopefully helping you lock in your final plans for those important Thanksgiving side dish ideas.
Can I use stuffing mix instead of dried bread cubes?
While I really push for drying your own bread because that texture is just superior, you definitely *can* use commercial stuffing mix. If you choose that route, you’ll likely need less added broth, so be cautious when adding the egg-broth mixture—start with about half the suggested amount and add more slowly. Also, since the mix already has seasoning, you might want to dial back on the dried thyme and rosemary slightly. It’s much easier to add flavor later than to take it away!
What temperature should I bake the stuffing at?
For our **oven baked stuffing**, we stick firmly to 350°F (175°C). This temperature is low enough to allow the interior to heat all the way through without drying out before the outside gets that gorgeous color we are aiming for. You are looking for that top layer, the one drizzled with butter, to be deeply golden brown and feel firm and crisp when you gently touch it. If the edges start looking too dark before the middle feels hot, just tent your dish loosely with foil and continue baking until done.
I want to try cornbread stuffing variations—can I adapt this?
Absolutely! If you love cornbread stuffing variations, this recipe is wonderfully adaptable. The recipe calls for 12 cups of bread cubes in total. If you want to incorporate cornbread, I suggest substituting 4 to 6 cups of the regular bread cubes with crumbled, stale cornbread. The cornbread absorbs moisture very differently, so be prepared to potentially add another splash or two of broth while mixing to ensure everything is evenly moistened before baking. The savory sausage pairs perfectly with the slightly sweet corn flavor!
Is this recipe good if I am making a small, oven-safe casserole dish?
Yes, this is a robust recipe for any format! If you use a smaller or deeper dish—say, a tight 8×8 casserole dish instead of the 9×13—you’ll definitely need to increase your baking time by about 15 to 20 minutes, maybe even more depending on the depth. The center takes longer to heat up when the dish is deep. Just ensure the internal temperature reaches safe levels, and remember, the visual cue of that crispy, golden top means your **oven baked stuffing** is finished!
Estimated Nutritional Snapshot
When I calculate the nutrition for a rich dish like this, I always remind everyone that these numbers are just starting points! Because we are using real pork sausage, butter, and bread, the exact values can change based on the brand of sausage or the type of bread you choose for your **classic bread stuffing**. Think of this as a good guideline for planning your holiday menu, not a strict dietary breakdown.
This data is based on dividing the recipe yields into 10 generous servings. It shows us that while this is a hearty, comforting side, it should be enjoyed in moderation alongside the rest of the fantastic spread!
- Serving Size: 1 cup
- Calories: 350
- Fat: 22g
- Saturated Fat: 8g
- Carbohydrates: 28g
- Protein: 14g
- Sodium: 550mg
- Sugar: 2g
It’s important to remember these are estimates, especially concerning the sodium content, which depends heavily on the salt added to the sausage and the broth you choose for moisture. If you use low-sodium broth, you can easily reduce that number significantly. Enjoy every delicious bite!
PrintClassic Sausage and Herb Stuffing with a Crispy Top

This recipe creates a savory, comforting sausage stuffing with a moist interior and a golden, crisp exterior, perfect for your holiday table.
- Prep Time: 20 min
- Cook Time: 45 min
- Total Time: 65 min
- Yield: 10 servings 1x
- Category: Holiday Side Dish
- Method: Baking
- Cuisine: American
- Diet: Vegetarian
Ingredients
- 1 pound bulk savory pork sausage
- 1 large yellow onion, chopped
- 3 celery stalks, chopped
- 1 tablespoon fresh sage, finely chopped
- 1 teaspoon dried thyme
- 1 teaspoon dried rosemary
- 1/2 teaspoon salt
- 1/4 teaspoon black pepper
- 12 cups dried bread cubes (use a mix of white and sourdough for best texture)
- 2 large eggs, lightly beaten
- 2 1/2 cups chicken or turkey broth
- 1/2 cup (1 stick) unsalted butter, melted
Instructions
- Preheat your oven to 350°F (175°C). Lightly grease a 9×13 inch baking dish.
- In a large skillet over medium heat, cook the sausage, breaking it up with a spoon, until browned. Drain off excess grease.
- Add the chopped onion and celery to the skillet with the sausage. Cook until the vegetables soften, about 5 to 7 minutes.
- Stir in the fresh sage, thyme, rosemary, salt, and pepper. Cook for 1 minute until fragrant. Remove the skillet from the heat.
- In a very large bowl, combine the dried bread cubes and the sausage-vegetable mixture. Toss gently to distribute the sausage evenly.
- In a separate medium bowl, whisk together the beaten eggs and the chicken or turkey broth.
- Pour the egg and broth mixture over the bread mixture. Toss everything gently until the bread is evenly moistened. Do not overmix.
- Transfer the stuffing mixture to the prepared baking dish. Drizzle the melted butter evenly over the top surface.
- Bake for 35 to 45 minutes. The stuffing should be heated through, and the top layer should be golden brown and crisp.
- Let the stuffing rest for 10 minutes before serving. This is a great make ahead stuffing option.
Notes
- For a richer flavor, use homemade bread cubes that have been dried out overnight.
- If you prefer cornbread stuffing variations, substitute 6 cups of the bread cubes with crumbled cornbread.
- To prepare ahead, assemble the entire dish (Steps 1 through 4), cover it tightly, and refrigerate for up to 24 hours. Add 10 to 15 minutes to the baking time if baking directly from the refrigerator.
Nutrition
- Serving Size: 1 cup
- Calories: 350
- Sugar: 2
- Sodium: 550
- Fat: 22
- Saturated Fat: 8
- Unsaturated Fat: 14
- Trans Fat: 0
- Carbohydrates: 28
- Fiber: 2
- Protein: 14
- Cholesterol: 75