
There is just something magical about homemade candy, isn’t there? It feels like a little piece of luxury you’ve crafted yourself—a celebration, really. Too often, people imagine that making truly silky, decadent confectionery requires a chemistry degree, but I promise you, that is absolutely not the case here. Forget everything you think you know about temperamental candy making. This Super Easy, Creamy Maple Fudge Recipe will change your mind completely. We are achieving that perfect melt in your mouth texture, the kind that sings of autumn and cozy kitchens, using very few fussy steps. This is simple elegance, made achievable, and it highlights the gorgeous sweet depth of pure maple syrup. I hope learning more about my journey in the kitchen inspires you to try this very straightforward recipe for yourself. Read more about my philosophy here.
- Why This is the Best Maple Fudge Recipe You Will Make
- Essential Ingredients for Perfect Maple Fudge
- Step-by-Step Instructions for Creamy Homemade Fudge
- Tips for the Ultimate Maple Walnut Fudge Success
- Making Maple Fudge for Easy Holiday Gifts Food
- Storage and Keeping Your Maple Fudge Fresh
- Frequently Asked Questions About Maple Fudge
- Estimated Nutritional Snapshot for This Maple Fudge
- Share Your Sweet Maple Treats Experience
Why This is the Best Maple Fudge Recipe You Will Make
I want you to pull this recipe out all year long, not just for Christmas! It’s truly special because it cuts out all the guesswork. You’ll find this is the ultimate dessert for impressing people without stressing out at the stove. This makes reliably creamy homemade fudge every single time.

Achieving Velvety Maple Confection Texture
The secret to that gorgeous, velvety maple confection look and feel is combining the sugar with sweetened condensed milk and hitting that magic temperature. That little bit of heat-working ensures the sugar crystals stay small, giving you fudge that melts beautifully.
Simple Fudge Recipe for Quick Results
If you think candy making takes hours, think again! Your active prep time is minimal here. This is one of the quickest, most approachable easy maple desserts I have developed. Honestly, most of the time is just waiting for it to set up, which is the best part—you can go put your feet up!
Essential Ingredients for Perfect Maple Fudge
Gathering everything before you start cooking is crucial when making candy; rushing that step is how you end up with lumps instead of luxury! For this maple fudge, we keep the ingredient list short, meaning the quality of what you use really shines through. Remember, using just a few beautiful components lets the true maple flavor come forward, which is what we want in our simple fudge recipe.
Here is exactly what you will need:
- One 14-ounce can of sweetened condensed milk
- One cup of granulated sugar
- One cup of beautiful, pure maple syrup
- One tablespoon of unsalted butter—softened a bit!
- One teaspoon of vanilla extract
- One cup of white chocolate chips (optional, but lovely!)
- Half a cup of chopped walnuts (if you are making maple walnut fudge)
Ingredient Notes and Real Maple Syrup Recipes
This is the most important note I can give you for any maple creation: please, please use 100% pure maple syrup. That breakfast pancake syrup just won’t cut it—it uses corn syrup and artificial flavoring and will completely ruin the authentic taste we are seeking in these real maple syrup recipes. If you opt for the white chocolate chips, they aren’t just for sweetness! They blend right into the base and help provide that extra smooth, rich mouthfeel we call creamy homemade fudge.
Step-by-Step Instructions for Creamy Homemade Fudge
Alright, time to move from the counter setup to the stovetop! Since this is a candy, not a baked good, we aren’t worrying about the oven at all. What we are worried about is precision, which builds the trust you need in a good recipe. Paying close attention during this brief cooking window ensures we get that velvety texture that defines our maple fudge. Get your heavy-bottomed pot ready, because we are making magic happen right here!
Preparing Your Pan and Combining Ingredients
First things first: prepping the vessel! Line that 8×8 inch pan with parchment paper, and here is a trick: let the paper hang over two sides like little handles. You’ll thank me later when you need to lift this sweet block out easily. Once lined and lightly greased, grab your condensed milk, the sugar, and that wonderful maple syrup, and whisk them together gently in the saucepan. We are setting the stage for that incredible sweet maple treat!
The Critical Cooking Stage for Maple Fudge
Put the pan over medium heat and stir, stir, stir. You must keep stirring until the sugar is completely gone—no graininess allowed! We are aiming for the soft-ball candy stage, which means hitting exactly 234°F on your candy thermometer. Watch it carefully; it needs a good 8 to 10 minutes of simmering. If you don’t have a thermometer—and don’t worry if you don’t—cook it until the mixture thickens noticeably and slides away from the bottom when you scrape your spoon across it.
Finishing and Setting Your Maple Fudge
Pull that pan off the heat the second it hits the right spot! Immediately stir in your butter until it melts right in. If you are feeling extra decadent, drop in those white chocolate chips now until everything is glossy. If you decided on maple walnut fudge, fold in those nuts along with the vanilla extract. Pour it all into your prepared pan and just let it be. Don’t poke it or rush it! Letting it cool slowly at room temperature is the best way to guarantee that perfect, melt in your mouth fudge finish.

Tips for the Ultimate Maple Walnut Fudge Success
Now that you know the basic process for this gorgeous maple fudge, let’s talk about making it truly exceptional, especially if you are adding that crunchy texture everyone loves. If you’re going for that rich maple walnut fudge, a little preparation goes a long way. My best advice for ensuring your fudge remains smooth and those nuts don’t sink to the very bottom is very simple.
Toast your walnuts lightly before chopping and adding them in Step 4. Just five minutes in a dry skillet wakes up their flavor wonderfully! Once they are toasted and cooled, toss them in just a pinch of your powdered sugar (if you have any extra), which helps them adhere better to the fudge mixture. This stops them from migrating entirely to the bottom layer while it’s setting up.

Also, remember that temperature control we discussed? It is vital for that smooth finish. If the mixture gets too hot, even slightly, you risk the fudge becoming hard rather than the luxuriously soft confection we set out to create. Trust me on this; patience during that cooking phase prevents disappointment later. You can explore more of my cooking wisdom right here on the blog.
Making Maple Fudge for Easy Holiday Gifts Food
You know, making something this delicious always makes me think about sharing! This maple fudge is one of those wonderful recipes that travels beautifully and looks incredibly thoughtful when packaged up. If you’re looking for easy holiday gifts food that feels truly gourmet, this is it.
Once your fudge is completely set and firm—and I mean *firm*—the presentation is key! Use those parchment handles we left hanging out to lift the whole slab onto a clean cutting board. You’ll want a sharp knife for clean edges. I usually aim for small, neat squares—maybe an inch by an inch—because this is rich candy, meant to be savored! Cutting them smaller stretches your batch further for gifting.
For packaging, skip plastic clamshells; they make the fudge sweat a bit. Instead, I love using small, clear cellophane bags tied with a deep green or burgundy ribbon. For an extra elegant touch, I place the squares in mini, fluted paper candy cups before bagging them—it keeps them from sticking together. If you want to dress them up even more, drizzle a tiny bit of melted dark chocolate over the fudge *before* it sets completely, or just before gifting! For more ideas on beautiful, simple treats, have a peek at my perfect chocolate cupcakes recipe—it’s another fantastic gift contender!
Storage and Keeping Your Maple Fudge Fresh
Once you’ve resisted the urge to eat the entire batch in one sitting, we need to talk about keeping this gorgeous maple fudge perfect! Candies like this behave a little differently than cakes or cookies, so where you store it really matters for maintaining that melt in your mouth quality we worked so hard for.
The really great news is that because this recipe is candy-based rather than cake-based, it holds up beautifully! For the best texture—the smoothest, creamiest result—I always push for room temperature storage first. Keep the fudge in an airtight container at a cool room temperature. It should stay wonderfully decadent for about ten days this way. Trust me, it rarely makes it that long in my house, but that’s the shelf life!
If your kitchen runs particularly warm, or perhaps you made a massive batch for the holidays and need it to last longer, the refrigerator is your friend. Pop it into an airtight container there. It will stay fresh for up to three weeks! Just remember one crucial thing if you chill it: let it sit out on the counter for about 30 minutes before serving. Chilled fudge can feel a tiny bit firm, and you want it to soften up just enough so that lovely, buttery texture shines through when you bite into it.
Never freeze fudge if you can avoid it. While technically it can be done if tightly wrapped, the temperature changes can sometimes encourage sugar weeping or slight graininess upon thawing, and we want to avoid anything that compromises that velvety result!
Frequently Asked Questions About Maple Fudge
It’s natural to have a few questions when you’re dipping your toes into the world of candy making! I’ve collected a few of the most common things I hear about mastering this maple fudge recipe to make sure your batch turns out perfect and rich every time.
Can I make this maple fudge without a candy thermometer?
Absolutely, you can! While the thermometer gives you that exact perfection for a simple fudge recipe, it isn’t mandatory. If you don’t have one, you need to watch the mixture closely as it cooks. You’ll know it’s ready when it thickens up considerably and, if you run your spoon across the bottom of the pot, the fudge pulls away from the metal slightly before slowly flowing back together. That visual cue tells you the candy stage is reached!
How do I prevent my maple fudge from becoming grainy?
Graininess is the enemy of all candy makers, but we beat it here by controlling the heat! The absolute key to achieving that creamy homemade fudge texture is twofold: first, make sure you dissolve all the sugar crystals completely before it starts to boil, and second, let the fudge cool slowly and undisturbed at room temperature for at least three hours once transferred to the pan. Rushing the cooling process can sometimes encourage that sugar crystallization.

Is this considered a No Bake Maple Candy?
That’s a great distinction to make! While we don’t put this mixture into the oven to bake it, it does require active stovetop cooking to reach the soft-ball stage. So, it isn’t truly a ‘no-bake’ treat in the sense that you might mix ingredients cold and just chill them. It needs that initial application of heat to properly combine the sugar structure required for delicious fudge, unlike some refrigerated candies.
If you have any other questions at all, please feel free to reach out to me via my contact page. I love hearing from you!
Estimated Nutritional Snapshot for This Maple Fudge
Now, I know some of us check the labels, and others of us just dive right in, but I wanted to give you an idea of what this pure maple delight entails. Remember, this is just an estimate because the exact values—especially the fat and sugar content—will shift depending on whether you included the optional white chocolate chips or walnuts, and of course, the sugar content in your specific brand of real maple syrup.
For the basic version, based on a yield of 36 small squares, here’s a general look at what you’re enjoying:
- Serving Size: 1 square
- Calories: About 150
- Sugar: Roughly 22g
- Fat: About 6g
- Protein: 2g
- Carbohydrates: About 24g
I always say that eating something delicious brings joy, and that counts for something, right? But seriously, since this is a homemade candy, these numbers change based on your choices. If you add those delicious walnuts, your fat and protein will bump up slightly. If you skip the optional white chocolate, the sugar might dip a bit. Enjoy this rich treat responsibly, knowing you made it with the best, most natural ingredients!
Share Your Sweet Maple Treats Experience
The story doesn’t end when the fudge is cut, you know! The best part of sharing these simple, elegant recipes is hearing how they turn out in *your* kitchen. I truly hope this maple fudge becomes one of those reliable favorites you reach for when you need something quick, comforting, and deeply flavorful.
I put so much care into testing every single step to ensure you get that perfect, creamy result, and now I’d love to see your hard work! If you made this batch of sweet maple treats, please take a moment to leave a star rating at the top of the post. It helps me immensely and lets other home cooks know they can trust this recipe.
Did you add the walnuts? Did you find that pure maple syrup made a huge difference? Tell me all about it in the comments section below! And please, tag me in your photos on social media when you package these up for gifting or enjoy them on a cozy evening. I always adore seeing your beautiful presentations—it makes my day! I’ve shared some of my favorite appetizer ideas, too, if you happen to need something savory to balance out all this sweetness over at my appetizers page!
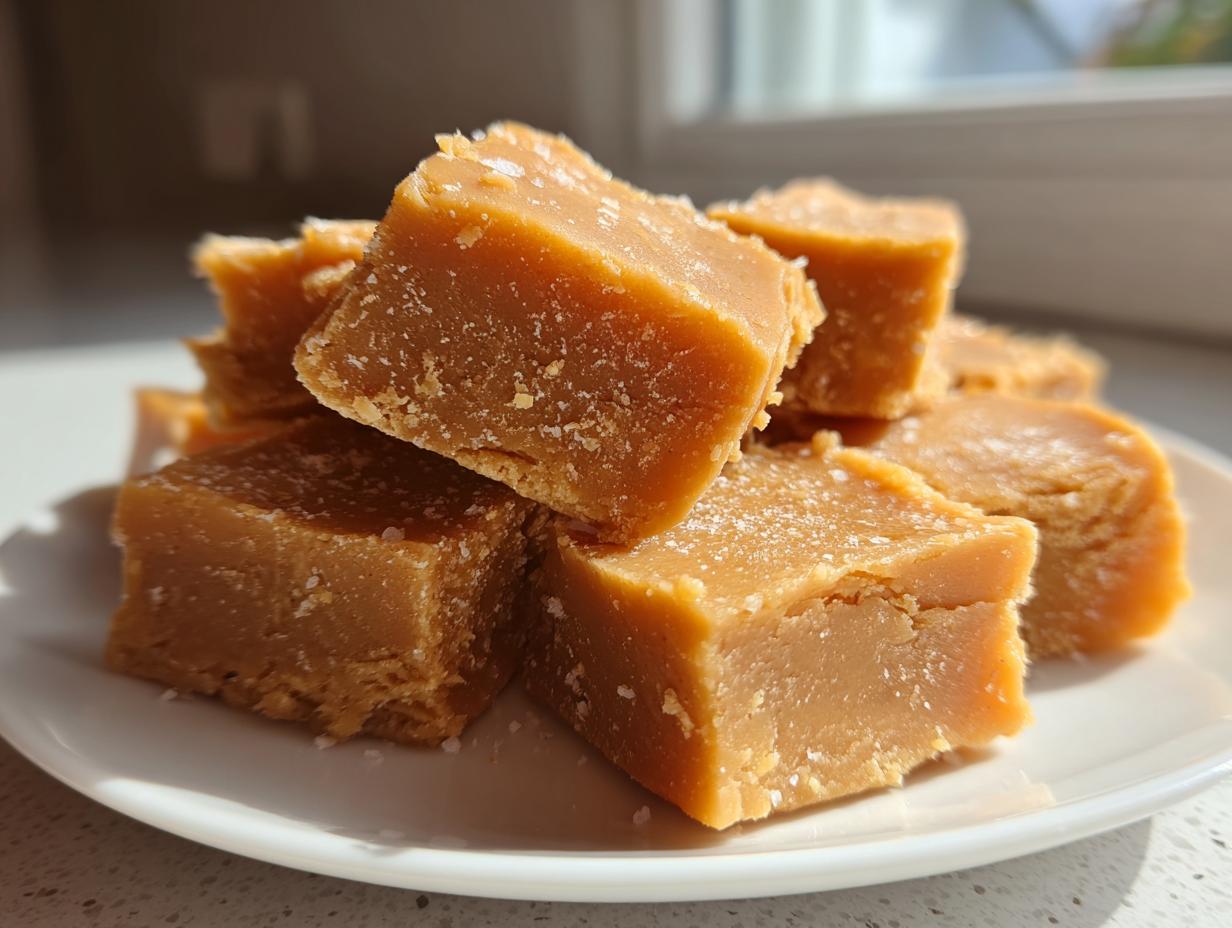
PrintSuper Easy, Creamy Maple Fudge Recipe

Create a velvety, melt-in-your-mouth maple fudge using real maple syrup. This simple recipe delivers rich flavor and a smooth texture, perfect for holiday treats or a decadent homemade gift.
- Prep Time: 10 min
- Cook Time: 10 min
- Total Time: 4 hours 20 min
- Yield: About 36 small squares 1x
- Category: Dessert
- Method: Stovetop Cooking
- Cuisine: American
- Diet: Vegetarian
Ingredients
- 1 (14 ounce) can sweetened condensed milk
- 1 cup granulated sugar
- 1 cup real maple syrup
- 1 tablespoon unsalted butter
- 1 teaspoon vanilla extract
- 1 cup white chocolate chips (optional, for extra creaminess)
- 1/2 cup chopped walnuts (optional)
Instructions
- Line an 8×8 inch baking pan with parchment paper, leaving an overhang on the sides for easy removal. Lightly grease the paper.
- In a medium, heavy-bottomed saucepan, combine the sweetened condensed milk, granulated sugar, and real maple syrup.
- Place the saucepan over medium heat. Stir constantly until the sugar dissolves completely and the mixture begins to simmer.
- Continue to cook, stirring frequently, until the mixture reaches 234°F (112°C) on a candy thermometer. This usually takes about 8 to 10 minutes. Do not let it boil rapidly.
- Remove the saucepan from the heat immediately. Stir in the butter until it melts completely.
- If using, stir in the white chocolate chips until smooth. If using walnuts, fold them in now.
- Stir in the vanilla extract.
- Pour the fudge mixture into the prepared pan. Spread it evenly with a spatula.
- Let the fudge cool completely at room temperature for at least 3 hours, or chill in the refrigerator for 1 hour until firm.
- Use the parchment overhang to lift the fudge from the pan. Cut into small squares. Store airtight at room temperature or refrigerated.
Notes
- For the best flavor, use high-quality, pure maple syrup. Avoid pancake syrup.
- If you do not have a candy thermometer, cook until the mixture thickens noticeably and pulls away slightly from the bottom of the pan when stirred.
- This fudge sets up best when cooled slowly at room temperature, which helps achieve the smoothest texture.
- This recipe makes a wonderful, easy holiday gift when cut and packaged nicely.
Nutrition
- Serving Size: 1 square
- Calories: 150
- Sugar: 22g
- Sodium: 35mg
- Fat: 6g
- Saturated Fat: 4g
- Unsaturated Fat: 2g
- Trans Fat: 0g
- Carbohydrates: 24g
- Fiber: 0g
- Protein: 2g
- Cholesterol: 15mg