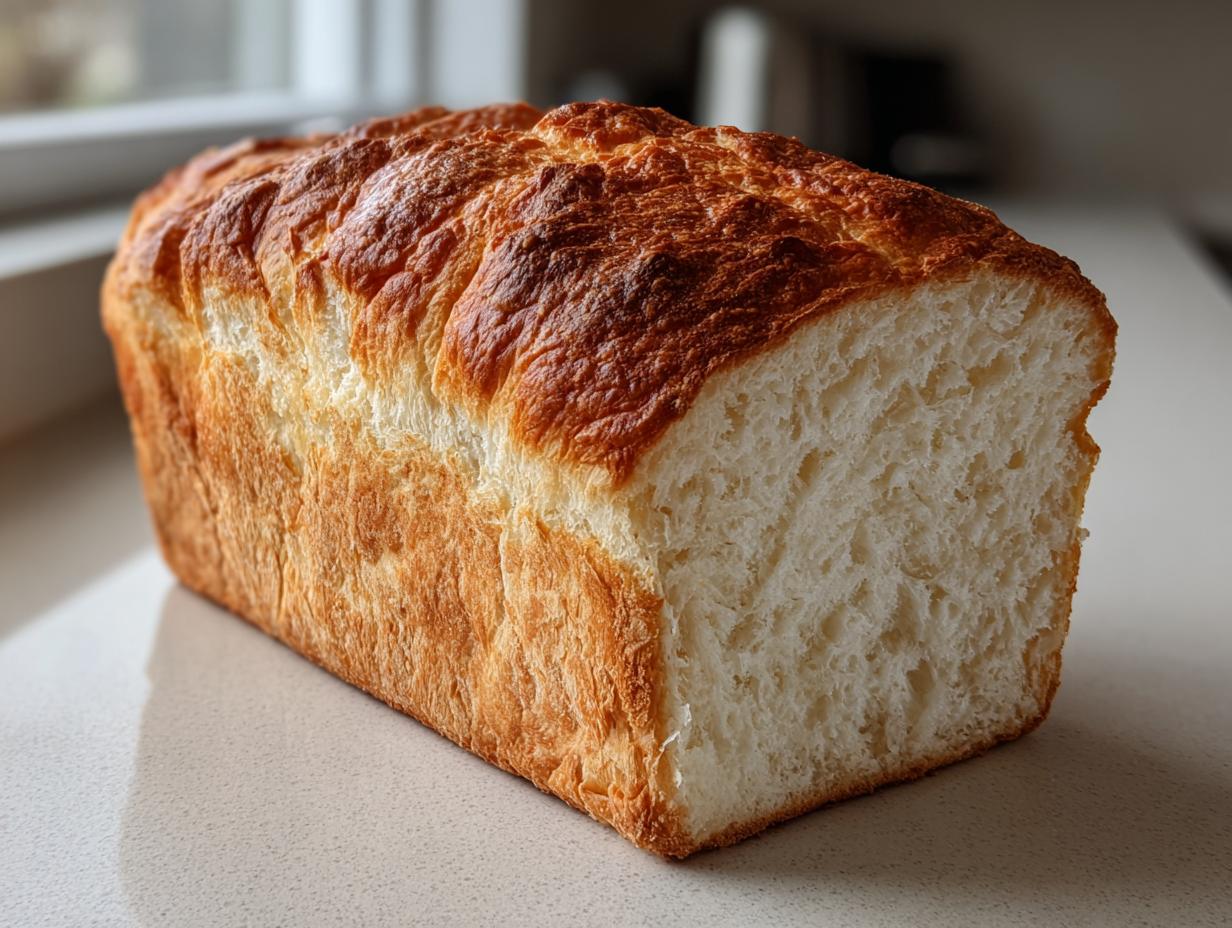

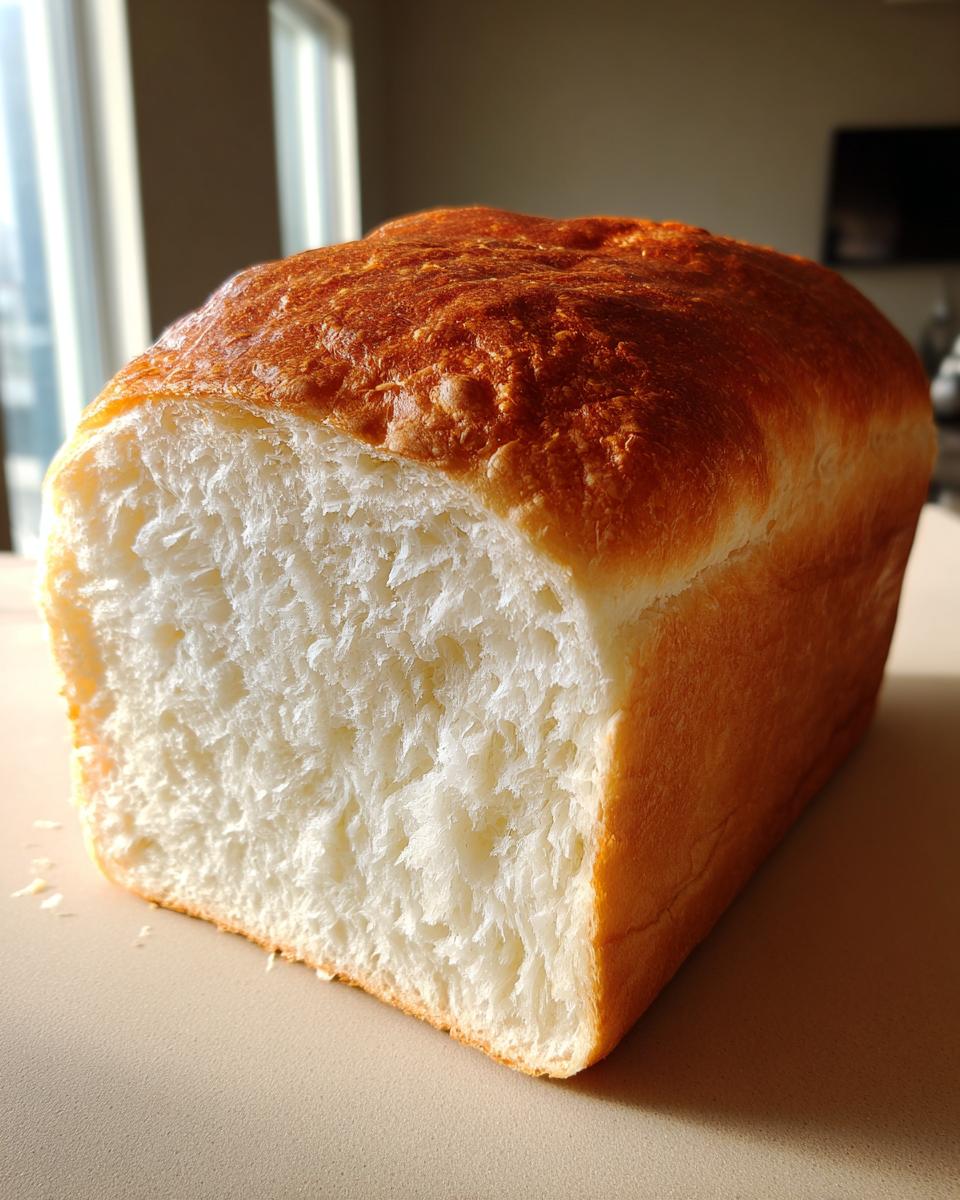
There is truly nothing that compares to the feeling of pulling a loaf of homemade bread out of the oven. That warm, yeasty cloud that fills your entire house? It’s instant comfort, really. I know that baking bread can seem intimidating—all that kneading and waiting—but trust me on this: you can absolutely master it. This recipe for Fluffy Homemade Sandwich Bread is my absolute go-to. It’s incredibly approachable, practically guarantees that beautiful, soft texture, and gets you a show-stopping loaf of white bread from scratch without any fuss. It’s my foundational bread recipe, and I’m so excited for you to try it!
- Why This Fluffy Homemade Sandwich Bread Recipe Works for Everyone
- Gathering Your Ingredients for the Perfect Loaf of Bread
- Step-by-Step Instructions: Mastering Your Homemade Bread
- Baking Tips and Tricks for the Best Homemade Bread
- Variations on This Simple Bread Recipe
- Storing Your Fresh Baked Goodness (Homemade Bread)
- Serving Suggestions for Your Soft Loaf Recipe
- Frequently Asked Questions About Making Bread
- Estimated Nutrition for This Homemade Bread Recipe
Why This Fluffy Homemade Sandwich Bread Recipe Works for Everyone
I want you to feel completely confident walking into this recipe. This isn’t some complicated artisan loaf that needs specialized equipment; this is pure, lovely comfort baking. It’s designed to be reliable, which is why it has been saved nearly 50,000 times by bakers just like you!
- It’s built on a simple yeast bread basics foundation, making it the perfect Beginner Bread Recipe.
- We use milk and a touch of butter to guarantee that iconic Fluffy Bread texture you crave for sandwiches.
- The steps are straightforward—no complex folding or special pre-ferments required!
If you’re looking for a truly dependable loaf, you can trust this method. It delivers that pillowy interior everyone loves every single time you bake it. Feel free to look at other tried-and-true methods, like the one detailed here, but I think you’ll stick with mine!
Gathering Your Ingredients for the Perfect Loaf of Bread
To achieve that dreamy, soft texture of classic White Bread From Scratch, the ingredients need just a little attention before we start. Having everything measured and ready is half the battle won! Here’s exactly what you’ll need for this simple loaf recipe:
- 1 cup warm milk (aim for 105-115°F—warm to the touch, not hot!)
- 2 1/4 teaspoons active dry yeast
- 1/4 cup granulated sugar
- 1 teaspoon salt
- 1/4 cup unsalted butter, softened to room temperature
- 3 cups all-purpose flour, plus extra for dusting
- 1 large egg, lightly beaten (this is for our golden wash!)
Ingredient Notes and Substitutions for Your Bread
A quick note on quality! If you want an even richer flavor, go ahead and use whole milk instead of regular; it makes the crumb so lovely. Also, that milk temperature is key for truly Easy Bread Making—too cold and the yeast gets sleepy, too hot and… well, we kill it! If you see your yeast fails to foam up in the first step, it signals that the water was probably too hot, and we’ll need to start over with fresh yeast. That patience upfront saves so much disappointment later.
Step-by-Step Instructions: Mastering Your Homemade Bread
This is where we turn simple ingredients into glorious, tangible bread! Don’t rush these steps, especially the waiting times—that’s the magic happening inside the dough. Baking is about patience, and this recipe rewards you for it beautifully.
Activating the Yeast and Mixing the Bread Dough
First things first: we have to wake up that yeast! In a big bowl, put your warm milk and sprinkle the yeast right on top. Wait five minutes. If you don’t see some lovely foam—like tiny bubbles having a party—then your yeast isn’t happy, and we need to start over. Once it’s foamy, stir in the sugar along with the salt and softened butter until everything melts together. Then, slowly add the flour, about a cup at a time. We mix just until it looks shaggy and messy. That’s the sign to get your hands in there!
Kneading and the First Rise for Fluffy Bread
Now we dedicate about 6 to 8 minutes to kneading. Turn that shaggy mass onto a lightly floured counter. Push down and away with the heel of your hand, fold it over, and repeat! You’ll feel a real transformation here—the sticky lump will become smooth and elastic. When you poke it and it gently springs back, it’s ready. Pop that smooth dough into an oiled bowl, cover it, and let it rest for about an hour and a half until it’s doubled. This first rise is crucial for that light, Fluffy Bread texture we adore.
Shaping and the Second Rise of Your Sandwich Bread Loaf
Once doubled, gently ‘punch’ the air out—it’s very satisfying! Turn it out, shape it into a rectangle that fits your loaf pan, and then roll it up tightly, pinching that final seam closed so it stays secure. Place it seam-side down in your greased 9×5 pan. Cover it again, warm spot, for about 40 more minutes. We are looking for the dough to crown maybe an inch over the rim of the pan—that’s the perfect signal that it’s ready for the oven. If you want more guidance on working with dough, I have some great basics here.
Baking Tips and Tricks for the Best Homemade Bread
Now that our loaf looks ready, we need to make sure the bake sets us up for success! Getting the heat right is one of the most important Baking Tips and Tricks for a beautiful finish. Preheat your oven to 375°F while the dough hits its second rise. You’re baking until that top is beautifully golden brown, but don’t just trust your eyes!
I always use an instant-read thermometer; the internal temperature needs to hit 200°F. That assures me the structure is set and the yeast has done its final job. When you pull it out—and this part is crucial—get it out of the hot metal pan right away! Place it on a wire rack immediately. If you leave it in the pan, the steam gets trapped and you end up with a slightly gummy bottom, which we definitely want to avoid.
This is the standard time for a 9×5 loaf, but if you use a deeper pan, just give it an extra 5 or 10 minutes. For a slightly softer crust, pop your butter brush out right when the loaf comes out of the oven. You can find my tips for achieving that perfect crust over on my whole wheat recipe page, too!
Variations on This Simple Bread Recipe
While I absolutely adore this bread exactly as written—it’s my foolproof guide to amazing homemade bread—I also love tweaking things once you feel comfortable with the basic process! Baking should be fun, not rigid. Once you’ve mastered the rise and the shape, you can start playing around with textures and flavors.
For a lovely herb bread, try adding about two tablespoons of dried rosemary or Italian seasoning right when you add the flour. It smells divine while baking! If you want a nice texture contrast, a half cup of sunflower or poppy seeds stirred in during the final minutes of kneading is wonderful. These additions hardly affect the rise time at all.
If you’re aiming for that ultra-soft, slightly sweeter texture we associate with a wonderful Milk Bread Recipe, you can substitute a portion of the flour with milk powder. Try adding about 2 tablespoons of dry milk powder along with your flour. It enriches the dough and makes it taste incredibly soft, almost like the famous Tangzhong method I explore in detail here. It’s a simple trick that elevates this classic sandwich loaf!
Also, if you ever worry about shelf stability, adding just one extra tablespoon of sugar when you mix the dry ingredients can help keep your bread softer for longer. It retains a touch more moisture, keeping that fresh baked goodness around for those extra lunch boxes!
Storing Your Fresh Baked Goodness (Homemade Bread)
You’ve accomplished something truly wonderful, and now we need to protect that beautiful loaf! The critical secret to keeping your Homemade Bread Recipe fresh is cooling completely. Don’t slice into that bread while it’s warm, I beg you! All that trapped steam will turn your tender crumb gummy.
Once fully cool—and I mean touch-it-and-it’s-room-temperature cool—transfer it into a clean bread bag or wrap it tightly in plastic wrap. Storing it on the counter is fine for two or three days for this Fresh Baked Goodness. If you want it to last longer, slice it first, then freeze the slices! It toasts up perfectly right from frozen.
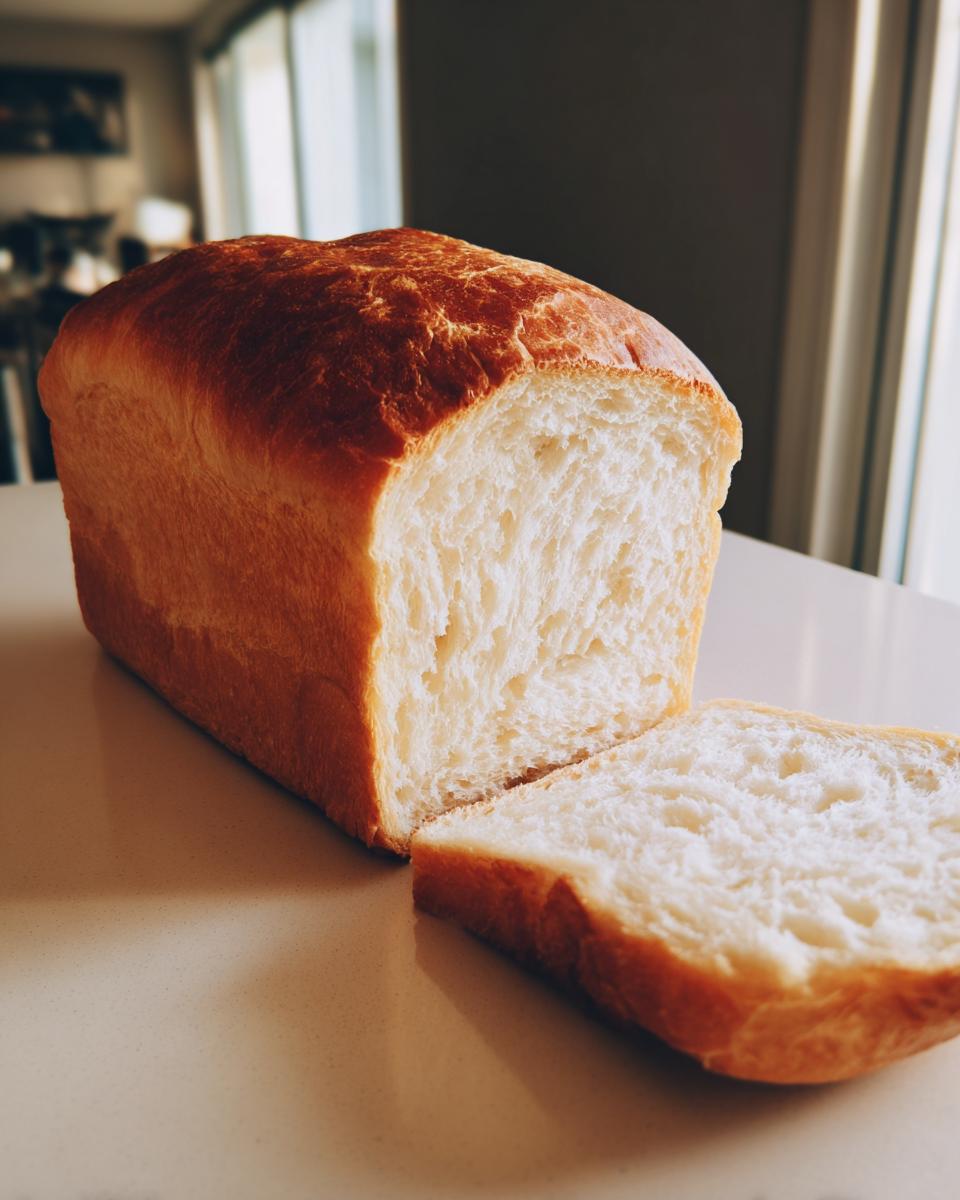
Serving Suggestions for Your Soft Loaf Recipe
Now that you have this incredible, tender Soft Loaf Recipe, what are you going to do with it? Well, obviously spreading it thickly with butter while it’s still slightly warm is non-negotiable for a perfect breakfast moment. My family goes through jars of homemade jam in days when I make this bread!
But honestly, as someone who cherishes that Mediterranean approach to food, my favorite way to enjoy simple, quality bread is soaking up high-quality olive oil. Drizzle it right on a thick slice—it’s elegant simplicity! Beyond toast, this loaf is the backbone of any great sandwich. If you’re looking for other comfort dishes, you might enjoy how I use my biscuit recipe base for biscuits and gravy; the same principles of fluffy texture apply!
Frequently Asked Questions About Making Bread
Whenever I share this recipe, I get the sweetest notes asking for clarification on the steps, especially for those new to yeast baking. It’s completely normal! Understanding a few key pointers about Yeast Bread Basics makes all the difference between an okay loaf and one that sings. Let’s tackle some common hurdles right here so your next bake is a triumph!
Can I make this bread dough without kneading?
That’s a very popular question, especially since No Knead Bread has gotten so much attention! You absolutely *can* skip the dedicated 8 minutes of kneading for this recipe, if you must. Here’s the trade-off: kneading develops the gluten structure, which is what traps those lovely gas bubbles for that towering, fluffy sandwich loaf texture. If you skip it completely, your bread will still work, but it will be denser, more like a rustic loaf than a commercial soft slice. If you skip kneading, just let it rise as planned, but expect a less lofty rise.
What if my dough doesn’t rise?
Oh, the dreaded flat dough! It’s usually one of two culprits, and it always comes back to that yeast activation step earlier on. First, check your water temperature. If the milk was too hot when you added the yeast, you cooked the poor little organisms, and they can’t do their work. That’s why we insist on just warm—think baby bath temperature—not steaming hot. If the temperature was perfect, it means your yeast might have been older and wasn’t viable anymore. Don’t add the flour until you see that beautiful foam! If it fails to foam, toss it out and grab a fresh packet of yeast. It’s the only way to guarantee that beautiful second rise where the dough crowns perfectly over the pan.
Estimated Nutrition for This Homemade Bread Recipe
When we talk about comfort baking, we usually aren’t focused on counting macros, but I know many of you are curious about what goes into this gorgeous Homemade Bread Recipe. So, here is the nutritional break down! Please remember that these figures are only estimates based on the exact ingredients listed above and the yield of one loaf. Since we are baking from scratch, the precise values can shift a little depending on the brand of flour or the exact size of that ‘large’ egg!
I always find it encouraging that something so delicious, made simply with flour, milk, and butter, tastes this good without a huge list of artificial additives or stabilizers. That’s the beauty of making your own Soft Loaf Recipe!
- Serving Size: 1 slice
- Calories: 150
- Total Fat: 3g
- Saturated Fat: 2g
- Carbohydrates: 28g
- Protein: 4g
- Sugar: 4g
You can always lower the carbohydrate or sugar content slightly if you were to swap out some of the all-purpose flour for a whole wheat blend in a future batch, though that will slightly change that signature fluffy texture. If you want to explore that comparison further, you can see some fantastic guides on flour substitutions elsewhere, like this resource.
PrintFluffy Homemade Sandwich Bread: An Easy Yeast Recipe
Bake a soft, fluffy loaf perfect for sandwiches and toast using this simple yeast bread recipe. This tutorial guides beginners through making classic white bread from scratch.
- Prep Time: 20 min
- Cook Time: 35 min
- Total Time: 1 hour 50 min
- Yield: 1 loaf 1x
- Category: Baking
- Method: Yeast Baking
- Cuisine: American
- Diet: Vegetarian
Ingredients
- 1 cup warm milk (about 105-115°F)
- 2 1/4 teaspoons active dry yeast
- 1/4 cup granulated sugar
- 1 teaspoon salt
- 1/4 cup unsalted butter, softened
- 3 cups all-purpose flour, plus more for dusting
- 1 large egg, lightly beaten
Instructions
- In a large bowl, combine the warm milk and yeast. Let it sit for 5 minutes until foamy. This confirms your yeast is active.
- Stir the sugar and salt into the yeast mixture. Add the softened butter and mix until combined.
- Gradually add the flour, one cup at a time, mixing until a shaggy dough forms.
- Turn the dough out onto a lightly floured surface. Knead the dough for 6 to 8 minutes until it becomes smooth and elastic. You should feel the dough soften.
- Place the dough in a lightly oiled bowl, turning it once to coat. Cover the bowl with plastic wrap or a clean towel and let it rise in a warm place for 1 to 1.5 hours, or until doubled in size. This is the first rise.
- Gently punch down the risen dough to release the air. Turn it onto a lightly floured surface.
- Shape the dough into a rectangle roughly the size of your loaf pan (9×5 inches). Roll the dough up tightly, starting from the short end, pinching the seam closed.
- Place the shaped dough, seam-side down, into a greased 9×5 inch loaf pan.
- Cover the pan loosely and let the dough rise again in a warm spot for 30 to 45 minutes, or until the dough has crowned about 1 inch over the rim of the pan. This is the second rise.
- Preheat your oven to 375°F (190°C) during the last 15 minutes of the second rise.
- Brush the top of the loaf lightly with the beaten egg for a golden finish.
- Bake for 30 to 35 minutes, or until the top is golden brown and the internal temperature reaches 200°F (93°C).
- Remove the bread from the pan immediately and cool completely on a wire rack before slicing. This prevents a gummy texture.
Notes
- For a richer flavor, substitute whole milk for the warm milk.
- If your kitchen is cold, place the covered bowl in a turned-off oven with the light on to create a warm environment for rising.
- To achieve a softer crust, brush the top of the loaf with melted butter immediately after removing it from the oven.
Nutrition
- Serving Size: 1 slice
- Calories: 150
- Sugar: 4
- Sodium: 250
- Fat: 3
- Saturated Fat: 2
- Unsaturated Fat: 1
- Trans Fat: 0
- Carbohydrates: 28
- Fiber: 1
- Protein: 4
- Cholesterol: 15