

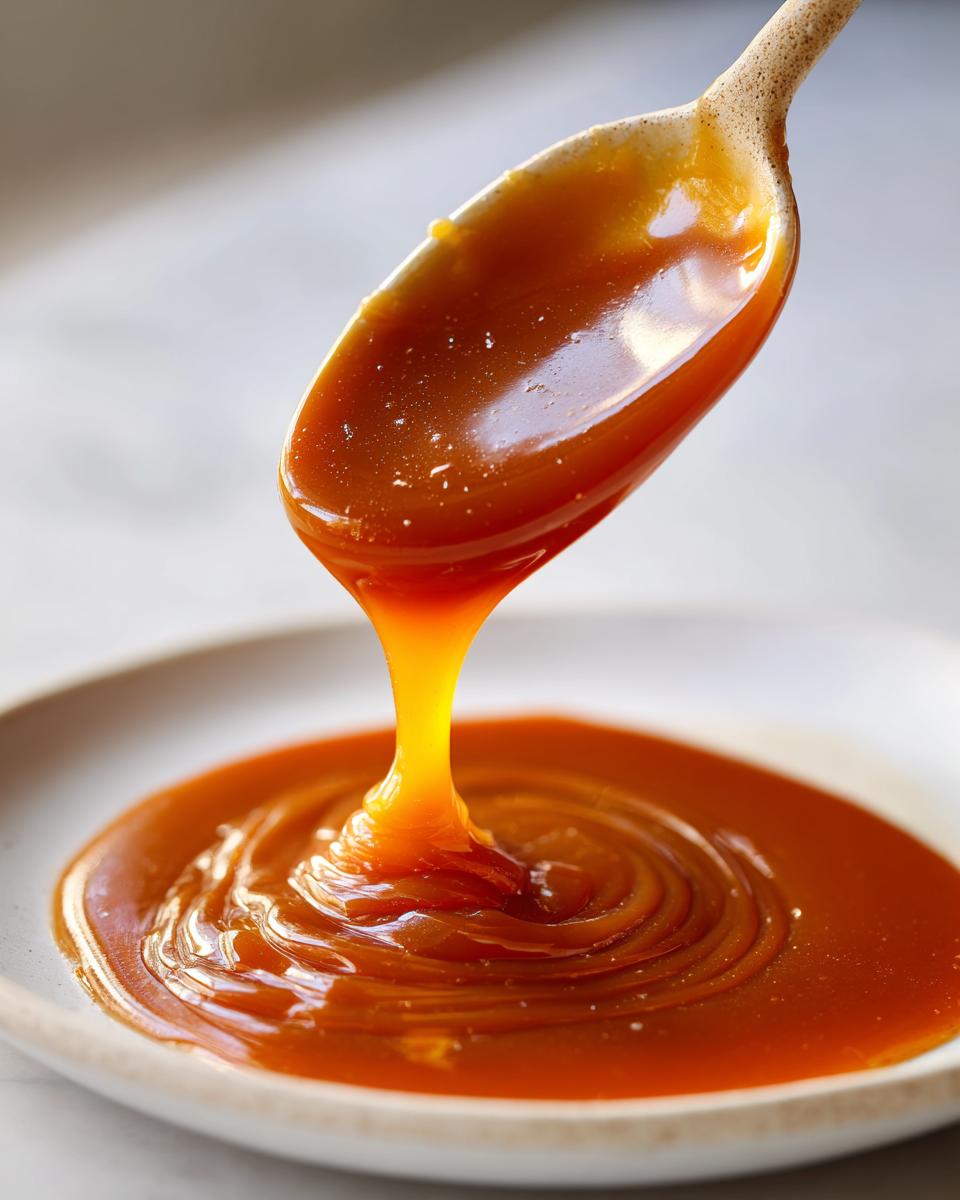
There is a certain kind of magic that happens when simple white sugar transforms right on your stovetop. That deep, nutty aroma fills the kitchen, and you realize you’ve created something truly luxurious from scratch. I adore recipes that make the spectacular feel easy, and this one is the absolute pinnacle of approachable elegance. Forget those jars sitting in the supermarket aisle; today, we are making my Easy Homemade Salted Caramel Sauce.
Trust me when I say this is the best caramel you’ll ever make at home. It comes together in under twenty minutes, and it is so rich and buttery. Whether you’re drizzling it over a slice of cake or stirring it into your morning coffee, this versatile sauce will instantly elevate whatever it touches. It’s a staple I simply couldn’t keep hidden any longer!
- Why This Easy Homemade Salted Caramel Sauce Recipe Works
- Ingredients Needed for Your Salted Caramel
- How To Make Caramel: Step-by-Step Instructions
- Tips for Perfect Caramel Sauce Consistency
- Creative Ways to Use Your Homemade Caramel
- Storage and Reheating Instructions for Your Caramel
- Frequently Asked Questions About Making Caramel
- Estimated Nutritional Data for Salted Caramel
- Share Your Homemade Caramel Creations
Why This Easy Homemade Salted Caramel Sauce Recipe Works
When I developed this recipe, my goal was to capture that deep, sophisticated flavor of classic homemade caramel without needing a candy thermometer or hours of fuss. This isn’t just another dessert topping; it’s an instant confidence booster in the kitchen! It’s reliable, tested repeatedly, and truly delivers on ease.
- It’s a genuinely Quick Caramel Dessert solution for any weeknight craving.
- It creates a thicker, more luxurious texture than most quick recipes out there.
- The addition of good salt elevates the sweetness perfectly.
Speed and Simplicity for Perfect Caramel
Honestly, you can have this done faster than it takes to order takeout! Because we are using the wet-sugar method carefully, we avoid that frightening stage where sugar solidifies into a hard brick. It’s streamlined for the home cook, which means less stress and more perfect, amber-colored caramel every time.
Versatility of This Rich Sweet Sauce
Once you have this rich sweet sauce ready, the possibilities explode! It is undeniably the Best Caramel Topping around. I use it to dress up everything from warm apple fritters to dipping fresh apple slices. It’s wonderful swirled into chilled cream or poured over vanilla ice cream. If you ever decide to try making those soft, chewy caramels, you start with this exact base!
Ingredients Needed for Your Salted Caramel
For a topping that tastes this deep and luxurious, you might think you need a pantry full of specialty items, but that’s not the case here. The secret to a superior caramel flavor lies in using good quality basics and handling them correctly. We keep this ingredient list tight so you can focus on mastering the technique!
- 1 cup granulated sugar
- 6 tablespoons unsalted butter, cut into pieces
- 1/2 cup heavy cream, warmed slightly
- 1 teaspoon vanilla extract
- 1/2 teaspoon sea salt, or to taste
I always have my butter waiting on the counter to soften a little while I measure everything else out. And don’t forget those vanilla notes—it really finishes the flavor profile perfectly. If you’re looking for other wonderful sweet creations, check out my recipe for caramel popcorn!
Ingredient Notes and Substitutions for Best Caramel
Every single ingredient plays a part in the magic, so keep these small details in mind for the very best results. Your effort here directly impacts the final smoothness of your sauce.
First, please warm your heavy cream slightly before you add it to the melted sugar and butter, as noted in the instructions. If the cream is too cold, the drastic temperature difference can cause the mixture to seize up hard and fast. Trust me, warming it up just a bit ensures a much smoother incorporation!
Next, about the salt. While regular sea salt works beautifully, if you want to elevate this sauce to something truly special—something restaurant-quality—try finishing it with just a pinch of Fleur de Sel. That specific flaky salt adds a refined crunch and flavor complexity perfect for a true Fleur de Sel Caramel experience.
Finally, don’t panic if your sauce seems too thin right when you take it off the heat. This sauce thickens beautifully as it cools down on the counter. If for some reason it gets too stiff later, it’s easily fixed right back on the stovetop over low heat or in short bursts in the microwave.
How To Make Caramel: Step-by-Step Instructions
This is the part where we turn basic sugar into liquid gold! Mastering how to make caramel is less about fancy equipment and more about timing and attention. I follow these steps religiously because the difference between a perfect sauce and a scorched mess is just about thirty seconds. You’ve got this, but you need to watch the pot!
Melting the Sugar for Smooth Caramel
First off, get that sugar into a medium, heavy-bottomed saucepan set over medium heat. Here’s the trick: for the first minute or so, just let it sit. Don’t stir it! You want the edges to start turning liquid on their own. Once you see that melting happening, then you can gently use a heatproof spatula to encourage the rest of the sugar to melt down. Keep moving the spatula slowly, incorporating the crystals into the melted pools, until everything dissolves. You are looking for a rich, deep amber color—that’s pure, beautiful caramel flavor developing right there. As soon as it hits that perfect hue, pull the pan straight off the burner immediately. Seriously, don’t delay!

Incorporating Butter and Cream for the Caramel Sauce Recipe
Now we build that buttery texture. With the pan off the heat, you’re going to carefully drop in your cubed butter, one piece at a time, whisking constantly. It will bubble up like crazy—that’s normal! That vigorous bubbling means the water in the butter is mixing with the hot sugar. Once the butter is completely melted in, slowly, slowly—and I mean slowly—pour in your pre-warmed heavy cream while you whisk everything together. This step is dramatic! It will bubble up even higher, but keep whisking until the whole thing comes together into one smooth liquid. If you want to see a video of this technique, I walk through it in detail in my guide on the science of caramelization because it’s so important.
Once smooth, return the caramel sauce recipe to very low heat, stirring for just one last minute. Then, stir in your vanilla and that essential sea salt. Pour it into a jar, let it cool, and get ready for the best homemade topping ever.
Tips for Perfect Caramel Sauce Consistency
Getting that luxurious, perfect texture right out of the pot is what separates an okay sauce from an absolutely sensational one. Since we aren’t using a thermometer, we rely on temperature changes and visual cues, which means you need to know what to do when things look a little off. Remember, this is a temperamental batch of delicious brown gold, so slight adjustments are part of the fun of making homemade caramel!
The sauce will look quite thin right when you take it off the heat, especially if you used slightly cooler cream. Don’t worry! The most important step is letting it cool. As a rule, I let it sit on the counter for about 30 minutes. Seriously, step away for a bit.

When cool, it should have the velvety consistency of thin maple syrup—perfect for drizzling. If you want it even thicker for, say, making those amazing gooey caramel bars, you can gently heat the cooled sauce again for another minute or two on the stove, or microwave it in 10-second bursts. It tightens up beautifully when chilled, so err on the side of slightly too thin when hot!
Creative Ways to Use Your Homemade Caramel
Now that you’ve created this incredible, rich base for dessert toppings, the real fun begins! Having a jar of this homemade caramel sauce tucked away in the fridge feels like having a secret weapon against any dessert slump. I love having this on hand because it makes even the simplest treats feel special and elegant, which is what Unfold Recipes is all about, right?
You poured your heart into making this, so let’s celebrate! Don’t just stick to pouring it over ice cream, although that is mandatory at least once. Think about how this beautiful, buttery flavor can elevate your standard breakfast or how it can bring that wow factor to a simple platter of fruit. This is exactly why I test these recipes over and over; I want you to feel confident using every drop of that gorgeous rich sweet sauce!
Drizzling Sauce Recipe Ideas
This is more than just a topping; it’s an experience! If you’re looking for easy enhancements, try these applications right away. The depth of flavor from letting the sugar reach that deep amber color really shines through in these recipes.
- Coffee Perfection: Stir a tablespoon right into your morning latte or iced coffee before adding milk. That touch of sea salt perfectly cuts the bitterness of roasted coffee beans.
- Breakfast Upgrade: Drizzle generously over homemade pancakes or French toast. It’s fantastic alongside my recipe for apple fritters, where the warm fruit meets the cool sauce.
- Cake Assembly: Use it as a luscious layer between cake sponges, or as the secret ingredient in a wonderful, cozy baked item like my apple dump cake!
- Baking Boost: Think about layering this into your next baked creation. If you love that combination of salty and sweet, this recipe is the essential base for turning a simple shortbread into stunning gooey caramel bars. It brings so much more flavor than anything store-bought!

The sheer versatility of this drizzling sauce recipe means you get so much homemade joy out of one short cooking session. Keep experimenting with it! It’s the perfect introduction to baking with caramel without diving into candy making just yet.
Storage and Reheating Instructions for Your Caramel
Once you’ve made this incredible sauce, the next big question is, how do I keep this liquid gold fresh? Don’t worry, storing this caramel is nearly as easy as making it. Because we used heavy cream and a decent amount of butter, we need to treat it right to maintain that silky texture.
For the best flavor and texture retention, I always recommend keeping your homemade caramel sauce in an airtight, heatproof jar in the refrigerator. It’s going to firm up quite a bit in there—that’s normal for a sauce made with real butter! It should easily last for at least two to three weeks in the fridge. If you find it seems a little too stiff after a few days, resist the urge to try to scoop it out!
Reheating is essential to bring it back to that perfect, pourable state. You have two excellent methods, depending on how much time you have before you plan to drown your dessert in it (and I fully support that plan).
- The Microwave Burst: This is my go-to for small amounts, say, enough to top a single bowl of ice cream. Take the jar (make sure it’s microwave-safe!) and heat it in 10-second intervals. Stir gently between each burst. It heats up fast, so check it often so you don’t overheat the edges.
- The Gentle Stovetop Warm-Up: If you need a larger batch softened, pour the amount you need into a little saucepan over very low heat. Just stir it constantly for a minute or two until it melts back into that gorgeous, rich sweet sauce consistency you remember. Remember, low and slow is the key here to prevent any scorching at the bottom of the pan.
Never try to reheat the whole jar sitting in a hot water bath, though—that can sometimes affect the texture unevenly. A quick microwave zap or a minute on the stovetop brings your delicious caramel right back to life!
Frequently Asked Questions About Making Caramel
Even with the most straightforward recipes, questions about those tricky moments pop up! Making caramel from scratch can feel intimidating, but I promise it’s built on simple chemistry. Once you understand what to look for, you’ll be whipping up this salted caramel recipe confidently every time you need a fix. Here are the common snags people run into when making this sauce.
What happens if my caramel seizes when I add the cream?
Oh, that moment when you pour in the cream and the whole thing turns into a hard, lumpy sugar mess? That’s called seizing, and it happens because the temperature dropped too fast. Don’t panic! This is fixable. Just put the pot back on the *very* low heat setting. Gently whisk the mixture—don’t beat it hard—and watch as the sugar starts to slowly melt back into the cream and butter. It just needs a little coaxing to remember it wants to be a smooth sauce again. It’s the ultimate test of patience, but it always works out!
Can I use brown sugar instead of granulated sugar for this caramel sauce recipe?
You absolutely can, and this is where you start getting into those richer, deeper flavors that are almost like toffee! If you swap the granulated sugar for all brown sugar, you’ll get a darker color right from the start and a much more distinct molasses flavor. It’s delicious, but remember that brown sugar has more moisture, so you might need to cook it just a touch longer before adding the butter to ensure that deep amber color develops properly. It makes a fantastic variation for those who love that deep, smoky sweetness in their homemade caramel!
How long does this homemade caramel last?
Because this recipe uses heavy cream and butter, we treat it like a dairy product. For the very best texture and to ensure no changes happen to the flavor, I always recommend storing the finished caramel in an airtight container in the refrigerator. Honestly, the flavor stays vibrant for a good three weeks! If you want to keep it longer, you can certainly freeze it for up to three months, though you’ll want to use an ice cube tray for easy thawing of smaller portions. Just remember that it will need a good reheat to return to its perfect, pourable consistency.
Estimated Nutritional Data for Salted Caramel
I always think it’s helpful to have a general idea of what’s in the goodies we make, even though I’m certainly not counting calories when I drizzle this rich sauce over a warm brownie! The nutrition facts below are estimates based on the ingredients list provided above. Remember, these are just guides—your exact values will vary a bit based on the brands of butter and cream you use, so take them with a grain of salt (and maybe a little extra caramel drizzle on top!).
- Serving Size: 2 tablespoons
- Calories: 180
- Sugar: 25g
- Sodium: 120mg
- Fat: 9g
- Saturated Fat: 5g
- Unsaturated Fat: 4g
- Trans Fat: 0g
- Carbohydrates: 26g
- Fiber: 0g
- Protein: 0g
- Cholesterol: 30mg
See? Even being decadent feels a little better when you know exactly what is in your homemade dessert. Because we are making this from scratch, we have full control over the quality, which is always the most important thing to me.
Share Your Homemade Caramel Creations
I truly hope sharing this Easy Homemade Salted Caramel Sauce recipe has inspired you to create something wonderful in your own kitchen! For me, these elegant, simple recipes are the most rewarding because they encourage creativity. Now that you have this incredible homemade topping, I’d absolutely love to hear about how you’re using it!
Did you use it to top ice cream? Did you stir it into a strong cup of coffee? Or perhaps you finally got brave enough to try making soft chewy caramels? Please, don’t keep all that buttery goodness to yourself!
Your feedback matters so much to me, Catherine, as it helps me ensure my recipes are truly accessible and delicious for home cooks like you. Taking a moment to leave a rating and some comments lets me know where this recipe lands on your personal favorites list. Your thoughts help other readers decide if they should take the dive into making their own rich sweet sauce.
And when you share those beautiful drizzled jars or sauced desserts on social media, please tag me! I live for seeing your versions using this recipe—it’s the best part of telling these culinary stories together. If you have any burning final questions that weren’t covered in the FAQs, feel free to reach out via my contact page. Happy drizzling, my friends!
PrintEasy Homemade Salted Caramel Sauce

Make rich, buttery salted caramel sauce from scratch in under 20 minutes. This versatile topping is perfect for drizzling over ice cream, apples, or coffee.
- Prep Time: 5 min
- Cook Time: 10 min
- Total Time: 15 min
- Yield: About 1 1/4 cups 1x
- Category: Dessert Topping
- Method: Stovetop Cooking
- Cuisine: American
- Diet: Vegetarian
Ingredients
- 1 cup granulated sugar
- 6 tablespoons unsalted butter, cut into pieces
- 1/2 cup heavy cream, warmed slightly
- 1 teaspoon vanilla extract
- 1/2 teaspoon sea salt, or to taste
Instructions
- Place the sugar in a medium, heavy-bottomed saucepan over medium heat. Do not stir initially.
- Allow the sugar to melt completely around the edges. Once melting begins, gently stir the sugar with a heatproof spatula until all the sugar dissolves and turns a deep amber color. Watch closely to prevent burning.
- Remove the pan from the heat. Carefully add the butter pieces one at a time, whisking constantly until the butter is fully melted and incorporated. The mixture will bubble vigorously.
- Slowly pour in the warm heavy cream while whisking continuously. The mixture will bubble up again. Continue whisking until the sauce is smooth.
- Return the pan to low heat and cook for 1 minute, stirring constantly. Remove from heat.
- Stir in the vanilla extract and sea salt.
- Pour the caramel sauce into a heatproof jar or container. Let it cool slightly before using. The sauce will thicken as it cools.
Notes
- For the best results, warm your heavy cream slightly before adding it to the melted sugar and butter. This prevents the caramel from seizing too hard.
- If the caramel hardens too much upon cooling, reheat it gently on the stovetop or in the microwave in short bursts until it reaches your desired consistency.
- Use Fleur de Sel for a superior salted caramel flavor profile.
Nutrition
- Serving Size: 2 tablespoons
- Calories: 180
- Sugar: 25g
- Sodium: 120mg
- Fat: 9g
- Saturated Fat: 5g
- Unsaturated Fat: 4g
- Trans Fat: 0g
- Carbohydrates: 26g
- Fiber: 0g
- Protein: 0g
- Cholesterol: 30mg