
Sometimes, the most beautiful food is the simplest to create. I learned long ago, even back when I was navigating corporate PR, that the greatest sense of accomplishment comes from serving something truly impressive without spending hours stressing in the kitchen. That’s why I absolutely adore this classic Oreo Pie. Forget turning on the oven! This recipe captures that irresistible cookies-and-cream flavor in a dreamy, no-bake format. It’s pure, unadulterated joy in a pie dish, delivering elegance with absolutely zero fuss. It’s proof that home cooking can be both elegant and incredibly easy.
- Why This No Bake Oreo Pie is Your New Family Favorite Pie
- Gathering Ingredients for Your Ultimate Oreo Pie
- Crafting the Perfect Oreo Crust Pie Base
- Building the Creamy Oreo Dessert Layers
- Assembling and Chilling Your No Bake Oreo Pie
- Tips for the Best Oreo Pie Presentation and Serving
- Storage and Making Ahead for Your Holiday Oreo Pie
- Frequently Asked Questions About This Oreo Pie Recipe
- Estimated Nutritional Snapshot for Your Oreo Pie Slice
Why This No Bake Oreo Pie is Your New Family Favorite Pie
I developed this recipe after years of trying to find the perfect balance between decadence and speed, and let me tell you, this No Bake Oreo Pie delivers! We have tested this countless times to ensure it sets beautifully and tastes amazing every single time you make it. It checks every box for a truly reliable, impressive dessert. You can find more of my favorite simple sweets in my desserts collection!
- It achieves that deeply satisfying, creamy Oreo dessert texture without any fussy baking.
- It’s remarkably fast to assemble—you’ll have the filling ready in under 20 minutes.
- This Easy Oreo Pie Recipe uses simple, accessible ingredients, meaning less time shopping and more time relaxing!
Effortless Entertaining with an Oreo Pie
Because there is zero oven time involved, this pie is a dream for hosts. I absolutely love knowing I can prepare something this beautiful and rich ahead of time, freeing me up to focus on the main course or enjoy a glass of wine with my guests. If you are looking for a truly Low Effort Pie Recipe that still earns rave reviews, this is the one. It’s perfect for summer barbecues or adding a simple, elegant finish to a big holiday meal.
Gathering Ingredients for Your Ultimate Oreo Pie
The beauty of an Easy Oreo Pie Recipe like this is that you don’t need any specialty items. Seriously, check your pantry! We are relying on simple pantry staples combined with the iconic flavor of those chocolate sandwich cookies. This means less stress and more pie, which is always my goal in the kitchen. Having the ingredients prepped just slightly before you start mixing makes the assembly flow like a dream, so have your Oreos near the counter before you begin.
- 1 1/2 cups crushed Oreo cookies (about 30 cookies)
- 6 tablespoons unsalted butter, melted
- 1 (8 ounce) package cream cheese, softened
- 1 cup powdered sugar
- 1 teaspoon vanilla extract
- 1 (12 ounce) container frozen whipped topping (like Cool Whip), thawed
- 1 (3.4 ounce) package instant chocolate pudding mix
- 1 1/2 cups cold milk
- 1 cup crushed Oreo cookies, for topping
Ingredient Notes and Substitutions for Oreo Pie
A few quick notes here—these little things make the texture sing! First, that cream cheese absolutely has to be soft. Tap it with your finger; if it leaves an easy indent, it’s ready. If it’s chilly or even slightly stiff, your filling will be lumpy, and we simply cannot have that in a creamy dessert!
Second, for the whipped topping, you need it thawed so it’s easily foldable, but it should still be cold when you fold it into the pudding layer. That slight chill helps hold the structure of our mousse.
And please, if you can, stick to the real, genuine Oreo cookies for the crust and topping. Their specific texture and chocolate intensity are what give this the true Cookies and Cream Pie flavor we all crave. Substitutions are fine for other things, but the cookie backbone is essential here!
Crafting the Perfect Oreo Crust Pie Base
Alright, let’s start where all great pies begin: the foundation! We need a sturdy, flavorful base for our creamy filling. This step is super quick, especially since we are skipping the oven!
You start by taking those 1 1/2 cups of finely crushed Oreos—make sure you include the creamy filling in your crumbs; that little bit of fat helps hold everything together!—and mix them thoroughly with the 6 tablespoons of melted butter. You want the mixture to look like damp sand, just clinging together when you squeeze a small amount in your fist. Dump that buttery crumb mixture right into your 9-inch pie dish.
Now, this is important for a great slice: while you can certainly press it in with the bottom of a measuring cup or a flat glass, I always use my fingers to really push that Oreo Crust Pie base up the sides. Pack it down firmly! The tighter you pack it now, the less likely it is to crumble when you serve this rich dessert later.

Once it’s packed tight and level, pop that dish right into the freezer for at least 15 to 20 minutes while you whip up the filling. Freezing sets the butter, giving you a structure that won’t betray you later.
Now, here’s a quick little trick I picked up—and you can find this in the notes! If you are worried about humidity or just plan on transporting this, or maybe you just want that *extra* reassurance that your crust is rock solid, you can bake it. You just bake that buttery crumb mixture at 350°F (175°C) for about 8 minutes. It just toasts up the crumbs faintly. If you do this, make absolutely sure you let it cool completely before moving on to layering. But honestly, for a quick fix, the freezer works wonders!
Building the Creamy Oreo Dessert Layers
Now that our Oreo Crust Pie is chilling happily, it’s time for the best part—creating that signature, dreamy filling. This is where we build the luxurious texture that makes this Oreo Pie so famous. We actually create two distinct layers here, both built around lightness and that wonderful cookies-and-cream profile. Remember, the goal is a decadent, Creamy Oreo Dessert that feels fancy but is secretly so simple!
Achieving the Silky Cream Cheese Layer
We start by whipping the softened cream cheese until it’s completely smooth and free of any lumps. I mean it—no lumps allowed! Once it’s buttery soft, gently beat in the powdered sugar and vanilla. This forms the bright, slightly tangy base layer. When we add the first half of the thawed whipped topping, you must be gentle here. Use a spatula and fold softly. This keeps all those little air bubbles intact, which is key to that lighter-than-air feel in the final slice.
Preparing the Chocolate Oreo Pudding Pie Filling
Next up is our deep, rich chocolate layer that pushes this toward being a true Oreo Mousse Pie. In a separate bowl, you need to whisk together the instant chocolate pudding mix and the cold milk. Don’t stop whisking too soon! You should go for a full two minutes, maybe even a little longer, until you can visibly see it start to firm up. Let it sit for five minutes.” This lets the setting process really kick off.
Once it’s slightly thickened but still somewhat spoonable, gently fold in the remaining half of the whipped topping. You fold until just combined—you don’t want to deflate all that lovely air we just trapped in there! Then we layer this over the cream cheese base. You can find inspiration for more effortless no-bake treats on the blog, but this two-layer effect is truly something special.
Assembling and Chilling Your No Bake Oreo Pie
Okay, we have our sturdy, cold crust, and we have our two glorious, fluffy layers ready to reunite! This final assembly is almost too easy, which is why I love this No Bake preparation so much. It feels like cheating!
Start by carefully spooning that lighter cream cheese mixture onto your chilled crust. Spread it gently and evenly right to the edges. Then, take your beautiful chocolate mousse layer and spoon it right on top of the white layer. Don’t try to spread it too aggressively, or you might drag the white layer up into the chocolate. Just dollop it around and then use your offset spatula or the back of a spoon to smooth the top surface gently.

Now comes the hardest part of the whole process: waiting! This pie MUST chill. I know you want to cut into it immediately, but trust me, if you don’t give the filling time to really set up, it will be a soupy mess when you try to slice it. We need a minimum of four hours in the refrigerator. This allows the pudding and cream cheese base to solidify around the air we whipped into the topping, creating that signature, sturdy slice.
If you need to make this for a dinner party or a Holiday Oreo Pie gathering, chilling overnight is even better! The structure will be absolutely perfect, guaranteeing those clean, beautiful slices you see in photos—like the ones you can achieve with perfectly set chocolate treats, similar to this lovely chocolate cupcake recipe I also adore.
Cover the pie loosely with plastic wrap once it’s firm enough that the wrap won’t stick to the top filling. Honestly, patience equals perfection here. Four hours is the minimum for structure, but think of that chilling time as a necessary rest period before this pie shines at the dessert table!
Tips for the Best Oreo Pie Presentation and Serving
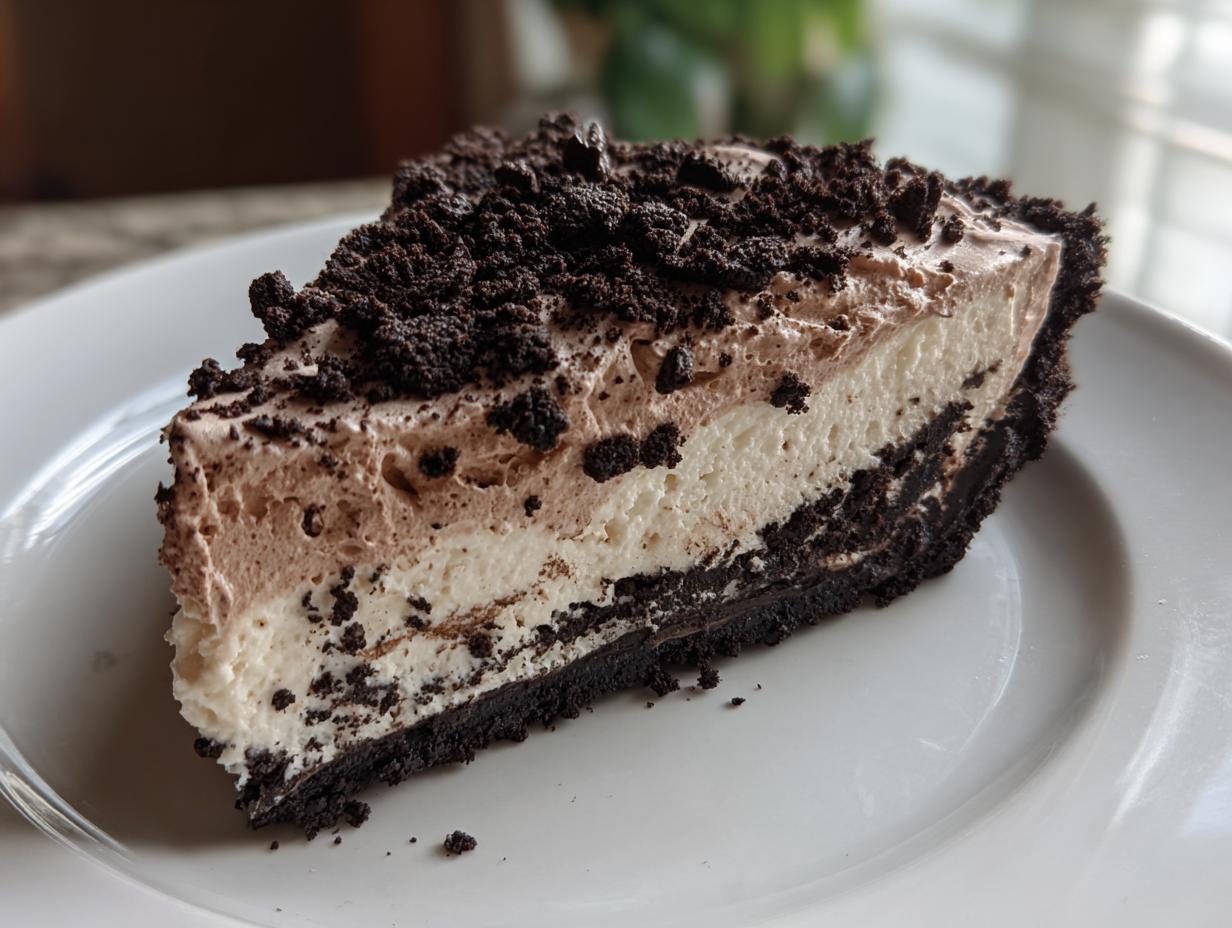
Once your beautiful No Bake Oreo Pie has set up perfectly—and I trust you let it chill those crucial four hours!—it’s time for the final flourish. A pie this delicious deserves a stunning presentation, but again, we are keeping it simple because that’s my philosophy here at Unfold Recipes.
The official instructions mention sprinkling the remaining cup of crushed Oreos over the top, and I never skip this step! It adds that necessary textural contrast right before you serve it. Think about it: smooth chocolate mousse, creamy center, sharp crunch on top. It’s perfect. I usually chop mine very coarsely, just a rough chop so you get varied sizes of crunchy bits across the surface. It makes the finished product look wonderfully indulgent.

I remember bringing this pie to a friend’s very casual backyard barbeque last summer. I hadn’t even put it on a nice stand yet; it was still just sitting on the counter near the salads, waiting for dessert time. Everyone gravitated toward it! My father-in-law, who usually saves room for pie exclusively, went back for a second slice before the main meal was even over! It truly transforms from a Simple Oreo Dessert into the star of the show just by existing.
When serving, use a sharp knife—warmed slightly under hot water works best—for the cleanest possible slice, especially through that frozen crust. Since this is so rich, a slightly narrower, wedge-shaped slice is usually perfect. The best part about finding a recipe you trust, like this incredible one, is that serving feels effortless. You can check out my latest thoughts and inspirations on hosting and everyday cooking over on the Unfold Recipes blog. Enjoy every bite!
Storage and Making Ahead for Your Holiday Oreo Pie
Since this Oreo Pie is such a fantastic addition to any busy holiday table—think Thanksgiving, Christmas, or even just a simple Friday night—knowing how to store it is just as important as knowing how to mix it! Because we didn’t bake anything, the freshness really comes from how well you protect it from the refrigerator air.
The number one rule for any No Bake Desserts item is proper covering. Once your pie is fully set after those mandatory chilling hours, you need to cover it. I recommend draping a layer of plastic wrap just over the top, but don’t let it touch the surface, or you risk smearing that gorgeous final sprinkle of Oreos. If you don’t want the wrap to stick, you can use toothpicks placed around the edges to hold the plastic up a bit.

This pie absolutely must stay refrigerated. It is not a shelf-stable dessert, especially with all that lovely cream cheese and whipped topping in there. Keep it chilled right up until about 15 minutes before you plan to serve it. Serving it slightly cool, but not ice-cold straight from the deepest part of the fridge, really lets the creamy texture shine through.
Now, about making it ahead: Because this recipe relies on whipped toppings and pudding setting, it is fantastic for preparing in advance for your next celebration! I find that the texture is actually best on Day Two. You can comfortably make this pie up to two days before you plan on serving it. This makes it an ideal Holiday Oreo Pie component because you can knock it out the day before your gathering, freeing up precious oven space!
If you are planning way ahead—say, for a big event next week—I’d suggest freezing it, though it changes the texture slightly. If you freeze it, make sure you use good foil and plastic wrap. When you thaw it in the fridge overnight, the texture will be slightly softer, more like a dense ice cream pie, but still delicious. For the absolute best experience, aim to serve it within 48 hours, which is why it’s perfect for prepping for a big dinner like Thanksgiving, much like I do with my favourite pumpkin dump cake.
Frequently Asked Questions About This Oreo Pie Recipe
I always get so many questions after posting a recipe that seems almost too easy! People want to make sure they get that perfect, bakery-quality texture without having to actually bake. Here are the most common things I hear regarding this gorgeous dessert.
Can I use a different cookie besides Oreos for this No Bake Oreo Pie?
That is a fair question! While I strongly insist that you use real Oreo cookies—or at least a very similar chocolate sandwich cookie—for the best flavor and texture in this No Bake Oreo Pie, you absolutely can substitute them. If you don’t have Oreos on hand, you could use chocolate wafer cookies or even graham crackers. However, and I must caution you here, the flavor profile changes dramatically! The specific flavor of that dark chocolate cookie is crucial to creating that classic taste. If you use chocolate wafers, you might want to add just a tiny pinch of cocoa powder to your butter mixture to deepen the chocolate note.
How does this compare to a store-bought Cookies and Cream Pie?
Oh, this is my absolute favorite comparison! When I perfected this recipe, I was aiming for something that had the incredible richness of those beautifully layered pies you see at dedicated pie shops or bakeries—you know the kind that look too perfect to be true? The difference here is simply freshness. Store-bought versions often rely on stabilizers to keep them perfect for weeks. Because we are using fresh cream cheese and real whipped topping, this Cookies and Cream Pie tastes vibrantly fresh. The texture is much softer, more like a true mousse, rather than the slightly drier, more rigid filling you find pre-packaged. It’s simply superior in flavor and texture!
Can I make this Oreo Pudding Pie firmer without baking the crust?
Yes, you definitely can fine-tune the firmness! So many people prefer a really, really firm slice, especially if they are cutting it in advance. Since we aren’t baking the crust, the structure relies entirely on the filling setting up in the cold. If you want it firmer than the 4-hour minimum chill time suggests, you have two excellent options for this Oreo Pudding Pie.
The easiest way is just to extend the chilling time. If you can manage six hours, or even better, chill it overnight, you’ll find the layers are exceptionally firm and slice beautifully. If you are short on time, you can slightly adjust the liquids in the pudding layer. For example, instead of 1 1/2 cups of cold milk for the pudding, you could try 1 1/4 cups. This gives the instant pudding a denser set once it combines with the whipped topping, making the overall pie decidedly firmer!
Estimated Nutritional Snapshot for Your Oreo Pie Slice
As we conclude this indulgent journey, I always feel it’s important to offer a little insight into what we’ve created. Food is meant to be savored, yes, but knowing what’s in a slice of this wonderful, creamy dessert certainly doesn’t hurt! Please keep in mind that since this is a homemade creation using specific branded items (like the cookies and the whipped topping), these numbers are educated estimates based on the ingredients listed above.
This snap-shot should give you a general idea of the nutrition breakdown for one generous serving of our Ultimate Oreo Pie:
- Serving Size: 1 slice
- Calories: 450
- Sugar: 35g
- Sodium: 320mg
- Fat: 28g
- Saturated Fat: 15g
- Unsaturated Fat: 13g
- Trans Fat: 0.5g
- Carbohydrates: 48g
- Fiber: 1g
- Protein: 5g
- Cholesterol: 30mg
It is certainly a treat, packed with rich flavor thanks to the chocolate, cream cheese, and butter in that gorgeous crust! Enjoy it, because as a satisfying No Bake Dessert, it’s worth every single ounce of that wonderful flavor. When something tastes this good, it feels like a special occasion anyway, so savor that slice!
PrintThe Ultimate No-Bake Oreo Pie: Creamy Dessert Perfection

Create the best Oreo Pie without turning on your oven. This easy, no-bake recipe delivers a rich, creamy mousse texture that rivals any bakery version, perfect for simple entertaining or holiday gatherings.
- Prep Time: 20 min
- Cook Time: 0 min
- Total Time: 4 hr 20 min
- Yield: 8 servings 1x
- Category: Dessert
- Method: No Bake
- Cuisine: American
- Diet: Vegetarian
Ingredients
- 1 1/2 cups crushed Oreo cookies (about 30 cookies)
- 6 tablespoons unsalted butter, melted
- 1 (8 ounce) package cream cheese, softened
- 1 cup powdered sugar
- 1 teaspoon vanilla extract
- 1 (12 ounce) container frozen whipped topping (like Cool Whip), thawed
- 1 (3.4 ounce) package instant chocolate pudding mix
- 1 1/2 cups cold milk
- 1 cup crushed Oreo cookies, for topping
Instructions
- Prepare the crust: Combine the 1 1/2 cups of crushed Oreos with the melted butter. Press the mixture firmly into the bottom and up the sides of a 9-inch pie dish. Place the crust in the freezer while you prepare the filling.
- Make the cream cheese layer: In a large bowl, beat the softened cream cheese until smooth. Gradually beat in the powdered sugar and vanilla extract until fully combined and creamy. Gently fold in half of the thawed whipped topping until just blended. Spread this mixture evenly over the chilled Oreo crust.
- Prepare the pudding layer: In a separate bowl, whisk together the instant chocolate pudding mix and cold milk for about two minutes, until the mixture begins to thicken. Let it stand for five minutes.
- Assemble the pie: Gently fold the remaining half of the whipped topping into the thickened chocolate pudding mixture. Spoon this chocolate mousse layer over the cream cheese layer in the pie crust.
- Chill: Cover the pie loosely with plastic wrap and refrigerate for at least 4 hours, or until the filling is firm.
- Serve: Before serving, sprinkle the remaining 1 cup of crushed Oreos over the top of the pie. Slice and serve cold.
Notes
- For an even richer, more decadent filling, substitute the instant chocolate pudding with a homemade chocolate custard base.
- If you prefer a firmer crust, bake the buttered crumb mixture at 350°F (175°C) for 8 minutes, then cool completely before filling.
- This pie tastes best when served within 2 days of making.
Nutrition
- Serving Size: 1 slice
- Calories: 450
- Sugar: 35g
- Sodium: 320mg
- Fat: 28g
- Saturated Fat: 15g
- Unsaturated Fat: 13g
- Trans Fat: 0.5g
- Carbohydrates: 48g
- Fiber: 1g
- Protein: 5g
- Cholesterol: 30mg