

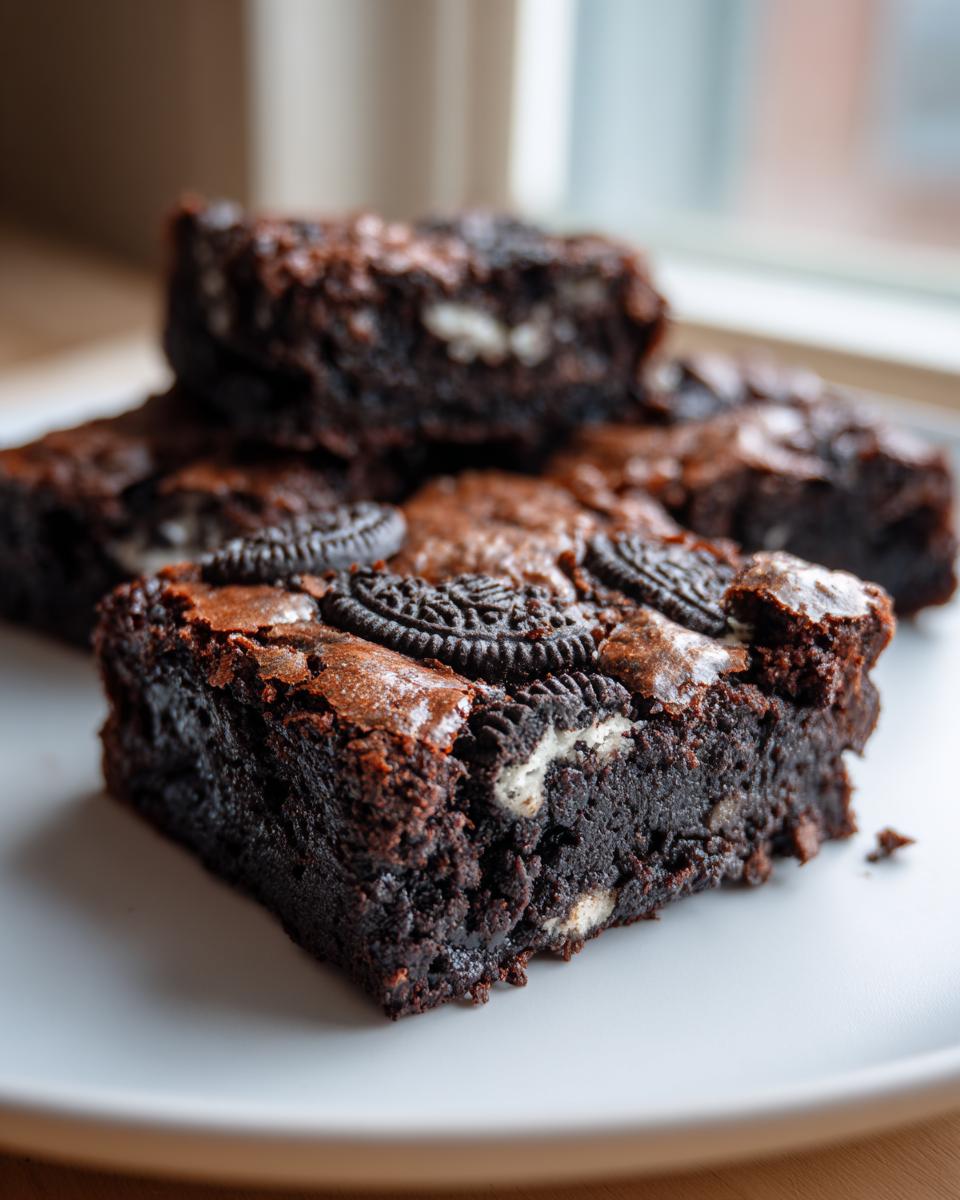
If you are hunting for the kind of chocolate treat that stops conversation dead in its tracks—the one where the edges are just chewy enough, the center melts in your mouth, and the top looks like polished stained glass—you’ve probably looked up recipes for oreo brownies. Believe me, I get it. Finding that perfect balance between fudgy and chewy can feel like luck, but after diving deep into pastry techniques from my culinary training, I’ve cracked the code! You can always check out more of my early recipe adventures over on the main blog!
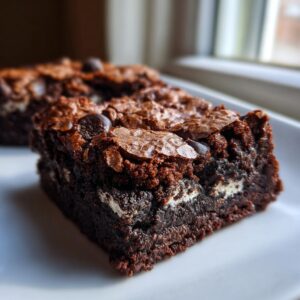
I’m Catherine, and trust me, this isn’t just another recipe floating around the internet. This is my meticulously tested, from-scratch formula for what I call the Ultimate Fudgy Oreo Brownies with a Shiny, Crackly Top. We’re aiming for that dense, irresistible texture that only comes from quality ingredients and careful technique. Forget dry, cakey squares; we’re making magic here, the kind of reliable dessert that always impresses.
- Why This Recipe for Oreo Brownies Delivers Fudgy Perfection
- Gathering Ingredients for Your Homemade Oreo Brownies
- Step-by-Step Instructions for the Best Oreo Brownies
- Tips for Success When Making Oreo Brownies From Scratch
- Creative Variations for Your Oreo Brownies
- Serving Suggestions for Decadent Chocolate Treats
- Storage and Reheating Instructions for Fudgy Oreo Brownies
- Frequently Asked Questions About Making Oreo Brownies
- Share Your Ultimate Oreo Brownies Experience
Why This Recipe for Oreo Brownies Delivers Fudgy Perfection
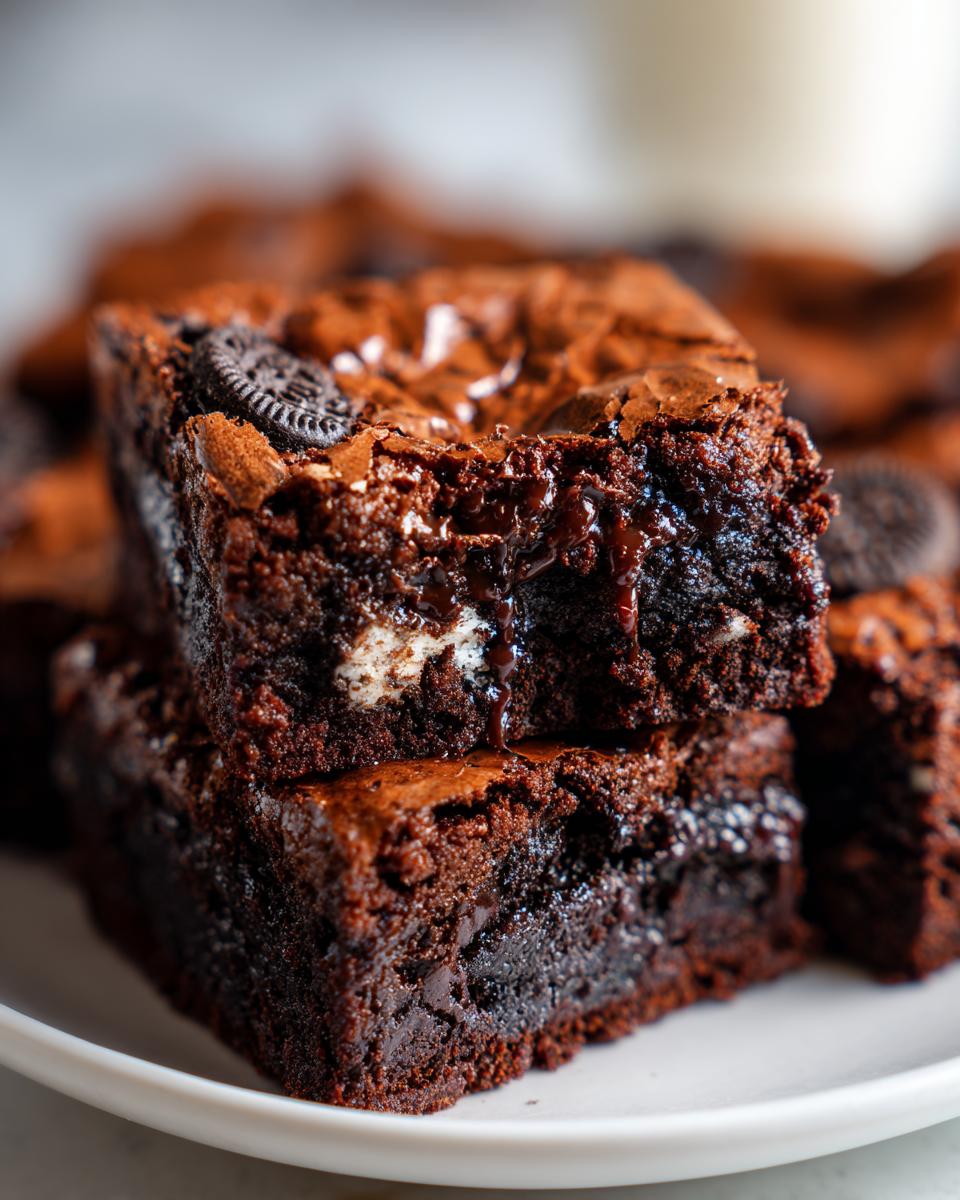
If you are tired of brownies that lean too cakey, you are in the right place. This isn’t a box mix hack; this is a serious, Fudgy Brownie Recipe developed to give you that signature dense interior every time. When you follow these exact steps, you are guaranteed a glorious, Chewy Chocolate Dessert experience.
- The ratio of fat (butter) to flour is intentionally high, which guarantees that rich, melt-in-your-mouth sensation.
- We use both granulated and brown sugar—the brown sugar adds moisture and chewiness that plain white sugar just can’t replicate.
- You get those beautiful pockets of crunchy Oreo nestled right into the dense chocolate base.
We combine those wonderful textures with what everyone truly wants in a premium bake. Check out how we manage that crust over on my dedicated page for fudgy brownies with a shiny top!
Achieving the Coveted Shiny, Crackly Top on Your Oreo Brownies
This shiny crust is all about the sugar dissolving completely while mixing with the melted butter and eggs. We whisk that mixture vigorously before anything else goes in—it creates a thin, sugary film on top during baking. The absolute key? Once the flour is in, you stop fussing with it! Overmixing whips air in and develops gluten, which ruins the crust’s surface tension. Treat that batter gently at the end!
Gathering Ingredients for Your Homemade Oreo Brownies
Now that we’ve talked texture, let’s talk about what you need to gather. Making these oreo brownies from scratch means using ingredients you probably already have, but the quality absolutely matters here, especially with something as chocolate-forward as this. As someone who trained formally, I can tell you that using a top-tier cocoa powder is non-negotiable if you want that deep, satisfying flavor profile reminiscent of the best homemade brownies.
This recipe is designed to be straightforward, focusing on maximizing chocolate impact. Remember, room temperature eggs always incorporate better into the wet mixture, giving you a smoother starting point for that beautiful shiny top. Here is what you’ll need:
- 1 cup unsalted butter
- 1 cup granulated sugar
- 1 cup packed light brown sugar
- 4 large eggs
- 1 tablespoon vanilla extract
- 3/4 cup unsweetened cocoa powder
- 1 teaspoon salt
- 1/2 teaspoon baking powder
- 3/4 cup all-purpose flour
- 1 cup chopped Oreo cookies (about 8 cookies)
- 1/2 cup whole Oreo cookies for topping
If you’re looking for other chocolate adventures, you might enjoy my recipe for chocolate cupcakes!
Ingredient Notes and Substitutions for Perfect Oreo Brownies
Let’s talk about the stars of the show besides the Oreos, of course! You absolutely must use high-quality cocoa powder—Dutch process works wonderfully if you have it, but any good unsweetened product will do the trick for a rich flavor. For the Oreos, chopping them roughly lets those crunchy pockets shine through instead of dissolving entirely. While I haven’t tested substitutions for the eggs here, make sure yours are at room temperature to properly emulsify with the sugars. That emulsification is part of the secret sauce for these from scratch brownies!
Step-by-Step Instructions for the Best Oreo Brownies
Alright, let’s get baking! The steps for these amazing oreo brownies are wonderfully simple, but I want you to pay close attention to the early steps, as that’s where we lock in the shiny top. We’re using melted butter here, which is characteristic of a great fudgy brownie recipe, but the way we treat the sugar and eggs afterward is what separates the good from the truly great.
First things first: get that oven preheated to 350°F (175°C). Grab your 9×9 inch pan and line it with parchment paper, making sure those edges hang over the sides—this is your safety net for easy removal later! Give the paper a quick spray or light grease if you want extra insurance.
We start by melting that cup of butter gently on the stove. Once it’s liquid, take it off the heat immediately. Now, whisk in both the granulated and the packed light brown sugar until everything looks smooth. When you look at the ingredients list, you’ll see this recipe calls for a lot of sugar paired with the melted butter—that’s the foundation of that incredible crust we are chasing.
Then comes the eggs. Add them in one at a time, beating well after each addition. Follow that with your vanilla. This is getting rich and wonderful already! Remember, this early whisking action is crucial for that top layer.
Mixing Technique for Fudgy Oreo Brownies Batter
In a separate bowl (we don’t need extra bowls, but for the dry stuff, it helps things combine smoothly), whisk together your cocoa powder, salt, and baking powder. Now, add this dry mixture right into your wet ingredients. Mix only until you see no more streaks of white flour. I mean it—stop stirring! Overmixing develops gluten far too quickly in a recipe like this, and that’s the enemy of fudginess and the enemy of that beautiful crackly top.
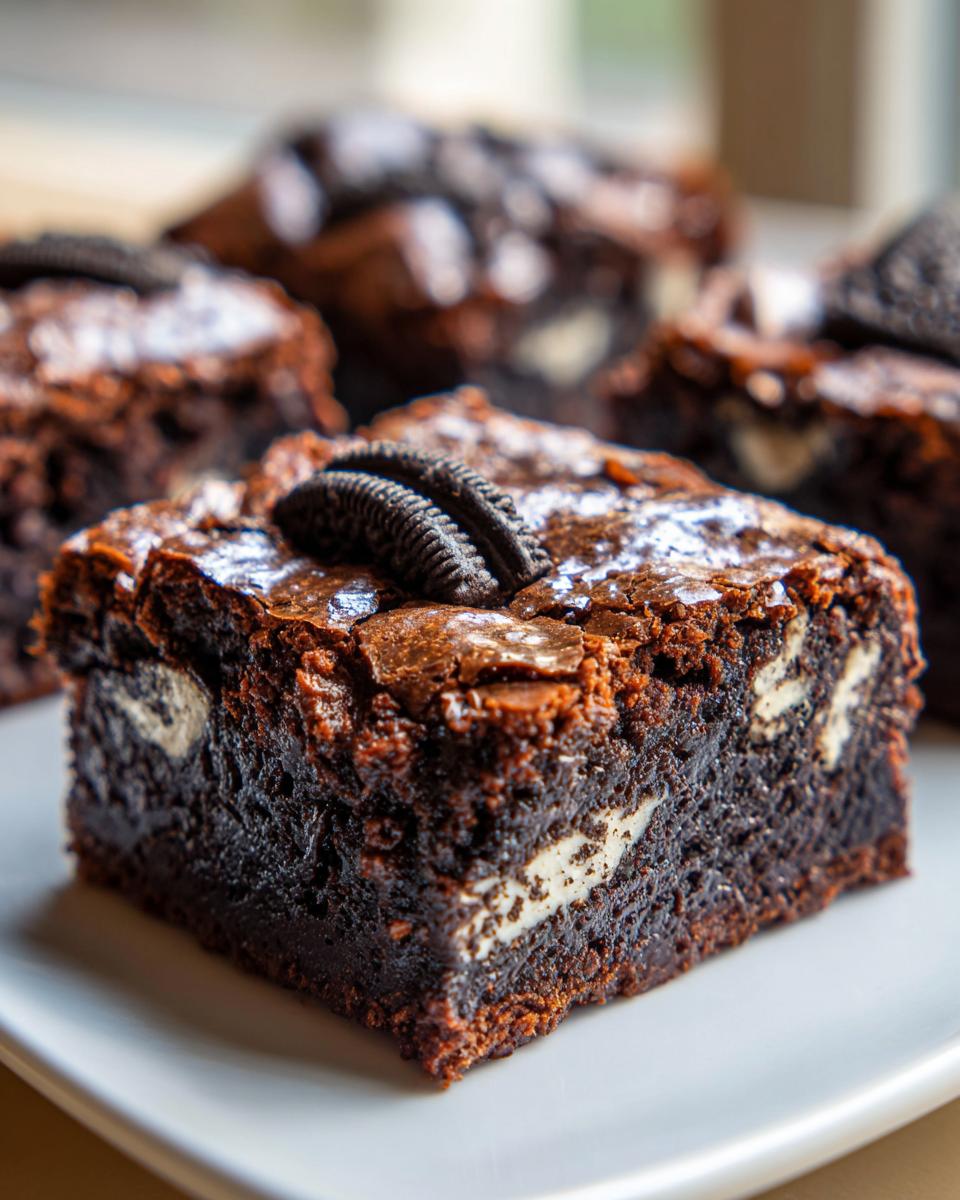
Once the flour is barely mixed in, gently fold in your cup of chopped Oreos. Don’t mash them; just coax them into the batter. Spread this everything-delicious batter carefully into your prepared pan. Top it all off by scattering those remaining whole Oreos over the surface. They look so pretty just sitting there, waiting to sink down just a little bit during the bake.
Baking and Cooling: Secrets to Chewy Chocolate Dessert Bars
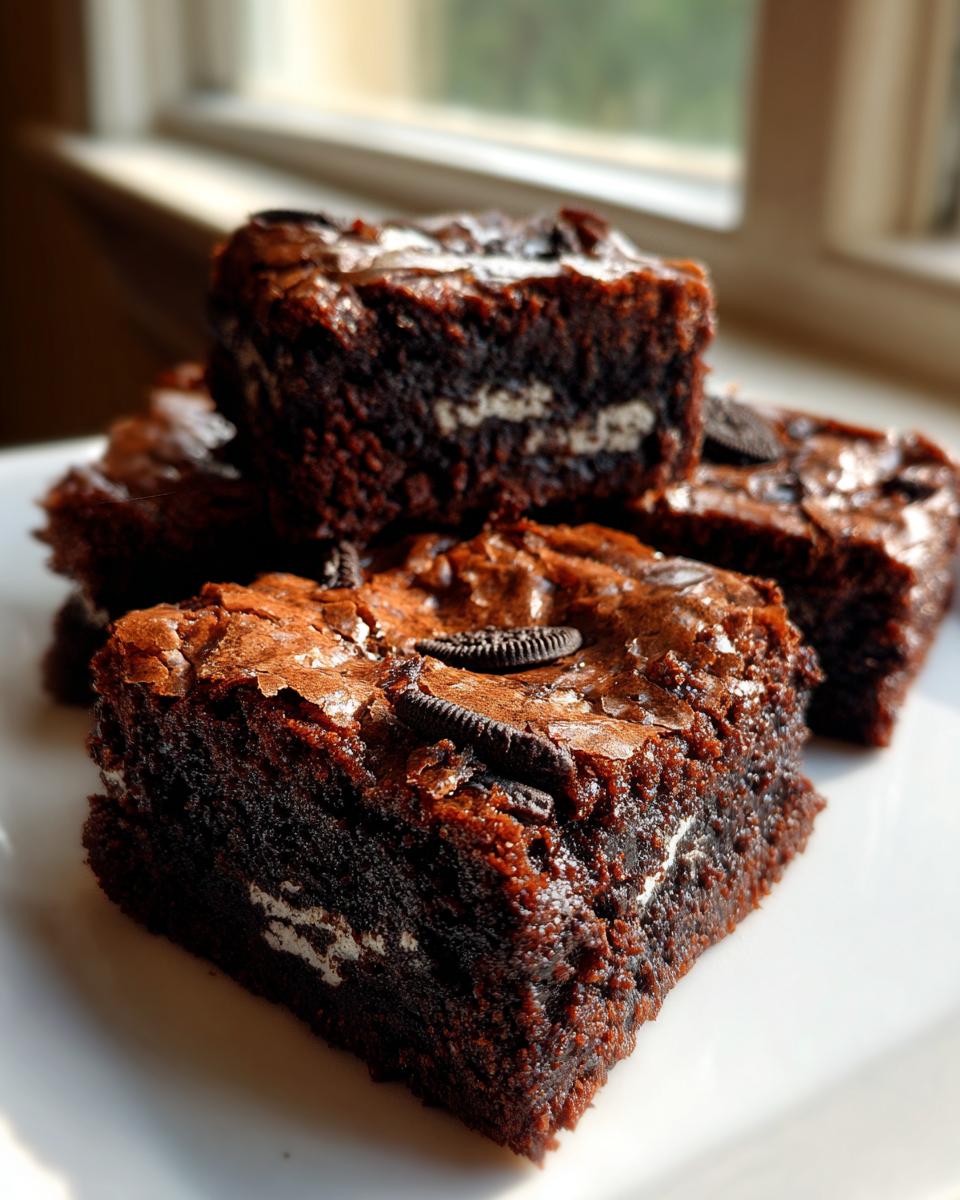
Pop the pan into that waiting oven for 30 to 35 minutes. Here’s my tip for testing doneness, which is essential for any Dessert Bars Recipe meant to be chewy: don’t look for a clean stick. Stick a toothpick near the center; you want it to come out sporting moist, sticky crumbs stuck to it, not wet sludge. If it comes out totally clean, you’ve gone too far, my friend!
The final, non-negotiable secret to achieving that signature fudgy, chewy texture we love in these homemade brownies? You must let them cool completely. Seriously, give them time! When they are cool, use the parchment paper overhang to lift the whole slab out onto a cutting board. For the very best texture, I always wrap mine tight and chill them in the fridge for at least an hour before slicing. This firms up the fat and locks in that dense, decadent melt.
If you want to see the next step in layering chocolate goodness, check out my recipe for chocolate chip cookie brownie bars!
Tips for Success When Making Oreo Brownies From Scratch
Even with a tried-and-true recipe like this one, there are always a few little hurdles we home cooks run into. In my experience, the number one issue people face with rich desserts is fussing with them too much! Remember what I said about the shiny top? Do not overmix the batter once that small amount of flour hits the scene. That turbulence is what develops gluten, and gluten is what creates cakey centers instead of our desired fudgy texture. It’s a fine line, I know!
Also, resisting the urge to cut into these while warm is crucial for achieving the absolute best chew. If you cut them too soon, the center will ooze everywhere, and you won’t get those clean squares you see in photos. Trust me on the cooling and chilling step—it transforms them from good brownies into truly extraordinary salted caramel brownies or, in this case, the best oreo brownies.
Creative Variations for Your Oreo Brownies
While the classic chocolate and vanilla cream of these Cookies and Cream Brownies is perfect just the way it is, sometimes you just need a little twist, right? That’s the fun of baking—once you master the base, you can start playing dress-up! I love encouraging people to take a tried-and-true recipe and make it their own, just like my dad taught me to add rosemary to everything!
If you’re feeling ambitious or just have a favorite kind of Oreo lying around, here are a couple of fun ways to switch things up:
- Mint Chocolate Dream: Swap out the standard Oreos for Mint Oreos! The slightly cool, sharp mint cuts through the richness of the fudge beautifully. This tastes incredible when paired with a tiny bit of peppermint extract, maybe half a teaspoon, mixed in with the vanilla during the wet ingredient stage.
- Red Velvet Style: This takes a little coordination, but it’s stunning for holiday parties! We use the recipe structure above, but before mixing in the flour, I add about 1 teaspoon of red food coloring and a tablespoon of white vinegar to the egg mixture for that signature tang you get in Red Velvet cake. It creates beautiful, deep red and black swirls.
If you want to see how I get those stunning visual effects on other baked goods, you should check out my recipe for spider web brownies! Or, if you are looking for something no-bake next time, these Halloween Oreo balls are ridiculously easy.
Serving Suggestions for Decadent Chocolate Treats
We’ve made these magnificent oreo brownies, and now it’s time to enjoy them! While they are absolutely phenomenal all by themselves—especially when chilled and sliced into those dense, chewy squares—sometimes a dessert just calls for a little accompaniment. Why stop at just a brownie when you can create a full experience?
For me, these are clearly Decadent Chocolate Treats, and they shine brightest when balanced with something cool or something warm and aromatic.
- The Classic A La Mode: If you’re serving these slightly warm (which means you cheated and cut them early—I won’t tell!), a scoop of really good, high-quality vanilla bean ice cream is perfection. The contrast between the warm, gooey center and the cold, creamy ice cream is something truly special.
- The Coffee Companion: Since these are so rich, they pair perfectly with a strong, unsweetened beverage. I often have one of these with my afternoon cup of coffee. If you’re looking for something unique to sip, my recipe for Chai Latte Spiced Milk Tea balances the deep chocolate notes without overwhelming them.
- A Little Drizzle: While I love the natural crackly top, sometimes I warm up a tablespoon of raspberry jam and drizzle it over the top of a warm slice. The bright fruit acidity cuts right through the intense chocolate flavor. It’s elegant, effortless entertaining!
Honestly, once you master the texture in these oreo brownies, you’ll find endless ways to serve them up for whatever occasion calls for something truly special.
Storage and Reheating Instructions for Fudgy Oreo Brownies
The beautiful thing about these oreo brownies is that they actually get better the next day! Because of that high butter content and fudgy structure, they firm up beautifully as they cool and chill. You want these to last? Here is how to handle storage to keep that chewiness locked in. If you happen to have leftovers (which, in my house, is rare!), wrapping them properly is key.
To maintain that perfect texture, I always advise keeping them tightly wrapped in plastic wrap inside an airtight container at room temperature for up to three days. If you are pressing me on the timeline, they are genuinely best on days two and three because the moisture has settled perfectly into the chocolate base, making them even fudgier!
BUT, here is my personal preference: If you want that absolute peak, super-dense, almost truffle-like texture, wrap slices individually and keep them in the refrigerator. Chilling really enhances the chewiness, making them feel incredibly decadent. You can find another great make-ahead recipe idea when you look at my no bake cookies post!
When it comes to reheating these chewy chocolate dessert bars, you barely need to do anything. If you prefer them slightly gooey again, just let a slice sit on the counter for about 20 minutes to return near room temperature. If you’re in a real rush, thirty seconds in the microwave is plenty. Don’t zap them for too long, or you risk melting the filling right out of those poor little Oreo pieces!
Frequently Asked Questions About Making Oreo Brownies
I know you might have a few lingering questions before you dive into the oven. That’s smart! Baking is chemistry, and understanding the ‘why’ behind the steps ensures you get that truly perfect result every single time. It’s one thing to follow instructions, but knowing why we do things is what turns you into a confident baker. These are the questions I get asked most often about whipping up these oreo brownies!
If you are looking for speedier treats after you master this recipe, I have some great foolproof ideas on my easy bake desserts page, too!
Can I use store-bought brownie mix instead of making oreo brownies from scratch?
You certainly *can*, and it will certainly be an Easy Oreo Dessert! However, I have to be honest with you: using a box mix dramatically changes the texture. Boxed mixes are designed to be mostly cakey—they rely on leavening agents and different fat ratios to puff up. Since our goal here is dense, rich, and fudgy—that signature texture of the oreo brownies we love—making these from scratch brownies is the only way to achieve that perfect, melt-in-your-mouth chewiness we talked about. Box mixes just can’t support the weight and richness of all those Oreos the same way our homemade batter does!
What is the secret to getting a shiny top on my oreo brownies?
This is the visual cue everyone associates with a bakery-quality brownie, and it all happens right at the beginning! The secret is the aggressive whisking of the melted butter, the granulated sugar, AND the brown sugar together *before* you add the eggs. Spend a good minute or two really whipping that mixture until it lightens slightly in color. When you add the eggs one by one and whisk well after each, you are dissolving those sugar crystals into a syrup.
This glossy syrup layer bakes on top of the batter, creating that thin, jewel-like, crackly crust. Make sure you stop mixing the second the flour goes in, too, as heavy mixing right at the end will destroy that delicate layer we just built!
Share Your Ultimate Oreo Brownies Experience
Baking is such a journey, and honestly, the best part of sharing these recipes after hours of testing in my kitchen is hearing from you! I truly hope these oreo brownies have become a new favorite in your rotation.
Once you’ve managed that perfect glossy top and you’ve enjoyed a slice (maybe even warmed slightly with a scoop of ice cream!), I would absolutely love for you to come back and share your triumphs. Did you try the mint variation, or did you stick to the classic? Let me know!
Please, take a moment to leave a rating for this recipe below. Your feedback helps other home cooks feel confident about trying something new, and I rely on it to make sure every single recipe here at Unfold Recipes is the best it can be. I read every single comment!
If you snap a photo of your beautiful, chewy, Oreo-packed squares fresh from the pan, please share it on social media and tag me! Seeing your creations—your own stories unfolding in the kitchen—is what keeps me inspired to keep developing these approachable, elegant recipes for you. Don’t forget to look around at my general desserts category for your next decadent chocolate bake!
PrintUltimate Fudgy Oreo Brownies with a Shiny, Crackly Top
Make these made-from-scratch Oreo brownies for a rich, dense texture and a gorgeous, shiny, crackly crust. These cookies and cream brownies are chewy, fudgy, and perfect for any chocolate lover.
- Prep Time: 15 min
- Cook Time: 35 min
- Total Time: 50 min
- Yield: 16 brownies 1x
- Category: Dessert
- Method: Baking
- Cuisine: American
- Diet: Vegetarian
Ingredients
- 1 cup unsalted butter
- 1 cup granulated sugar
- 1 cup packed light brown sugar
- 4 large eggs
- 1 tablespoon vanilla extract
- 3/4 cup unsweetened cocoa powder
- 1 teaspoon salt
- 1/2 teaspoon baking powder
- 3/4 cup all-purpose flour
- 1 cup chopped Oreo cookies (about 8 cookies)
- 1/2 cup whole Oreo cookies for topping
Instructions
- Preheat your oven to 350°F (175°C). Line a 9×9 inch baking pan with parchment paper, leaving an overhang on two sides for easy removal. Lightly grease the paper.
- In a medium saucepan, melt the butter over low heat. Remove from heat.
- Whisk the granulated sugar and brown sugar into the melted butter until fully combined.
- Whisk in the eggs one at a time, mixing well after each addition. Stir in the vanilla extract.
- In a separate bowl, whisk together the cocoa powder, salt, and baking powder. Add this dry mixture to the wet ingredients and mix until just combined. Do not overmix.
- Gently fold in the 1 cup of chopped Oreo cookies.
- Spread the batter evenly into the prepared pan. Arrange the whole Oreo cookies on top of the batter.
- Bake for 30 to 35 minutes. The edges should look set, and a toothpick inserted near the center should come out with moist crumbs attached, not wet batter. This ensures a fudgy texture.
- Let the brownies cool completely in the pan on a wire rack before lifting them out using the parchment overhang.
- Cut into squares. For the best fudgy texture, chill the brownies for at least one hour before slicing.
Notes
- For the best shiny, crackly top, do not overmix the batter once the flour is added. Overmixing develops gluten, which hinders the crust formation.
- Use high-quality cocoa powder for a deeper chocolate flavor in your homemade brownies.
- If you prefer a chewier texture, slightly underbake the brownies by about 2 minutes.
Nutrition
- Serving Size: 1 brownie
- Calories: 310
- Sugar: 30
- Sodium: 180
- Fat: 18
- Saturated Fat: 10
- Unsaturated Fat: 8
- Trans Fat: 0
- Carbohydrates: 35
- Fiber: 1
- Protein: 4
- Cholesterol: 65