
Isn’t it frustrating when you crave that pillowy, wonderfully charred flatbread from your favorite Indian restaurant, only to find that trying to replicate it at home feels impossible? We spend so much time perfecting the curry that sometimes the bread falls flat—literally. Well, I’ve cracked the code for you! This recipe is my definitive guide to **homemade naan bread** that achieves that incredible soft, chewy texture we all adore, and guess what? We’re doing it all on your simple kitchen stovetop. It brings me such joy to share techniques that remove the barrier to authentic flavors. Forget complicated equipment; this easy skillet method is about approachable elegance and stunning results every single time. For more about my journey in simplifying beautiful cooking, feel free to check out my story here.
- Why This Is the Best Easy Homemade Naan Recipe
- Gathering Ingredients for Your Homemade Naan Bread
- Step-by-Step Instructions for Chewy Naan Bread Tutorial
- Cooking Your Homemade Naan Bread Without Tandoor
- Finishing Touches for Buttery Naan Side Dish
- Variations: Mastering the Garlic Naan Bread Recipe
- Tips for Success When Making Homemade Naan Bread
- Storing and Reheating Your Soft Fluffy Naan Bread
- Frequently Asked Questions About This Simple Indian Bread Recipe
Why This Is the Best Easy Homemade Naan Recipe
Listen, I know finding a recipe for **Soft Fluffy Naan Bread** that actually delivers on its promise can be a real headache. So often, what we end up with is stiff or tough, which totally defeats the purpose of enjoying a perfect curry night. What sets this recipe head and shoulders above the rest is that we’ve eliminated the biggest hurdle: the tandoor oven! This method is built for the home kitchen and delivers reliable, stretchable, chewy results every single time. You won’t have to guess or cross your fingers anymore; this foolproof approach ensures elegance on your plate without the culinary stress. And if you love reading more about my kitchen philosophy, you can always find my latest thoughts over on the blog!
Achieving Restaurant Style Naan at Home with a Skillet
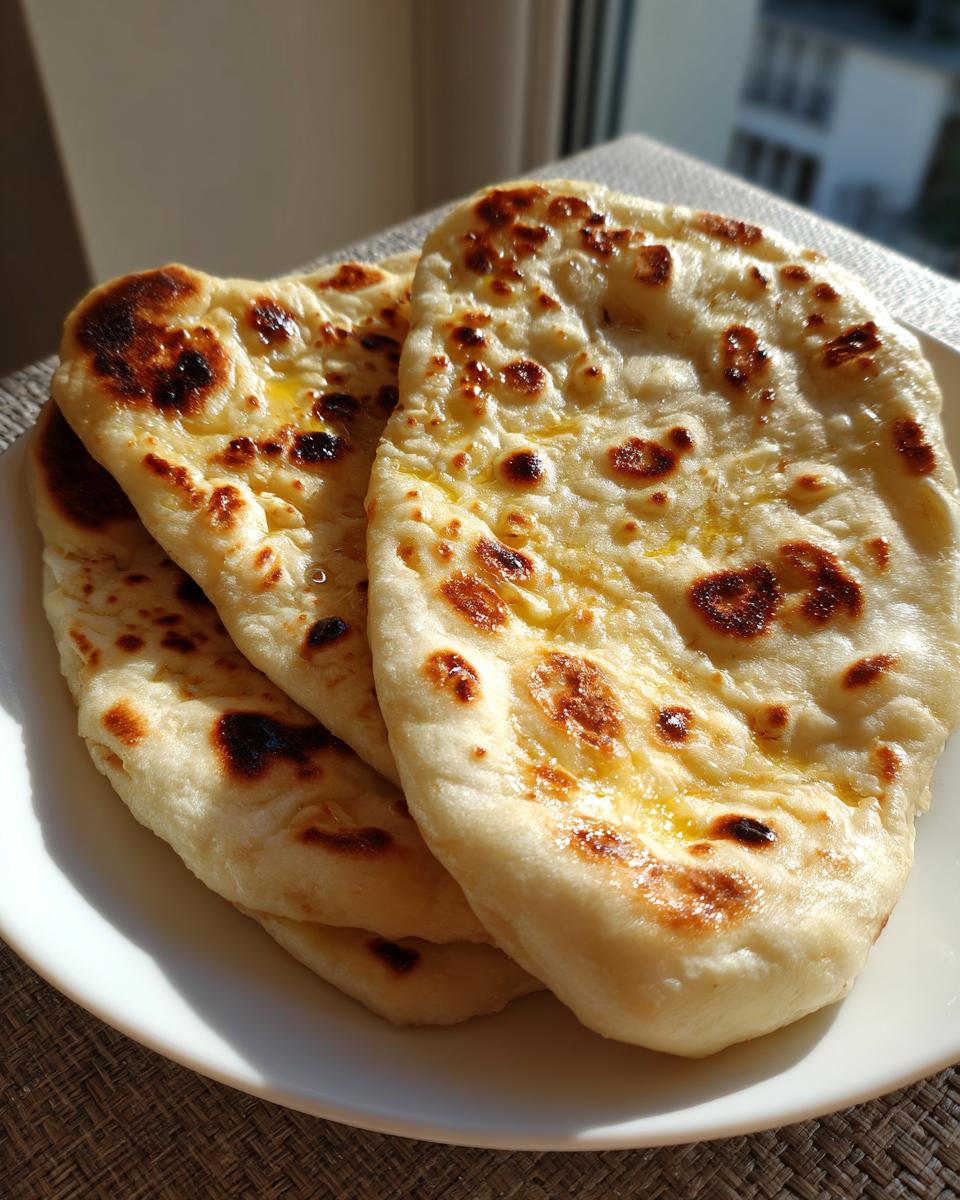
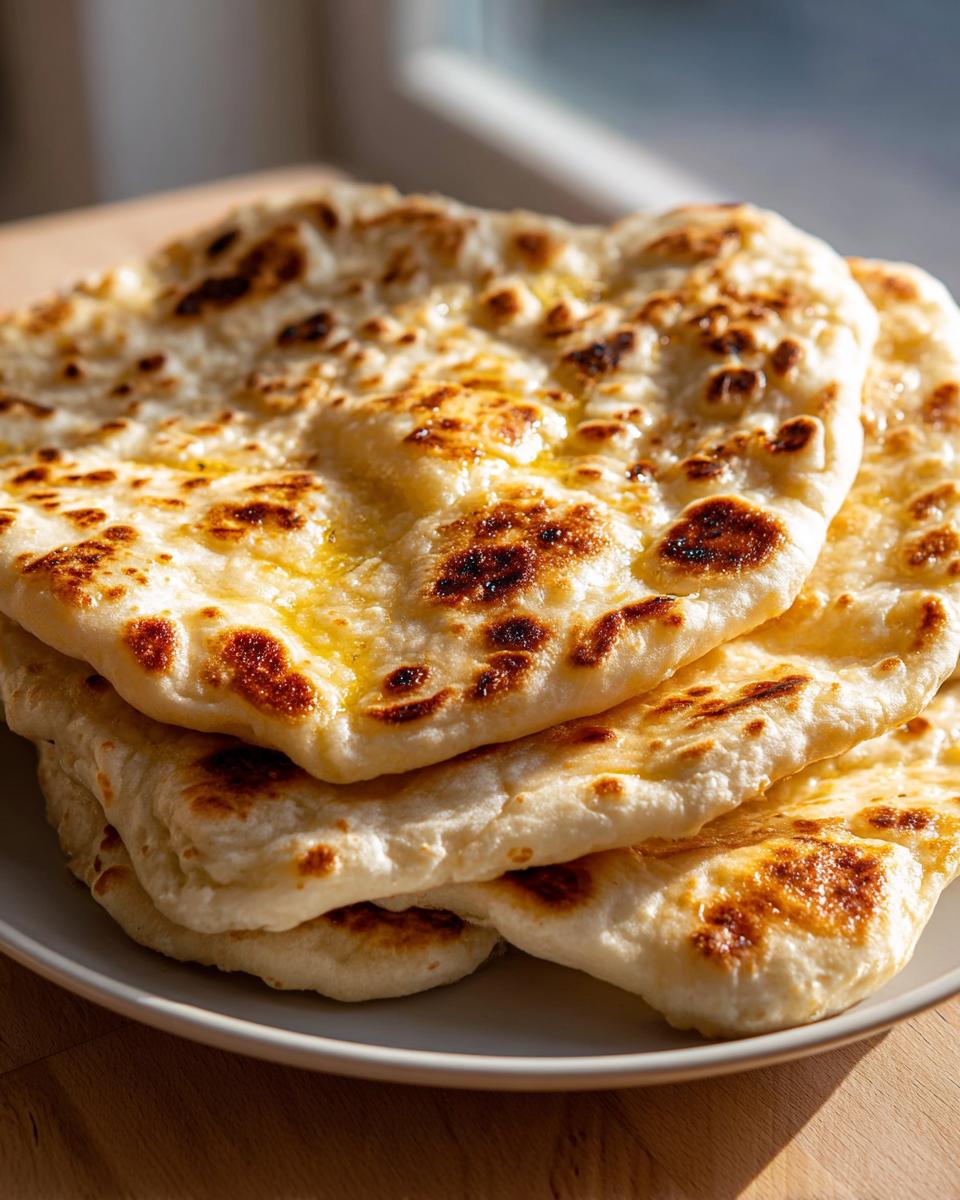
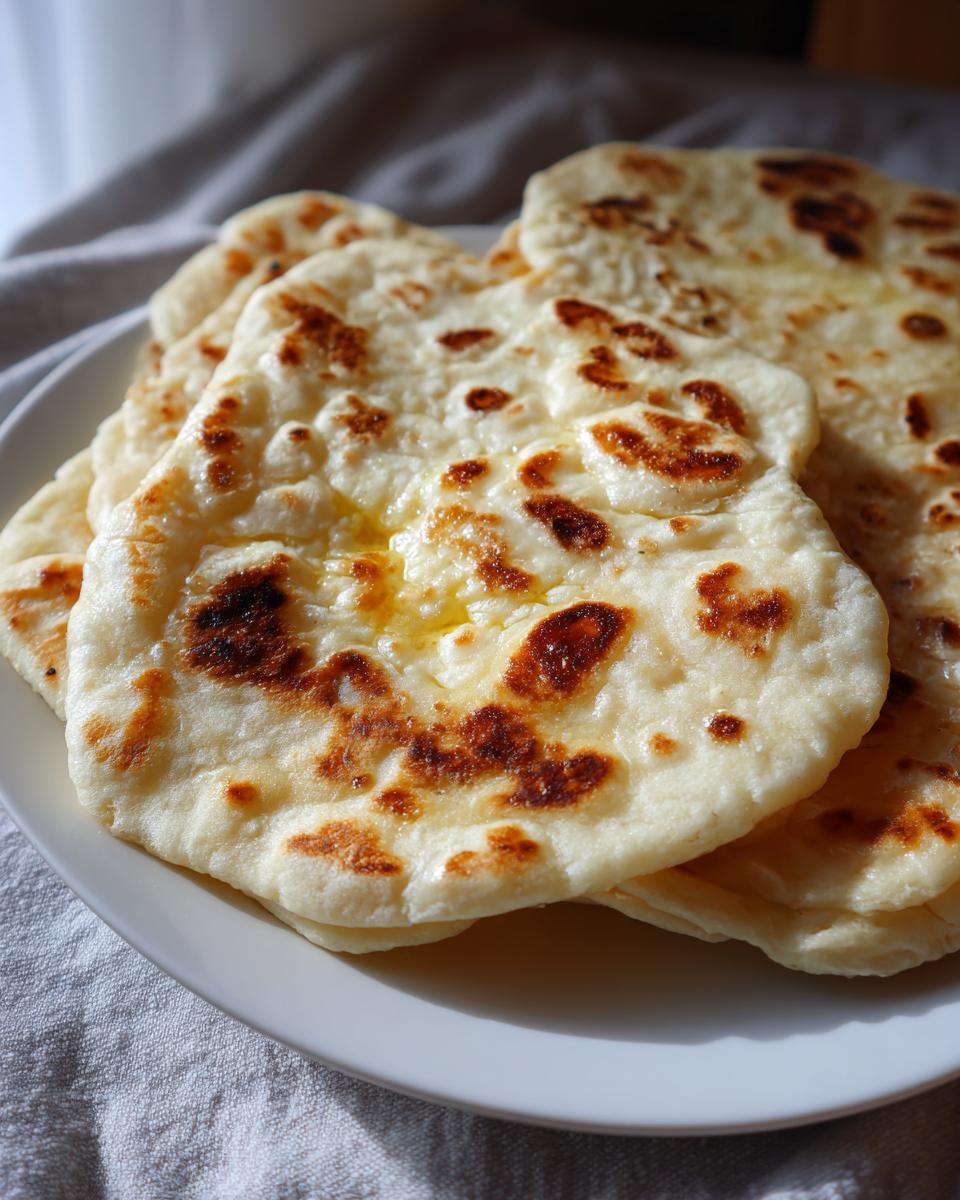
That beautiful char and puff you see in restaurants? That comes from intense, direct heat, which is exactly what a screaming-hot cast iron skillet gives us. There’s no need for specialized clay ovens here! When the dough hits that searing hot surface, the moisture trapped inside immediately turns to steam, forcing the bread to balloon up beautifully. These bubbles create those desirable dark spots that are the hallmark of authentic naan. It works like magic, I promise.
The Role of Yogurt in Soft Fluffy Naan Bread
This is where we separate the good bread from the truly great bread. We need full-fat yogurt, and it needs to be incorporated properly into our dough. Why all the fuss over dairy? The slight acidity in the yogurt works as a natural tenderizer. It breaks down a little bit of the gluten structure just enough to make the dough pliable when you roll it, leading to that irresistible, long-lasting chew. The yogurt is essential for perfect **homemade naan bread**.
Gathering Ingredients for Your Homemade Naan Bread
To start creating this incredible **homemade naan bread**, you’ll be happy to know we aren’t trekking to any specialty shops! Every single item here is a simple pantry staple you likely already have on hand. We are focusing on quality over complexity, which, as I always say, results in the most satisfying cooking experience. We just need a few key players to get this dough ready for its rise.
Ingredient Clarity and Preparation Notes
Details matter immensely when you’re working with yeast, so please pay attention to these specifics! When you warm up the water for the yeast, aim for that sweet spot: about 105 to 115°F. Too cold, and the yeast just sleeps; too hot, and you might accidentally kill it! Patience is key there. Also, make sure that yogurt is full-fat. That extra bit of fat is crucial for that supple texture later on. And for those who are already thinking ahead to the best topping, remember to have that one clove of garlic ready if you plan on making our fantastic, buttery topping variation!
Step-by-Step Instructions for Chewy Naan Bread Tutorial
Now we finally get to work building this masterpiece! This is the most rewarding part of the entire process, leading to that wonderfully **Chewy Naan Bread Tutorial** result we’ve been aiming for. Remember, baking, especially with yeast, is a process of structure building. We aren’t rushing this; we are patiently layering the elements to make sure your bread puffs up perfectly on the skillet later. Trust me; the time spent letting the dough rest is what separates a good flatbread from an unforgettable one. I often make a pot of soup, like my creamy Chicken Gnocchi Soup, while the dough is doing its rising work!
Mixing the Quick Naan Bread Dough
First things first, you must check your yeast! That activation step earlier ensures you have lively yeast ready to work hard. Once it’s foamy, we add it to the dry flour and salt mixture along with the yogurt and oil. Don’t panic when it looks messy! Mix it just until everything comes together into what I call a ‘shaggy’ mass. This means you’ve combined the ingredients without developing too much tough gluten yet. Pull it out onto your counter and let your hands take over for the kneading part.
The First Rise: Patience for Puffy Flatbread Instructions
After kneading until it’s smooth and elastic—that takes purpose, about 5 to 7 minutes—it’s time to let it rest and work its magic. Place that dough ball in a lightly oiled bowl, cover it up tight, and find a warm spot in your kitchen. This first rise is absolutely non-negotiable if you want those beautiful air pockets. You need it to double in size, which usually takes between an hour to an hour and a half, depending on your kitchen temperature. If you want those airy, **Puffy Flatbread Instructions** met, respect the rising time!
Cooking Your Homemade Naan Bread Without Tandoor
Okay, this next part is where so many people think they need a fancy brick oven, but I promise you, they are absolutely wrong! You can achieve that incredible, airy texture and those beautiful brown char spots needed for authentic **homemade naan bread** right on your stovetop. The secret weapon here is heat—serious, intense heat. I want you to get your cast-iron skillet or your heaviest frying pan out, and you need to crank that burner up to medium-high or even high. We want that pan screaming hot before the dough even touches it. Don’t put any oil in there yet; we need that dry heat transfer for the best possible puffing action! If you’re looking for other ways to make impressive breads easily, you might enjoy my Stromboli recipe as well.
Shaping and Cooking the Homemade Naan Bread
Once the pan is sizzling hot, divide your rested dough balls and start rolling them out on a lightly floured surface. I aim for a teardrop or oval shape, aiming for about 1/8 of an inch thick. Don’t roll them too thin, or they won’t puff! Carefully lay one shaped piece onto that dry, hot skillet. You should hear an immediate sizzle—that’s success! Cook the first side for about 1 to 2 minutes until you start seeing these lovely big bubbles form and the bottom has some nice, dark spots. Then, flip it over and cook the second side for about a minute more. Now, for my little secret to guarantee ultimate puffiness: if you have a gas stove, carefully pick up the naan with tongs and briefly place the underside directly over the open flame for just a few seconds. Watch it balloon! Just be incredibly careful—it happens fast!
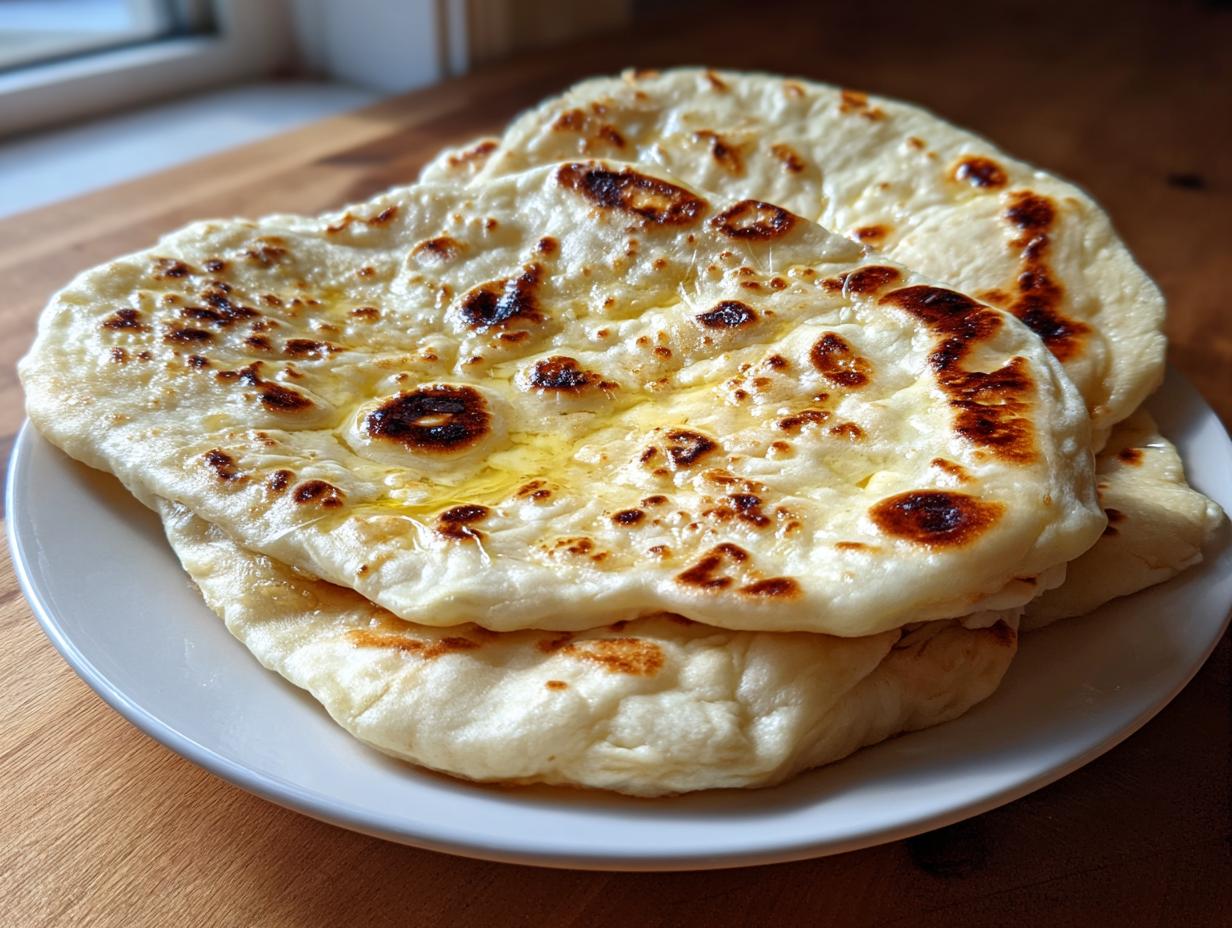
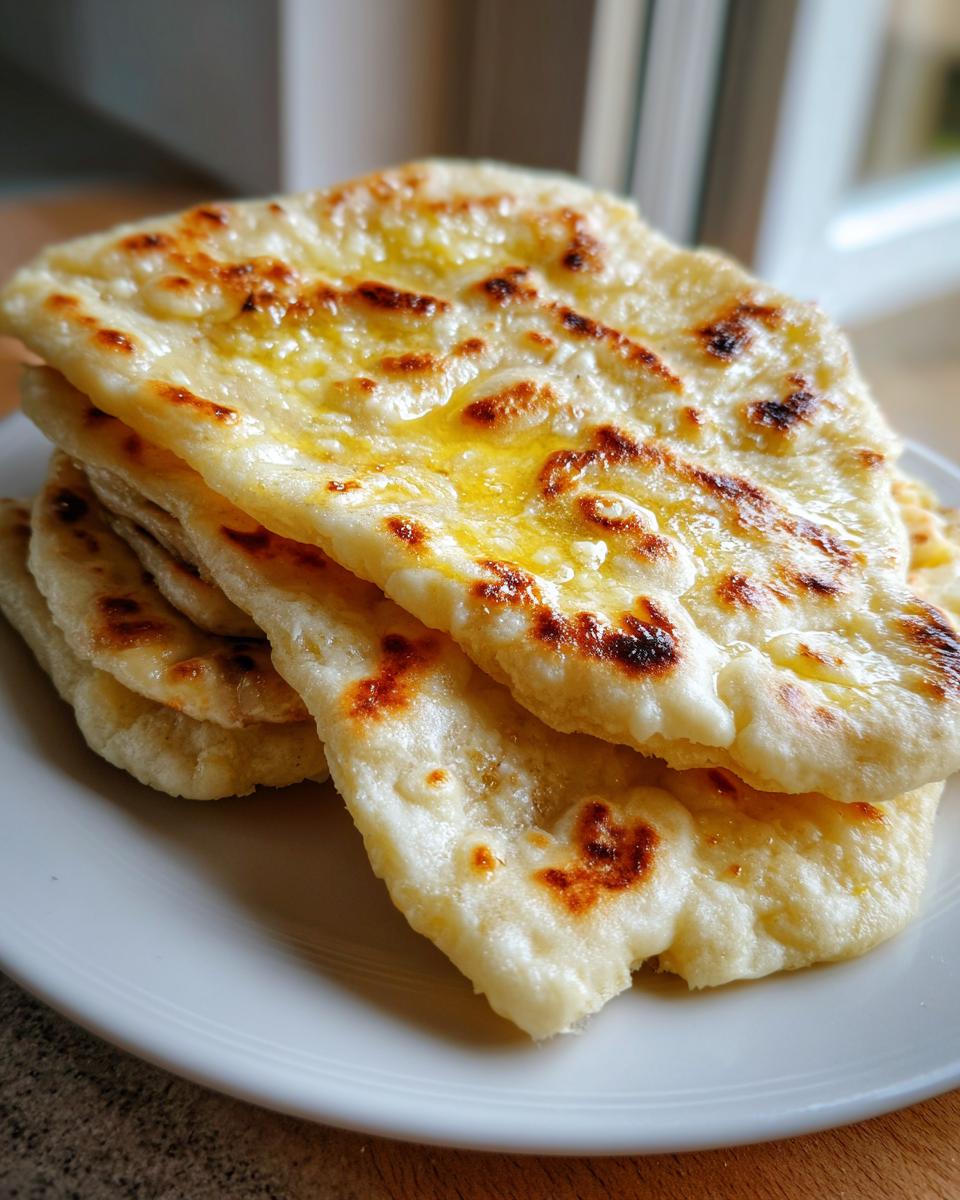
Finishing Touches for Buttery Naan Side Dish
The second your naan comes off that searing hot skillet, you need to work quickly! That puffiness begins to soften right away, so we need to lock in the flavor and moisture immediately. This final step is what truly transforms this incredible flatbread into the perfect **Buttery Naan Side Dish** worthy of any dinner table. As soon as it hits the plate, grab your melted butter—and listen closely for the garlic variation I know you’re eager to try!
Variations: Mastering the Garlic Naan Bread Recipe
If you’re like me, once you’ve nailed the basic, impossibly soft naan, you immediately think, “How can I make this even more decadent?” The answer, my friends, is right here! Mastering the **Garlic Naan Bread Recipe** is so straightforward, and honestly, it takes this **homemade naan bread** from side dish to the star of the whole meal. It’s perfect for scooping up rich sauces or just eating on its own, warm off the skillet.
The adaptation happens right at the very end, during that crucial brushing step. Immediately after you pull a piece of hot naan off the pan, you want to whisk together that 2 tablespoons of melted butter with that one tiny, finely minced clove of fresh garlic. My tip here is to keep the garlic very fine, almost paste-like, so it doesn’t burn too fast when it hits the hot bread. Brush this fragrant, melted butter mixture generously over the entire surface of your warm naan.
You can even sprinkle a tiny pinch of flaky salt over the garlic butter while it’s still wet if you want an extra flavor pop! If you enjoy these complex flavor additions, you absolutely must try my recipe for Easy Oven-Baked Garlic Toast—it follows a similar philosophy of layering simple, fresh flavors!
Tips for Success When Making Homemade Naan Bread
Even with the best recipe in hand, sometimes the execution needs a little nudge. To truly master **How to Make Soft Naan**, you need to treat your ingredients and your cooking surface with a little respect. My best advice, honed over many frustrating batches early in my culinary explorations, centers on two things: temperature and heat intensity. Don’t skimp on the temperature checks!
First, make absolutely certain that water you used to wake up your yeast was truly in that 105 to 115°F window. This subtle difference dictates whether your dough rises beautifully or just sits there sadly. Secondly, and this is crucial for that restaurant-quality puff, your skillet needs to be ridiculously hot—seriously, hotter than you think it should be. If you are nervous about the heat, let the dough rest for that extra 15 minutes after shaping; that crucial second rest helps the gluten relax one last time before hitting the heat, guaranteeing you get that chewy, tender quality every single time.
Storing and Reheating Your Soft Fluffy Naan Bread
The hardest part about making **homemade naan bread** is usually stopping ourselves from eating the entire batch straight from the skillet, I know! But if you do manage to save some for later, keeping them soft is simple. Once completely cool, stack the naan and wrap them very tightly in foil or place them in a high-quality zip-top bag. This traps that last bit of moisture. To bring them back to life—and trust me, you want them warm—just reheat them briefly in a dry, hot skillet for about 30 seconds per side, or in a quick blast in the oven. They’ll puff right back up!
Frequently Asked Questions About This Simple Indian Bread Recipe
As you get comfortable making this bread, I often get questions about shortcuts or troubleshooting. It’s wonderful that you all are diving in and experimenting! Here are a handful of the most common queries I receive about achieving that perfect texture.
Can I use baking powder instead of yeast for naan bread?
That’s a great question about substitutions! For this particular recipe, I really lean on the yeast because it contributes so much flavor complexity—that barely-there tang that makes it taste authentic. Yeast also gives us that beautiful, slow structure for a truly **Soft Fluffy Naan Bread**. If you are in a massive rush, there are definitely **No Yeast Naan Bread Ideas** out there that rely on baking powder, but honestly, those tend to result in something closer to a regular flatbread than a classic soft naan. For the best result today, stick with the yeast!
How do I prevent my naan from becoming tough or dry?
This usually comes down to two things, and we’ve touched on both! First, when you mix it, stop kneading the moment the dough feels smooth and elastic—overworking it develops too much tough gluten. Second, ensure you let your dough have that full, luxurious rise! Rushing the process means the yeast hasn’t done its job creating those internal pockets of air. And remember that full-fat yogurt? It coats those gluten stands, keeping everything tender. Don’t skip the yogurt if you want that perfect chew!
What is the best curry to serve with this bread?
Oh, I love this question because it completes the meal! It truly elevates your **Naan for Curry Night**. While this bread goes beautifully with almost anything, whether you’re using it to scoop up rich lentil daal or a spicy Vindaloo, I find it sings when paired with something creamy and slightly tangy. Try making a rich, creamy tomato-based Indian chicken curry. The sweetness and acidity of the sauce cling perfectly to the slightly buttery surface of the naan. It’s utter comfort on a plate!
If you have any other specific questions or just want to share your results, please don’t hesitate—you can always reach me through my contact page. And for more amazing flavor ideas on garlic bread, check out this link I found: Soft Garlic Naan Bread.
PrintEasy Homemade Soft and Chewy Naan Bread Recipe (Skillet Method)

Create restaurant-style naan bread at home using only your stovetop skillet. This recipe yields incredibly soft, fluffy, and chewy flatbread perfect for pairing with your favorite curries.
- Prep Time: 20 min
- Cook Time: 15 min
- Total Time: 1 hour 45 min
- Yield: 8 servings 1x
- Category: Side Dish
- Method: Stovetop/Skillet
- Cuisine: Indian
- Diet: Vegetarian
Ingredients
- 1 teaspoon active dry yeast
- 1 teaspoon sugar
- 1/2 cup warm water (about 105-115°F)
- 3 cups all-purpose flour, plus more for dusting
- 1 teaspoon salt
- 1/2 cup plain yogurt, full fat
- 2 tablespoons olive oil, plus more for brushing
- 1/4 cup milk, for brushing
- 2 tablespoons melted butter, for brushing
- 1 clove garlic, minced (optional, for topping)
Instructions
- Activate the yeast: In a small bowl, combine the warm water, sugar, and yeast. Let this mixture sit for 5 to 10 minutes until it becomes foamy.
- Prepare the dough: In a large bowl, whisk together the flour and salt. Add the foamy yeast mixture, yogurt, and 2 tablespoons of olive oil to the dry ingredients. Mix until a shaggy dough forms.
- Knead the dough: Turn the dough out onto a lightly floured surface. Knead for 5 to 7 minutes until the dough is smooth and elastic.
- First rise: Lightly oil a clean bowl. Place the dough in the bowl, turning to coat. Cover the bowl with plastic wrap or a clean kitchen towel. Let the dough rise in a warm place for 1 to 1.5 hours, or until it doubles in size.
- Divide and rest: Gently punch down the risen dough. Divide it into 8 equal pieces. Roll each piece into a ball. Cover the balls and let them rest for 15 minutes.
- Prepare the skillet: Heat a cast-iron skillet or heavy-bottomed pan over medium-high heat until it is very hot. Do not add oil to the pan yet.
- Shape the naan: On a lightly floured surface, take one dough ball and roll it out into an oval or teardrop shape, about 1/8 inch thick.
- Cook the naan: Place one rolled piece of dough onto the hot, dry skillet. Cook for 1 to 2 minutes until large bubbles form on the surface and the underside has light brown spots.
- Flip and finish: Flip the naan over. Cook the second side for about 1 minute until it develops more char spots. If you want more puffing, you can briefly place the cooked side directly over an open gas flame using tongs for a few seconds (use caution).
- Brush with butter: Immediately transfer the cooked naan to a plate. Brush the top generously with melted butter. If making garlic naan, mix the minced garlic into the melted butter and brush that mixture on top.
- Repeat: Continue with the remaining dough pieces, stacking the cooked naan and covering them lightly to keep them warm. Serve immediately.
Notes
- For the softest naan, ensure your yogurt is full-fat and at room temperature before mixing it into the dough.
- Achieving those signature charred spots requires a very hot skillet. Do not overcrowd the pan while cooking.
- If you want to make Garlic Naan, mix 1 clove of minced garlic into the 2 tablespoons of melted butter before brushing the cooked bread.
Nutrition
- Serving Size: 1 piece
- Calories: 210
- Sugar: 2
- Sodium: 250
- Fat: 5
- Saturated Fat: 2
- Unsaturated Fat: 3
- Trans Fat: 0
- Carbohydrates: 36
- Fiber: 1
- Protein: 6
- Cholesterol: 5