
Do you ever smell something and instantly find yourself transported back to the lunch line, clutching a sticky five-dollar bill? For me, that scent is the sweet, unmistakable aroma of our very own School Cafeteria Treats. These lunch lady peanut butter bars are the ultimate comfort food, a taste of simpler times that we can recreate perfectly right here at home. What makes these bars so special is their clear, satisfying layers—a sturdy base, a fluffy filling, and that decadent chocolate crown. The very best part? You can skip the oven entirely if you need a quick fix! I’ve applied my culinary training to ensure this Easy Lunch Lady Bars Recipe delivers that authentic texture, marrying nostalgia with precision, just for you.

- Why These lunch lady peanut butter bars Are a Comfort Food Peanut Butter Treat
- Gathering Ingredients for Your lunch lady peanut butter bars
- Step-by-Step Instructions for Classic lunch lady peanut butter bars
- Expert Tips for Perfect lunch lady peanut butter bars
- Serving Suggestions for Potluck lunch lady peanut butter bars
- Storage and Make-Ahead Tips for lunch lady peanut butter bars
- Frequently Asked Questions About Retro Desserts
- Nutritional Estimates for Homemade lunch lady peanut butter bars
- Share Your Story of These lunch lady peanut butter bars
Why These lunch lady peanut butter bars Are a Comfort Food Peanut Butter Treat
When I look at these Nostalgic Peanut Butter Bars, I don’t just see a dessert; I see a ticket straight back to childhood. They are the ultimate Comfort Food Peanut Butter Treats because they rely on those familiar, wonderful pantry staples. They taste exactly like they should—rich, easy, and deeply satisfying.
Distinct Layered Perfection
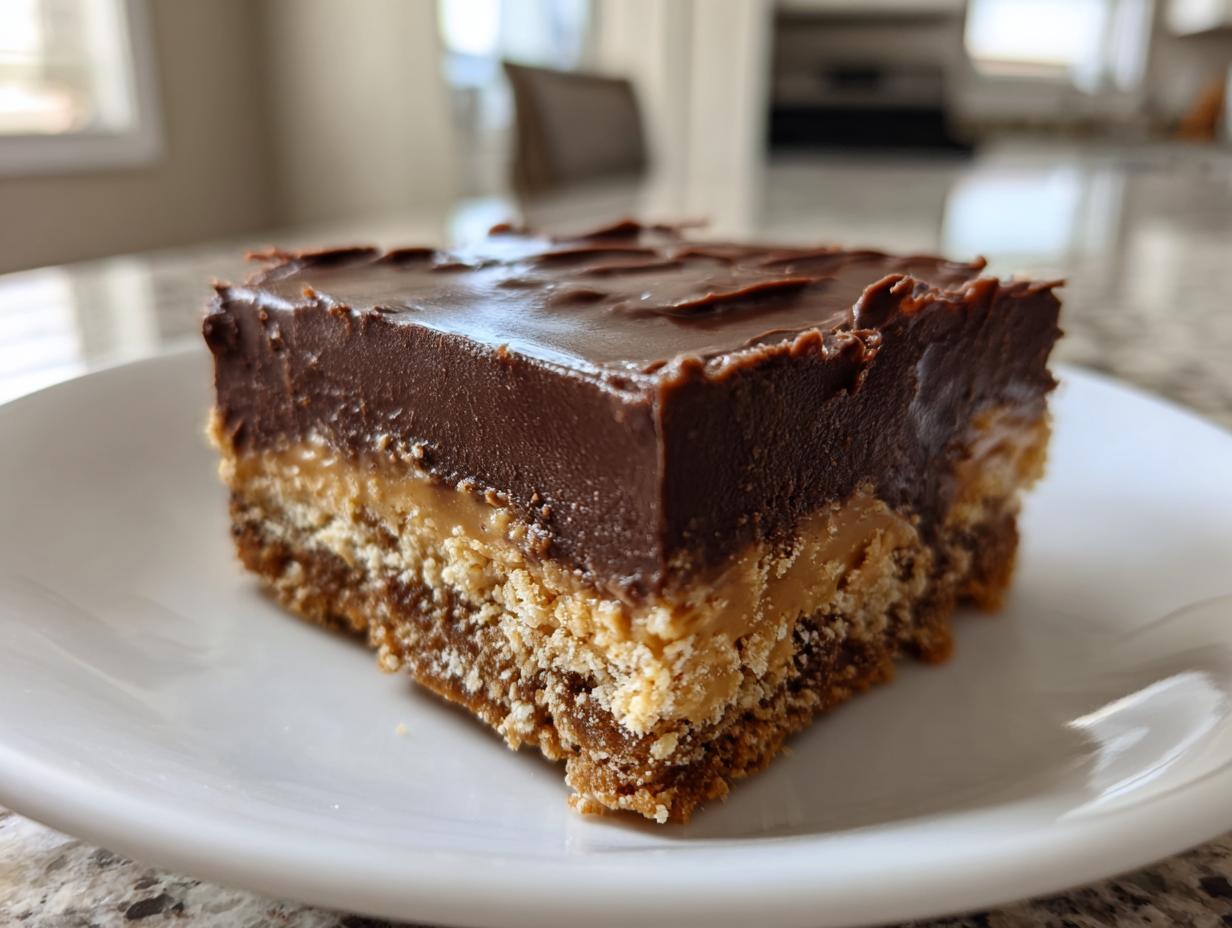
The magic here is truly in the structure. You get three perfect textural experiences in one bite. The bottom layer is this wonderfully crumbly base, thanks to the graham crackers. Then you hit that cool, smooth peanut butter filling, which contrasts beautifully with the firm, glossy chocolate topping we pour over it. It’s a study in textural contrast!

Simple Seven Layer Bars Simplicity (No Bake Lunch Lady Bars Recipe)
Don’t let the layers fool you into thinking this is complicated. This is perhaps the easiest dessert I’ve ever developed. Since these qualify as No Bake Peanut Butter Chocolate Bars, you save so much time! This truly is the Easy Lunch Lady Bars Recipe you’ve been searching for. Seriously, if you can stir ingredients together, you can master these bars. If you check out my main desserts page, you’ll see I favor elegance that doesn’t require hours of fuss.
Gathering Ingredients for Your lunch lady peanut butter bars
Okay, let’s talk about what you need to make these legendary bars. Because this recipe is no-bake, you don’t have to worry about preheating the oven, which is always a win in my book! We are relying on cold and softened ingredients to give us structure. Don’t skimp on the quality here; while these bars are wonderfully simple, great ingredients make all the difference in achieving that perfect, recognizable throwback flavor. Remember, we are building three distinct layers of deliciousness, so keep your bowls ready!
For the Graham Cracker Base
This is the foundation, and you want it firm enough to stand up to the filling. We are not baking this layer, so make sure you press it down really, really well!
- 1 1/2 cups graham cracker crumbs
- 1/2 cup (1 stick) unsalted butter, melted
For the Creamy Peanut Butter Filling
This middle layer is where everything turns smooth and dreamy. We use both confectioners’ sugar and two different measures of peanut butter and butter to get that almost fluffy but firm texture when chilled.
- 1 cup confectioners’ sugar
- 1 cup creamy peanut butter
- 1/2 cup (1 stick) unsalted butter, softened
- 1/2 cup creamy peanut butter
For the Rich Chocolate Topping
We are melting these down to create that glossy, snappy top layer. The small addition of peanut butter keeps the chocolate from getting too hard, which is key for cutting!
- 1 cup semi-sweet chocolate chips
- 1/4 cup creamy peanut butter
Step-by-Step Instructions for Classic lunch lady peanut butter bars
Alright, let’s get mixing! The beauty of making these lunch lady peanut butter bars is how quickly the layers come together. You’ll want to start by preparing your pan; this step is non-negotiable if you want the bars to release cleanly later. Grab a standard 9×13 inch pan and line it with parchment paper, making sure you leave a good overhang on the sides. That overhang acts as your little handles later on—trust me, you absolutely need those!
First up is the base. In a bowl, combine your graham cracker crumbs and the 1/2 cup of melted butter. Mix it up until it looks like wet sand. Press that mixture firmly and evenly into the bottom of your prepared pan. Get in there and really compact it down. Next, let’s tackle that magnificent filling. Use a hand mixer or stand mixer to beat together that cup of confectioners’ sugar, the full cup of peanut butter, the 1/2 cup of softened butter, and the extra 1/2 cup of peanut butter until it’s delightfully smooth. If it feels stiff as concrete, just add a tiny splash—maybe one tablespoon—of milk until it’s spreadable. Spread this filling right over your crust.
Now for the chocolate top! This is where we combine the chocolate chips and the last 1/4 cup of peanut butter. I always do this in short bursts in the microwave—30 seconds at a time—stirring well between each interval. You don’t want scorched chocolate! Once it’s glossy and completely smooth, pour it right over that peanut butter layer and spread it swiftly to cover every inch. Once it’s all assembled, you need patience. Place the whole thing carefully into the refrigerator and let it chill for at least two hours until that chocolate is completely firm. Once chilled, use those parchment handles to lift it out, and then slice it into those perfect squares. Remember, if you want the true no-bake version, simply skip baking the base layer and chill that crust for about 30 minutes before adding the filling!

Expert Tips for Perfect lunch lady peanut butter bars
I adore this recipe because it’s so reliable, which is something I look for in every Best Lunch Lady Bar Recipe. Over the years, I’ve tweaked things just slightly to ensure maximum stability and flavor when I bring these to gatherings. Getting those layers just right takes knowing a few insider tricks!
Ingredient Notes and Substitutions for lunch lady peanut butter bars
You absolutely must use creamy peanut butter for the filling if you want that signature smooth texture; crunchy nuts just won’t blend correctly into that center layer. If you find your filling feels too thick—almost like dough instead of spreadable frosting—don’t panic! That just means your butter or peanut butter was a little too cold. Add a single tablespoon of whole milk, mix it again briefly, and watch it smooth right out. Also, those source notes mentioned swapping crumbs? Yes! If you run out of graham crackers, crushed vanilla wafers work beautifully for the base; it reminds me of the shortbread base used in some of my father’s holiday Spanish desserts.
Achieving the Right Chill Time
Two hours in the refrigerator is the *minimum* time needed to set these bars properly, especially that chocolate topping. If you try to cut them before they are fully chilled, you’ll end up with a messy plate of chocolate streaks and soft filling. That said, if you’re serving a crowd and want a slightly softer bite, you can take the whole pan out about 15 minutes before you plan to serve. This softens the topping just enough to make the bar more tender, but don’t leave it out too long, or things get messy fast!
Serving Suggestions for Potluck lunch lady peanut butter bars
These Potluck Peanut Butter Bars are a guaranteed crowd-pleaser, but arranging them nicely makes all the difference when presenting them on a party platter. Since the chocolate topping is quite rich, I love serving them alongside something bright and acidic to cut through that sweetness. Think fresh raspberries or thinly sliced strawberries!

For a truly elegant presentation at a gathering, I often cut a few bars slightly larger than others and garnish the top center of each one with a single miniature peanut butter cup or a drizzle of high-quality melted white chocolate. No one expects this level of care in a retro dessert, so it always gets rave reviews! If you need inspiration for other dishes to serve alongside these beauties, check out my favorites on my appetizers page.
Storage and Make-Ahead Tips for lunch lady peanut butter bars
One of the reasons I love these lunch lady peanut butter bars so much for entertaining is how perfectly they handle being made ahead of time. Because they rely on chilling rather than baking, they are wonderful to prepare the day before your event! Store the entire, uncut slab tightly covered in the refrigerator; they keep beautifully for up to one week this way.
If you need to keep them longer, these bars freeze wonderfully, too! I often wrap them well after cutting and pop them into the freezer for up to three months. They thaw best right on the counter for about an hour before serving. For reference on other great make-ahead recipes, you can look at my tips for things like my freezer breakfast burritos.
Frequently Asked Questions About Retro Desserts
It’s funny how a simple square of peanut butter and chocolate can bring back such strong memories! I gathered a few of your most common questions about perfecting these Retro Desserts.
Can I make these lunch lady peanut butter bars with crunchy peanut butter?
That’s a great question about variation! Traditionally, the classic lunch lady peanut butter bars filling is ultra-smooth, which is why I stick to creamy peanut butter for that middle layer. It blends better with the softened butter and sugar to create that decadent, almost mousse-like texture. However, if you truly prefer texture, you can absolutely substitute half of the creamy peanut butter with crunchy! Just know that layer won’t be quite as seamless.
Are these truly School Cafeteria Treats, or just similar?
Oh, these are the real deal! They nail that iconic trio: the slightly salty, buttery graham cracker base, the thick, sweet peanut butter filling, and the firm chocolate shell. This structure—graham base, PB middle, chocolate top—is exactly what made them a favorite in the lunchroom circuit decades ago. When you make these Nostalgic Peanut Butter Bars at home, you’re recreating a specific moment in American comfort food history!
How long can I store these No Bake Peanut Butter Chocolate Bars?
Because these are No Bake Peanut Butter Chocolate Bars and they are stored chilled, they hold up beautifully. I find they taste best within the first three to four days right out of the refrigerator. Even after a week, they are perfectly safe, though the chocolate topping might soften slightly depending on how warm your fridge runs once they’re cut into squares. If you need them to last longer, freezing is definitely the best strategy.
Nutritional Estimates for Homemade lunch lady peanut butter bars
I always feel a little shy sharing the exact nutritional breakdown because, honestly, these are pure, unadulterated comfort food born from the glorious days of American Retro Desserts. These lunch lady peanut butter bars aren’t exactly diet food, and that’s okay! We embrace them for the joyful treat they are. The figures below try to capture what you might expect from one generous square based on the recipe ingredients, but please remember these are just my estimates.
Every ingredient we use can slightly shift these totals, especially the type of peanut butter or the chocolate chips you select. This level of transparency is important to me, showing you that even indulgent recipes can be accounted for!
- Serving Size: 1 bar
- Calories: 250
- Sugar: 20g
- Sodium: 150mg
- Fat: 16g
- Saturated Fat: 5g
- Unsaturated Fat: 11g
- Trans Fat: 0g
- Carbohydrates: 24g
- Fiber: 1g
- Protein: 6g
- Cholesterol: 10mg
When you treat yourself to one of these perfectly layered Potluck Peanut Butter Bars, know that you are enjoying a classic for a reason. The fat and sugar contribute to that incredible flavor and satisfying texture we all remember from those school days!
Share Your Story of These lunch lady peanut butter bars
Truly, making these lunch lady peanut butter bars connects us, doesn’t it? That’s why I always love hearing from you after you’ve brought this little piece of nostalgia into your own kitchen. Did you make them for a reunion? Did they take you straight back to lunchtime in the third grade? I want to know!
Please, if you loved this recipe, leave a rating for these Nostalgic Peanut Butter Bars right here on the page. More importantly, leave a comment telling me your favorite childhood cafeteria memory. Sharing our food stories is what Unfold Recipes is all about!
If you found these Easy Lunch Lady Bars Recipe helpful, don’t forget to share a link with a friend who might need a dose of delicious, easy comfort today. You can always reach me directly through my contact page if you have specific questions about the layers or the chilling time. Enjoy every single square!
PrintClassic Nostalgic Lunch Lady Peanut Butter Bars (No-Bake Option Available)

Recreate the comforting taste of school cafeteria treats with these easy Lunch Lady Peanut Butter Bars. This recipe features distinct, satisfying layers of a graham cracker base, creamy peanut butter filling, and a rich chocolate topping. You can prepare them as a simple baked bar or use the no-bake variation for quick assembly.
- Prep Time: 20 min
- Cook Time: 0 min
- Total Time: 2 hours 20 min
- Yield: 24 servings 1x
- Category: Dessert
- Method: No-Bake
- Cuisine: American
- Diet: Vegetarian
Ingredients
- 1 1/2 cups graham cracker crumbs
- 1/2 cup (1 stick) unsalted butter, melted
- 1 cup confectioners’ sugar
- 1 cup creamy peanut butter
- 1 cup confectioners’ sugar
- 1/2 cup (1 stick) unsalted butter, softened
- 1/2 cup creamy peanut butter
- 1 cup semi-sweet chocolate chips
- 1/4 cup creamy peanut butter
Instructions
- Prepare a 9×13 inch baking pan by lining it with parchment paper, leaving an overhang for easy removal.
- For the base layer, combine the graham cracker crumbs and 1/2 cup melted butter in a medium bowl. Press this mixture firmly and evenly into the bottom of the prepared pan.
- For the peanut butter filling, beat together 1 cup confectioners’ sugar, 1 cup creamy peanut butter, 1/2 cup softened butter, and 1/2 cup creamy peanut butter until smooth. If the mixture is too stiff, add one tablespoon of milk. Spread this filling evenly over the crust.
- For the chocolate topping, melt the chocolate chips and 1/4 cup creamy peanut butter together in a microwave-safe bowl in 30-second intervals, stirring until completely smooth.
- Pour the melted chocolate mixture over the peanut butter layer and spread it to cover the surface.
- Chill the bars in the refrigerator for at least 2 hours, or until the chocolate topping is firm.
- Lift the bars out of the pan using the parchment paper overhang. Cut into squares.
- For the no-bake option, skip baking the crust. After pressing the crust into the pan, proceed directly to chilling the peanut butter filling layer until firm before adding the chocolate topping.
Notes
- For a richer chocolate flavor in the topping, substitute 1 tablespoon of the peanut butter with 1 tablespoon of unsalted butter.
- If you prefer a softer chocolate topping, slightly warm the bars before serving.
- You can substitute graham cracker crumbs with crushed vanilla wafers for a different flavor profile.
Nutrition
- Serving Size: 1 bar
- Calories: 250
- Sugar: 20
- Sodium: 150
- Fat: 16
- Saturated Fat: 5
- Unsaturated Fat: 11
- Trans Fat: 0
- Carbohydrates: 24
- Fiber: 1
- Protein: 6
- Cholesterol: 10