

There is something truly magical about holiday baking, isn’t there? It’s when our kitchens stop being just a functional room and start becoming a place for creating little pieces of edible art. As someone who built a career on telling wonderful stories, I find these whimsical moments—like turning simple cookies into adorable melted snowman cookies—to be the best kind of narrative. Baking these, using my culinary training to ensure they look elegant but are simple enough for anyone, brings back such sweet holiday memories for me. Forget overly fussy techniques; this recipe is pure, joyful, festive fun waiting to unfold on your platter. You can read more about my journey from the PR world to the kitchen right here on the site.
- Why You Will Love These Melted Snowman Cookies
- Gathering Ingredients for Your Melted Snowman Cookies
- Step-by-Step Assembly for Perfect Melted Snowman Cookies
- Tips for Mastering Your Melted Snowman Cookies Decoration
- Storing and Transporting Your Melted Snowman Cookies
- Frequently Asked Questions About Melted Snowman Cookies
- Nutritional Estimate for Melted Snowman Cookies
- Share Your Adorable Melting Snowman Cookies Creations
Why You Will Love These Melted Snowman Cookies
When I develop holiday recipes, I always ask myself: Is this show-stopping enough for a party but easy enough for a Tuesday afternoon? These cookies check both boxes beautifully. They are truly one of my favorite Christmas cookie recipes because they pack so much personality onto a simple sugar cookie base.
- Maximum Cuteness, Minimum Effort: The visual impact is huge—everyone stops to look! Yet, the construction uses basic candies, making them fantastic for simple cookie decorating ideas.
- Perfectly Kid Friendly: Seriously, if you need kid friendly holiday treats that keep little hands busy and giggling, this is it. They don’t need precision; the messier the puddle, the better the melt looks!
- Fantastic for Holiday Baking Fun: These aren’t just cookies to eat; they are an activity. Pull them out the weekend after Thanksgiving and turn it into a family event.
- Great for Cookie Exchanges: Once the icing sets, these festive winter desserts hold up surprisingly well. They are definitely among my go-to best Christmas cookie trade recipes because they always get rave reviews.
- Versatile Base: While I love the classic sugar cookie, you can swap that out easily if you prefer a richer flavor. We give variations later on!
Gathering Ingredients for Your Melted Snowman Cookies
When I make these enchanting treats, I want the process to be as smooth as the icing on the final cookie. Since the real fun is in the decorating, we don’t need to fuss too much with the base layer. I always keep my ingredients simple so we can focus our energy on making the cutest little snowman faces possible. Keep everything ready before you start assembly!
Base Cookie and Marshmallow Components
For the baked base, absolutely feel free to use your favorite recipe, or just grab reliable store-bought sugar cookie dough. If you want to save time and skip the dreaded dough chill time, look specifically for a no chill sugar cookie dough—it’s a lifesaver during busy holiday baking weeks.
- 1 batch prepared sugar cookie dough (store-bought is my secret weapon here!)
- 12 large marshmallows (for the body)
- 12 mini marshmallows (for the head)
Decoration Details for the Adorable Melting Snowman
This is where the magic happens! The details are small but make all the difference in achieving that genuinely whimsical look. Having these small candies ready means you can start assembling right away.
- 1 cup royal icing (you might need a bit extra for the puddle, so make sure you have enough)
- 24 small candy eyes
- 24 orange sprinkles or small candy pieces (these are the perfect little noses!)
- 24 thin pretzel sticks or licorice pieces (for those floppy, melting arms)
- 24 small, colorful candies or sprinkles (let these act as the colorful scarves!)
Step-by-Step Assembly for Perfect Melted Snowman Cookies
Now for the fun part! Making these easy snowman cookies is all about assembly, not complicated baking. Once your cookies are completely cool—and I mean totally cool, or the marshmallow will just slide right off—we can start building our little melt puddles. It truly takes only about 37 minutes total if you have your dough ready to go, but the payoff in festive charm is huge! If you’re ever feeling ambitious and want to skip the store-bought route entirely, I have a recipe for a fantastic edible cookie dough that works beautifully as a base.
Baking the Base and Preparing the Icing
First things first: bake your chosen sugar cookies according to your recipe, and let them cool completely on a wire rack. Don’t rush this part, darling; warm cookies equal melted marshmallows before you even start decorating! While they cool, get your royal icing ready. You want it thin enough to spread into a nice puddle, but still thick enough that those tiny facial details won’t just run away the moment you pipe them.
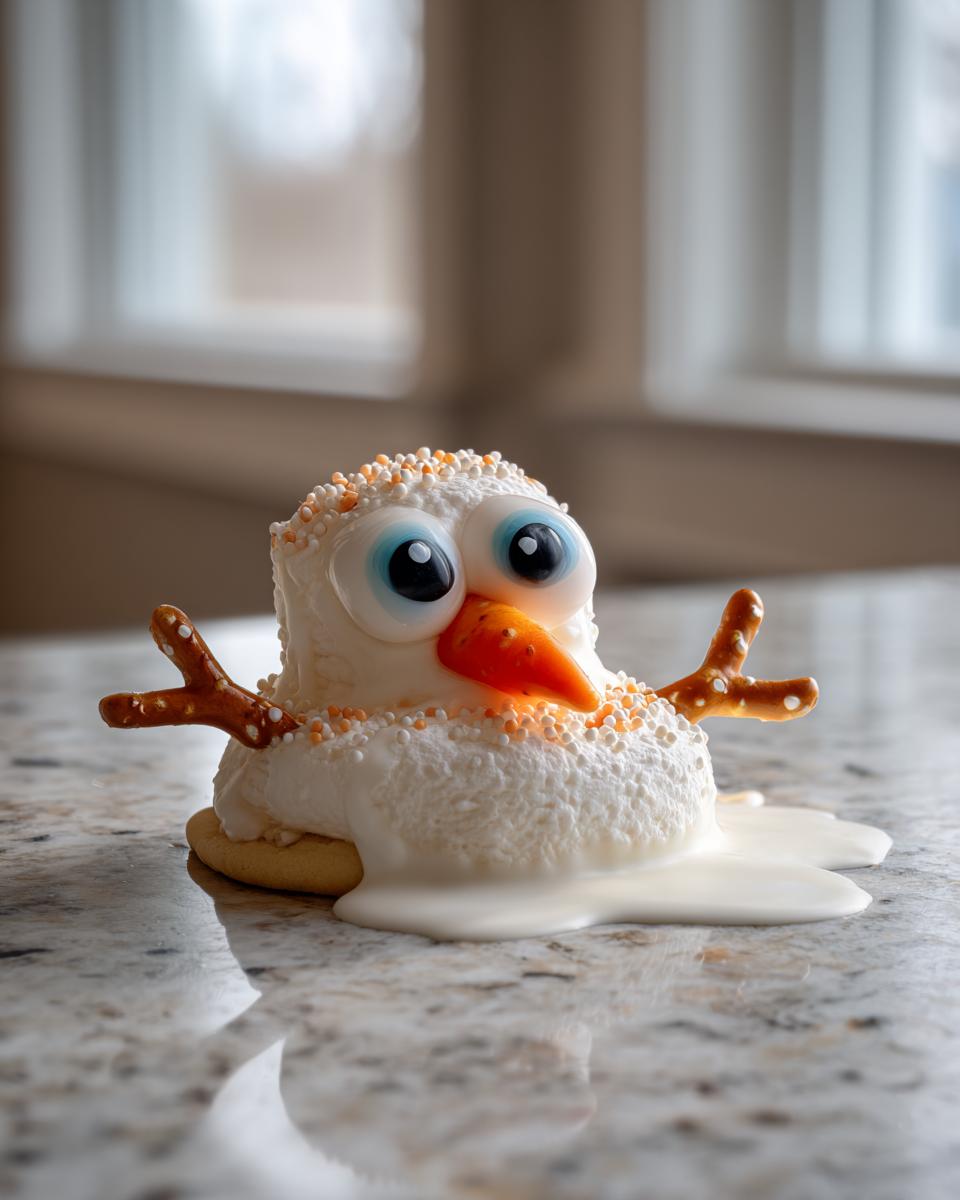
Constructing the Snowman Body and Creating the Melted Look
Take one large marshmallow and place it near the top center of your cookie base. Use a small dab of icing underneath it just to adhere it firmly. This is the body! Next, we create the melt. I take a bit more icing and gently spread it around the base of that large marshmallow, letting it flow outward a little onto the cookie surface. That thin runoff layer is what sells the whole “melting into the sun” look. Don’t forget to secure the mini marshmallow right on top of the large one for the head—another tiny dot of icing helps here.

Adding the Finishing Touches to Your Melted Snowman Cookies
Once the body is set, we give him a face! Dot on those two candy eyes, and use a single orange sprinkle right below them for a perfect little carrot nose. Now for the arms: gently press two pretzel sticks into the sides of the large marshmallow body. Finally, place one colorful candy right where the head meets the body to look like a cute scarf falling off a melting figure. Remember, if you want these for a party, they need hours to dry fully, so plan your timing!
Tips for Mastering Your Melted Snowman Cookies Decoration
If you’ve ever worked with royal icing—and trust me, having that culinary training helps here—you know consistency is everything. These charming festive winter desserts look intricate, but the secret is just using two slightly different icing consistencies. I want you to achieve that perfect, effortless melt without losing control of those tiny facial features.
Icing Consistency for the Best Melting Effect
For the main ‘puddle’ of melted snow, you want your royal icing to be slightly runnier than normal. Think of it like a fast-flowing river. This allows it to spread naturally when you dollop it around the marshmallow base, giving you that gorgeous, organic melting look without having to fuss with smoothing it too much. However, for the eyes, nose, and securing the head, you need a much stiffer consistency—more like thick toothpaste. This ensures those little details stay exactly where you put them, even if the base is still setting up.
Ingredient Swaps for Different Melted Snowman Cookies
While the sugar cookie base is lovely and neutral, I always encourage cooks to make the recipe their own. If you prefer a richer flavor, trying a buttery peanut butter cookie dough instead is phenomenal; the peanut butter complements the sweet marshmallow so nicely. And if you run out of pretzel sticks for arms? Don’t panic! Thin strips of dark chocolate or even black licorice cut into small segments work just as well to give your snowman his final, slightly sad, melting pose. You can always find more simple swaps and ideas over on my recipe blog.
Storing and Transporting Your Melted Snowman Cookies
These adorable cookies are surprisingly sturdy once you let them rest, which makes them perfect for sharing! If you are making these for a holiday party or a big gifting session—definitely consider them for your next batch of Christmas cookie trade recipes. The key, and I can’t stress this enough, is patience with the drying process. You must ensure that royal icing is completely hard to the touch before layering them or packing them up.
Store them in a single layer in an airtight container at room temperature. If you absolutely must stack them, place a small square of wax paper between each beautiful melted snowman cookie to prevent the decorations from sticking to one another. For more simple entertaining inspiration, perhaps for appetizers that pair well with holiday treats, take a peek at my appetizer collection.
Frequently Asked Questions About Melted Snowman Cookies
I know when I’m developing a new holiday treat, I always have about a hundred questions floating around. It’s better to ask than to end up with a melted marshmallow disaster! Here are a few things I always hear from cooks when making these adorable figures.
Can I use store-bought cookies instead of baking from scratch for these melted snowman cookies?
Oh, absolutely! That’s one of the best parts about these! If you are looking for truly kid friendly holiday treats that get done quickly, using pre-made sugar cookie dough or even high-quality, flat shortbread cookies is perfectly fine. My goal here is to remove stress, not add it. Baking from scratch is lovely, but sometimes we just need speed to focus on the cute decorating!
What kind of icing works best for decorated sugar cookies like these?
You really must use Royal Icing here, my dear. A simple powdered sugar glaze might look fine initially, but it will stay sticky and won’t properly set up to hold all those little candy decorations—the eyes, the nose, the pretzel arms. Royal Icing hardens into a firm shell, which is non-negotiable if you want stable, sharp details on your decorated sugar cookies.
Are melted snowman cookies good for Christmas cookie trade recipes?
Yes, they travel wonderfully once they’ve set! They are certainly one of my favorites for Christmas cookie trade recipes because they always get gathered up first—they’re just so charming (and they hide any minor imperfections beautifully!). Just remember my earlier tip: you need to allow at least six to eight hours, maybe even overnight, for the royal icing puddle and details to dry rock solid before gently packaging them up. If they are tacky, they will stick together, and you’ll end up with a pile of sadness instead of a perfect snowman!
Nutritional Estimate for Melted Snowman Cookies
Now, I always say that when we are baking for the pure joy of the holidays, we aren’t tracking every macro, are we? These melted snowman cookies are about charm and celebration, not dieting! But for those of you who like to plan ahead or just want a general idea of what you’re enjoying, I pulled together the estimated nutrition based on the core ingredients—the cookie, the marshmallow, and the icing.
Please remember, because we are using store-bought bases sometimes, or choosing different sprinkles, these figures are just a lovely starting point, a general guide for one cookie serving size.
- Serving Size: 1 cookie
- Calories: 180
- Sugar: 18g
- Fat: 9g (Saturated Fat: 3g)
- Carbohydrates: 24g
- Protein: 3g
- Cholesterol: 5mg
These numbers reflect a standard recipe using a simple sugar cookie base and the marshmallow/icing decorations. If you opt for heartier bases, like using that peanut butter cookie dough I mentioned earlier, those fats and carbs will shift a bit! Enjoy them as the delightful, whimsical treats they are meant to be.
Share Your Adorable Melting Snowman Cookies Creations
And there you have it, my friends—a truly whimsical and memorable addition to your holiday baking repertoire. I truly hope these melted snowman cookies bring as much easy joy and laughter to your kitchen as they do to mine. Remember, every dish we create tells a story, and sharing your unique, brightly-scarfed snowmen continues that narrative beautifully.
When you’ve finished letting the icing set and your creations are ready for their close-up, I absolutely want to see them! Leave a comment below telling me how the decorating went—did your pretzel arms stay put? Were your orange sprinkles perfect for the nose? Did you use store-bought dough or did you whip up a batch of decorated sugar cookies from scratch?
Your feedback helps the whole Unfold Recipes family grow, and honestly, seeing your finished products is the highlight of my week. It warms my heart to know my recipes are making their way onto your holiday tables. If you’ve taken photos, feel free to share them, and if you have any pressing questions that remain after reading all of the FAQs, please don’t hesitate to reach out via my contact page. And if you were inspired to find another simple recipe for your holiday baking lineup, you can always check out some similar wonderful ideas over in this collection: Melted Snowman Cookies Recipe for Kids & Holiday Baking. Happy baking, and may your holidays be bright!
PrintAdorable Melted Snowman Sugar Cookies

Create these charming Melted Snowman Sugar Cookies for a fun, kid-friendly holiday baking project. These cookies use simple decoration techniques to achieve a whimsical, melting effect perfect for Christmas cookie trades.
- Prep Time: 25 min
- Cook Time: 12 min
- Total Time: 37 min
- Yield: 12 servings 1x
- Category: Dessert
- Method: Assembly/Decorating
- Cuisine: American
- Diet: Vegetarian
Ingredients
- 1 batch prepared sugar cookie dough (store-bought or no-chill recipe)
- 1 cup royal icing (pre-made or homemade)
- 12 large marshmallows
- 12 mini marshmallows
- 24 small candy eyes
- 24 orange sprinkles or small candy pieces (for noses)
- 24 thin pretzel sticks or licorice pieces (for arms)
- 24 small, colorful candies or sprinkles (for scarves)
Instructions
- Prepare and bake your sugar cookies according to your chosen recipe. Cool the cookies completely on a wire rack.
- Prepare the royal icing. Thin the icing slightly so it spreads easily, but remains thick enough to hold shape for details.
- Place one large marshmallow near the top center of each cooled cookie. This will be the snowman’s head.
- Use a small amount of icing to secure the large marshmallow head to the cookie base.
- Create the ‘melted’ puddle effect by spreading a thin layer of icing around the base of the large marshmallow, letting it flow outward slightly onto the cookie surface.
- Attach the small marshmallow onto the large marshmallow to form the head. Secure it with a tiny dot of icing if needed.
- Decorate the face: Place two candy eyes onto the small marshmallow head. Place one orange sprinkle below the eyes for the nose.
- Attach the ‘arms’: Gently press two pretzel sticks or licorice pieces into the sides of the large marshmallow, positioning them as if the snowman is melting.
- Add the ‘scarf’: Place a colorful candy or sprinkle just below the head where it meets the body marshmallow to resemble a scarf.
- Allow the icing to dry completely before serving or storing. This is a great recipe for holiday baking fun.
Notes
- For the easiest assembly, use store-bought sugar cookie dough. This makes the recipe very kid friendly.
- If you want a richer base, use a peanut butter cookie dough instead of plain sugar cookies.
- To achieve the best melting look, use a slightly runnier consistency of royal icing for the base puddle than you use for the facial details.
- These cookies are excellent for Christmas cookie trade recipes because they travel well once the icing is fully set.
Nutrition
- Serving Size: 1 cookie
- Calories: 180
- Sugar: 18
- Sodium: 110
- Fat: 9
- Saturated Fat: 3
- Unsaturated Fat: 6
- Trans Fat: 0
- Carbohydrates: 24
- Fiber: 1
- Protein: 3
- Cholesterol: 5