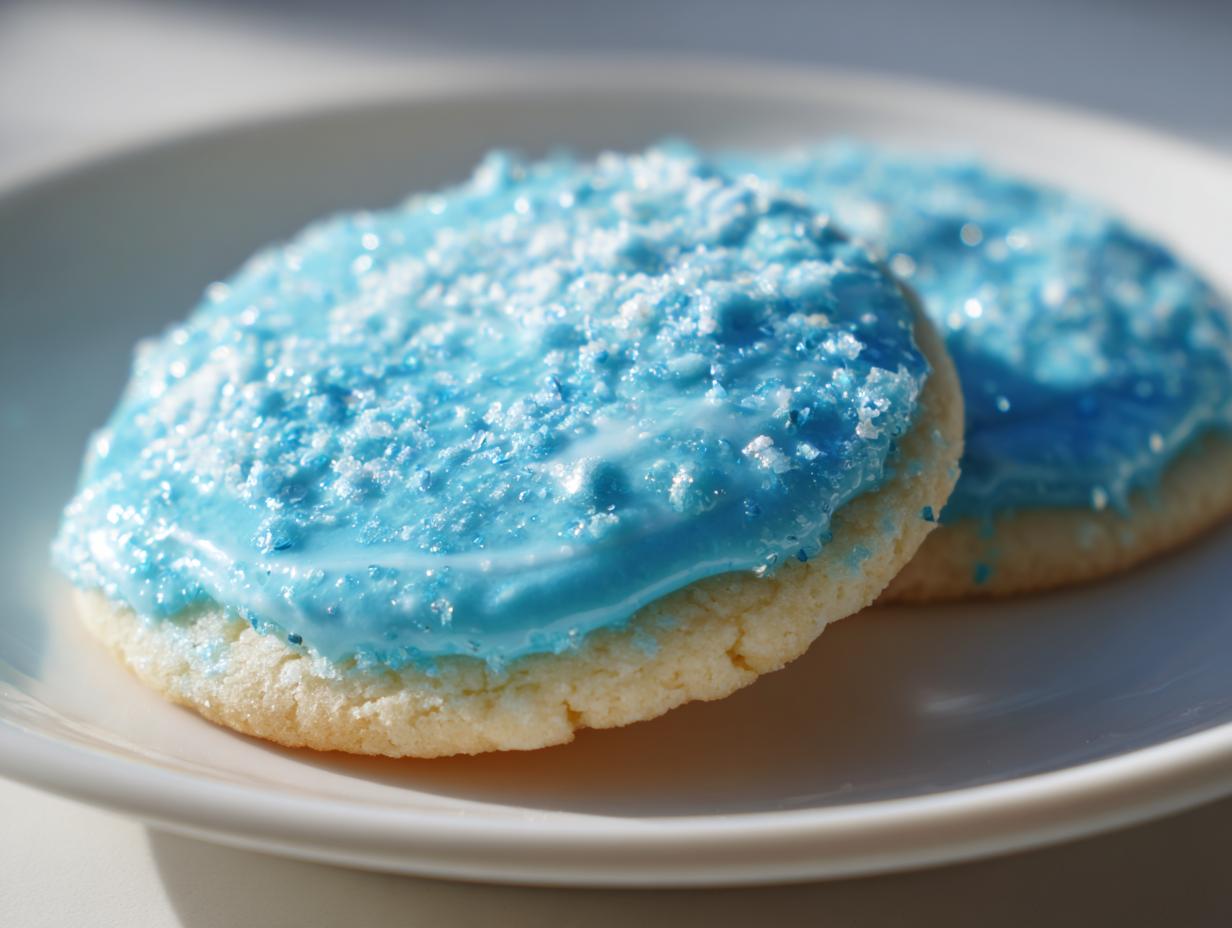

Oh, the sheer frustration of watching your beautifully cut-out cookies sink under a pool of runny glaze! We’ve all been there, haven’t we? You spend hours making perfect dough only to have your decoration collapse into a sad, sticky puddle. Well, I promise you, that ends today. What I’m sharing here is my absolute go-to sugar cookie icing recipe. It’s designed to give you that professional, smooth, glossy finish that dries rock-hard, which is essential if you plan on stacking them for gifting or shipping, like I often do for friends during the holidays. This reliable glaze sets up beautifully, acting as such an easy royal icing alternative, giving you that crisp edge without any fuss. Trust me, this is the one you’ll want saved in your favorites file after you bake your next batch of chai spice sugar cookies.
- Why This Is The Best Sugar Cookie Icing Recipe for Decorating
- Ingredients for Your Hard Setting Sugar Cookie Glaze
- Step-by-Step: How to Make Homemade Cookie Icing
- Mastering Cookie Decorating Icing Recipe Techniques
- Tips for Success with This Shiny Sugar Cookie Icing Tutorial
- Storage & Reheating Instructions for Leftover Cookie Icing
- Frequently Asked Questions About This Sugar Cookie Icing Recipe
- Nutritional Estimates for Sweet Cookie Glaze Recipe
- Share Your Beautifully Iced Creations
Why This Is The Best Sugar Cookie Icing Recipe for Decorating
There’s nothing quite like seeing a tray of perfectly decorated cookies, and that look comes down to the finish of the icing itself. This recipe is engineered for maximum visual impact and practicality. It gives you that beautiful, shiny sugar cookie icing tutorial quality finish that looks straight out of a professional bakery. Forget the messy buttercream that smears the moment you sneeze near it! We are aiming for perfection here, especially when making fruit pizza sugar cookies where the base needs support.

Achieving a Sugar Cookie Icing That Dries Firm and Stackable
The non-negotiable element for me is that the icing *must* set up firm. We use meringue powder here—it’s a safe, reliable way to get that structure without using raw eggs. Paired with just a tiny bit of corn syrup, it stabilizes everything, creating the perfect stackable cookie icing recipe. You can box these cookies up for faraway relatives, and they still look flawless when they arrive. That hard-setting glaze is the secret weapon!
The Secret to a Smooth Cookie Icing Recipe for Beginners
Even if you’ve never touched a piping tip before, this will work for you. It’s truly an easy royal icing alternative because the mixing does most of the heavy lifting. If you beat it just long enough—and I mean beat it—it incorporates air in totally the right way, which results in a flawless, smooth cookie icing recipe for beginners. You skip the stickiness and go straight to that shiny, professional coating.
Ingredients for Your Hard Setting Sugar Cookie Glaze
Okay, let’s talk ingredients. When you’re aiming for this kind of professional, hard setting sugar cookie glaze, the quality of what goes into the bowl really matters. I’ve listed out exactly what you need below, but pay close attention to the prep notes, especially the sifting. You don’t want lumps when you’re aiming for that smooth, impeccable look, right?
- 4 cups powdered sugar, sifted
- 1/4 cup meringue powder
- 1/2 cup warm water (you might need a touch more or less, always have extra ready!)
- 1 teaspoon clear vanilla extract
- 1/2 teaspoon light corn syrup (optional, but trust me on this one for shine!)
Ingredient Notes and Substitutions for Glossy Icing Recipe for Cookies
I know some people worry about meringue powder, but this is where we build structure and food safety into our glossy icing recipe for cookies. Using meringue powder instead of raw egg whites gives you that characteristic Royal Icing texture—hard, smooth, and completely safe without stressing over egg handling. It’s just so much more reliable for consistent results, especially when you’re making a big batch for holiday cookie decorating.
Now, about that corn syrup. You asked about no corn syrup cookie icing options, and yes, you *can* skip it. If you leave it out, you still get a great hard-setting icing. But if you want that magazine-worthy, mirror-like sheen? The light corn syrup is your inexpensive secret weapon for that extra gloss and incredible durability. I highly recommend it if you want the best possible result for your baked goods.
Step-by-Step: How to Make Homemade Cookie Icing
Following the measurements is one thing, but the mixing process is where our sugar cookie icing recipe really comes alive! I always follow these steps precisely because how you mix determines whether you get stiff peaks for outlining or a pourable glaze for flooding. It’s all about building that ideal texture so you can achieve that perfect, professional look on your holiday treats.
Mixing the Base for Your Sugar Cookie Icing Recipe
First things first: get those dry ingredients—the sifted powdered sugar and meringue powder—combined well in your stand mixer bowl before you add anything wet. Then, add your water, vanilla, and that optional corn syrup. I start mixing on the absolute lowest speed; you don’t want a cloud of white dust floating across your kitchen, trust me! Once it just comes together, ramp it up to medium-high. You need to beat this mixture for a solid three to five minutes. That extended beating is key! When you stop, the icing should look glossy and hold medium peaks when you lift the whisk. That’s your consistency for outlining your intricate designs.
Adjusting Consistency: Best Cookie Icing for Flooding
If you stop at the outlining stage, your icing will be too thick to spread smoothly across the center of the cookie, which is called flooding. This is the most important part if you want that completely flat, smooth surface. You need to add water, one teaspoon at a time, mixing completely after each addition. We are looking for the ‘ribbon test.’ When you lift your beater, the icing should drip off in a steady, luxurious ribbon. You should be able to count to ten before that ribbon completely disappears back into the main bowl of icing. That slow melt tells you you’ve hit the sweet spot for the best cookie icing for flooding!
Mastering Cookie Decorating Icing Recipe Techniques
Now that we have this beautiful, perfectly tempered base for our cookie decorating icing recipe, it’s time to actually use it! This is where technique makes all the difference between an amateur cookie and one that looks like it needs its own tiny velvet rope. Remember, we are preparing for the flood, but every good flood needs strong, dependable banks first. It’s a two-part application process that takes patience, but it yields the most stunning results, ready for any of your holiday cookie icing tutorial dreams.

Coloring Your Icing for a Professional Look
When it comes to color, please, please, please forget the standard liquid food coloring you use for cake sponges. That stuff is mostly water, and adding it to this delicate glaze is a recipe for disaster—it instantly thins out our beautiful consistency. We need to use concentrated gel or paste food colorings. I call this technique “coloring sparingly.” Just touch a toothpick into the gel coloring and swirl it into your separated bowls of icing. It goes a long way! You can always add more color, but you can’t easily take it away without ruining the sweet cookie glaze recipe structure. Mix until the color stops streaking; then you’re ready to save some bowls for white details or that final layer of white piping.
Drying Time for Stackable Cookie Icing Recipe
This is the discipline part. Once you’ve flooded your cookie—that means filling in the area inside your outline—you must stop touching it! Ideally, you let the outline set for about 15 to 30 minutes before you flood it. But once the flooding is done, humidity is your enemy, and time is your friend. You’re looking at a full 6 to 12 hours of undisturbed drying time for this batch to become a true stackable cookie icing recipe. If you try to stack them too soon, you’ll end up with colored smudges all over the back of the cookie above it. Be patient; the reward is cookies that look absolutely crisp and professional!
Tips for Success with This Shiny Sugar Cookie Icing Tutorial
Even with a rock-solid recipe like this gorgeous shiny sugar cookie icing tutorial guide, sometimes things get a little fussy in the kitchen. That’s totally normal! Part of mastering any baking technique is learning how to troubleshoot on the fly. I’ve gathered the few things I learned over years of making hundreds of batches of cookie icing to help you achieve that consistent, beautiful result every single time. These are my tried-and-true fixes for when the icing isn’t behaving perfectly!

What to Do If Your Icing Is Too Thick
If your icing starts to feel like it’s fighting you during the outlining stage—maybe it won’t come out of the piping bag easily, or the line looks jagged—it’s too thick. Don’t panic and don’t add a giant splash of water! The key here is control. Just gently stir in water, half a teaspoon at a time, until that thick icing relaxes back into a workable, soft-peak consistency. Remember, you always want to be able to fix something that is too thin by adding more sifted powdered sugar, but fixing something that’s too wet is a much longer process. Start small. This keeps your color for cookie icing vibrant, too.
Bringing Back Icing That Has Started to Crust Over
If you leave your bowls of icing out on the counter for a while while you’re decorating a huge batch of cookies—which I often do when preparing for big occasions—the surface will naturally form a slight crust. This is normal! It’s drying, which is what we want for the final product, but not when it’s still in the bowl. You don’t need to remake the batch. Just take a clean spatula or spoon and scrape that slightly hardened top layer off into the trash. Then, stir the rest vigorously (or use a mixer on low) and add just a tiny drizzle of water until it’s smooth and glossy again. It’s like waking it up!
Achieving the Sugar Cookie Toppings Professional Look
The very last thing you’ll want for that sugar cookie toppings professional look is a dull, chalky finish. That’s where our optional corn syrup truly shines, but technique matters too! When you are flooding the cookies, try to keep your bag or squeeze bottle moving smoothly over the surface. After you fill an area, pick up the cookie and gently shake it back and forth. This motion helps the icing “settle” and self-level, pushing out any tiny air bubbles you might have accidentally created with your piping bag. When you let it dry under room temperature (but not in direct sun!), that extra smoothing action gives you the amazing, mirror-like shine you see in magazines. If you want to see more inspiring ways to decorate, you can always check out my latest baking adventures on the blog!
Storage & Reheating Instructions for Leftover Cookie Icing
One great thing about this sugar cookie icing recipe is that it makes a decent batch, so sometimes, just like when making my pumpkin cheesecake, you end up with leftovers! Since this is a hard-setting glaze, storage is crucial so it doesn’t cure prematurely in the bowl. You absolutely need to keep any unused icing airtight. I recommend transferring the colored icing into small, airtight containers or even heavy-duty zip-top bags, pushing out as much air as possible before sealing.

For short-term storage—say, you’re decorating over two days—just keep it sealed on the counter at room temperature. This glaze typically does fine for 24 hours at room temp, especially because of the meringue powder content. However, if you need to save it for a week or more, the refrigerator is safer! Just make sure it’s double-bagged or tightly sealed, as the fridge humidity can affect texture.
Now, when you pull that refrigerated icing out, it will be stiff, like a rock—that’s because it’s doing its job of hardening! Don’t despair. To revive it, you need to bring it back to room temperature first. Once it’s soft, you’ll need to add a few drops of warm water, mixing very gently at first. Remember, we are just rehydrating it slightly, not thinning it completely. Usually, five or six gentle stirs with a spoon is enough to bring back that beautiful, smooth, workable consistency needed for more decorating!
Frequently Asked Questions About This Sugar Cookie Icing Recipe
Whenever I develop a recipe that relies heavily on technique, like this one for achieving that perfect hard set, I always get a flood of questions! It’s completely normal because icing is so much more finicky than cake batter. If you’re nervous about getting the right results for your next big bake, here are some of the things people ask me most often about this sugar cookie icing recipe. Hopefully, this clears up any last-minute worries before you start mixing!
Can I use milk instead of water in this cookie decorating icing recipe?
That is a really common question, especially if you only have milk on hand! While you *could* use milk, I strongly advise against it, particularly if your main goal is a hard, stackable finish. Milk contains fat and sugars that interfere with the chemical process that allows the meringue powder and sugar to dry firmly. If you use milk, you’ll likely end up with a much softer set, maybe even something that feels tacky the next day—not ideal for stamping your cookies with designs. For the absolute best structure in this cookie decorating icing recipe, stick to warm water or, sometimes, clear lemon juice if you need that slightly acidic kick for flavor.
How long does this hard setting sugar cookie glaze take to dry completely?
This is where patience truly pays off. While the icing will look set enough to touch after just a few hours, to guarantee that completely dry, firm, crunch-free surface that won’t smudge? You need to give it time. I always plan for a minimum of 6 hours, but truthfully, 10 to 12 hours is what I count on, especially if I’m decorating in humid weather. Humidity is the enemy of a dry glaze! If the air is damp, the drying time stretches out. Don’t try to rush it by putting them in the oven; that just melts the shine right off. Check out this resource if you are trying to speed up the curing process in a pinch, but airflow and time are usually best!
Is this the same as traditional Royal Icing?
That is the million-dollar question! For all intents and purposes, this recipe behaves almost exactly like classic Royal Icing, which is why I call it an easy royal icing alternative. The key binder in both is typically egg whites, but we are using meringue powder here instead. Meringue powder contains stabilizers (and often dried egg whites) that make the mixing process more predictable and remove the risk associated with using raw eggs in large amounts. So, while the ingredients are slightly altered for ease and safety, the end result is the same: a beautiful, hard setting sugar cookie glaze that you can pivot from outlining to flooding just like the traditional recipe.
Nutritional Estimates for Sweet Cookie Glaze Recipe
Oh, while we are talking specifics for this sweet cookie glaze recipe, I know some of you are just as interested in the numbers as you are in the flavor! I always have my recipes professionally analyzed, but please remember these values are always estimates. They are based on the exact ingredients listed above, and as we both know, the brand of powdered sugar or the amount of water you end up needing can slightly shift the final count. That said, this gives you a good benchmark for what you’re working with!
This data breaks down based on dividing the whole batch by approximately 48 servings (since one batch usually covers about 2 dozen standard cookies).
- Serving Size: 1/4 cup icing
- Calories: 180
- Sugar: 45g
- Sodium: 15mg
- Total Fat: 0g
- Carbohydrates: 45g
- Protein: 1g
Because this type of icing is almost entirely sugar and meringue powder stabilizers, you’ll see that the sugar content leads the way, which is exactly what we expect from a hard-setting glaze! Use these numbers as a guide, especially if you are serving these gorgeous cookies at a gathering where guests might be mindful of their intake. It’s all about enjoying every single bite, though, isn’t it?
Share Your Beautifully Iced Creations
And there you have it! We’ve transformed simple powdered sugar into the most versatile, resilient, and absolutely gorgeous sugar cookie icing recipe. I truly hope you feel as confident diving into your decorating as I do when I make my seasonal cheesecake recipes; this icing is just that reliable.
For me, the greatest joy in developing these recipes is seeing them come to life in your kitchens. When you take the time to pipe, flood, and admire those smooth, glossy finishes, you are unfolding your own beautiful kitchen story. I sincerely want to see what you create!
Please, when you finish decorating your stackable cookies—be they holiday shapes, birthday cut-outs, or just because shapes—come back, leave me a rating below, and tell me how this hard setting sugar cookie glaze performed for you. Did you use the corn syrup? Did you love the thin consistency for flooding? Your feedback helps other home cooks feel brave enough to try this technique.
And if you happen to share photos over on social media? Tag me! Seeing my techniques bring such vibrant, edible art into your homes encourages me every single day to keep stirring, mixing, and sharing the best that baking has to offer. Happy decorating, truly!
PrintThe Perfect Sugar Cookie Icing Recipe That Dries Hard and Smooth

This sugar cookie icing recipe creates a smooth, glossy finish that dries firm, making it ideal for stacking and gifting your decorated cut-out cookies.
- Prep Time: 15 min
- Cook Time: 0 min
- Total Time: 15 min
- Yield: Coats approximately 2 dozen 3-inch cookies 1x
- Category: Baking
- Method: Mixing/Glazing
- Cuisine: American
- Diet: Vegetarian
Ingredients
- 4 cups powdered sugar, sifted
- 1/4 cup meringue powder
- 1/2 cup warm water (approximately)
- 1 teaspoon clear vanilla extract
- 1/2 teaspoon light corn syrup (optional, for extra shine)
Instructions
- In a large bowl, whisk together the sifted powdered sugar and meringue powder until fully combined.
- Add the warm water, vanilla extract, and corn syrup (if using) to the dry ingredients.
- Mix on low speed with an electric mixer until the ingredients are just combined. Scrape down the sides of the bowl.
- Increase the mixer speed to medium-high and beat for 3 to 5 minutes until the icing is smooth, glossy, and holds medium peaks. This is the consistency for outlining.
- To achieve a flooding consistency, add water, one teaspoon at a time, beating well after each addition, until the icing slowly drips off a spoon in a continuous ribbon that disappears back into the bowl after counting to ten.
- Divide the icing into separate bowls for coloring. Add gel food coloring sparingly and mix until the color is uniform.
- Use the thicker icing for outlining the cookies. Let the outline set for 15 to 30 minutes.
- Use the thinner (flooding) icing to fill in the outlined areas. Gently shake the cookie to smooth the surface.
- Allow the cookies to dry completely at room temperature for 6 to 12 hours, or until the icing is completely hard to the touch.
Notes
- For a professional look, use gel food coloring, as liquid coloring can thin the icing too much.
- If the icing becomes too thick while working, stir in water, 1/2 teaspoon at a time, until the desired consistency returns.
- This hard-setting glaze provides a stackable cookie icing recipe perfect for holiday cookie decorating.
Nutrition
- Serving Size: 1/4 cup icing
- Calories: 180
- Sugar: 45
- Sodium: 15
- Fat: 0
- Saturated Fat: 0
- Unsaturated Fat: 0
- Trans Fat: 0
- Carbohydrates: 45
- Fiber: 0
- Protein: 1
- Cholesterol: 0