
When Halloween rolls around, there’s just something magical about turning ordinary food into spooky creations, right? And my all-time favorite way to do that? With these unbelievably cute and super easy mummy hot dogs! They’re a total hit with the kids, and honestly, who can resist a little hot dog wrapped up like a tiny mummy? Here at Unfold Recipes, I’m all about making impressive-looking food accessible, and these mummies are the perfect example. They prove you don’t need a ton of fancy ingredients or hours in the kitchen to create something truly special and fun for a spooky weeknight dinner or your next Halloween bash. It just takes a little crescent roll dough and a dash of imagination! For more about my kitchen philosophy, check out my about page!
- Why You'll Love These Mummy Hot Dogs
- Gather Your Mummy Hot Dogs Ingredients
- Crafting Your Mummy Hot Dogs: Step-by-Step
- Tips for Making the Best Mummy Hot Dogs
- Make-Ahead and Reheating Mummy Hot Dogs
- Serving Suggestions for Your Mummy Hot Dogs
- Frequently Asked Questions About Mummy Hot Dogs
- Nutritional Information for Mummy Hot Dogs
- Share Your Spooky Creations!
Why You’ll Love These Mummy Hot Dogs
Seriously, these mummy hot dogs are a total win-win:
- Kid-Friendly Fun: Kids absolutely adore helping make (and eating!) these little guys.
- Lightning Fast: We’re talking ready in about 30 minutes, start to finish!
- Perfectly Spooky: They’re the star of any Halloween party or festive meal.
- Barely Needs Ingredients: You probably have most of what you need already – just hot dogs, crescent rolls, and something for eyes!
- Decorating Delight: Letting the kids add the mummy bandages and eyes is half the fun!
Gather Your Mummy Hot Dogs Ingredients
Alright, let’s get our spooky little guys ready! You really don’t need much for these mummy hot dogs, which is part of why I love them so much. Just grab these three things:
- 8 all-beef hot dogs (or your favorite kind!)
- 1 can (8 oz) refrigerated crescent rolls (the ones that pop open are the most fun!)
- Mustard or small candy eyes (for those googly mummy eyes – totally essential for the look!)
That’s it! See? So easy. It’s a good idea to decide if you want to use mustard squiggles for the eyes *before* you start wrapping, or if you’ve got those cute little candy eyes, have them ready to go.
Crafting Your Mummy Hot Dogs: Step-by-Step
Okay, now for the fun part – turning these ordinary hot dogs into spooky mummy goodness! For tons more fun ideas, you’ve got to see these mummy dog variations. It’s surprisingly easy, and I’ve got a few little tricks to make sure yours look amazing.
Preparing the Dough for Mummy Hot Dogs
First things first, let’s get that crescent roll dough ready. Gently unroll the entire sheet of dough – try not to tear it! Then, take your pizza cutter or a sharp knife and cut the dough lengthwise into thin strips. I usually aim for about ¼ to ½ inch wide. Thinner strips give you more of that classic mummy bandage look, and they bake up super crispy!
Wrapping Your Mummy Hot Dogs
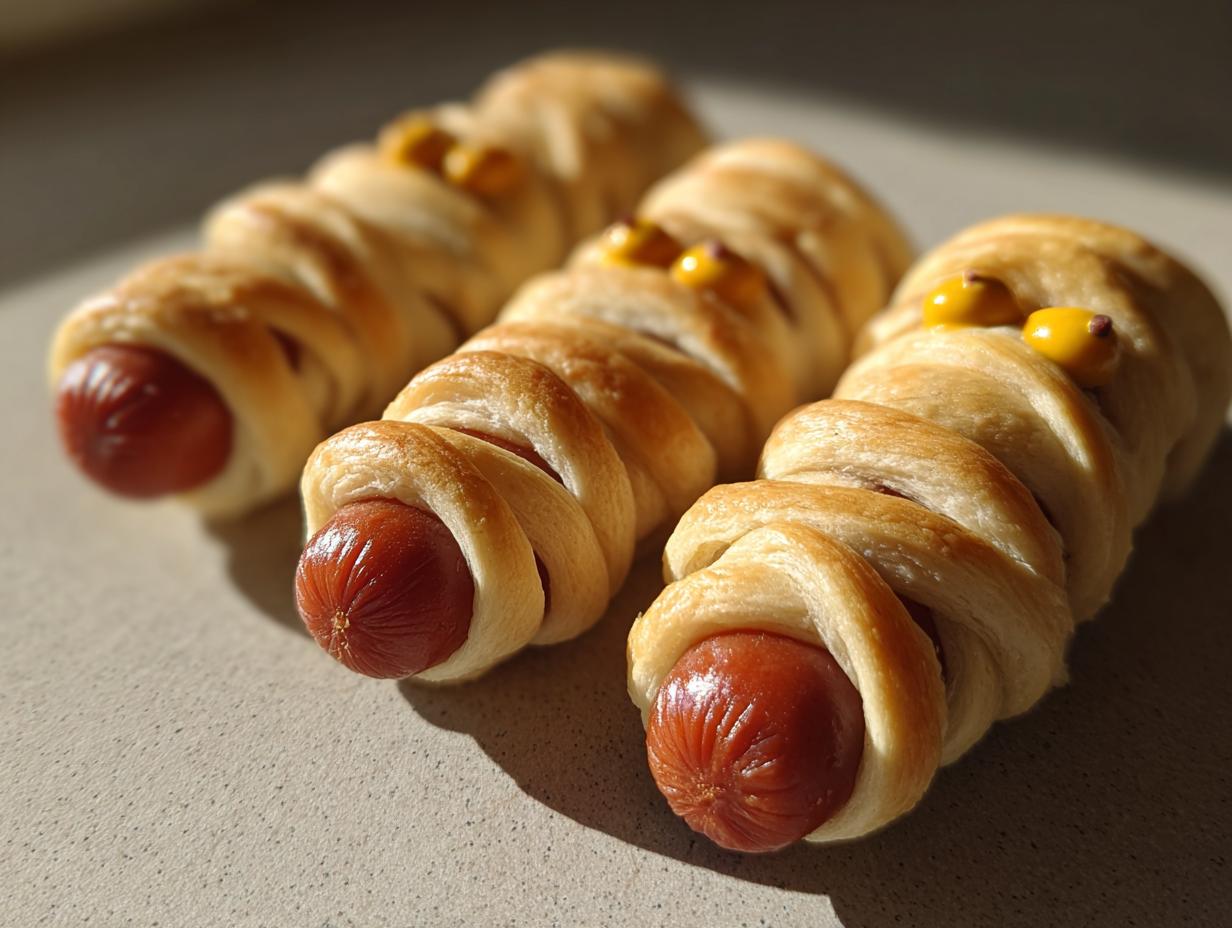
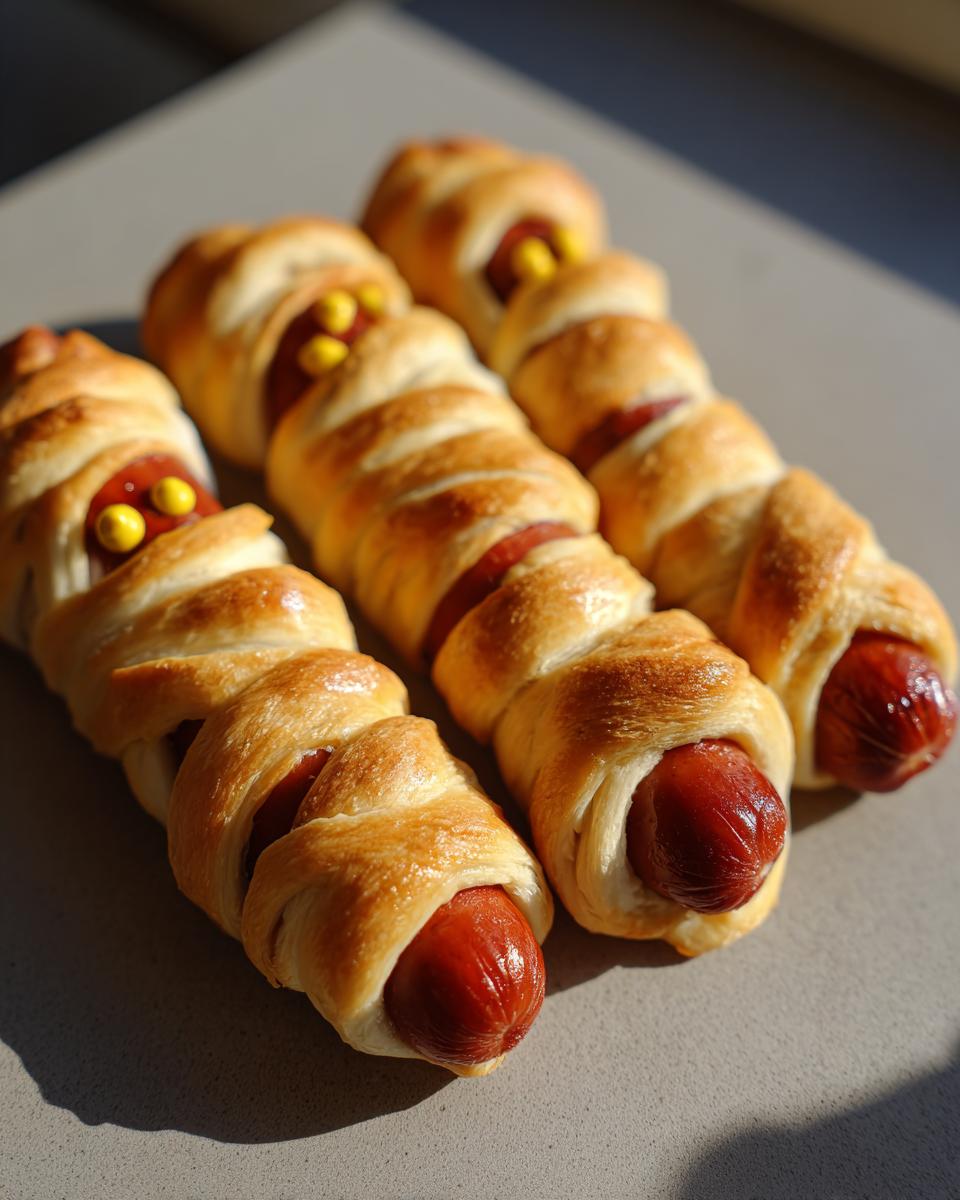
This is where the magic happens! Lay your hot dog on a clean surface. Start by wrapping one strip of dough around the top, anchoring it near the hot dog’s “head.” Then, just start wrapping the strips around the hot dog, crisscrossing them like you’re bandaging a tiny mummy leg. Don’t worry about it being perfect – uneven wraps actually make them look more authentic! Just make sure to leave a little gap at the top where the face will eventually go. Tuck the ends of your last strip underneath the hot dog so they don’t unravel in the oven. It’s a funny thing, but the dough doesn’t really expand *that* much, so you don’t have to go too crazy with the wrapping.
Baking the Perfect Mummy Hot Dogs
Once all your little mummies are wrapped, place them onto a baking sheet lined with parchment paper. I always tell people to preheat your oven to 375°F (190°C). Pop them in and bake for about 12 to 15 minutes. You want that dough to turn a gorgeous golden brown and look nicely cooked through. Keep an eye on them, because ovens can be a bit different! If they start looking too dark on top but the dough isn’t quite ready, you can always loosely tent them with a piece of foil.

Decorating Your Mummy Hot Dogs
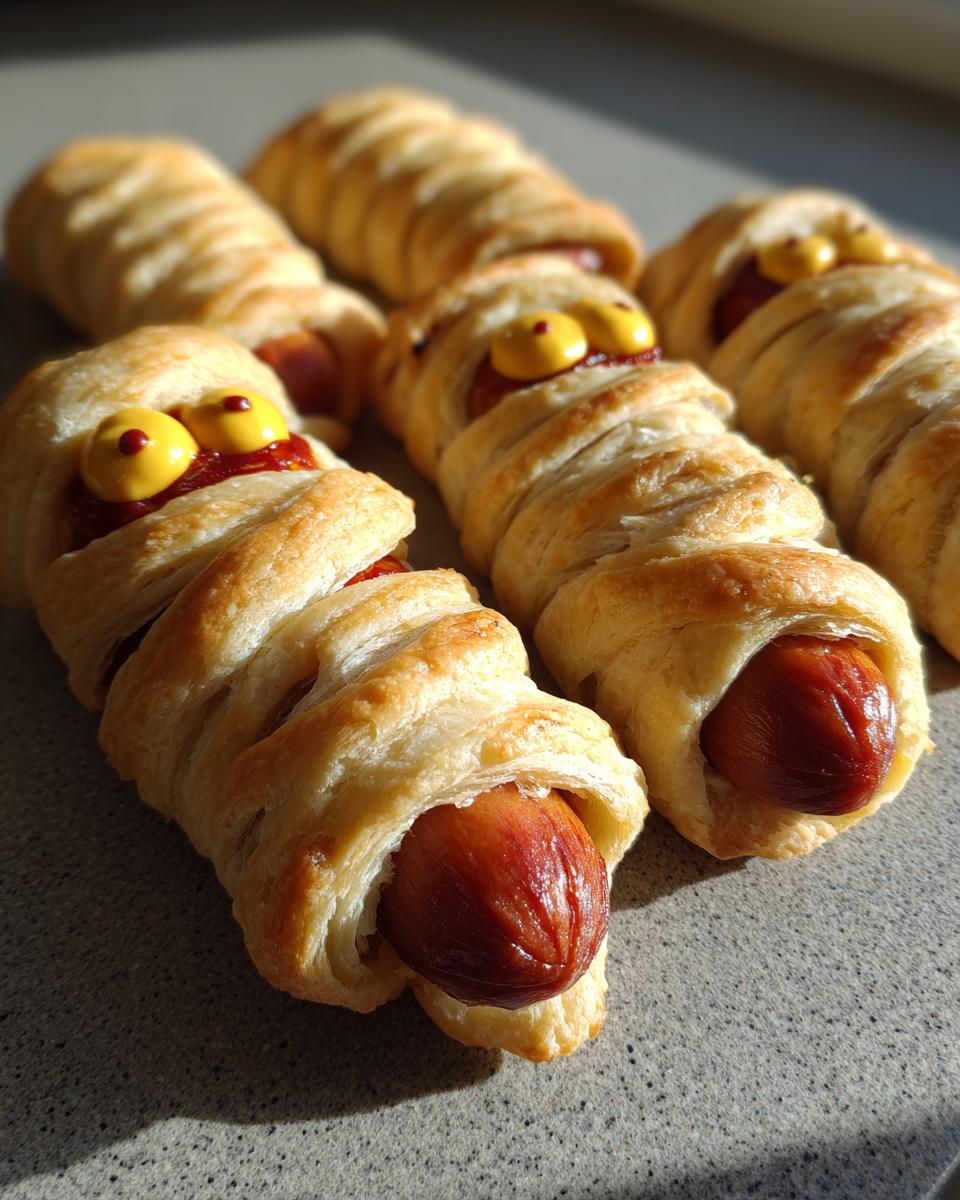
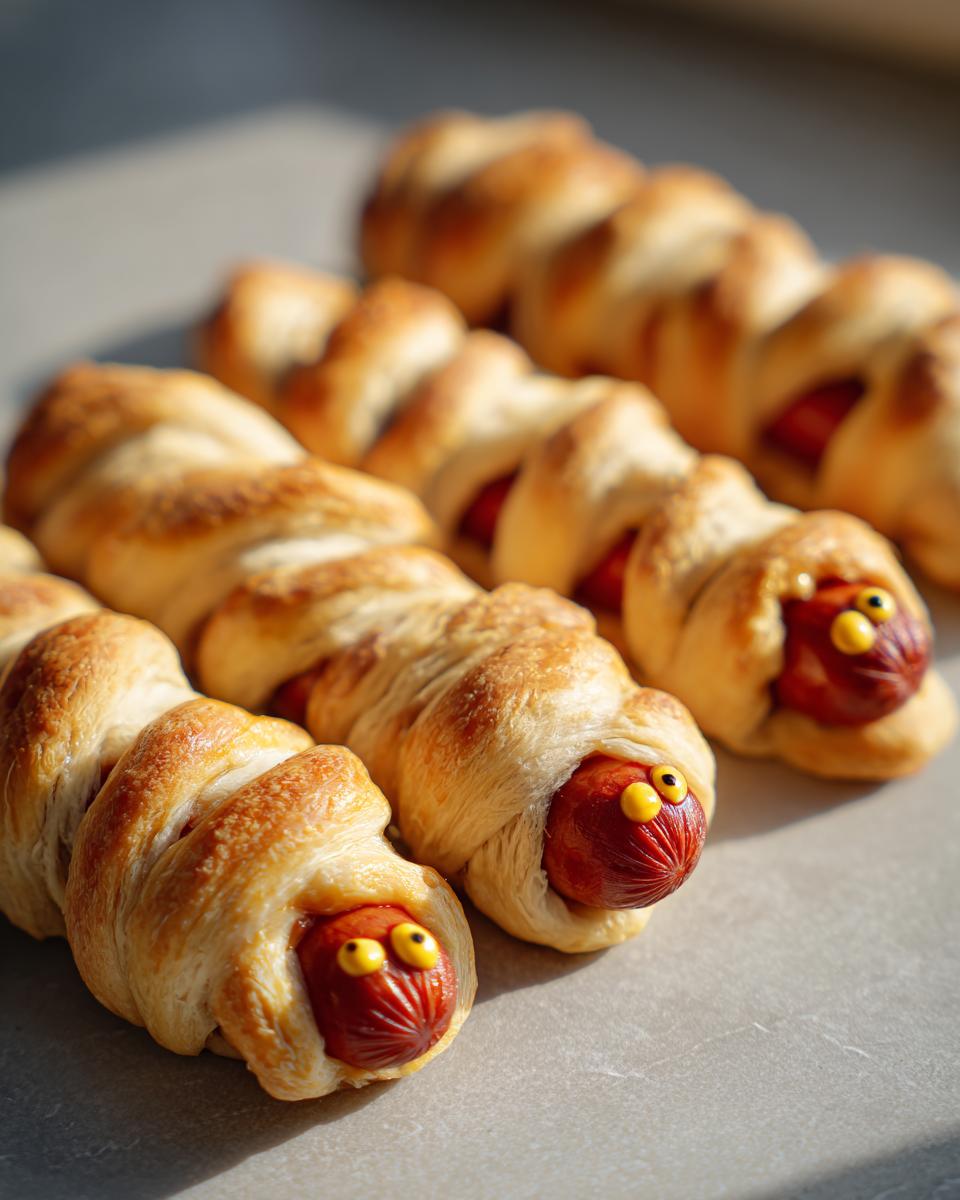
Now for the best part – giving them eyes! Once they’re out of the oven and cooled just a tiny bit (so you don’t melt your decorations!), just add two little dots of mustard for eyes in that space you left earlier. If you’ve got those cute little candy eyes, that’s even better! Just pop them on, and voilà! Your mummy hot dogs are ready to spook and delight.
Tips for Making the Best Mummy Hot Dogs
Okay, so you’ve got darling mummy hot dogs, but maybe they’re not *quite* Hollywood-ready yet? Don’t you worry! I’ve learned a thing or two from my own kitchen adventures, and I’m happy to share my secrets for making these spooky snacks absolutely perfect every single time. You’ll find all sorts of handy hints on my blog, but here are my top tips just for these mummies:
Achieving Perfectly Cooked Mummy Hot Dogs
The most important thing is making sure that gorgeous crescent dough is fully baked! Since the dough is wrapped so much, it can sometimes be a little doughy in the middle. If your mummies are looking a little pale on top but you can tell the dough isn’t quite done, don’t be afraid to loosely tent them with foil and give them a few more minutes. Or, if you like that extra-crispy bandage effect, just bake them for another 2-3 minutes past the golden-brown stage – trust me, it’s worth it!
Creative Ways to Decorate Mummy Hot Dogs
Mustard and candy eyes are classic, but why stop there? You can totally get creative with your mummy faces! Try using tiny dots of black edible food marker for super-fine eyes, or even a little dab of cream cheese frosting if you’re feeling fancy. Some folks even use little pieces of olive for eyes on their mummy hot dogs. Whatever you choose, just make sure whatever you use for eyes is applied after baking so it doesn’t melt or burn!
Make-Ahead and Reheating Mummy Hot Dogs
You know, one of the best things about these mummy hot dogs is how perfectly they work for planning ahead! If you’re hosting a party and want to get a head start, you can totally assemble these little guys earlier in the day. Just wrap your hot dogs, place them on your baking sheet (maybe cover them loosely with plastic wrap), and keep them in the fridge until you’re ready to bake. They’re a fantastic example of how you can easily prep for events, kind of like how I prep my freezer breakfast burritos for busy mornings!
When it’s time to bake them from the fridge, they might need just a minute or two longer in the oven, so keep an eye on them. Now, if you have any leftover mummy hot dogs (which is rare in my house!), reheating is a breeze. Forget the microwave, it makes the dough all weird and chewy! Instead, pop them back into a preheated oven at 350°F (175°C) for about 5-7 minutes until they’re warm and the dough is crisp again. Or, if you have an air fryer, you’re in luck! Just pop your mummy hot dogs in there at the same temperature, 350°F (175°C), for about 3-4 minutes, and they come out almost as good as fresh from the oven. Perfect for getting your “air fryer mummy hot dogs” fix whenever the craving strikes!
Serving Suggestions for Your Mummy Hot Dogs
Honestly, these mummy hot dogs are so fun, they practically steal the show at any Halloween gathering! They’re perfect on their own as a little spooky snack, but they also pair wonderfully with other festive treats. Picture this: a spread of ghoulish goodies with your mummy hot dogs taking center stage! You could totally serve them alongside some of my other easy appetizers, maybe some spooky spiderweb dip or ghost-shaped quesadillas. And for a more complete meal, they’re great with a side of oven-baked sweet potato fries and a simple salad – maybe a “witch’s brew” salad from some of my soup and salad recipes. They make any Halloween party or even just a weeknight dinner feel extra special and fun!
Frequently Asked Questions About Mummy Hot Dogs
Got questions about these spooky little guys? I totally get it! It’s always good to know the little details, especially when you’re trying to nail that perfect mummy look. Here are some things people often ask about my mummy hot dogs:
Can I use different types of hot dogs?
Oh, absolutely! While I love classic all-beef hot dogs, feel free to use whatever you have on hand. Turkey dogs, chicken dogs, or even veggie dogs work wonderfully. Just make sure they’re a standard size so the crescent roll bandages fit nicely. It’s a great way to cater to different tastes and dietary needs!
What if my crescent dough is too sticky?
This happens sometimes, especially if it’s a bit warm in your kitchen! Don’t worry. Lightly flouring your hands and your work surface usually does the trick. You can also use a bench scraper or a thin spatula to help lift and move the dough strips if they’re sticking to your cutting board. Just work quickly and gently.
Are these suitable for very young children?
Yes, they are a fantastic option for little ones! For very young children, you might want to stick to mustard for the eyes instead of candy eyes, as candy can be a choking hazard. Also, make sure the hot dogs are cut into smaller, manageable pieces after baking if little ones are eating them. It’s a fun way to get them involved in cooking and enjoy a festive meal!
How do I get the dough to stay on the hot dog?
The best trick is to really press the ends of the dough strips down firmly against the hot dog before you bake them. tucking the last strip end underneath helps a lot too. Don’t overthink it; a few well-placed pinches will secure your mummy bandages. The dough basically bakes onto the hot dog, keeping its shape!
Nutritional Information for Mummy Hot Dogs
Now, I’m not a nutritionist or anything, but based on the typical ingredients for these mummy hot dogs, you’re looking at about 250 calories per serving. You’ll get around 15g of fat, 20g of carbs, and 8g of protein. Of course, this can totally change depending on the brand of hot dogs and crescent rolls you use, or if you go a little wild with the mustard eyes! It’s good to know, though, especially if you’re working on your keto meal plan delivery or just trying to keep track of things.
Share Your Spooky Creations!
Alright, my fellow kitchen adventurers, now it’s YOUR turn! I absolutely adore seeing what you all create in your own kitchens. Did your mummy hot dogs turn out perfectly spooky? Did the kids have a blast helping out? I’d love to hear all about it! Please, share your photos, rate this recipe, or tell me your favorite part in the comments below – or even reach out through my contact page! Your spooky triumphs inspire me!
PrintMummy Hot Dogs

Easy and fun mummy hot dogs made with crescent rolls, perfect for Halloween parties or a spooky weeknight dinner.
- Prep Time: 15 min
- Cook Time: 15 min
- Total Time: 30 min
- Yield: 8 servings 1x
- Category: Appetizer
- Method: Baking
- Cuisine: American
- Diet: Vegetarian
Ingredients
- 8 hot dogs
- 1 can (8 oz) refrigerated crescent rolls
- Mustard or small candy eyes for decoration
Instructions
- Preheat your oven to 375°F (190°C). Line a baking sheet with parchment paper.
- Unroll the crescent dough and separate it into 8 triangles.
- Cut each triangle lengthwise into thin strips to create the mummy bandages.
- Wrap a few strips of dough around each hot dog, leaving a small gap for the face. You can crisscross the strips or wrap them in a spiral.
- Place the wrapped hot dogs on the prepared baking sheet.
- Bake for 12-15 minutes, or until the dough is golden brown and cooked through.
- Remove from oven and let cool slightly.
- Add mustard dots or candy eyes to the gap you left for the face.
Notes
- For crispier mummy dogs, bake for an additional 2-3 minutes.
- To reheat, place in a 350°F (175°C) oven for 5-7 minutes or in an air fryer at 350°F (175°C) for 3-4 minutes.
- You can prepare these ahead of time and refrigerate them before baking.
Nutrition
- Serving Size: 1 mummy dog
- Calories: 250
- Sugar: 3g
- Sodium: 600mg
- Fat: 15g
- Saturated Fat: 5g
- Unsaturated Fat: 10g
- Trans Fat: 0g
- Carbohydrates: 20g
- Fiber: 1g
- Protein: 8g
- Cholesterol: 30mg