

You know those days when you’ve crushed your workout, everything feels right in the world, but then that fierce sugar craving hits? I totally get it. For the longest time, satisfying that craving meant compromising my nutritional goals. But not anymore! I finally cracked the code on creating a truly decadent, creamy, high-protein dessert that feels like cheating but totally isn’t: the **Protein Cheesecake**.
Forget the oven; we are keeping things simple and fast with these No-Bake **Protein Cheesecake** Jars. They are literally my go-to because you can whip up four servings quicker than preheating an oven, and they’re perfect for grabbing straight from the fridge for meal prep. Trust me, when you’re trying to stay on track, having a reliable, delicious, guilt-free sweet treat like this on hand is everything. I’ve tested this formula rigorously. If you want to read a little more about my journey in the kitchen from PR to pastry, you can check out my story on the About Page!
- Why This No-Bake Protein Cheesecake Jars Recipe Works for You
- Gathering Ingredients for Your Protein Cheesecake Jars
- Step-by-Step Instructions for No Bake Protein Cheesecake
- Tips for the Best Protein Cheesecake Results
- Variations on This Healthy Cheesecake Dessert
- Serving Suggestions for Your Protein Cheesecake Jars
- Storage and Reheating Instructions for Protein Cheesecake
- Frequently Asked Questions About Protein Cheesecake
- Nutritional Estimate for This Protein Cheesecake
- Share Your Guilt Free Cheesecake Creations
Why This No-Bake Protein Cheesecake Jars Recipe Works for You
When you are serious about hitting your macros but still crave something that tastes like a real dessert, this format shines. We kept this recipe totally fuss-free, meaning you skip the oven time entirely! It delivers exactly what we need.
High Protein Cheesecake Recipe Benefits
- This is a powerhouse High Protein Cheesecake Recipe; you get a whopping 25 grams of protein packed into every single serving!
- Zero oven time means it’s an incredibly Meal Prep Protein Dessert—mix it up, jar it, and enjoy all week.
- It’s ready in minutes, so you get instant gratification without sacrificing your goals.
Achieving That Creamy Protein Dessert Texture
I know what you’re thinking: protein powder makes things grainy, right? Not here! Because we are relying on a blend of cottage cheese and Greek yogurt instead of tons of cream cheese, you get that desired Creamy Protein Dessert texture. It sets up beautifully, creating a truly Light & Creamy Cheesecake experience without the headache.

Gathering Ingredients for Your Protein Cheesecake Jars
Before those jars go into the fridge, we need to gather our building blocks! This Protein Cheesecake is all about choosing the right ingredients to get that perfect texture and protein punch without adding unwanted fats or sugars. If you’re curious how this compares to some other healthy options out there, check out this post on High-Protein Cheesecake recipes for comparison!
Crust Components for this Protein Cheesecake
We’re keeping the crust simple but structure-focused. You don’t need much for this part, just enough to line the bottom of your jars. You’ll mix about 1/2 cup of crushed graham crackers—or if you’re keeping it gluten-free, grab some low-carb cookie crumbs—with just 1 tablespoon of melted light butter or coconut oil. That small amount of fat is crucial for binding everything together!
The High-Protein Filling Base
This is where the magic happens! For the filling, we’re ditching the heavy cream cheese for something much leaner yet equally creamy. You absolutely need 1 cup of low-fat cottage cheese and 1 cup of plain non-fat Greek yogurt. Then, mix in 1/2 cup of your favorite vanilla or unflavored protein powder and about 1/4 cup of powdered erythritol or whatever zero-calorie sweetener you prefer. See? This smart dairy swap turns it right into a fantastic Cottage Cheese Cheesecake Recipe variation!
Step-by-Step Instructions for No Bake Protein Cheesecake
Alright, we have our ingredients ready, now let’s put this gorgeous No Bake Protein Cheesecake together! Since we aren’t doing any baking, it’s all about quick assembly and making sure we give it enough time to chill properly. Trust me, this little process takes about fifteen minutes of active work, and then the fridge does the rest! If you stick closely to these steps, you’ll see how easy it is to get a great result, much like making delicious no-bake cookies.
Preparing the Crust and Chilling
First things first: the base! Take that crumb and melted butter mixture you prepared and divide it evenly among four small jars or ramekins—use about one tablespoon for each jar. You need to press it down firmly with the back of a spoon. This structure is non-negotiable if you want a decent crust! Once those crumbs are packed in tight, pop them in the fridge immediately. They need a nice chilly base to handle the filling, so let them hang out there while you move on to the best part.
Blending the Creamy Protein Cheesecake Filling
Time to make it smooth! Dump all your filling ingredients—the cottage cheese, yogurt, protein powder, sweetener, vanilla, and zest—right into your food processor or a really good, high-speed blender. You must process this until it looks completely uniform. I mean it, totally seamless! Stop and scrape down the sides a few times to make sure there are no little lumps of cottage cheese lurking around. We are aiming for that velvety, perfect texture only a great Protein Cheesecake deserves.

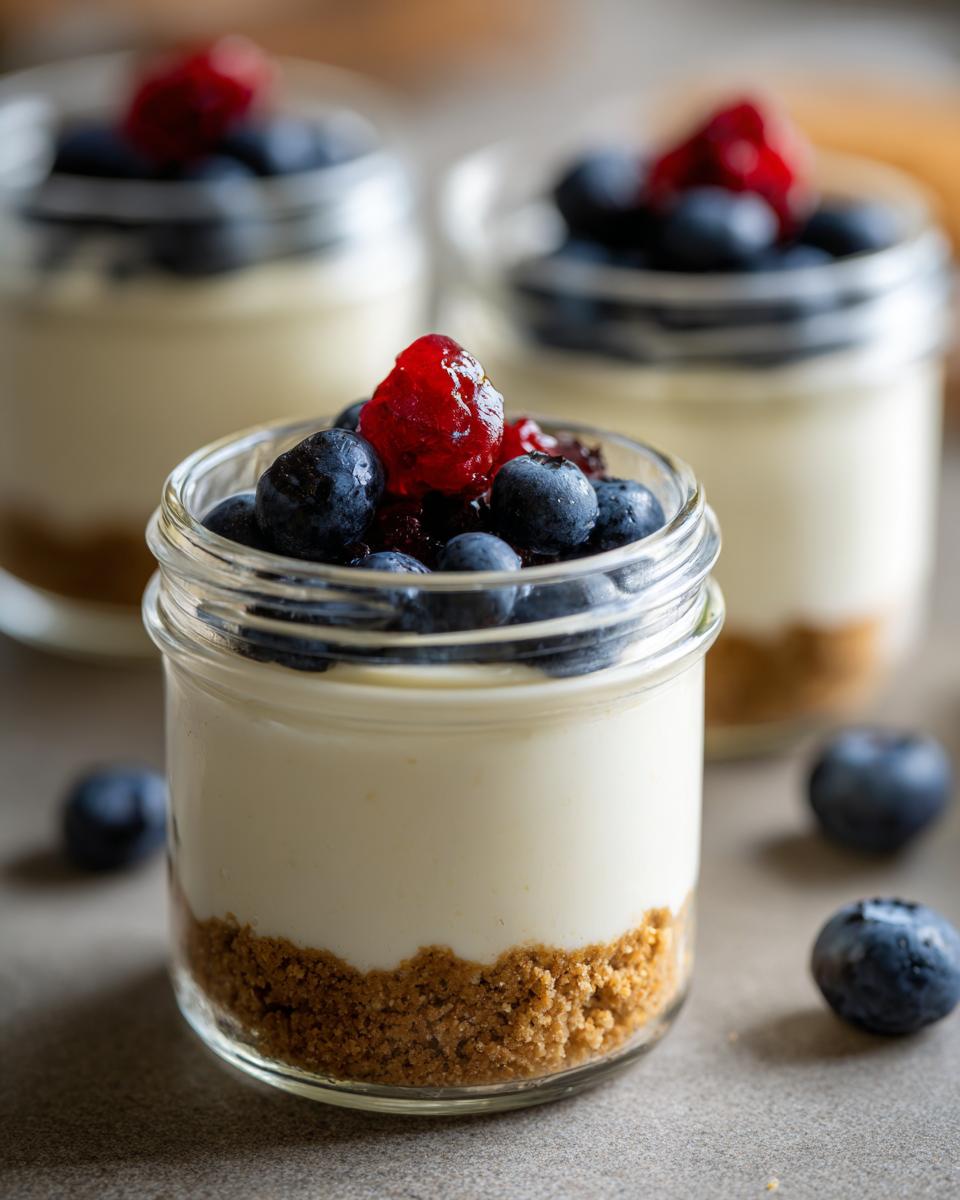
Assembling and Setting the Protein Cheesecake Jars
Once the filling is silky smooth, take your chilled crusts out. Spoon or pipe that gorgeous filling right over the crusts in the jars. Then, you can add any toppings you like—a few fresh berries or a sprinkle of sugar-free chocolate chips works wonders. Now comes the hardest part: you have to cover them and put them back in the fridge for a solid two hours minimum. This chilling step is essential so the filling sets firm. If you want inspiration for other similar light desserts, you should totally check out this great High Protein Cheesecake Fluff recipe!

Tips for the Best Protein Cheesecake Results
Even though this is super easy because it’s a no-bake recipe, there are always little tricks I lean on to make sure my Protein Cheesecake comes out absolutely perfect every time. I’ve learned a few little secrets that can save you from a slightly too-runny dessert!
Texture Adjustments for Your Protein Cheesecake
Sometimes, depending on the brand of Greek yogurt I grab, the filling feels just a touch too soft for my liking. If you want it rock-solid, try using only the low-fat cottage cheese and skipping the yogurt completely. It will thicken up wonderfully! Alternatively, if you happen to have some regular cream cheese lying around, adding just one tablespoon of it to the mix can instantly boost that classic, dense texture we’re all chasing.
Making Ahead for Meal Planning
This is honestly one of the best parts of these dessert jars. They need time to set anyway, so it works out perfectly for meal prep days! I always advise my readers that you can prepare these Protein Cheesecake Jars up to three full days in advance and keep them sealed tightly in the fridge. They get even better as the flavors meld over that first day. It’s so satisfying pulling out a pre-portioned, high-protein treat exactly when you need it!
Variations on This Healthy Cheesecake Dessert
Even though this base recipe for Protein Cheesecake is fantastic as-is, sometimes you just need a little shake-up to keep things exciting! Since this is such a customizable recipe, you can tweak it easily to fit whatever flavors you’re craving or whatever dietary goals you’re focusing on that week. It’s a staple for easy, Healthy Cheesecake Dessert nights! If you love cheesecake variations, you should definitely see my recipe later on for Pumpkin Cheesecake!
Flavor Swaps for Your Protein Cheesecake
If vanilla isn’t what you are feeling, swapping out the protein powder is so simple. Try using a chocolate protein powder instead! If you do that, you’ll want to skip the lemon zest and maybe mix in a teaspoon of unsweetened cocoa powder into the filling. Then, use sugar-free chocolate chips or even a drizzle of sugar-free caramel on top. Strawberry protein powder works brilliantly too—it pairs perfectly with fresh berries!
Achieving a Keto Protein Cheesecake
If you’re watching carbs closely and aiming for a Keto Protein Cheesecake, don’t worry, this is super adaptable. The main swap is in the crust—you must use low-carb or keto-friendly cookie crumbs since traditional graham crackers are out. Then, just make sure the sweetener you choose, like erythritol or monk fruit, is definitely zero-net-carb before you start blending. You can find some great inspiration on customizing sweets like this over at The Big Man’s World!
Serving Suggestions for Your Protein Cheesecake Jars
Because these little jars are so light and packed with almost 25 grams of protein, they fit into so many different parts of your day! They serve as an amazing, slightly upgraded snack.
If you’re looking for a real win, this is the perfect light finish to any dinner party where you’ve had a heavier main course. Or, honestly, they make for the best kind of Post Workout Sweet Treat because they satisfy that deep craving for something rich without feeling heavy.
I love drizzling just a tiny bit of zero-sugar maple syrup over the top right before grabbing one from the fridge. For more amazing dessert ideas that fit into a healthy lifestyle, you can always browse my full collection of Desserts!
Storage and Reheating Instructions for Protein Cheesecake
Since these are incredible Dessert in a Jar Recipes, storage is super straightforward, which is another win for meal prep! Because we didn’t bake our Protein Cheesecake, reheating is strictly off the table—you want it chilled and firm, always!
The key here is refrigeration. Make sure those lids are sealed tight! If you keep them covered properly in the fridge, they stay perfectly set and creamy for about three to four days. I hope you don’t have leftovers, but if you do, they keep beautifully! You can learn more about making these sweet jars ahead of time on Medium.
Frequently Asked Questions About Protein Cheesecake
I get so many questions about these little jars because everyone wants to know how something this creamy can be so good for them! I’ve gathered the most common things people ask me when they’re trying to figure out how to incorporate this amazing Protein Cheesecake into their routine. If you’re looking for more general insights into recipes, feel free to check out my main Blog archives!
Can I make this Protein Cheesecake without cottage cheese?
That’s a great question that comes up often! You absolutely can swap the cottage cheese out entirely for more Greek yogurt, but you have to be mindful of the texture. If you do this, to keep that lovely, firm structure that makes it a worthy Low Calorie Cheesecake, you should try using an extra-thick Greek yogurt—maybe even strain it slightly first. Otherwise, it might turn out a little softer than you expect.
How does this recipe compare to commercial meal delivery companies options?
Honestly, I think homemade wins every single time, especially when it comes to controlling ingredients. When you make this Protein Cheesecake at home, you know exactly what’s going into it because you controlled the sugar and fat levels yourself. A lot of commercial options, even those associated with meal delivery companies, tend to have hidden fillers or use sweeteners I try to avoid. This recipe just delivers purer flavor!
Is this recipe considered a Low Calorie Cheesecake?
It certainly is! If you look at the nutrition facts, each jar clocks in at around 220 calories, which is fantastic for a proper dessert. Because we use the lean dairy bases and zero-calorie sweetener, it absolutely falls into that perfect category of a Low Calorie Cheesecake that you can enjoy without guilt, especially when compared side-by-side with those heavier, traditional baked versions you see around.
Nutritional Estimate for This Protein Cheesecake
Okay, let’s talk numbers! I know so many of you are tracking your macros, just like I do when I’m trying to stay on track alongside testing recipes. This no-bake Protein Cheesecake is designed to be macro-friendly, hitting that high protein/low fat sweet spot!
Keep in mind that these numbers are just an estimate—they completely depend on the brand of protein powder you use, whether your Greek yogurt was truly non-fat, and what you choose for toppings. If you decide to skip the simple crust or go heavy on the berries, those figures will shift slightly. But if you follow the recipe exactly, you get something amazing!
Here is the breakdown per one jar serving:
- Calories: 220
- Protein: 25g (Yes, twenty-five grams! That’s why we call this a High Protein Dessert!)
- Fat: 6g (And most of that is the good kind!)
- Carbohydrates: 18g
- Sugar: 4g (Mostly natural sugars from the dairy base!)
It’s pretty wild, right? It tastes like real dessert but fits perfectly into almost any healthy meal planning strategy. If you are curious to see how closely dedicated meal delivery companies can get to these macros, sometimes it’s easier just to make your own deliciousness at home. For another great recipe idea that focuses on healthy fats and clean ingredients, take a peek at this German recipe for Protein Cheesecake!
Share Your Guilt Free Cheesecake Creations
Well, that’s it! My secrets for making the creamiest, dreamiest Protein Cheesecake Jars without ever turning on the oven. I really hope you whip these up because they make hitting those fitness goals so much sweeter.
When you make them in your kitchen, please don’t forget to come back here and leave me a rating! Tell me what you thought—did you stick with the vanilla or did you try a fun flavor swap? And if you post a picture of your jars on social media, tag me! I absolutely love seeing how you top your Guilt Free Cheesecake creations—fresh berries, sugar-free drizzle, or maybe a little something unexpected.
It means the world to me when you share your culinary adventures. If you have any questions at all while you’re blending, don’t hesitate to reach out via my Contact Page. And if you loved this grab-and-go healthy treat, you absolutely have to peek at what the folks over at Eva Whisks are doing with their Protein Cheesecake Jars for more inspiration!
Happy scooping!
PrintNo-Bake High-Protein Cheesecake Jars

Make creamy, satisfying protein cheesecake in individual jars. This no-bake recipe uses Greek yogurt and cottage cheese for a high-protein, low-guilt dessert perfect for meal prep.
- Prep Time: 15 min
- Cook Time: 0 min
- Total Time: 2 hours 15 min
- Yield: 4 servings 1x
- Category: Dessert
- Method: No-Bake
- Cuisine: American
- Diet: Low Fat
Ingredients
- 1 cup low-fat cottage cheese
- 1 cup plain non-fat Greek yogurt
- 1/2 cup vanilla or unflavored protein powder
- 1/4 cup powdered erythritol or preferred zero-calorie sweetener
- 1 teaspoon vanilla extract
- 1/4 teaspoon lemon zest
- 1/2 cup crushed graham crackers or low-carb/gluten-free cookie crumbs (for crust)
- 1 tablespoon melted light butter or coconut oil
- Optional topping: Fresh berries or sugar-free chocolate chips
Instructions
- Prepare the crust: Mix the crushed graham crackers or crumbs with the melted butter or coconut oil. Press about 1 tablespoon of the mixture firmly into the bottom of four small jars or ramekins. Chill these crust layers while you prepare the filling.
- Make the filling: Combine the cottage cheese, Greek yogurt, protein powder, sweetener, vanilla extract, and lemon zest in a food processor or high-speed blender. Process until the mixture is completely smooth and creamy, scraping down the sides as needed.
- Assemble the jars: Spoon or pipe the cheesecake filling evenly over the chilled crust layers in the four jars.
- Top the jars: Add your desired topping, such as a few fresh berries or a sprinkle of sugar-free chocolate chips.
- Chill: Cover the jars and refrigerate for at least 2 hours to allow the filling to set firmly before serving.
Notes
- For a thicker texture, use all cottage cheese instead of mixing with Greek yogurt, or add 1 tablespoon of cream cheese substitute if available.
- This recipe is excellent for meal planning; prepare up to three days in advance and store sealed in the refrigerator.
- If you are tracking macros similar to those provided by meal delivery companies, note that this recipe is high in protein and low in added sugar.
Nutrition
- Serving Size: 1 jar
- Calories: 220
- Sugar: 4
- Sodium: 250
- Fat: 6
- Saturated Fat: 3
- Unsaturated Fat: 3
- Trans Fat: 0
- Carbohydrates: 18
- Fiber: 1
- Protein: 25
- Cholesterol: 15