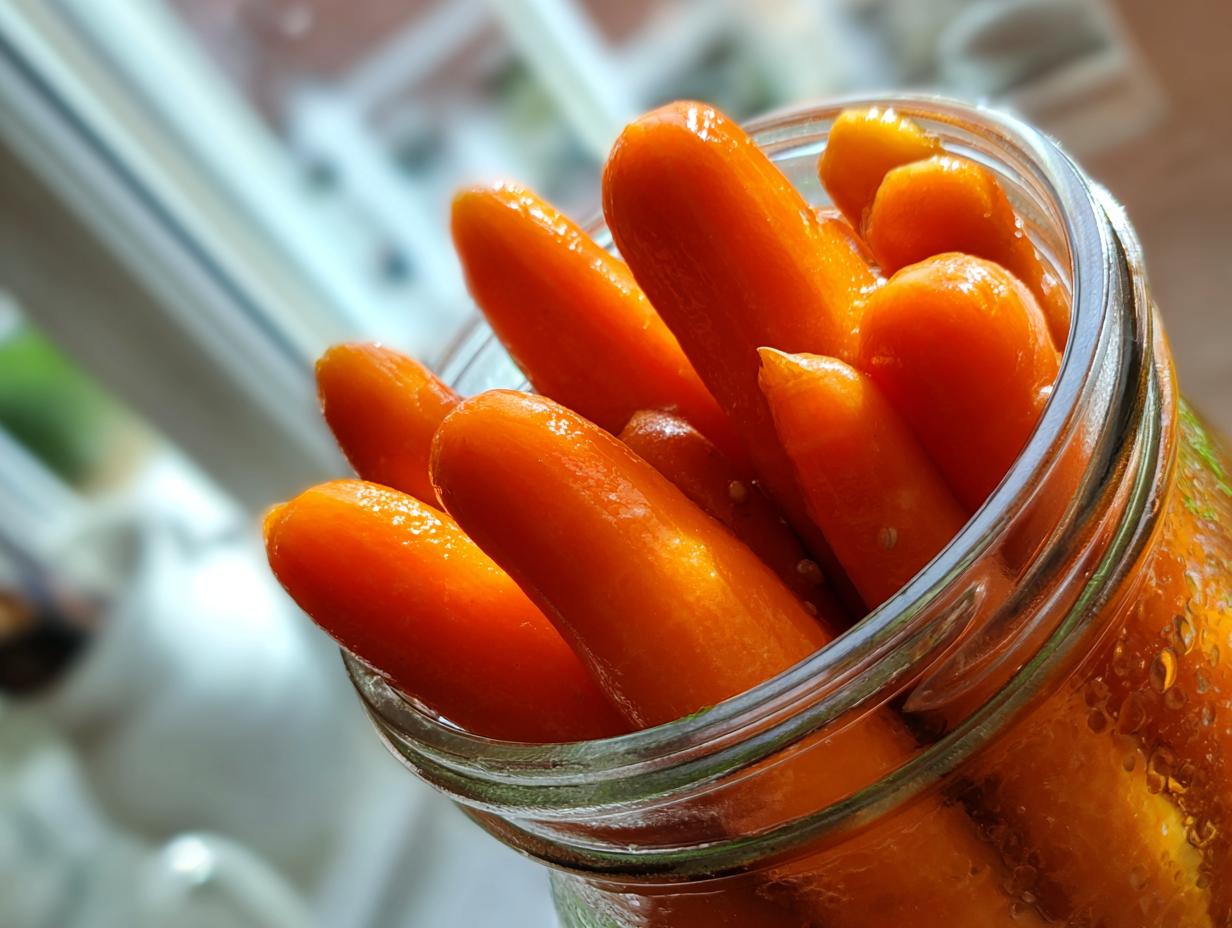

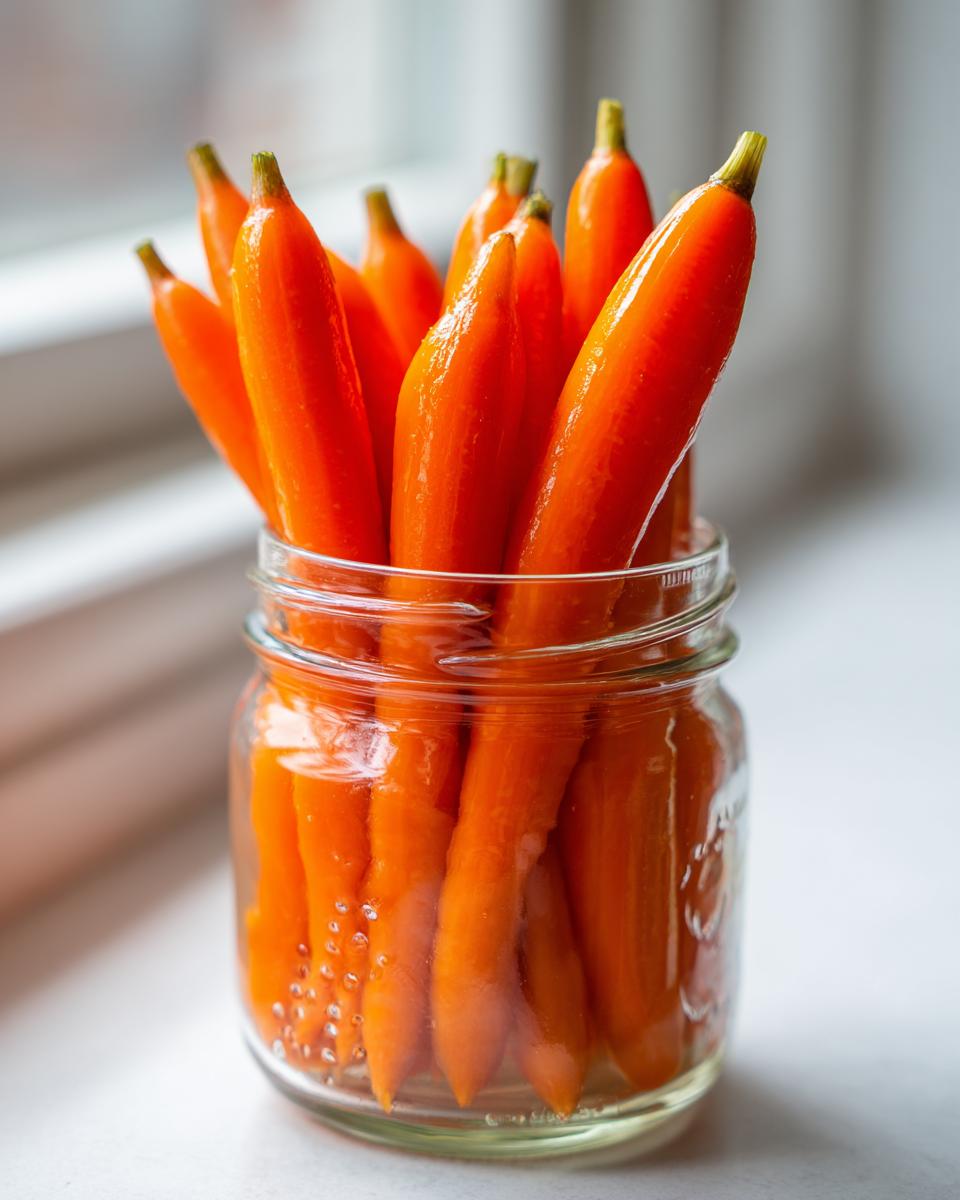
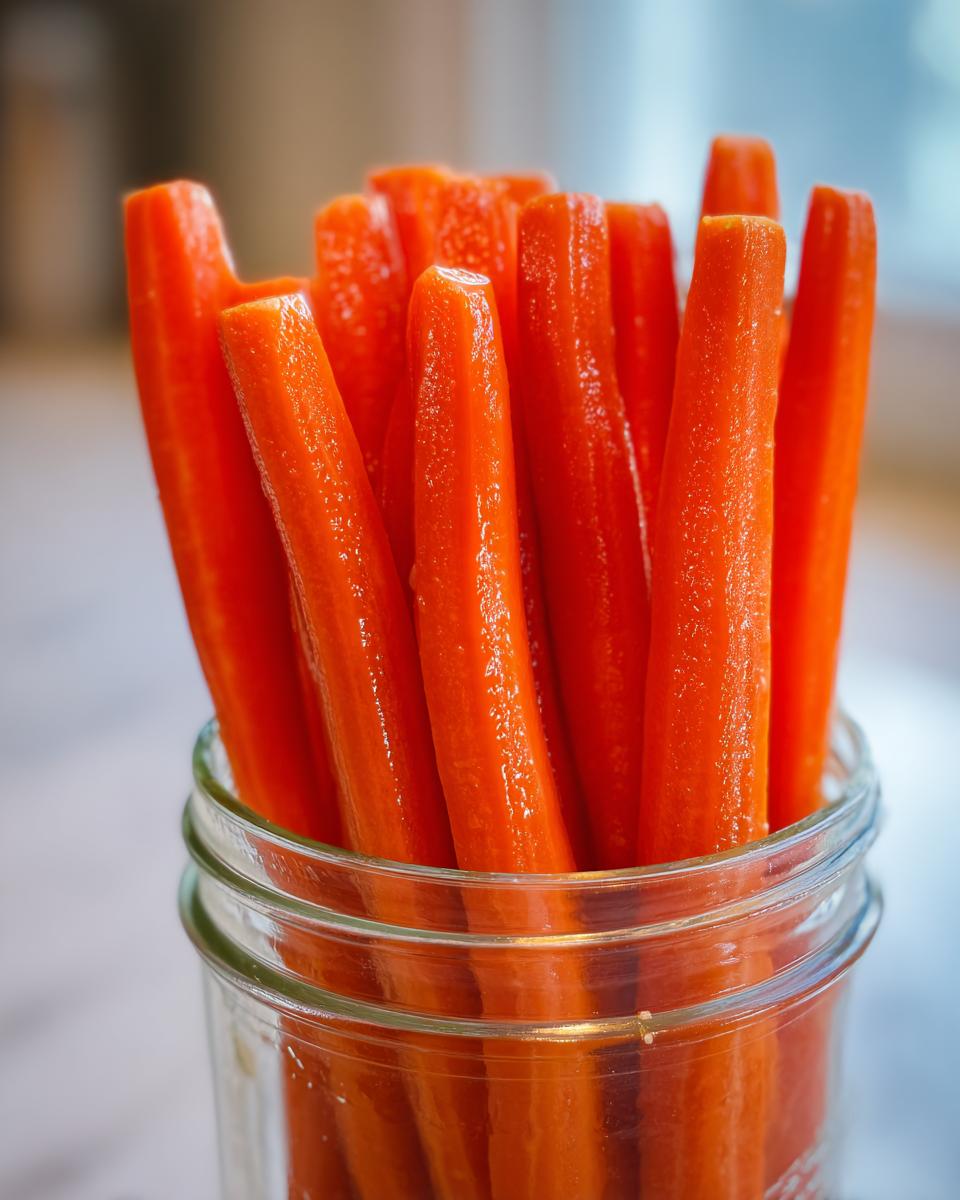
There is nothing quite like the vibrant snap of a perfect pickle, and I truly believe that homemade preserves elevate even the simplest weeknight meal. If you’ve been holding off on making your own because canning sounds too fussy, I have the perfect secret for you! Welcome to my recipe for Quick Refrigerator Dill and Garlic Pickled Carrots. These aren’t just any carrots; they are bright, wonderfully crunchy, and ready incredibly fast, using just the refrigerator method. Forget complicated steps—these simple pickled carrots bring a burst of tangy flavor to everything from tacos to charcuterie boards. Trust me, once you try this recipe, you’ll be keeping a jar in your fridge year-round.
- Why This Quick Refrigerator Pickled Carrots Recipe Works
- Gathering Ingredients for Your Pickled Carrots
- Step-by-Step Instructions: How to Make Quick Pickled Carrots
- Flavor Variations for Your Homemade Pickled Vegetables
- How to Use Your Crunchy Pickled Carrots
- Tips for Perfect Refrigerator Pickled Carrots
- Storage and Shelf Life of Pickled Carrots
- Frequently Asked Questions About Pickled Carrots
- Nutritional Estimate for Tangy Carrot Pickles
- Share Your Experience Making Pickled Carrots
Why This Quick Refrigerator Pickled Carrots Recipe Works
I developed this recipe because I hate waiting! If you are looking for the best pickled carrot recipe that delivers incredible flavor fast, this is it. It’s all about getting those satisfyingly crunchy pickled carrots onto your plate without the fuss of water baths.
Speed and Simplicity for Perfect Pickled Carrots
This truly is the ultimate Easy Pickled Carrots Recipe because it uses the refrigerator method. We have only about 5 minutes of actual cook time, and zero actual canning required. You just mix the brine, pour it over, and chill! The hardest part is waiting for them to chill.
Flavor Profile: Tangy Dill and Garlic Pickled Carrots
While you can make spicy versions, I love starting you off with the bright, classic flavor. The combination of tangy vinegar, savory garlic, and aromatic dill seed gives these dill pickled carrots a sharp zip that cuts perfectly through richer foods. It’s refreshing and incredibly bright.
Gathering Ingredients for Your Pickled Carrots
To make our brilliant Quick Refrigerator Dill and Garlic Pickled Carrots, you really only need standard pantry staples, which is what makes this such a reliable homemade pickled vegetables recipe. We are keeping things straightforward here—the magic is in the balance of the brine ingredients!
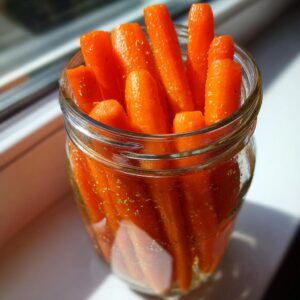
You’ll need about one pound of carrots, and please wash and peel them before you cut them into spears or coins. I prefer spears because they look so fantastic on a cheese board, but coins are great for snacking. For the brine itself, we need white vinegar (the standard strength is perfect), water, kosher salt, and a touch of sugar to balance that amazing tang.
For the flavor builders, gather four cloves of good garlic, which should be smashed—don’t bother mincing them! We’re using dill seed today, but that’s listed right there with the peppercorns. And listen closely: if you want to level up into **spicy pickled carrots**, toss in about half a teaspoon of red pepper flakes here. It adds just a lovely gentle warmth.
Step-by-Step Instructions: How to Make Quick Pickled Carrots
Okay, this is where the magic happens, and honestly, it’s so fast you’ll wonder why you ever bought jarred versions! Following these steps ensures you get that perfect, reliable result every time we make this Simple Brine Recipe for Carrots. Remember, the key with refrigerator pickles is managing the temperature of the brine so it doesn’t steam the carrots, which ruins the crunch we are aiming for.
Preparing the Carrots and Jar
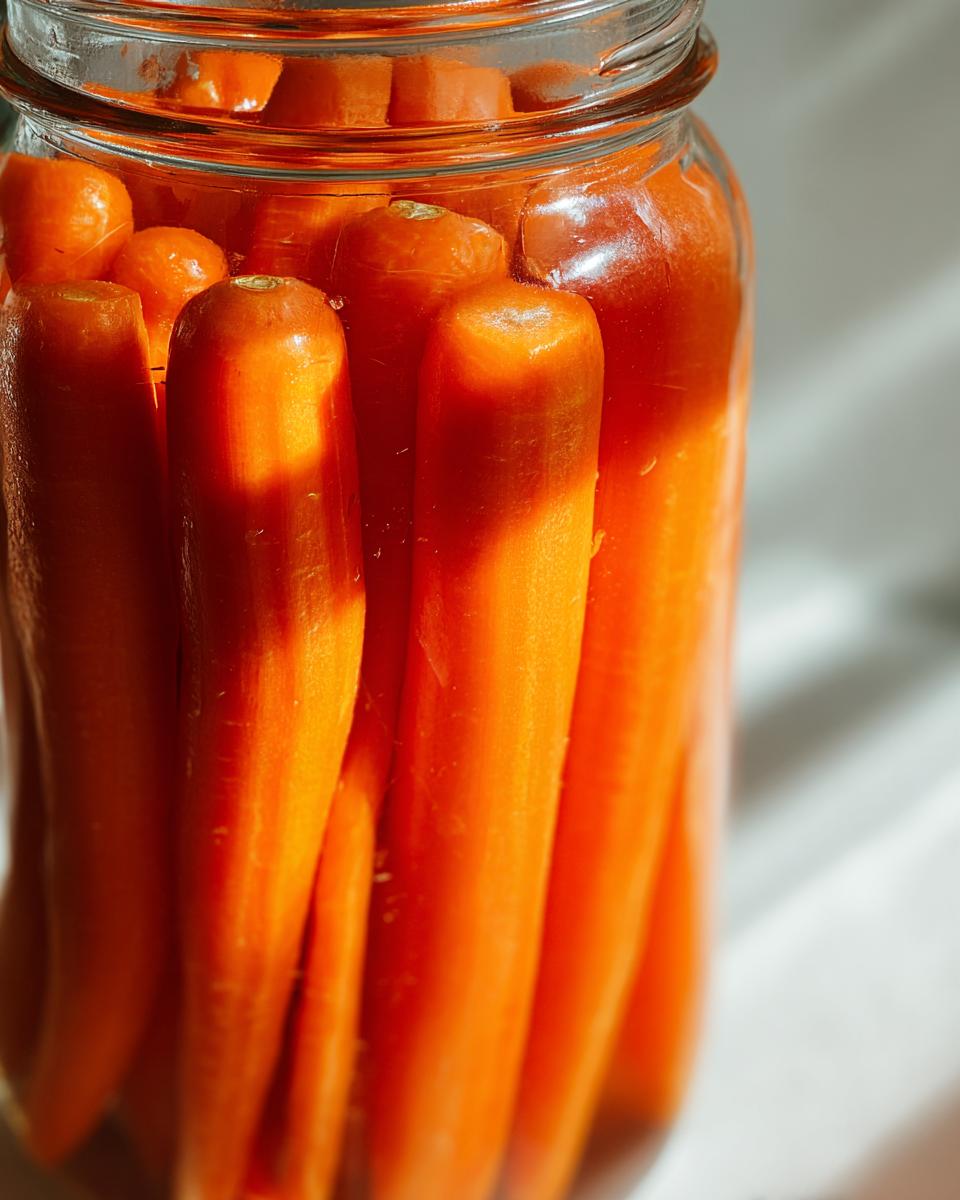
First things first, make sure your quart jar is sparkling clean! Wash your carrots thoroughly, peel them (I find peeling really helps the brine penetrate), and decide on your shape—coins work well, but I always go for spears for that gorgeous presentation. Pack those prepared carrots into the jar as tightly as you dare; the tighter they are packed, the less brine you’ll need to fully submerge them.
Creating the Simple Brine for Pickled Carrots
In a small saucepan, whisk together the water, vinegar, salt, and sugar. Heat this mixture over medium heat—just until you see the salt and sugar completely disappear. Now, this is critical: take it *off* the heat immediately! We do not want a rolling boil here. Once it’s off the burner, toss in your smashed garlic, peppercorns, dill, and any optional heat flakes. Give it a quick stir, and that’s your brine ready.
The Waiting Game: Cooling and Refrigerating Your Pickled Carrots
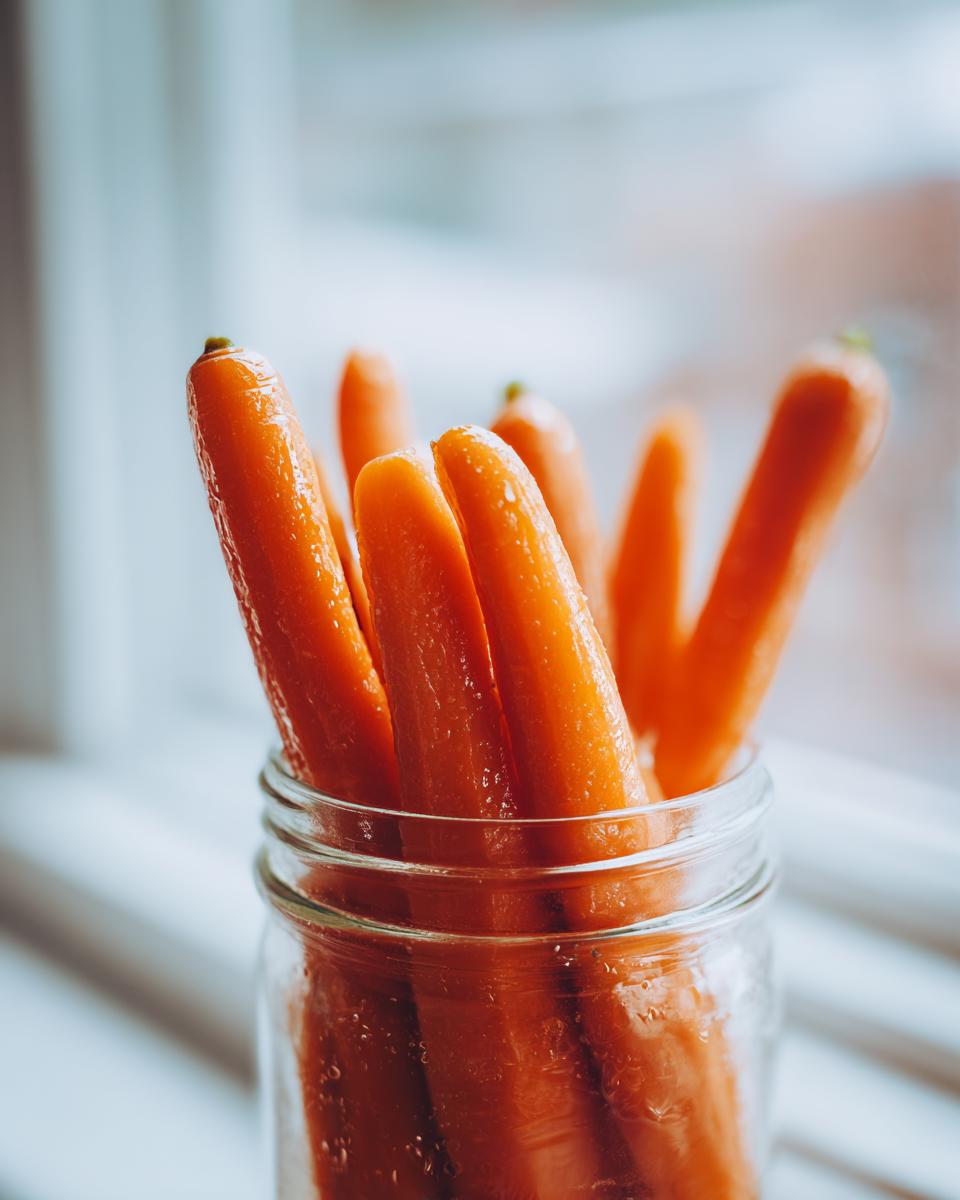
Carefully pour that warm brine right over the carrots until they are totally covered. Let the jar sit on the counter uncovered for a good 30 minutes just to de-heat a little—we don’t want to seal in steam! After that, seal it up tight and pop it into the fridge. While you *can* eat them after 2 hours, please give them a full 24 hours. That 24-hour mark is when these pickled carrots develop that deep, tangy flavor we are looking for.
Flavor Variations for Your Homemade Pickled Vegetables
Now that we have our reliable basic dill and garlic recipe down, we absolutely have to talk about playing around with the brine! That’s the joy of making tangy carrot pickles at home—you are totally in charge of the flavor profile. We already mentioned tossing in red pepper flakes for quick spicy pickled carrots, but if you want real depth of heat, you could even drizzle a little hot honey over the top right before serving. I saw a gorgeous recipe using hot honey that looked incredible—you can check out that sweet heat inspiration here!
Creating Tangy Carrot Pickles: The Mexican Style
If you love authentic Mexican flavors, you must try the taqueria style! For these Mexican Style Pickled Carrots, we ditch the dill entirely. Instead, grab half a teaspoon of dried oregano, which brings a completely different earthy note. The other major addition is about half a cup of thinly sliced white onion packed right in with the carrots. They give the whole jar a wonderfully savory punch.
Sweet and Sour Pickled Carrots Adjustment
Sometimes you just crave that perfect sweet/sour candy coating, right? If you find the basic brine a hair too tart for your liking, making these into sweet and sour pickled carrots is super simple. Just go back to the brine stage and bump that granulated sugar up from 1 tablespoon to 1 1/2 tablespoons. Taste the warm brine before you pour it—if it tastes good balanced now, it’ll be perfect when cold!
How to Use Your Crunchy Pickled Carrots
This is my favorite part! Once you have these gorgeous, bright spears sitting in your fridge, the possibilities open up everywhere. These aren’t just for nibbling alone—they are designed to be the star supporting actor in many dishes. Because they are so bright and acidic, they cut through richness beautifully, making them perfect side dishes or condiments.
I first realized just how versatile these were when I started piling them onto fish tacos. The crunch of these pickled carrot spears, whether you made them dill or spicy, just transforms the taco filling. Suddenly, your simple weeknight dinner feels like something special you’d pay extra for at a great restaurant.
Pickled Carrots for Sandwiches and Tacos
If you are building any kind of hearty sandwich—think pulled pork, a rich roast beef situation, or even just a thick slice of cheddar—you need that acidic pop to balance the fat. These make incredible sandwich toppings! For tacos, whether they are Mexican style or traditional, pile them on generously. They are fantastic taco condiments that replace the need for a squeeze of lime entirely.
Serving Pickled Carrots on Charcuterie Boards
You absolutely must try including these when you put together a grazing board. That intense sunset-orange color against creamy brie and salty prosciutto? Gorgeous! As genuine appetizer pickles, they offer a refreshing break between bites of cured meat and sharp cheese. I always make sure to scatter a few spears around the board. They look beautiful and taste even better when paired with something earthy, like a sharp aged Gouda or some olives. If you’re inspired to make the spicy batch, they go wonderfully alongside spicy meats; you can see how they are used in authentic Mexican spreads!
Tips for Perfect Refrigerator Pickled Carrots
You are now ready to make the absolute best pickled carrot recipe possible, and I want to make sure every batch comes out with that essential snap! Since we aren’t doing the heavy canning process, we rely completely on technique to keep these vibrant and crunchy for weeks. It really is the little details that matter most when you are making homemade pickled vegetables this way.
Maintaining Crispness in Your Pickled Carrots
My number one tip for the crunch factor is your carrots! Please use the freshest, firmest carrots you can find. If they feel soft at the store, skip them. And remember what I said about the brine: make sure it’s hot from dissolving the salt and sugar, but take it off the heat immediately so it isn’t actively boiling when you pour it over the jar. Letting it cool slightly prevents that steaming effect that softens vegetables.
Ensuring Full Submersion
If you cut your carrots thick, they might try to float a little bit when you first add the liquid. We need every bit of that tangy brine making contact! If you notice they are peeking out above the liquid line, try this little trick: take a tiny, food-safe zip-top bag, fill it with a spoonful of the brine mixture, seal it, and set that little bag right on top of the carrots. It acts as a perfect weight to keep everything submerged while it chills.
Storage and Shelf Life of Pickled Carrots
Since these are designed as quick refrigerator pickled carrots—and we skipped all the heavy canning steps—storage is very straightforward, which is another reason I love this recipe so much! The key is keeping them cold. These need to stay chilled 100% of the time.
Once the jar is cooled down from the initial pour, seal it tightly and move it straight into the fridge. If you followed the steps correctly, these tangy bites will maintain that fantastic crispness for about three weeks. That’s a great window for carrot preservation, allowing you to make a batch and enjoy them throughout several busy weeks!
If you notice the liquid level starts to drop over time—which can happen as the carrots compress—just make sure the vegetables are still submerged. If they aren’t, they might start to soften where they touch the air. But honestly, with how quickly these vanish in my house, three weeks is usually the absolute maximum they last!
Frequently Asked Questions About Pickled Carrots
Oh, I always get so many great questions when people try making their first batch of refrigerator pickled carrots! It makes total sense; you want to know exactly what to expect when you jump into making your own homemade pickled vegetables. Because this is a quick method, the timing and troubleshooting are slightly different than traditional canning, but don’t worry, it’s all super easy!
How long do these pickled carrots need to sit before eating?
This is the eternal question! You *can* technically eat them after about two hours because the vinegar has started to work its magic right away. However, if you want that truly deep, satisfying flavor where the dill and garlic have really sunk in—when they reach their potential as the best pickled carrot recipe—you really need to wait 24 hours. Let them sit overnight, and thank me later!
Can I use different vegetables with this simple brine recipe for carrots?
Absolutely you can! This simple brine recipe for carrots is brilliantly versatile. It works perfectly for things like cucumbers, thin slices of red onion, or even jalapeños if you want to double down on the heat. Just remember that thick-cut vegetables will need a bit more chilling time than our thin carrot coins to absorb the flavor fully.
Are these refrigerator pickled carrots safe to eat if they float slightly?
A little bit of floating is totally normal, especially right after you pour the brine. As long as your jar is sealed properly and kept cold in the refrigerator, a few pieces peeking up toward the top shouldn’t be an issue, provided the majority of the carrots are submerged in liquid. They stay safe in the fridge because the acidity is doing the preservation work!
Nutritional Estimate for Tangy Carrot Pickles
Now, I know some of you lovely cooks are watching your nutrition, and while these are definitely more of a zesty side treat than a main course, I always like to provide an estimate for transparency. It’s just part of making sure my recipes are reliable for you!
Since these tangy carrot pickles are mostly vinegar, water, and carrots, they are wonderfully light. Remember, these estimates are calculated for a single serving size of about one-quarter cup of the finished product, using the standard brine recipe without extra sugar or wild additions.
I always want to be clear: this is an estimate only! The exact brands of vinegar or salt you use can shift these numbers slightly, but this should give you a great idea of what you’re enjoying.
- Serving Size: 1/4 cup
- Calories: About 35
- Sugar: Only about 4g (mostly from the balancing sugar in the brine)
- Sodium: Around 350mg (this is the largest variable, depending on how salty you like your pickles!)
- Fat: 0g
See? A wonderful, crunchy, vibrant side dish that adds so much flavor for very little investment nutritionally. They are naturally vegetarian and vegan too, which is always a bonus when serving guests!
Share Your Experience Making Pickled Carrots
Now that you have your first jar of homemade refrigerator pickled carrots chilling away, I would be so honored if you would come back and tell me all about it! Here at Unfold Recipes, we truly believe that every dish cooked is a little story being created in your own kitchen.
Did you try the Mexican Style variation? Are you planning on using these fantastic quick pickled carrots on your next batch of street tacos? If you added a little extra spice or perhaps tried a slightly sweeter brine, please let me know in the comments below! I read every single one, and your feedback helps me refine and improve these recipes for everyone.
If you snapped a picture of your finished jar of zesty tangy carrot pickles sitting on your dining table—especially if they are showing off their amazing crunch next to a beautiful meal—please tag me on social media! Sharing your culinary successes is the best part of this journey. I can’t wait to see how you’ve unfolded this recipe in your own beautiful home!
PrintQuick Refrigerator Dill and Garlic Pickled Carrots
Make crunchy, tangy pickled carrots at home without canning. This refrigerator pickle recipe is simple, fast, and perfect for adding zest to tacos, salads, or charcuterie boards.
- Prep Time: 15 min
- Cook Time: 5 min
- Total Time: 20 min
- Yield: 1 pint 1x
- Category: Side Dish
- Method: Refrigerator Pickling
- Cuisine: American
- Diet: Vegetarian
Ingredients
- 1 pound carrots, peeled and sliced into spears or coins
- 1 cup white vinegar (5% acidity)
- 1 cup water
- 2 tablespoons kosher salt
- 1 tablespoon granulated sugar
- 4 cloves garlic, smashed
- 1 teaspoon whole black peppercorns
- 1 teaspoon dried dill seed (or 1 small fresh dill sprig)
- Optional: 1/2 teaspoon red pepper flakes for heat
Instructions
- Prepare the carrots: Wash and trim the carrots. Cut them into spears or thin coins, depending on your preference. Pack the prepared carrots tightly into one clean pint-sized glass jar.
- Make the brine: In a small saucepan, combine the vinegar, water, kosher salt, and sugar. Heat over medium heat, stirring until the salt and sugar dissolve completely. Do not boil.
- Add aromatics: Remove the brine from the heat. Add the smashed garlic cloves, peppercorns, dill seed, and optional red pepper flakes to the hot brine. Stir briefly.
- Pour the brine: Carefully pour the hot brine over the carrots in the jar, ensuring the carrots are fully submerged. Leave about 1/2 inch of headspace at the top of the jar.
- Cool and refrigerate: Let the jar cool on the counter for about 30 minutes. Once cooled, seal the jar tightly with a lid and transfer it to the refrigerator.
- Wait to eat: Allow the carrots to chill and pickle for at least 2 hours before serving. For the best flavor, wait 24 hours. These crunchy pickled carrots keep well in the refrigerator for up to three weeks.
Notes
- For a Mexican style pickled carrot flavor, replace the dill seed with 1/2 teaspoon dried oregano and add 1/2 cup thinly sliced onion to the jar.
- These refrigerator pickles are excellent as a topping for tacos or as a side for sandwiches.
- If you prefer a sweeter pickle, increase the sugar in the brine to 1 1/2 tablespoons.
Nutrition
- Serving Size: 1/4 cup
- Calories: 35
- Sugar: 4g
- Sodium: 350mg
- Fat: 0g
- Saturated Fat: 0g
- Unsaturated Fat: 0g
- Trans Fat: 0g
- Carbohydrates: 8g
- Fiber: 2g
- Protein: 0g
- Cholesterol: 0mg