

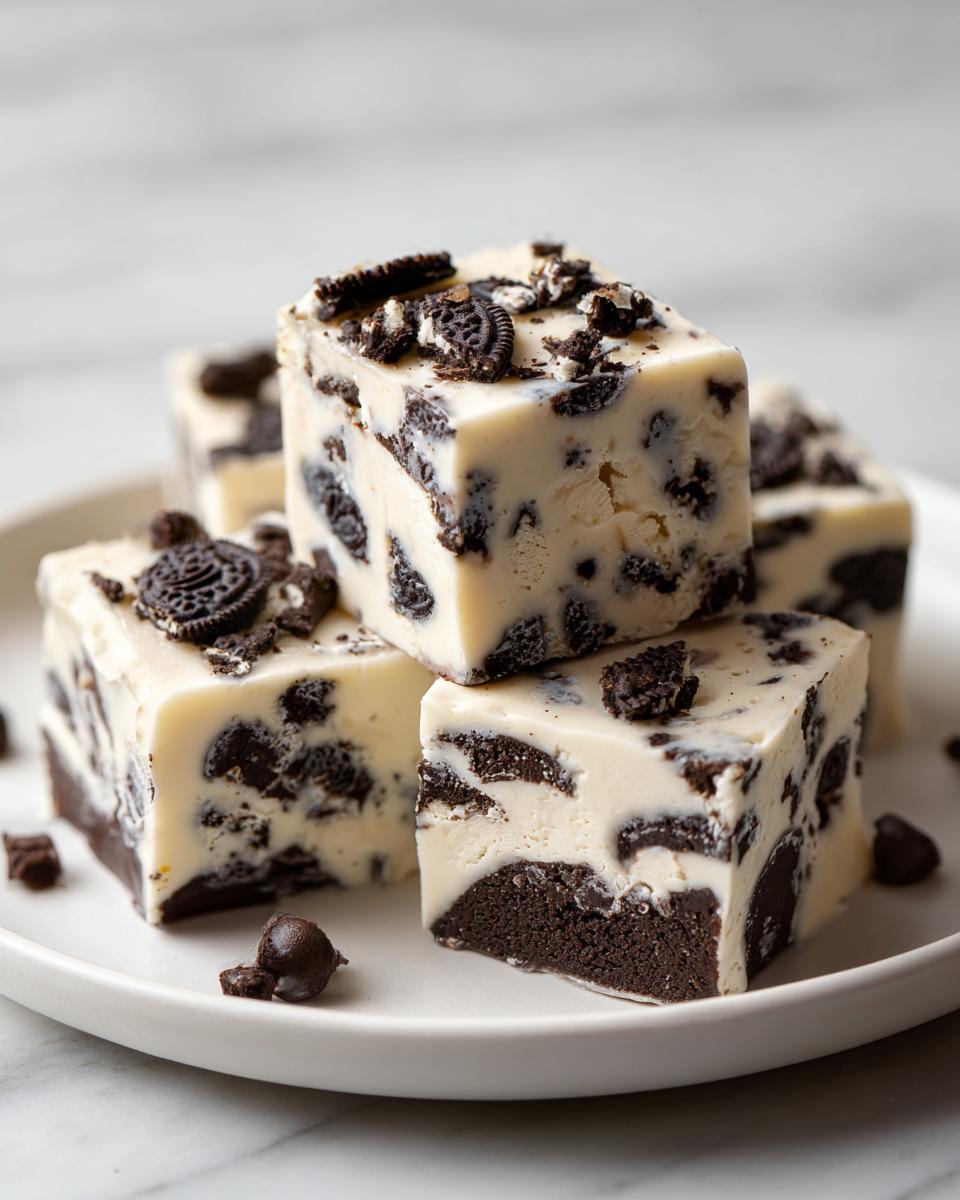
When you need an indulgent, deeply satisfying dessert but simply cannot face turning on the oven, you need a foolproof shortcut. That’s where my favorite kind of magic happens—the kind that delivers stunning results with minimal effort. This is truly the easiest, creamiest oreo fudge recipe you will ever encounter. We are talking about only three ingredients that melt together into pure cookies and cream perfection! It’s a sweet story of simple indulgence, proving that approachable elegance doesn’t require hours of fuss. For those days when you need that decadent fix right now, trust me, this is the recipe to pull out. If you love treats that set up beautifully, you should also check out my guide to making perfect no-bake cookies!
- Why This 3-Ingredient Oreo Fudge Recipe is Your New Favorite Shortcut Fudge
- Gathering Ingredients for Your Oreo Fudge
- Step-by-Step Instructions for No Bake Oreo Fudge
- Tips for Perfect Creamy Fudge Success
- Serving Suggestions for This Chocolate Cookie Dessert
- Storage and Make-Ahead Tips for Homemade Candy
- Variations on the Classic Oreo Fudge Recipe
- Frequently Asked Questions About Oreo Fudge
- Nutritional Estimates for Simple Fudge Recipe
Why This 3-Ingredient Oreo Fudge Recipe is Your New Favorite Shortcut Fudge
If you’re looking for an absolute showstopper that takes almost no effort, this is it. We call this our signature shortcut fudge because it bypasses all the tricky candy-making steps that usually intimidate people. I’ve tested this specific ratio of white chocolate, condensed milk, and Oreos countless times in my kitchen to ensure it sets up with that perfectly creamy fudge texture every single time—no graininess, no melting issues later on. It’s the definition of a crowd-pleaser!
It’s my go-to when I need something fast but want it to look and taste incredible. You can whip this up while your coffee is brewing, and it’s ready to slice after just a couple of hours in the fridge. It’s a fantastic recipe to have in your back pocket for spontaneous sweet cravings.
Key Benefits of Our Easy Oreo Fudge Recipe
- It strictly uses only 3 core ingredients. Seriously, that’s it!
- It’s a completely No Bake Treat, which means zero oven time!
- The resulting flavor is the richest Cookies and Cream Fudge you can imagine.
- It looks sophisticated enough to be a thoughtful Holiday Fudge Gift if you wrap it up nicely.
When you need a quick win in the kitchen, remember this magic, and then go check out my recipe for easy peanut butter cookies for another simple favorite.
Gathering Ingredients for Your Oreo Fudge
Alright, let’s talk about what you need to make this dreamy oreo fudge. Because this recipe is so simple, the quality of what you use really shines through! You only need three things, but they have to be the right things. Don’t run out and grab the cheapest stuff on the shelf for the chocolate—that’s the secret to getting that beautiful, smooth melt we are aiming for.
Here’s the short list:
- One 14-ounce can of sweetened condensed milk (full-fat only, please!)
- About 2 cups of white chocolate chips
- 3 cups of Oreos, crushed into bits—don’t pulverize them completely!
It’s so satisfying to put these few things together and turn them into something incredible. Don’t forget to check out my post on how to get a gorgeous melt using brown butter in chocolate chip cookies—it teaches the same gentle heating principle!
Ingredient Notes and Substitutions for White Chocolate Fudge
My number one piece of advice here revolves around the melting agent. If you decide you want to be fancy and use actual white chocolate bars instead of chips, you must chop them up super fine. Chips have stabilizers that help them hold their shape—if you use a solid bar, it needs the extra surface area to melt evenly with the milk.
Also, when you grab that sweetened condensed milk, make absolutely sure it’s the *sweetened condensed* kind, not evaporated milk. Evaporated milk has no sugar, and it will result in a weird, grainy mess! This distinction is crucial for achieving that perfect sliceable, white chocolate fudge texture that holds all those cookie chunks in place.
Step-by-Step Instructions for No Bake Oreo Fudge
This is where the fun starts, and honestly, it moves fast! We are looking at only about 10 minutes of active prep time before this whole thing goes into the fridge. Remember, since this is a no bake oreo fudge, we are talking about speed and simplicity. You need to work quickly but carefully, especially when the chocolate is hot—nobody wants scorched white chocolate!
Just a quick note before we dive in: the active prep is about 10 minutes, and the actual melting time is maybe 2 minutes total. Total couch-sitting time waiting for it to set is closer to two hours, but who’s counting? For more quick, luxurious treats, take a peek at my silky smooth chocolate mousse guide—it’s elegant, but just as easy!
Preparing the Pan and Crushing the Cookies
First things first, let’s get the pan ready. Grab an 8×8 inch baking dish, and this is a step you absolutely cannot skip if you want a clean slice: line it with parchment paper. Make sure you leave some extra paper draping over the sides, creating little handles. This little overhang is your secret weapon later for lifting the whole slab out later—it makes cutting your easy fudge so much cleaner!
Next up, the cookies. You can either toss your Oreos into a food processor for a nearly instant crush, or—if I’m feeling rustic and don’t want to pull out the big guns—I just toss them into a heavy-duty zip-top bag and give them a good, firm whack with a rolling pin. You want bits, not dust. We need that satisfying crunch!
Melting the Base and Folding in Oreos
Now for the microwaving, and this requires attention! Put your white chocolate chips and the can of sweetened condensed milk into a sturdy bowl. Microwave in 30-second bursts. I mean it—30 seconds, stir well. Do this until it’s melted and glossy. This gentle heating prevents the white chocolate from seizing up on you. It should look like liquid silk when you’re done.
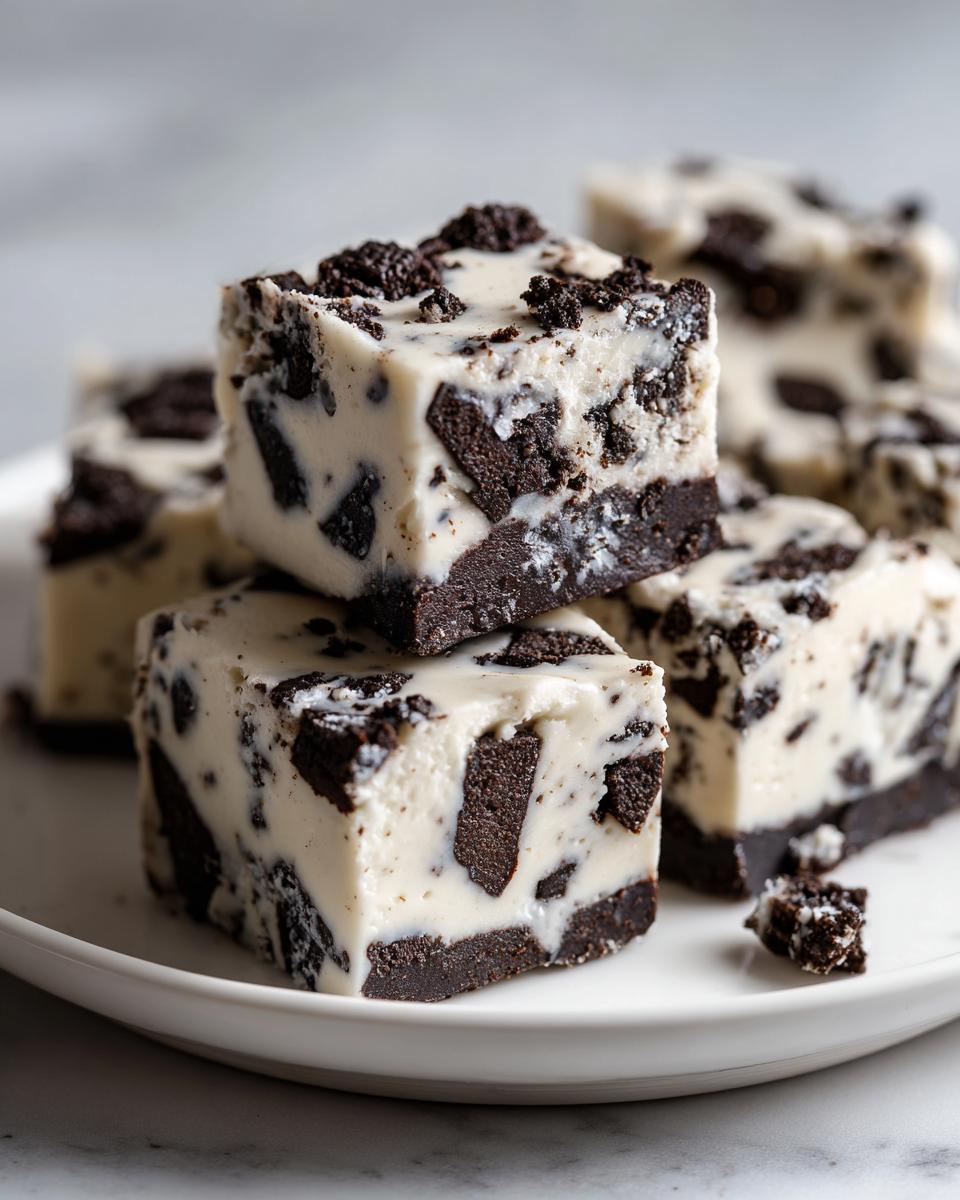
Once it’s smooth, immediately fold in those crushed Oreos. You want to incorporate them gently. Don’t beat it up aggressively! We are just folding them in until they are thoroughly coated and distributed throughout the rich base. That careful mixing right there? That’s what locks in that wonderful creamy fudge texture we are craving. Pour it into your lined pan immediately and press it down evenly before popping it into the cold.
Tips for Perfect Creamy Fudge Success
Getting this creamy fudge right is all about managing temperature and timing. Since we aren’t cooking this mixture on the stovetop, we rely on the microwave, which means we have to be gentle when melting the chocolate and milk. The biggest enemy of smooth fudge is high heat applied too quickly, which can make your gorgeous white chocolate base grainy or oily. Always stir often during that melting process, even if it seems like overkill. That attention to detail is what builds trust in a recipe! Don’t forget to check out my recipe for rocky road fudge for another delicious no-bake alternative.
Once everything is combined, do not rush the chilling; that is when the magic happens and the fudge stabilizes. It’s totally worth the wait for that signature melt-in-your-mouth texture.
Achieving the Ideal Set Time for Your Oreo Dessert
You have two options for setting up your Oreo dessert, depending on how quickly your sweet tooth is buzzing! If you can wait patiently, pop the pan into the refrigerator for a solid two hours. That gives the fudge the perfect density—it will be totally firm but still tender enough to cut easily without crumbling everywhere. Just make sure it’s not rock hard when you go to slice it, or you risk shattering those beautiful white chocolate and Oreo layers.
If time is running short and you need these cookie fudge bars *now*, you can speed things up by placing the pan into the freezer for about 30 minutes. Just keep an eye on it! Either way, make sure it’s completely chilled before you attempt to lift it out using those parchment paper handles we talked about.
Serving Suggestions for This Chocolate Cookie Dessert
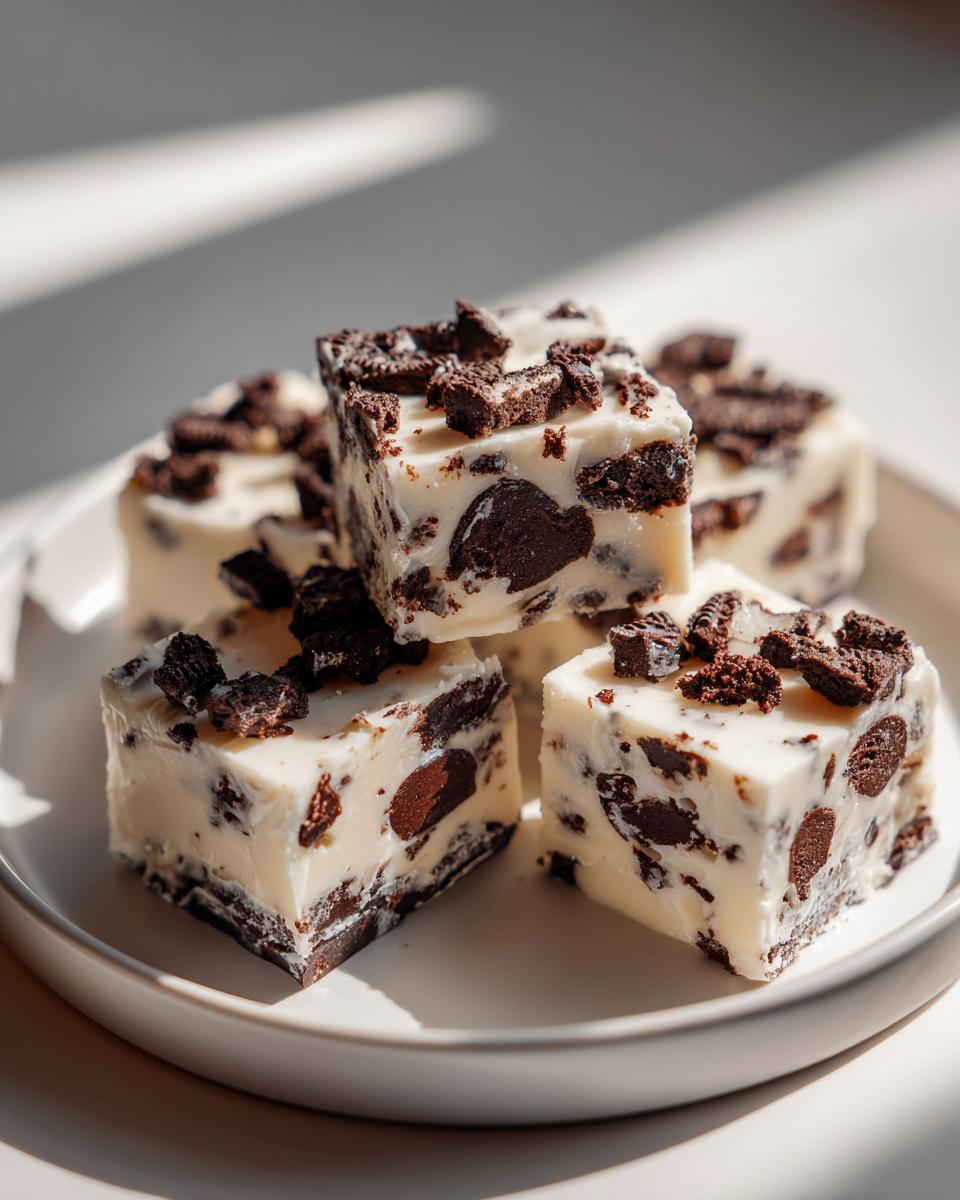
Since this chocolate cookie dessert uses white chocolate and condensed milk, it is incredibly rich! I always recommend slicing these into very small squares. They are deceptively decadent, so a little piece goes a long way, especially when you are preparing a platter for guests. These are perfect little bites for an afternoon coffee break—the sweetness pairs beautifully with a strong, dark roast!
If you are putting these out for a party, try sprinkling just a few coarse sea salt flakes on top right before serving; that little savory pop cuts through the sweetness wonderfully. Or, if you are after something vibrant, serve a small square alongside a few fresh raspberries or a drizzle of tart lemon curd. It transforms this simple treat into something almost elegant! If you’re looking for another easy crowd-pleaser, you should definitely give my caramel popcorn recipe a try next time you need a party treat!

Storage and Make-Ahead Tips for Homemade Candy
One of the best things about this homemade candy is how well it keeps! If you don’t gobble it all up the day you make it—which is a real possibility, I know—you’ll want to store it properly. Keep any leftover **oreo fudge** in a completely airtight container. I’ve found that keeping it in a cool pantry at room temperature works great for about a week, though I usually prefer the fridge because I like mine nice and firm.
If you’re planning ahead for gifts or the holidays, this fudge freezes beautifully! Wrap each square tightly in plastic wrap before popping them into a freezer-safe bag. This prevents any freezer taste from getting in. When you are ready to package them up for gifting, wrapping each square individually in little cellophane bags makes them look so professional and keeps them fresh for friends and family!
If you want other great make-ahead sweets, you have to look at my famous candied apples recipe, too!
Variations on the Classic Oreo Fudge Recipe
While this 3-ingredient version of **oreo fudge** is pure magic on its own, sometimes you just need to spice things up a little! I love dreaming up little twists because it makes the recipe feel new every time I make it. The great news is that because the base is so simple and robust, it handles additions beautifully without collapsing or getting too soft.
For an instant holiday upgrade—or if you just really love that minty chocolate pairing—try stirring in about a teaspoon of pure peppermint extract right before you pour it into the pan! It transforms this into a beautiful cookies and cream fudge with a cool kick.
Another fun idea is layering! Instead of folding all the white chocolate into the Oreos, pour half of the plain melted base into the pan first. Then, mix the crushed Oreos into the *remaining* melted chocolate and pour that over the top layer. You get a beautiful contrast.
If you want a less sweet, deeper chocolate flavor, you can swap out half of your white chocolate chips for semi-sweet chips. It gives the fudge a richer, almost dark chocolate look. For more fun, decadent layered treats, you must look at my recipe for Halloween Oreo Balls!
If you want to see how another home cook approaches a similar candy, I always enjoy reading the ideas over at the SugarHero blog, too!
Frequently Asked Questions About Oreo Fudge
I get so many questions come through my inbox because everyone wants their oreo fudge to be absolutely perfect—and it should be! Dealing with fudge can sometimes feel a bit intimidating because it’s a candy, but I promise, with this simple recipe, it’s almost foolproof. Let’s tackle a few common things I hear about texture, ingredients, and getting that perfect set time.
Can I use regular chocolate milk instead of condensed milk?
Oh, honey, please don’t! That’s the biggest mistake people make when trying to substitute items in this 3 ingredient fudge. Regular chocolate milk is mostly water and doesn’t have that massive sugar content that sweetened condensed milk brings. If you swap it out, you won’t get the rapid setting or the thick, creamy texture you need. You’ll end up with a soupy, sad chocolate puddle rather than gorgeous cookie fudge bars!
Why is my fudge coming out grainy or oily?
Graininess or oiliness nearly always comes down to how you melted the white chocolate. If you overheat the chips when mixing them with the condensed milk, the fats separate, and you get that grainy mouthfeel. Remember my advice above? Use short bursts in the microwave and stir thoroughly between each one. You want it smooth and glossy, not boiling hot!
Can I use different cookies besides Oreos in this simple fudge recipe?
Of course! This is where you can personalize your simple fudge recipe. Any firm sandwich cookie works beautifully, so feel free to use alternative chocolate cream cookies. However, if you want a different flavor profile, you could try swapping half the Oreos for something crunchy like shortbread or even crushed pretzels for a salty kick! Just make sure whatever you use is completely dry before folding it in so it doesn’t affect the setting process.
If you have any other burning questions about creating this deliciousness, feel free to poke around my general recipe archive for more tips!
Nutritional Estimates for Simple Fudge Recipe
Now, I know many of you who come to Unfold Recipes appreciate food that tastes amazing and feeds the soul, but sometimes we just want to peek at the numbers, right? Because this simple fudge recipe relies heavily on white chocolate and sweetened condensed milk, it is definitely a decadent treat! We are making candy here, folks, and it’s meant to be rich!
Please remember that these figures are just estimates based on the specific quantities listed in the recipe. If you use a different brand of chocolate or swap out the cookie type, your final count will shift slightly. This calculation is based on yielding 36 small squares from the entire batch.
Here is a breakdown of the estimated nutritional profile per serving:
- Calories: 185
- Sugar: 20g
- Fat: 10g (Saturated Fat: 6g)
- Protein: 2g
- Carbohydrates: 23g
It’s a wonderful thing to have on hand during the holidays or when you need a perfect little something after dinner. Enjoy it for what it is—a truly irresistible, rich indulgence!
PrintEasy 3-Ingredient Oreo Fudge
Make rich, creamy cookies and cream fudge using only three simple ingredients. This no-bake recipe is quick to prepare and perfect for a decadent, fast dessert or homemade candy gift.
- Prep Time: 10 min
- Cook Time: 2 min
- Total Time: 2 hours 12 min
- Yield: 36 small squares 1x
- Category: Dessert
- Method: No Bake
- Cuisine: American
- Diet: Vegetarian
Ingredients
- 1 (14 ounce) can sweetened condensed milk
- 2 cups white chocolate chips
- 3 cups crushed Oreo cookies (about 24 cookies)
Instructions
- Line an 8×8 inch baking pan with parchment paper, leaving an overhang on the sides for easy removal.
- Place the white chocolate chips and sweetened condensed milk in a microwave-safe bowl.
- Microwave in 30-second intervals, stirring well after each interval, until the mixture is completely smooth and melted. This usually takes 1 to 2 minutes total.
- Gently fold in the crushed Oreo cookies until they are evenly distributed throughout the chocolate mixture.
- Press the fudge mixture evenly into the prepared baking pan.
- Refrigerate for at least 2 hours, or until the fudge is firm enough to slice.
- Use the parchment paper overhang to lift the fudge from the pan. Slice into small squares before serving.
Notes
- For a quicker set time, you can chill the fudge in the freezer for about 30 minutes.
- If you prefer a darker chocolate flavor, substitute half of the white chocolate chips with semi-sweet chocolate chips.
- Crush the Oreos in a food processor or by placing them in a sealed bag and crushing them with a rolling pin.
Nutrition
- Serving Size: 1 square
- Calories: 185
- Sugar: 20g
- Sodium: 95mg
- Fat: 10g
- Saturated Fat: 6g
- Unsaturated Fat: 4g
- Trans Fat: 0g
- Carbohydrates: 23g
- Fiber: 0.5g
- Protein: 2g
- Cholesterol: 10mg