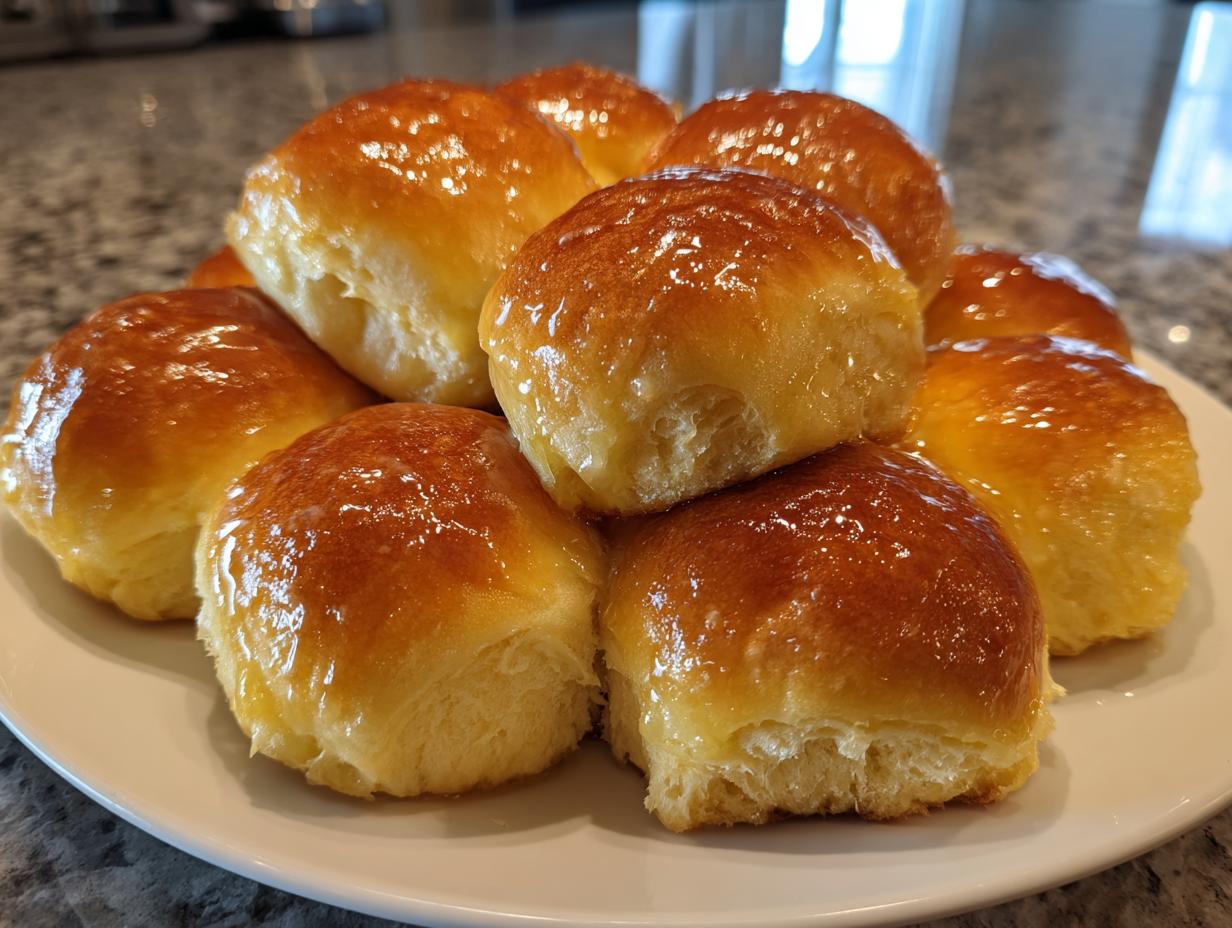

Oh, there is just nothing in the world that competes with the smell of truly fresh bread baking, is there? Forget those sad, plastic-wrapped things from the grocery store! If you’re looking for that perfect, pillowy side dish to elevate your next family dinner—or yes, even Thanksgiving—you have come to the absolute right place. I’ve spent ages refining yeast doughs to make sure they are foolproof, and I promise these are the ultimate soft and fluffy homemade dinner rolls you will ever make. They are rich with that classic, comforting buttery flavor we all crave. Trust me, once you master this recipe, you won’t look back. As I share the story behind Unfold Recipes on my About page, you’ll see my whole goal is approachable elegance, and these rolls definitely deliver that warmth without any unnecessary fuss.
- Why You Will Love These Soft Dinner Rolls Recipe
- Essential Ingredients for Fluffy Homemade Bread Dinner Rolls
- Step-by-Step Instructions for Perfect Dinner Rolls
- Tips for Success: Achieving Soft Dinner Rolls Every Time
- Dinner Roll Variations: Sweet Dinner Rolls and Garlic Butter Rolls Recipe
- Make Ahead Dinner Rolls and Storage Instructions
- Frequently Asked Questions About Making Dinner Rolls
- Estimated Nutritional Information for These Dinner Rolls
- Share Your Experience Baking These Comfort Food Baking Dinner Rolls
Why You Will Love These Soft Dinner Rolls Recipe
These aren’t just bread; they are little clouds of buttery happiness. I developed this recipe because I simply couldn’t stand the thought of another dry, flavorless roll sitting next to a beautiful holiday turkey. When you bake these at home, you know exactly what went into them! I hope you check out my latest posts for more kitchen inspiration!
- Unbelievably Soft & Fluffy Texture: Seriously, they pull apart like cotton candy. The technique ensures maximum fluffiness without being airy or collapsing.
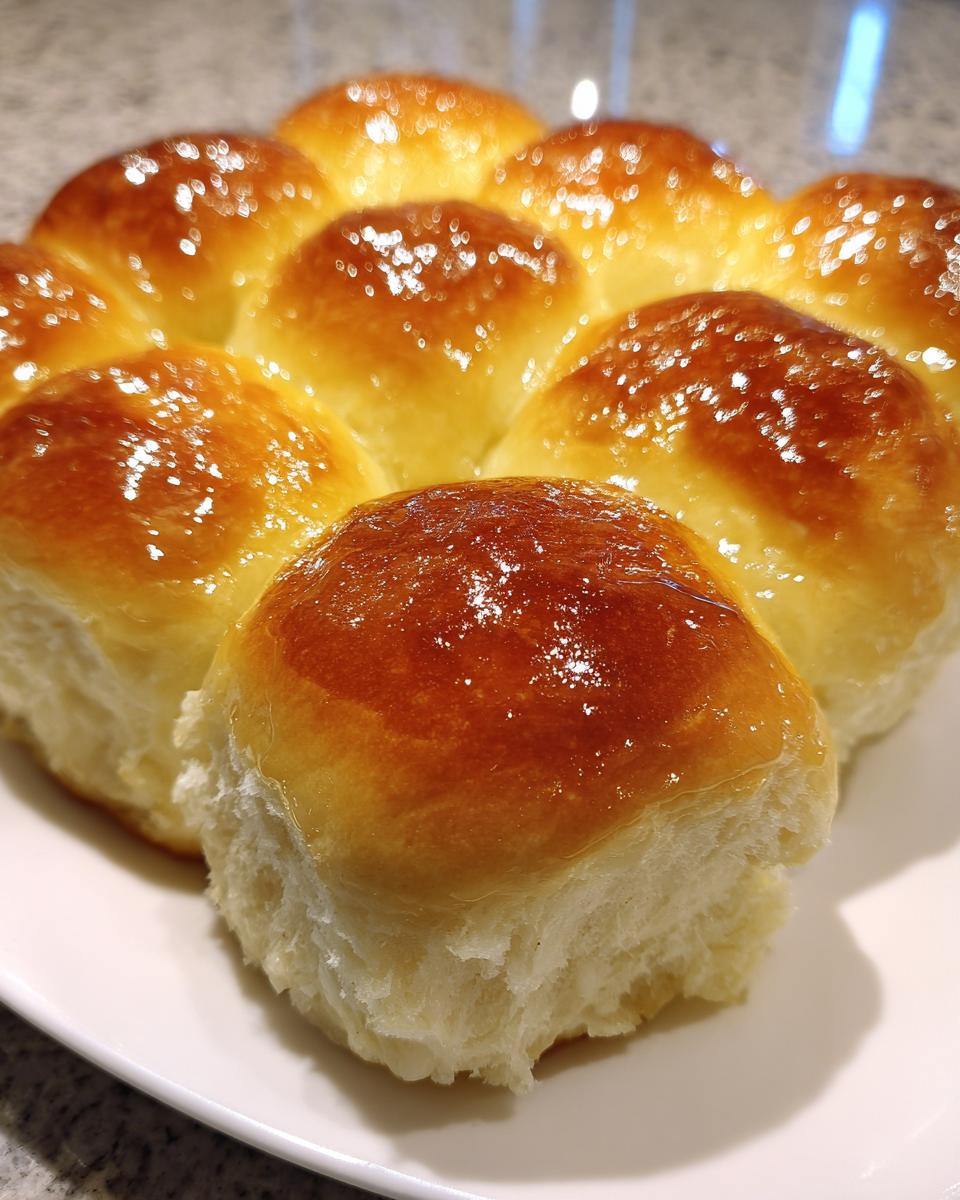
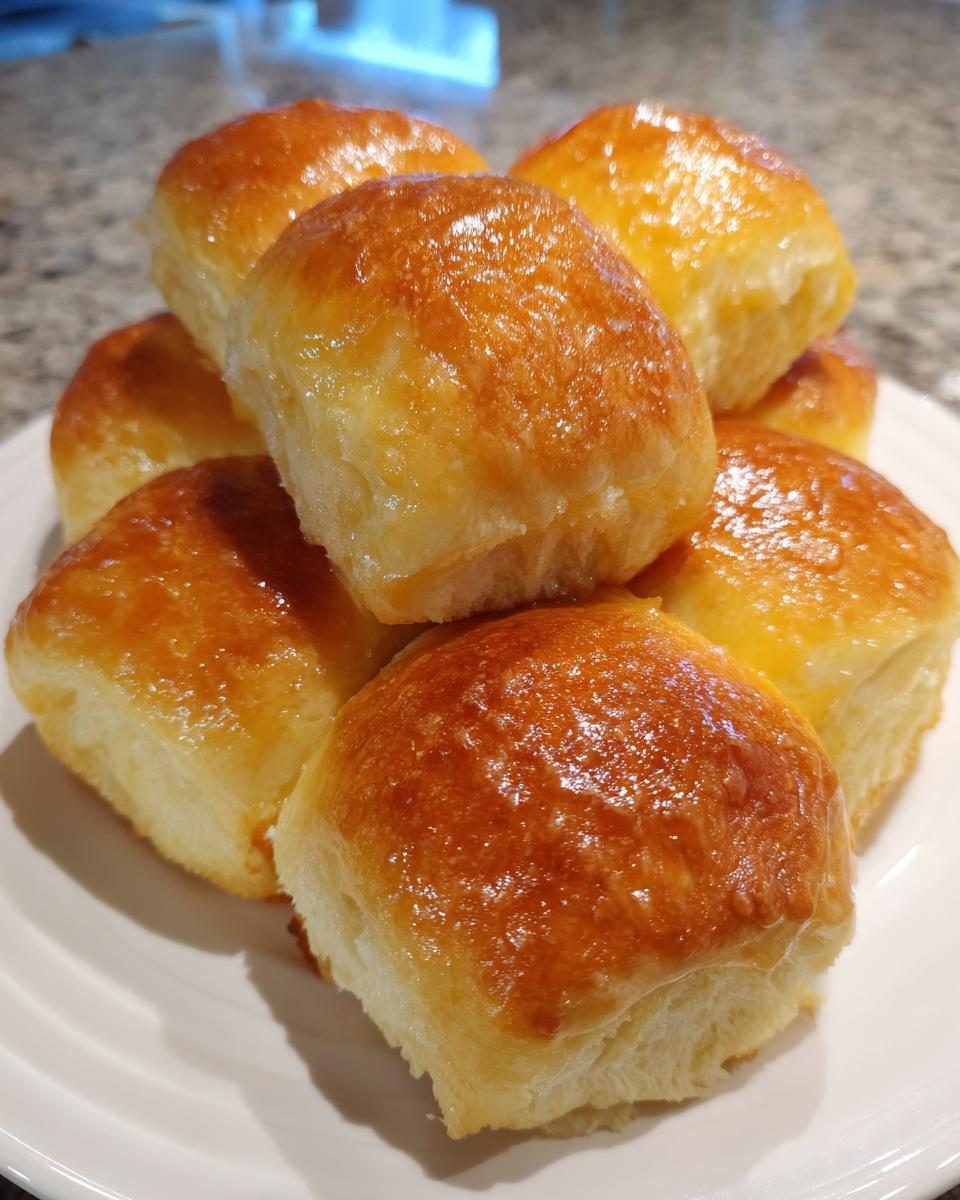
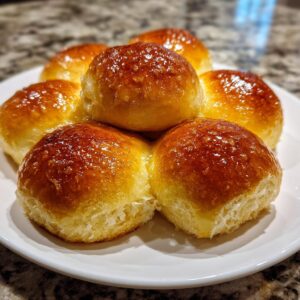
- That Buttery Finish: We brush them with melted butter right out of the oven—it’s non-negotiable, which gives us that decadent, comforting flavor.
- Better Than Store-Bought, Hands Down. Once you smell these rising, you’ll realize you can never go back to the freezer aisle again.
- Perfect for Holidays AND Weeknights: They feel special enough for Thanksgiving, but they’re easy enough for a simple Tuesday night pasta dinner.
- Impressive Results with Simple Steps: Even if you’re new to baking with yeast, I’ve broken down the process to be totally straightforward and reliable.
- Ready in Under Two Hours: While they need time to rise, the actual active prep work is minimal, meaning you get amazing results relatively quickly!
Essential Ingredients for Fluffy Homemade Bread Dinner Rolls
Okay, let’s talk supplies! These soft dinner rolls rely on simple ingredients, but the quality and temperature matter SO much because we are dealing with yeast—our temperamental little friend. Trust me on the temperature here; lukewarm milk is crucial before we introduce the yeast. If it’s too hot, you kill the yeast, and then you are stuck with dense hockey pucks instead of fluffy homemade bread. Not what we want!
My recipe uses basic components, which keeps this under a completely easy dinner roll recipe category. And please, make sure that egg is at room temperature! It mixes in so much better that way.
- 1 cup warm milk (about 110°F—use a thermometer if you’re nervous!)
- 2 1/4 teaspoons active dry yeast
- 1/4 cup granulated sugar
- 1 large egg, room temperature
- 1/4 cup unsalted butter, melted
- 1 teaspoon salt
- 3 1/2 cups all-purpose flour, plus more for dusting
- 1/2 cup (1 stick) unsalted butter, melted, for brushing (This is key for the buttery finish!)
Step-by-Step Instructions for Perfect Dinner Rolls
This is where the magic happens, and I want you to treat this process with a little patience—it’s worth every minute when you bite into that fluffy center. We have two distinct rising periods here, so don’t confuse them! My biggest piece of advice for the proofing stages: find the warmest, draft-free spot in your house. Sometimes, I turn my oven light on without turning the heat on; that little bit of warmth helps those yeast rolls bloom perfectly. If you are ever looking for tips on other fluffy baked goods, check out my guide on fluffy biscuits and gravy recipe!
Activating the Yeast and Mixing the Dough for Dinner Rolls
First things first, we gotta wake up that yeast! Pour your warm milk into a big bowl—remember, we want it around 110°F, nice and warm but not scalding hot. Sprinkle the yeast right on top and let it sit for about five minutes. You should look back and see a nice foamy layer; that foam means your yeast is alive and ready to work its magic for our fluffy homemade bread!
Next, whisk in the sugar, your room temperature egg, the first 1/4 cup of melted butter, and the salt until they are just mixed. Now, start adding the three and a half cups of flour slowly. Don’t dump it all in at once! Stop as soon as it turns into a shaggy, slightly sticky mess you can barely stir.
Kneading and First Rise for Buttery Yeast Rolls
Time to get your hands dusty! Turn that shaggy dough out onto a lightly floured surface. Knead this dough for a good 6 to 8 minutes. You’re building structure here, so keep going until it feels smooth and wonderfully elastic—it should stretch slightly without tearing right away. That elasticity is the secret to getting those tall, soft dinner rolls.
Plop the dough into an oiled bowl, turn it over so it’s coated, cover it up tight, and put it somewhere warm. We let this first rise go for about an hour to an hour and a half, or until it has actually doubled in size. Don’t rush this part!
Shaping and Second Rise (Proofing) of Your Dinner Rolls
Once doubled, gently punch the air out. See? It deflates beautifully! Now, divide that dough equally into 12 pieces. I just eyeball mine for a weeknight batch, but if you want perfect uniformity, you can weigh them out! Roll each portion aggressively between your palms to create tight, smooth little balls. That tension on the outside helps them hold their shape as they bake.
Place those little dough balls snugly into your greased 9×13 pan, leaving about an inch between them—this spacing is key for those super soft sides! Cover the pan again, and this is our second rise, which takes about 30 to 45 minutes. They should look puffy, like little pillows ready for the oven.
Baking and The Essential Butter Brush Finish for Dinner Rolls
Get your oven preheated to 375°F (190°C). Bake these babies for 15 to 18 minutes. You want them golden brown on top, and if you tap the bottom, they should sound hollow! As soon as they come out of the oven, you absolutely must brush all that remaining melted butter over the top immediately. Melting butter soaks right into the crust and keeps them moist for days!
Now, if you want to lean into that sweet, slightly warm flavor profile that everyone loves, try this: before brushing, mix that remaining 1/2 cup of butter with 1 tablespoon of honey and a tiny pinch of cinnamon. Brushing this mixture on hot rolls gives you that famous Texas Roadhouse Style Rolls Copycat finish!

Tips for Success: Achieving Soft Dinner Rolls Every Time
Baking is chemistry, but with these buttery yeast rolls, it’s also a little bit about listening to the dough. If you want those incredibly soft dinner rolls every time, stop fighting with your ingredients! The number one mistake I usually see is adding way too much flour while kneading. Remember, the dough should be slightly tacky when you turn it out—if you dust the counter heavily, you’ll end up with stiff, dense results, which defeats the purpose of this fluffy bread recipe!
Stick to my room temperature rule for the egg and that 110°F milk for the yeast revival. If your dough doesn’t seem to rise for the first proof, your kitchen might be too cold, so try putting the bowl near a pilot light or in a turned-off oven with the light on. For easier weeknight baking, check out my guide on a weeknight bread recipe, but remember for these rolls, patience during the rise is king!
Dinner Roll Variations: Sweet Dinner Rolls and Garlic Butter Rolls Recipe
Part of the fun of mastering a great base recipe like this is figuring out how to tweak it for different meals, right? These dinner rolls are so versatile, and I love dressing them up depending on what we’re serving. Whether you need something slightly sweet for a weekend brunch or something savory for a big pot of chili, this dough handles it beautifully.
If you want to make a batch of true Sweet Dinner Rolls, it’s super simple. For the dough shown above, just increase the granulated sugar in the initial mix from 1/4 cup to 1/3 cup. That small addition really brings out the sweet profile when baked. I also love to brush them with the honey-butter mixture we used for the Texas Roadhouse style, but I swap out the cinnamon for a tiny splash of vanilla extract in that final butter brush. Wow, those disappear fast!
Now, let’s pivot entirely to savory. If you prefer a salty, aromatic side dish—the perfect accompaniment for soups or stews—you need to try the savory take. If you’re looking for a great reference, I have a fantastic garlic bread recipe, but we can easily adapt our rolls to that amazing flavor profile, creating what I fondly call Garlic Butter Rolls Recipe.
To make the savory version, skip the honey and cinnamon in the final butter glaze. Instead, melt the final 1/2 cup of butter just as you did before, but whisk in three cloves of finely minced fresh garlic along with one teaspoon of dried parsley and maybe a pinch of dried oregano. Brush this garlicky goodness over the rolls immediately after they come out of the oven. The aroma that fills your kitchen is just unbelievable, and they transform into a truly savory side dish!
Make Ahead Dinner Rolls and Storage Instructions
I know how hectic life gets, especially when you’re cooking for holidays or hosting a big crowd. The beauty of this recipe is that you absolutely do not have to bake these all on the day of serving! Since these are yeast rolls that rely on rising time, planning ahead is your secret weapon for seeming totally relaxed on brunch day.
Mastering Make Ahead Dinner Rolls is super easy because we treat the dough right after that final shaping. Once you have rolled out those 12 little balls and arranged them in the pan, cover the pan tightly with plastic wrap—make sure it seals well so they don’t dry out!
Refrigerating Shaped Rolls (The Overnight Trick)
Place that covered pan directly into the refrigerator. They can chill like this for up to 24 hours. The cold slows down the second rise way down, which lets the flavors deepen slightly, almost giving them that coveted Old Fashioned Dinner Rolls kind of depth. When you’re ready to bake them, pull them out just about an hour before you want to put them in the oven. They need that hour on the counter to warm up a bit before the heat hits them. If you pull them straight from the fridge, you need to add about 5 to 10 extra minutes to the baking time, so keep an eye on that golden color!
Freezing and Reheating Baked Rolls
If you aren’t planning to serve them within a couple of days, you can freeze these beauties after they are fully baked and cooled. Just brush with butter as normal, let them cool completely to room temperature, and then store them in a zip-top freezer bag or wrapped tightly in foil. They’ll keep perfectly for about two months!
When you want to reheat them, I find the best method is wrapping an entire cluster of rolls back into foil, trapping in that moisture, and popping them into a 350°F oven for about 10 to 15 minutes. That blast of heat brings them right back to that soft, fluffy, just-baked texture. It’s the perfect solution for leftovers or serving warm rolls all day long!
Frequently Asked Questions About Making Dinner Rolls
I know when you’re diving into yeast baking, you often have a few panicky questions while you wait for that dough to rise! Don’t worry, that’s completely normal. I’ve gathered some of the things I hear readers ask most often about getting that perfect, fluffy texture in their dinner rolls.
Can I use instant yeast instead of active dry yeast in this recipe?
Yes, thankfully! Instant yeast and active dry yeast are very similar, but the preparation is slightly different. If you are using the instant kind, you can absolutely skip that initial five-minute blooming step in the warm milk. Just whisk the instant yeast right in with your flour, sugar, and salt, and then add the liquid mixture over the top! This is one of the ways you can turn this into a truly Quick Dinner Rolls recipe because it saves you about ten minutes of resting time. It’s great for busy weeknights!
How long do these soft dinner rolls stay soft after baking?
Oh, this is the million-dollar question! Because we use plenty of butter, these rolls stay remarkably soft for a long time—way better than anything you buy pre-made. If stored properly (I like to keep them covered tightly on the counter or in a bread box rather than the fridge, as the fridge dries them out), they are perfect for at least two full days. If you want that ‘just out of the oven’ feel on day two, a quick zap in the microwave (about 10 seconds per roll) or a short time in a warm oven brings them right back to life!
Do I really need to knead the dough, or can I skip that for an easy dinner roll recipe?
I totally understand the desire to skip the kneading—it requires elbow grease! But for this particular recipe, where we are aiming for that signature soft yet sturdy structure, I really, really recommend kneading for at least 6 minutes. Kneading develops the gluten structure. If you skip it, your rolls might rise really tall in the oven, but they’ll likely deflate or crumble because the structure can’t hold the air bubbles we created. If you absolutely must skip it, use a stand mixer with a dough hook and mix for about 8 minutes on medium-low speed instead.
Are these more like Old Fashioned Dinner Rolls or sweet Texas Roadhouse style rolls?
That’s a great question that gets to the heart of what makes them so satisfying! This base recipe leans heavily toward a classic, Old Fashioned Dinner Rolls profile—slightly sweet from the sugar, very buttery, and wonderfully tender. If you leave them plain with just the butter brush, that’s the classic choice. However, as I showed you above, it is incredibly easy to upgrade them! Just use that honey-butter brushing technique, and suddenly you have that recognizable sweet, classic restaurant roll flavor profile everyone adores. It’s the best of both worlds in one reliable dough!

If you’re looking for even more easy baking projects that are guaranteed winners, take a peek at my advice on making an easy dinner roll recipe!
Estimated Nutritional Information for These Dinner Rolls
Now, I know some of you are tracking macros or just curious about what’s in these buttery delights, so transparency is important to me! Since food is such a big part of my life (and likely yours, since you are here!), I always try to give an idea of what you are serving. These numbers definitely reflect the generous use of butter—because, honestly, we aren’t making these for their low-fat content, are we? We are making them for comfort!
Please remember that these values are estimates. My actual kitchen might use a slightly different brand of yeast or a slightly larger egg, so these figures are based strictly on the standardized breakdown of the ingredients listed in the recipe above. If you adjust the recipe significantly, especially if you use alternatives to butter or make the sweet roll variation, the numbers will change!
- Serving Size: 1 roll
- Calories: 220
- Fat: 9g
- Saturated Fat: 5g
- Trans Fat: 0g
- Cholesterol: 30mg
- Sodium: 280mg
- Carbohydrates: 32g
- Fiber: 1g
- Sugar: 4g
- Protein: 5g
They are perfectly portioned little bites of happiness!
Share Your Experience Baking These Comfort Food Baking Dinner Rolls
And just like that, you’ve graduated from store-bought sadness to baking bread you can be truly proud of! I poured my heart into making this the most reliable recipe for soft dinner rolls, and now I absolutely want to hear all about your success. There is nothing better than knowing I helped bring a little bit of that warm comfort food baking feeling right into your own home for your family.
Did you try the honey-cinnamon brush for that Texas Roadhouse vibe? Or did you stick to the classic, pure buttery finish? Tell me everything! Please take a moment to leave a star rating right here on the recipe card—it helps other home cooks find recipes they can trust, which is my absolute mission here at Unfold Recipes.
Don’t be shy about showing off your beautiful, golden-brown creations! Tag me on social media if you snap a picture; I genuinely love seeing your bakes. I’m always looking for inspiration, too, so if you have any other ideas for using this amazing yeast dough, drop a comment below. Happy baking, friend, and I hope these buttery treats become a new tradition for you!
If you are looking for more reliable, elegant baking that makes life easier, you might enjoy exploring my thoughts on comfort food baking!
PrintThe Ultimate Soft and Fluffy Homemade Dinner Rolls (Classic Buttery Recipe)
Bake incredibly soft, fluffy, and buttery yeast rolls from scratch. This recipe delivers comfort food better than store-bought options and is perfect for family dinners or holiday meals. Includes a variation for Texas Roadhouse style rolls.
- Prep Time: 25 min
- Cook Time: 18 min
- Total Time: 1 hour 58 min
- Yield: 12 rolls 1x
- Category: Side Dish
- Method: Baking
- Cuisine: American
- Diet: Vegetarian
Ingredients
- 1 cup warm milk (about 110°F)
- 2 1/4 teaspoons active dry yeast
- 1/4 cup granulated sugar
- 1 large egg, room temperature
- 1/4 cup unsalted butter, melted
- 1 teaspoon salt
- 3 1/2 cups all-purpose flour, plus more for dusting
- 1/2 cup (1 stick) unsalted butter, melted, for brushing
Instructions
- Combine the warm milk and yeast in a large bowl. Let stand for 5 minutes until foamy.
- Add the sugar, egg, 1/4 cup melted butter, and salt to the yeast mixture. Whisk until combined.
- Gradually add the flour, mixing until a shaggy dough forms.
- Turn the dough out onto a lightly floured surface. Knead for 6 to 8 minutes until the dough is smooth and elastic.
- Place the dough in a lightly oiled bowl, turning to coat. Cover the bowl with plastic wrap or a clean towel. Let the dough rise in a warm place for 1 to 1.5 hours, or until doubled in size.
- Gently punch down the dough. Divide it into 12 equal pieces. Roll each piece into a smooth ball.
- Arrange the dough balls in a greased 9×13 inch baking pan, leaving about 1 inch between them.
- Cover the pan loosely and let the rolls rise again in a warm spot for 30 to 45 minutes, or until puffy.
- Preheat your oven to 375°F (190°C).
- Bake for 15 to 18 minutes, or until the tops are golden brown.
- Immediately brush the tops of the hot rolls generously with the remaining 1/2 cup melted butter.
- Serve warm. For Texas Roadhouse style, mix 1/4 cup melted butter with 1 tablespoon of honey and a pinch of cinnamon before brushing on the hot rolls.
Notes
- For make ahead rolls, you can refrigerate the shaped rolls overnight after the second rise. Add 5-10 minutes to the baking time if baking directly from the refrigerator.
- If you are planning your weekly meals, these rolls freeze well after baking. Thaw them and reheat briefly in a warm oven.
- If you are looking for alternatives to traditional baking methods, consider using a sous-vide precision cooker for proofing dough at a consistent temperature, though traditional methods work well here.
Nutrition
- Serving Size: 1 roll
- Calories: 220
- Sugar: 4
- Sodium: 280
- Fat: 9
- Saturated Fat: 5
- Unsaturated Fat: 4
- Trans Fat: 0
- Carbohydrates: 32
- Fiber: 1
- Protein: 5
- Cholesterol: 30