

There is nothing quite like the moment you pull a tray of fresh bread from the oven. The scent alone sets the whole house at ease, doesn’t it? When I think about what truly defines a memorable meal, these rolls always come to mind. They aren’t just a side dish; they are the centerpiece of connection at the table. I spent years trying to perfect a recipe that yields the softest, fluffiest homemade dinner rolls you will ever taste, something reliable enough for a weeknight but special enough for my largest holiday gatherings.
These buttery, slightly sweet little treasures have become my signature way of sharing love, just like my parents shared their heritage through food. I know when you try them, they will start telling wonderful stories in your own kitchen, too. If you love learning more about the heart behind my cooking philosophy, you can always read up on my journey over on the About page.
- Why These Soft Dinner Rolls Are the Best Ever Buttery Rolls
- Gathering Ingredients for Perfect Buttery Bread Rolls
- Step-by-Step Guide to Making Easy Yeast Rolls Recipe
- Baking and Applying the Melted Butter Topping to Your Rolls
- Variations: Making Texas Roadhouse Copycat Rolls or Garlic Butter Rolls
- Tips for Success with Make Ahead Yeast Rolls
- Serving Suggestions for Your Warm Comfort Food Rolls
- Storage and Reheating Instructions for Leftover Rolls
- Frequently Asked Questions About Making Homemade Rolls
Why These Soft Dinner Rolls Are the Best Ever Buttery Rolls
I’ve tried countless recipes over the years, seeking that perfect balance of ease and show-stopping flavor. You know how sometimes a side dish upstages the main course? That happens when these come out of my oven. They truly are the Best Ever Buttery Rolls, and I needed them to be foolproof for big events like Thanksgiving.
This recipe isn’t fragile or fussy; it’s designed to deliver that pillowy soft texture reliably, transforming any simple dinner into a special occasion. They are the definition of Warm Comfort Food Rolls, made to be torn apart at the table.

Key Features of Our Fluffy Homemade Rolls
- They boast an incredible pillow-soft crumb that practically melts the second it hits your tongue.
- The flavor profile is rich, thanks to a generous brushing of butter, balanced by just a hint of sweetness.
- We include a make-ahead option, which means less stress when you are hosting a large gathering.
- They are incredibly sturdy for soaking up pan juices or being smothered in that optional cinnamon butter!
I developed this recipe after disappointing holiday meals where the store-bought bread just fell flat. Now, these rolls are the first thing people ask for. You can find more reliable favorites over in my general Side Dishes section.
Gathering Ingredients for Perfect Buttery Bread Rolls
Alright, let’s talk ingredients. For these buttery bread rolls to turn out just right, precision matters, even though the finished product feels effortless. I learned early on that yeast is highly sensitive, so pay close attention to that water temperature!
You need the water to be warm, not hot—think about bathwater. If it’s over 115°F, you’ll kill the yeast, and then your dough won’t rise, which is a huge disappointment when you’re excited to bake. We use just enough sugar to wake up that yeast and provide a delicate sweetness to the final roll.
Here is exactly what you need to pull together this simple recipe:
- 1 cup warm water (make sure this is between 105–115°F)
- 2 1/4 teaspoons active dry yeast (that’s one standard packet!)
- 1/4 cup granulated sugar
- 1/4 cup unsalted butter, melted, plus another 4 tablespoons reserved strictly for brushing the tops later
- 1 large egg, just lightly beaten
- 1 teaspoon salt
- 3 1/2 to 4 cups all-purpose flour (keep that extra flour handy!)
Making sure we have that dedicated extra butter really makes the difference between a nice roll and something truly show-stopping. Don’t skimp on that final brushing; that’s pure flavor right there.
Step-by-Step Guide to Making Easy Yeast Rolls Recipe
Now we get to the fun part—turning that sticky mess into beautiful, supple rolls! I’ve broken this down very clearly because the rising times are crucial to getting that cloud-like texture the moment you pull them out. Remember, yeast is alive, so keep your dough happy and warm during both rises. If you’re curious about quick baking beyond bread, I have some great cookie recipes too!
Activating Yeast and Mixing the Rolls Dough
First things first: wake up that yeast! Pour your warm water (remember that perfect 105–115°F range?) into your bowl and sprinkle the dry yeast right on top with a pinch of that sugar. Don’t stir it much; just let it sit for about five minutes. If you see a lovely layer of foam appear—like the head on a good beer—you’re golden! That means your yeast is ready to work its magic.
Next, you’ll stir in the rest of your wet ingredients—the melted butter, the rest of the sugar, the egg, and the salt. Then, introduce the flour slowly, mixing just until everything comes together into a messy ball. That’s what we want at this stage!
Kneading and First Rise for Fluffy Yeast Bread
Time to knead! Turn that dough out onto a lightly floured surface. I knead for a solid five to seven minutes by hand. You need the dough to become smooth and elastic. Here’s my trick for knowing when to stop: take a small piece of dough and gently stretch it. If you can stretch it thin enough to almost see light through it without tearing, that’s your beautiful gluten development! If it rips right away, keep kneading.
Once it passes the stretch test, place the dough in an oiled bowl, cover it securely, and let it rest in a warm spot for about an hour and a half. It needs to double in size to become truly Fluffy Yeast Bread.
Shaping and Second Rise for Soft Dinner Rolls
Gently punch the air out of the dough—don’t be aggressive! Now, divide it into 12 or 16 evenly sized portions. Rolling each piece into a tight, smooth ball in your hands ensures a uniform shape. Place all those little dough orbs snugly next to each other in your greased baking dish.
Now for the second rise, which gives these treats their final lofty texture. Cover them again and let them sit for about 30 to 45 minutes until they have puffed up again and are touching shoulders. These are now perfect Soft Dinner Rolls, ready for the oven!

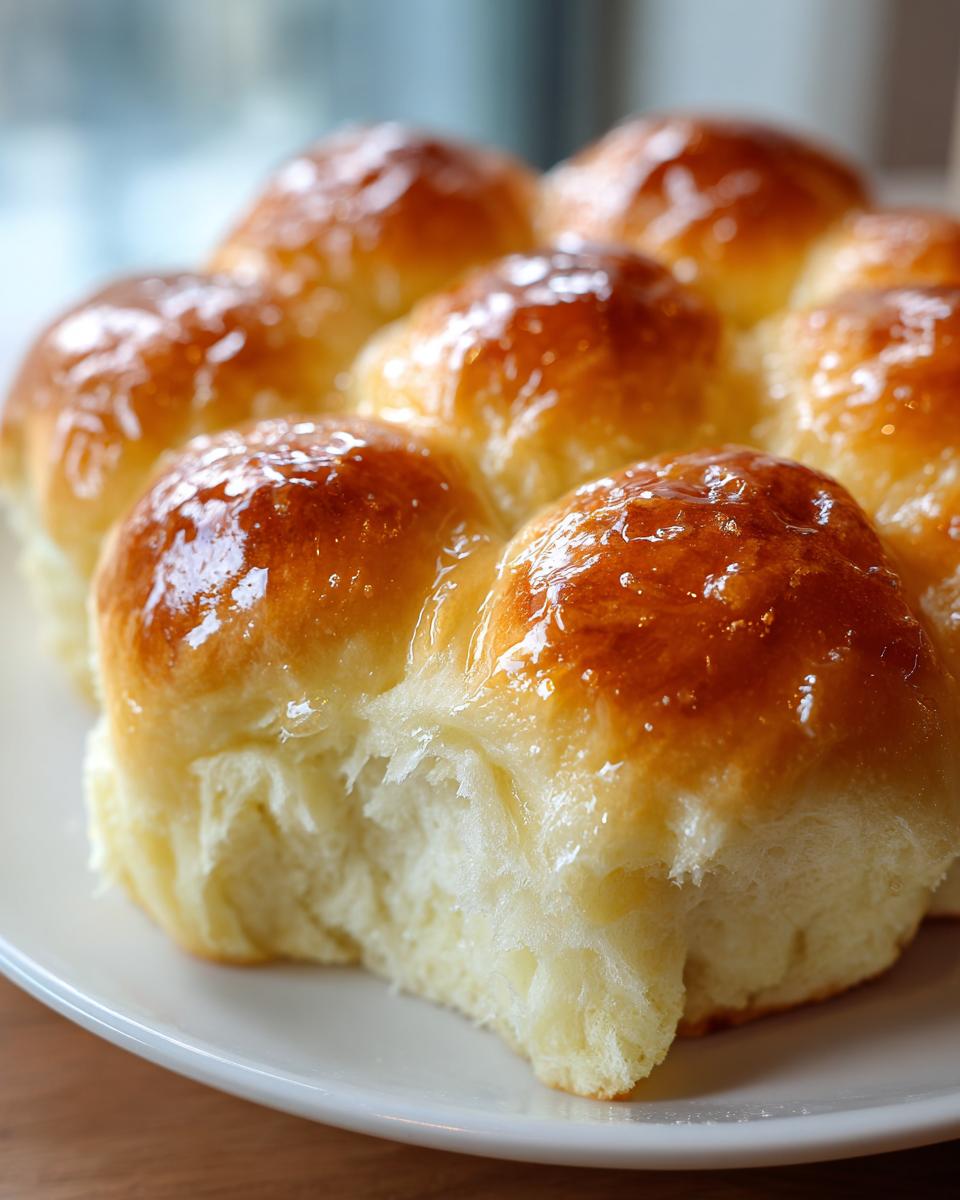
Baking and Applying the Melted Butter Topping to Your Rolls
The moment of truth! We preheat the oven to 375°F (190°C) for these lovely rolls. Once they are nicely puffed up from that second rise, slide the pan into the hot oven. They usually take between 15 and 20 minutes to achieve that perfect golden-brown top. You’ll know they are done when the tops are deeply colored and they sound a little hollow when you tap them gently.
But wait! The absolute best part comes immediately after they leave the heat. You must work fast here. Take those remaining 4 tablespoons of reserved melted butter—it should still be warm—and brush it generously all over the tops of the hot rolls. Honestly, this is my favorite moment in all of baking. The butter sizzles and absorbs instantly, and the smell that fills my house? It’s pure autumn, it’s Thanksgiving, it’s everything warm and wonderful.

That final buttery bath guarantees these are the softest rolls imaginable. Right after brushing, they are ready to serve alongside your favorite stew or roast—they are simply divine when warm!
Variations: Making Texas Roadhouse Copycat Rolls or Garlic Butter Rolls
While this recipe stands strong on its own, I know how much people adore those specific salty-sweet bakery flavors. So, let’s customize these wonderful rolls! Since these base ingredients are so flexible, we can easily transform them into something that tastes just like those famous restaurant favorites.
I want you to feel confident serving these up regardless of what flavor profile your family craves. My notes section is actually packed with ideas that people constantly ask me about when they see these come out of the oven!
If you want that slightly sweet, yeasty flavor that dips perfectly into honey butter, you can aim for that famous savory profile. For those who love a bit of zest, my roasted garlic bread will give you inspiration for a powerful flavor boost, but here is how to adapt these specific rolls:
For Texas Roadhouse Copycat Rolls:
This is so easy to do! After you brush the rolls with the initial melted butter—right when they come out of the oven—you’ll want to add a tiny secret weapon. Take about 2 tablespoons of that melted butter and mix it with just a splash of honey before brushing it over the tops. That blend of saltiness from the butter and the cooked sweetness of the honey is what makes those fluffy loaves taste just like the original. You can see guides on nailing that precise flavor over at this great resource.
For Garlic Butter Rolls:
If you want something truly decadent for dipping into a pot of soup, garlic rolls are the way to go. For the finishing brush, just skip the plain butter. Instead, mix 4 tablespoons of melted butter with one clove of finely minced fresh garlic and about a teaspoon of dried parsley flakes. Brushing this aromatic mix over the hot rolls right out of the oven infuses them with incredible flavor. They become savory, rich, and absolutely perfect for a cozy night in.
See? It’s so simple to adjust the final touch to make these rolls fit any meal you’re whipping up!
Tips for Success with Make Ahead Yeast Rolls
One of the biggest stressors when hosting a large dinner or preparing for a holiday feast is juggling oven space and timing. That’s why I rely on the make-ahead option for these fluffy homemade rolls! It’s a lifesaver, trust me.
The trick is to let the dough go through both rises first. Once the dough balls are shaped and snuggled into the pan for that glorious second proof—when they are puffy and ready to bake—that’s when we press pause. Cover that baking dish tightly with plastic wrap. You want a seal so no air gets in, which prevents a dry skin from forming on your dough.
You can safely pop these shaped rolls into the refrigerator for up to 12 hours. I often do this the night before Thanksgiving, meaning they are perfectly proofed and ready to bake first thing in the morning. It frees up so much counter space!
The most important rule when baking them straight from the fridge is patience. Do NOT put cold dough directly into a hot oven. That will shock the yeast and deflate your hard work. Take the pan out and let it sit on the counter, still covered, for about 30 minutes. This allows them to warm up just enough to activate that final rise before baking. They’ll bake up just as beautifully as if you’d made them all at once. If you’re looking for other great make-ahead ideas for breakfast, check out my notes on freezer meals!
Serving Suggestions for Your Warm Comfort Food Rolls
These beautiful, soft rolls truly elevate any meal, making them the star of your Warm Comfort Food Rolls lineup. Forget serving them only on holidays! They are fantastic alongside a hearty bowl of soup or soaking up the delicious gravy from a slow-cooked stew. If you happen to have leftovers—not that I ever do!—the best way to enjoy them is to tear them apart and dunk them into a warm dipping sauce.
My personal favorite way to serve them when I want a little something extra special is with my homemade cinnamon honey butter. It turns these already perfect bread sides into a dessert-level treat. If you’re looking for the perfect main dish to soak up all those butter-drenched crumbs, you must try my recipe for comforting chicken pot pie!
Storage and Reheating Instructions for Leftover Rolls
Even though these rolls disappear magically fast at my dinner table, sometimes we end up with a few survivors! We definitely don’t want those beautiful fluffy results to go stale overnight, so storage is key. The best way to keep them fresh is simply storing them at room temperature in an airtight container. Seal them up tight; this keeps the moisture locked in, which is what keeps them wonderfully soft.
I generally avoid the refrigerator for bread if I can help it, because cold air has a funny way of drying out the crumb, even when sealed well. If you need to store them longer than two days, freezing is far better than chilling them. Just wrap them tightly in plastic wrap first, and then foil.
Now, when it comes time to reheat, we want to bring them back to that ‘just-baked’ moment. The microwave is quick, but it doesn’t do them justice; they get tough fast. I always prefer the oven method for restoring that soft texture.
Restoring that Fresh-Baked Softness
Preheat your oven to 350°F (175°C). You can wrap the rolls very loosely in aluminum foil before placing them in the oven. The foil traps enough steam to warm them through gently without letting them dry out on the edges.
This usually takes about 8 to 10 minutes depending on how many you are warming up. As soon as they are hot all the way through, pull them out. If you want that extra moment of luxury, quickly brush the tops with just a tiny bit of melted butter right when they come out. That little bit of extra fat just makes them sing all over again. Trust me, reheating them properly makes all the difference for enjoying leftovers!
Frequently Asked Questions About Making Homemade Rolls
It’s funny how baking brings out so many questions, isn’t it? Even though I try to detail every single step in making these rolls perfect, there are always little points of confusion, especially when you are working with yeast for the first time. These are some of the most common things readers ask me, and I want to clear them up so you have complete confidence!
I want this recipe to be your go-to for Simple Roll Recipe from Scratch. So, let’s answer a few things:
Can I substitute the all-purpose flour for bread flour?
Yes, you absolutely can, and honestly, you might even get a slightly chewier texture if you do! Bread flour has more protein, which develops stronger gluten, leading to a nice stretch. If you swap it in, start with about 3 1/2 cups and only add more if the dough feels too sticky. Since you are aiming for these Soft Dinner Rolls to be incredibly tender, I personally prefer AP flour, but bread flour certainly won’t hurt the flavor!
Why do I need two separate rising periods?
That second rise is non-negotiable! The first rise builds the overall structure and flavor of the yeast. The second rise, or the final proof, is what gives you those beautiful, light, airy pockets inside the dough once they bake. Skipping it results in dense, heavy little hockey pucks instead of Fluffy Homemade Rolls. We need that final puff to make them truly melt in your mouth.
Can I use instant yeast instead of active dry yeast?
You certainly can! If you use instant yeast, you can skip the step where you bloom it in the warm water and sugar. Just whisk the instant yeast right in with your dry flour ingredients, and then proceed to mix in the liquid ingredients. It saves about five minutes, making these even closer to a Quick Dinner Rolls Recipe.
Can I use a stand mixer instead of kneading by hand for these rolls?
Oh, absolutely! I love kneading by hand because it’s therapeutic, but if you have a stand mixer, please feel free to use it. You’ll want to use the dough hook attachment, of course. After you mix everything until a shaggy dough forms, let it mix on a low to medium-low speed. You only need about 5 minutes of mixing time with the machine compared to the 7 minutes by hand. Just watch it closely; you want that smooth, elastic ball, but you don’t want the mixer to overheat the dough!
What is the best temperature for the water when making quick dinner rolls recipe?
This is such a key detail! For yeast to wake up happy and frothy, the water must be between 105°F and 115°F. If your water is colder than that, the yeast will just sit there, sluggish, and your dough won’t rise at all. If it’s too hot—say, near 135°F or above—you will actually kill the beneficial yeast cultures instantly, and you’ll end up with flat, unrisen bread. I keep a small digital thermometer nearby just for checking, but if you don’t have one, you want it pleasantly hot to the touch, but nowhere near what would burn your wrist.
We really want that yeast working hard to make these the best Buttery Bread Rolls possible, so checking the temp is worth the extra second! If you want to read more tips on my baking projects, pop over to my official blog!
PrintThe Best Soft, Fluffy, Buttery Homemade Dinner Rolls

Create irresistibly soft and fluffy homemade dinner rolls that taste better than store-bought. This easy recipe delivers buttery, slightly sweet rolls perfect for family dinners or holiday feasts.
- Prep Time: 25 min
- Cook Time: 20 min
- Total Time: 1 hour 50 min
- Yield: 12 large rolls 1x
- Category: Side Dish
- Method: Baking
- Cuisine: American
- Diet: Vegetarian
Ingredients
- 1 cup warm water (105-115°F)
- 2 1/4 teaspoons active dry yeast
- 1/4 cup granulated sugar
- 1/4 cup unsalted butter, melted, plus 4 tablespoons for brushing
- 1 large egg, lightly beaten
- 1 teaspoon salt
- 3 1/2 to 4 cups all-purpose flour
Instructions
- Combine the warm water and yeast in a large bowl. Let it sit for 5 minutes until foamy.
- Stir the melted butter, sugar, egg, and salt into the yeast mixture.
- Gradually add the flour, mixing until a soft dough forms.
- Turn the dough out onto a lightly floured surface. Knead for 5 to 7 minutes until the dough is smooth and elastic.
- Place the dough in a lightly oiled bowl, turning to coat. Cover the bowl with plastic wrap or a clean towel. Let the dough rise in a warm place for 1 to 1.5 hours, or until doubled in size.
- Gently punch down the risen dough. Divide the dough into 12 or 16 equal pieces. Roll each piece into a smooth ball.
- Arrange the dough balls close together in a greased 9×13 inch baking pan.
- Cover the pan loosely and let the rolls rise again for 30 to 45 minutes, or until puffy.
- Preheat your oven to 375°F (190°C).
- Bake the rolls for 15 to 20 minutes, or until they are golden brown on top.
- Immediately after removing the rolls from the oven, brush the tops generously with the remaining 4 tablespoons of melted butter.
- Serve the warm dinner rolls immediately.
Notes
- For make-ahead convenience, you can refrigerate the shaped rolls for up to 12 hours after the second rise. Let them sit at room temperature for 30 minutes before baking.
- To achieve Texas Roadhouse style rolls, brush the tops with melted butter mixed with a pinch of honey immediately after baking.
- If you prefer Garlic Butter Rolls, mix 4 tablespoons of melted butter with 1 clove of minced garlic and 1 teaspoon of dried parsley to brush on top.
Nutrition
- Serving Size: 1 roll
- Calories: 180
- Sugar: 4g
- Sodium: 250mg
- Fat: 7g
- Saturated Fat: 4g
- Unsaturated Fat: 3g
- Trans Fat: 0g
- Carbohydrates: 27g
- Fiber: 1g
- Protein: 4g
- Cholesterol: 25mg