

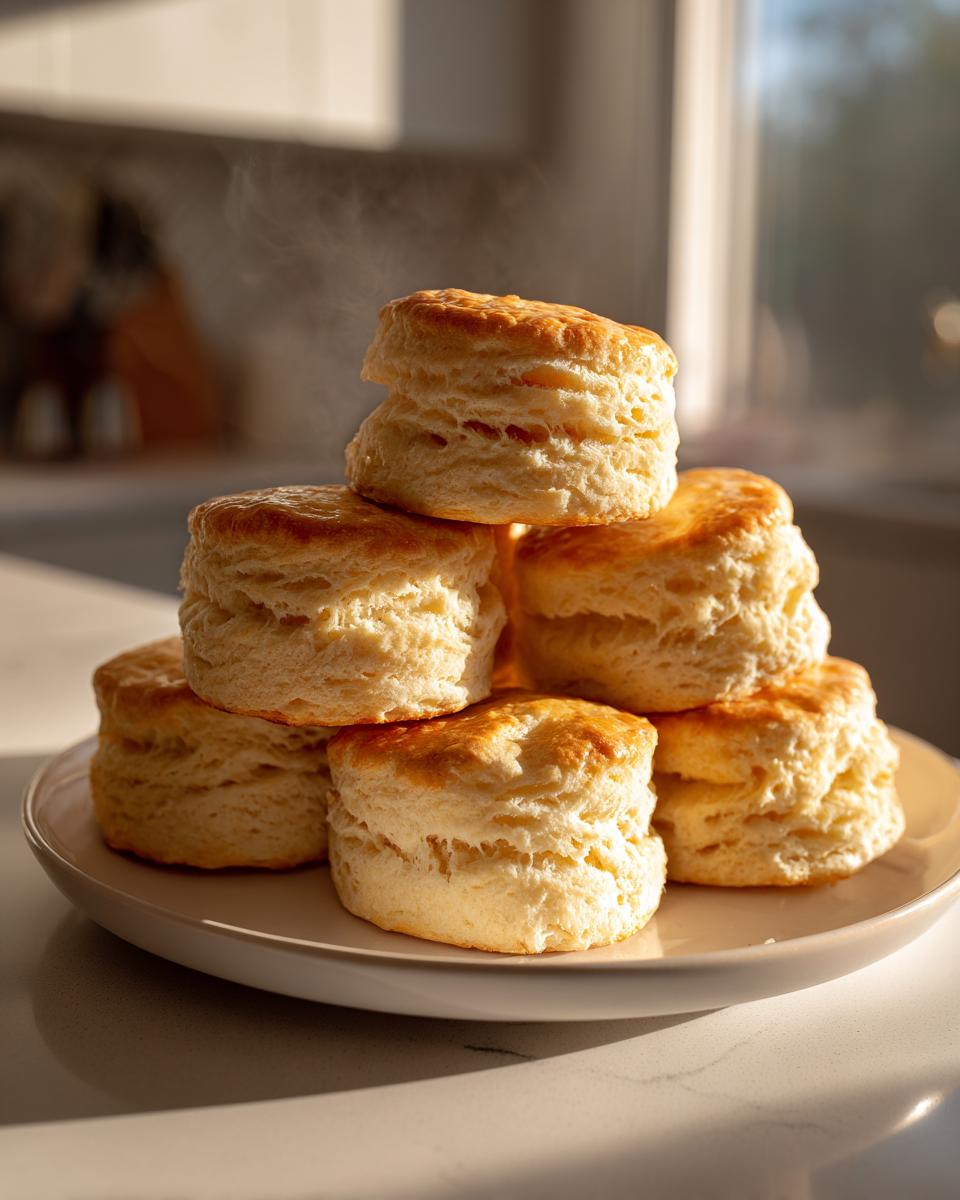
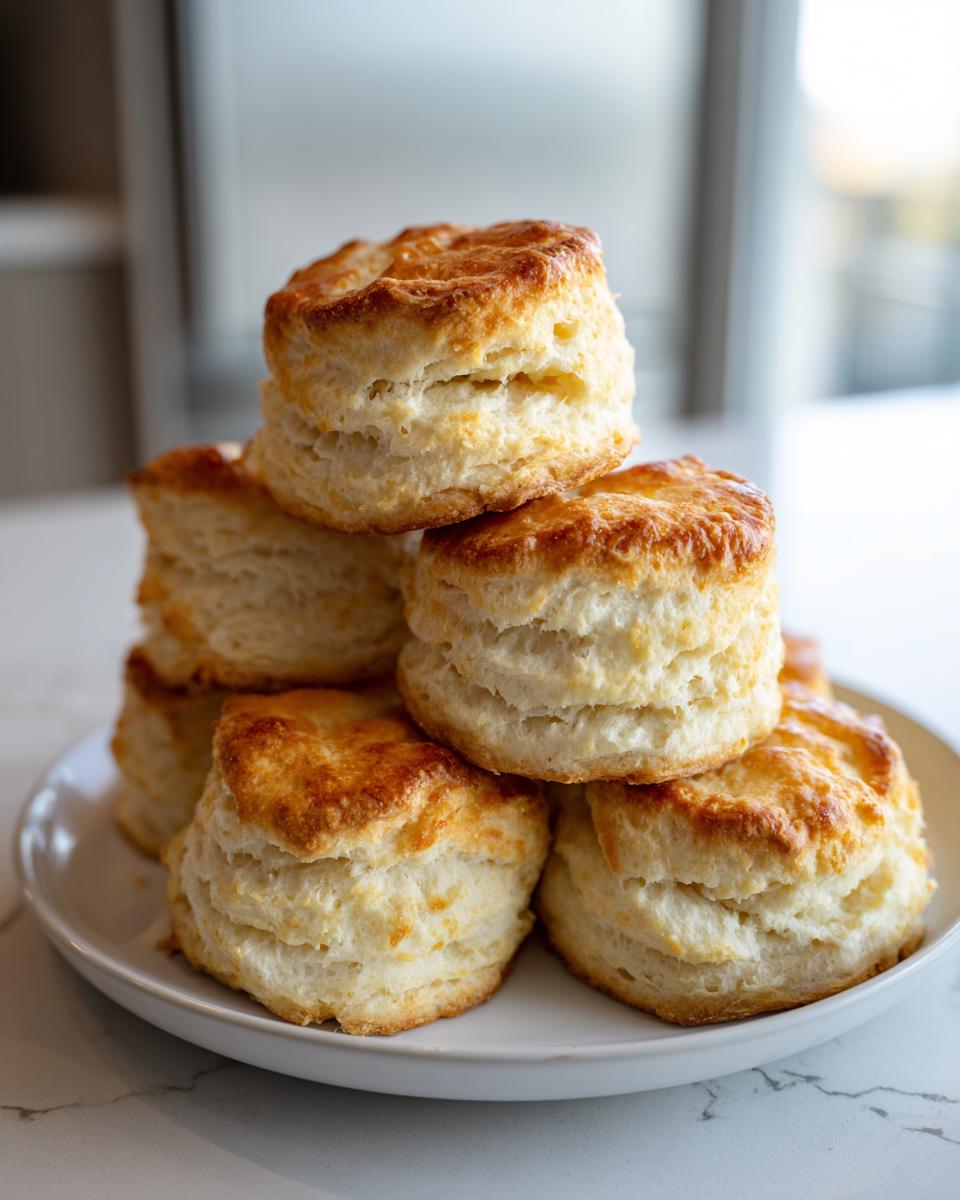
There is nothing quite like the comforting sight and smell of a truly perfect, tender biscuit emerging from the oven. I remember the first time I realized that achieving those light, airy layers wasn’t just reserved for Southern grandmothers—it was something I could master too. That journey led me straight to creating what I believe is the gold standard for buttermilk biscuits: tall, flaky, and deeply flavorful, all made beautifully from scratch. This recipe is about embracing the classic techniques that give you that impressive height and delicate crumb. When you nail this bread, you’re not just baking; you’re unfolding a little piece of kitchen magic. If you’ve been searching for the ultimate guide to fluffy biscuits and gravy, this is where the story begins.
- Why This Recipe Delivers the Best Buttermilk Biscuits
- Ingredients for Superior Buttermilk Biscuits
- How to Make Fluffy Biscuits Recipe From Scratch: Step-by-Step
- Tips for Old Fashioned Biscuits with Superior Texture
- Serving Suggestions for Buttery Homemade Biscuits
- Storage and Reheating for Fresh Buttermilk Biscuits
- Frequently Asked Questions About Buttermilk Biscuits
- Nutritional Estimates for Buttermilk Biscuits
- Share Your Perfect Buttermilk Biscuits Experience
Why This Recipe Delivers the Best Buttermilk Biscuits
I’ve spent years tweaking this method because I refuse to serve anything less than the absolute best buttermilk biscuits on my table. It’s not magic; it’s just smart technique applied consistently. We are aiming for three things here: they must be wonderfully tender buttermilk biscuits, golden on the outside, and wonderfully tall flaky biscuits. When you follow these crucial steps, you’ll understand why readers call this the recipe that gives them superior texture biscuits every single time.
Achieving Tall Flaky Biscuits Through Technique
The secret to that impressive height is keeping everything stone-cold—I mean fridge-cold butter and buttermilk! Those cold patches of butter melt in the oven’s heat, creating pockets of steam that push the layers apart. Then, that small letter-fold technique, or gentle lamination, we use just before cutting? That’s what sets up those beautiful, distinct layers you see when you pull them apart. If the butter gets warm, the layers melt together before they bake, and you end up with dense hockey pucks, not fluffy clouds!
Ingredients for Superior Buttermilk Biscuits
Now, let’s talk about what goes into these beauties. When you are making scratch made bread like this, the quality—and temperature—of your components truly matters. You’ll want to gather your flour, baking powder, salt, sugar, the cold butter cut into cubes, and your ice-cold buttermilk. In the final recipe post, I list the exact measurements, but I want you to really pay attention to the dairy! If you get this step right, I promise you’ll achieve that tender buttermilk biscuits texture you’re after.
Ingredient Notes and Substitutions for Buttermilk Biscuits
My absolute, non-negotiable rule is this: the butter must be cold. Like, just out of the freezer cold! If you cut your butter into chunks and it’s glistening or melting while you’re working it into the flour, you’re halfway to flat biscuits. That cold fat creates the steam we need for that lift, making these the lovely fluffy biscuits recipe they are. If you happen to be out of buttermilk—don’t panic! Just stir a teaspoon of white vinegar or fresh lemon juice into regular milk and let it sit for about five minutes. That’s your homemade substitute, but make sure that milk is cold too!
How to Make Fluffy Biscuits Recipe From Scratch: Step-by-Step
Making these incredible buttermilk biscuits is all about finding that balance: being gentle enough to keep the ingredients interacting correctly, but firm enough to create structure. We preheat the oven super high—you want that initial blast of heat to make the biscuits soar! Then we bring everything together. I know the dough looks messy at first, almost too wet—that’s exactly what we want. Remember, we aren’t making pizza dough here; we want shaggy, rustic components!
Mixing and Folding for Perfect Buttermilk Biscuits
When you add the buttermilk, mix it only until the flour is *just* incorporated. Stop stirring the second you can’t see dry streaks anymore! Overmixing is the number one enemy of easy homemade biscuits because it develops gluten, making them tough instead of tender. Now for the secret trick to achieving those beautiful height layers: gently pat the dough into a rectangle. Fold it in thirds like you’re folding a fancy letter. Don’t press it hard! We are layering, not smashing.
Cutting and Baking your Tender Buttermilk Biscuits
This part is critical for getting those amazing tall flaky biscuits. Take your biscuit cutter and press it straight down—think of it like stamping the dough. Please, please, please do not twist the cutter! Twisting seals the edges shut, and then the steam can’t escape upwards, leading to short, squat biscuits instead of high ones. Place them close together on your baking sheet if you prefer softer sides, or space them out if you like a crisp exterior crust.

Once they are baked to a beautiful golden brown, pull them out. If you want that extra buttery, golden sheen, brush them with a little melted butter while they are piping hot. The aroma alone will make your whole house smell like the perfect Southern kitchen.
For even more detailed advice on handling your dough and temperature control, I always recommend reviewing my comprehensive baking tips for biscuits guide right after you finish this section.
Tips for Old Fashioned Biscuits with Superior Texture
If you want to move beyond just ‘good’ biscuits and achieve truly exceptional, old fashioned biscuits that feel earned, we need to talk about a few more pro-level baking tips for biscuits. Consistency is everything, and these small adjustments really elevate the final product. I know you are busy, but even taking an extra minute or two makes all the difference between a decent breakfast pastry and bakery-worthy clouds of deliciousness.
One trick my mentor swore by, which I now insist on for every batch of buttermilk biscuits, is chilling the cut rounds. Once you’ve used your cutter on the dough, slip the entire baking sheet right into the freezer or the fridge for about ten minutes before they hit that hot oven. Why? It firms up the butter one last time, ensuring maximum steam power when they bake, leading to those glorious tall sides. For more insights into mastering the technique, you might find this resource on making biscuits from scratch particularly helpful!

Serving Suggestions for Buttery Homemade Biscuits
That moment when you pull these golden beauties out of the oven and just brush them with a little extra butter—honestly, that’s half the fun! These buttery homemade biscuits are so incredibly versatile. They obviously shine for breakfast, whether that means slathered in homemade strawberry jam or honey, or drowned in classic creamy gravy. I just love seeing them served up warm alongside a hearty night meal too.
Pairing Your Southern Style Baking with Dinner
These aren’t just for brunch, trust me! They are the perfect vehicle for sopping up every last bit of sauce from a slow-cooked pot roast or even alongside a healthier weeknight chicken dish. For true Southern style baking comfort, you absolutely must serve these alongside a big bowl of creamy sausage gravy; you can find my recipe right here for fluffy biscuits and gravy. They absorb those savory juices perfectly!
Storage and Reheating for Fresh Buttermilk Biscuits
When you inevitably have leftovers (if you can manage to have leftovers!), proper storage is key to maintaining that delicate texture. Store cooled, uneaten buttermilk biscuits in an airtight container at room temperature for up to two days. Don’t put them in the fridge, though—that humidity steals their tenderness! When you’re ready for another warm bite, the best way to bring back that just-baked magic is actually in the oven. Wrap your tender buttermilk biscuits loosely in foil and warm them at 350°F (175°C) for about 10 minutes. If you are in a real rush, a quick zap in the microwave works, but follow it up with 30 seconds in a toaster oven to crisp the outside back up!
Frequently Asked Questions About Buttermilk Biscuits
I know you’re probably reading this eager to get baking, but just in case you had a few nagging little questions about technique or speed, I wanted to cover a few things here. We want your first batch of buttermilk biscuits to be a triumph! Sometimes the most daunting part of baking isn’t the mixing, but knowing how to troubleshoot small ingredient hiccups before you even start. These are the questions I always get asked when friends try this recipe for the first time.
Can I use baking soda instead of baking powder in buttermilk biscuits?
Technically, yes, you absolutely can substitute baking soda for baking powder here, but it changes the chemistry a little bit. Baking powder already has its own acid inside, making it reliable. Since buttermilk is already acidic, using baking soda works as a strong lift, but it can impart a very slight soapy or metallic taste if you use too much. I stick to baking powder for the most neutral, perfect rise for these fluffy biscuits recipe, but if you must substitute, use about half the amount of baking soda called for in baking powder.
How do I make these a quick biscuit recipe?
You’re looking for speed—I totally get it! While I love the technique of folding, if time is tight, you can skip the letter fold described in the instructions. You can just gently mix everything until it barely comes together, cut the rounds, and bake them. They might lose a little height compared to the fully laminated ones, but you will still get lovely, tender buttermilk biscuits! Also, biscuit dough freezes wonderfully. You can prep a whole batch, put the raw cut rounds on a tray in the freezer, and then bake them straight from frozen—just add about 5 minutes to your bake time for a truly quick biscuit recipe!
If you are planning a big weekend event or want to make this part of your regular brunch lineup, mastering the freezer dough is a game-changer. Happy baking!
Nutritional Estimates for Buttermilk Biscuits
Sharing food is my favorite way to connect with you, and that includes being transparent about what we’re eating! Please keep in mind these numbers are just estimates based on the standard ingredients listed in the recipe—the type of flour or exact brand of butter can shift things slightly. For the typical serving of one biscuit, you’re looking at roughly 250 calories, 14 grams of fat, and a modest 5 grams of protein. It’s comfort food bread, after all, but made with high-quality, scratch ingredients, which always feels a bit better!
Share Your Perfect Buttermilk Biscuits Experience
Baking is truly a conversation, isn’t it? I pour all my care and my best tried-and-true methods into developing these recipes for you, and I just adore hearing what happens once they land in your kitchen. Did you nail that height? Are the layers peeling apart exactly as you hoped?
I would be so thrilled if you would leave your thoughts below! Tell me how your first batch of buttermilk biscuits turned out. If you are particularly proud of how wonderfully fluffy biscuits recipe turned out for you, please let me know—your success stories are what keep me inspired every day.
If you snapped a picture of those gorgeous golden tops or that perfect, steamy interior, please tag me! Sharing photos on social media lets me see your beautiful work and celebrate with you. I love seeing how you serve up your buttery homemade biscuits—whether they’re drowning in gravy or sitting next to a fresh salad. Head over to the main blog page and leave a comment! I can’t wait to read your notes.
PrintTall and Flaky Southern Buttermilk Biscuits From Scratch

Learn the simple method to create tender, buttery, and tall buttermilk biscuits from scratch. This recipe delivers superior texture every time you bake.
- Prep Time: 15 min
- Cook Time: 15 min
- Total Time: 30 min
- Yield: 8 servings 1x
- Category: Breakfast
- Method: Baking
- Cuisine: American
- Diet: Vegetarian
Ingredients
- 2 cups all-purpose flour
- 1 tablespoon baking powder
- 1 teaspoon salt
- 1 teaspoon sugar
- 6 tablespoons cold unsalted butter, cut into small cubes
- 3/4 cup cold buttermilk
Instructions
- Preheat your oven to 425°F (220°C). Line a baking sheet with parchment paper.
- In a large bowl, whisk together the flour, baking powder, salt, and sugar.
- Add the cold butter cubes to the dry ingredients. Use a pastry blender or your fingertips to cut the butter into the flour until the mixture resembles coarse crumbs with some pea-sized pieces of butter remaining.
- Make a well in the center of the mixture and pour in the cold buttermilk all at once.
- Mix gently with a fork until just combined. Do not overmix; the dough will be shaggy.
- Turn the dough out onto a lightly floured surface. Gently pat the dough into a rectangle about 1 inch thick.
- Fold the dough into thirds, like a letter. Turn the dough 90 degrees and gently pat it down again to about 3/4 inch thickness. This folding creates flaky layers.
- Use a 2-inch biscuit cutter to cut out rounds. Press the cutter straight down without twisting to keep the biscuits tall. Gather and gently re-roll scraps once, if necessary.
- Place the biscuit rounds close together on the prepared baking sheet for softer sides, or spaced apart for crispier sides.
- Bake for 12 to 15 minutes, or until the tops are golden brown.
- Remove from the oven and brush the tops immediately with melted butter, if desired. Serve warm.
Notes
- Keep all ingredients, especially the butter and buttermilk, very cold for the best flaky results.
- For extra tall biscuits, chill the cut dough on the baking sheet for 10 minutes before placing it in the hot oven.
- If you do not have buttermilk, mix 3/4 cup of regular milk with 3/4 teaspoon of white vinegar or lemon juice and let it sit for 5 minutes before using.
Nutrition
- Serving Size: 1 biscuit
- Calories: 250
- Sugar: 2
- Sodium: 450
- Fat: 14
- Saturated Fat: 9
- Unsaturated Fat: 5
- Trans Fat: 0
- Carbohydrates: 28
- Fiber: 1
- Protein: 5
- Cholesterol: 35