

When a craving hits for something truly spectacular—something that screams celebration and pure indulgence—we turn to the alchemy of fusion desserts. And let me tell you, nothing marries familiar comfort with showstopping elegance quite like a perfectly executed Samoa Cheesecake. This isn’t just a dessert; it’s the glorious love child of creamy, tangy cheesecake and our favorite gooey, crunchy Girl Scout cookie. I developed this recipe blending the precision I learned in culinary school with my lifelong passion for telling beautiful stories through food. If you’re looking for an impressive centerpiece that remains surprisingly approachable for the home kitchen, trust me, this is the one you need to unfold next. For more inspiration on decadent finales like this, take a peek at all my best dessert recipes.
- Why This Baked Samoa Cheesecake is a Showstopper
- Gathering Ingredients for Your Samoa Cheesecake Recipe
- Step-by-Step Instructions for Baked Samoa Cheesecake
- Tips for Success with Your Caramel Coconut Cheesecake
- Variations on the Samoa Cheesecake Theme
- Serving Suggestions for This Decadent Cheesecake Creations
- Storage and Reheating for Your Samoa Cheesecake
- Frequently Asked Questions About Samoa Cheesecake
- Appreciating the Story Behind This Samoa Cheesecake
Why This Baked Samoa Cheesecake is a Showstopper
I know, I know, a cheesecake topped like a cookie sounds a bit over the top, right? But that’s the wonderful magic of turning a classic snack into one of my favorite Decadent Cheesecake Creations! This baked version truly sings because it layers textures that just can’t be beaten. It’s rich, but never heavy, and it delivers that intense flavor punch you crave from the cookie.
Here’s exactly what makes this recipe worth the effort. If you love deep chocolate notes, you should absolutely check out my recipe for chocolate cupcakes later, but for now, focus on this masterpiece:
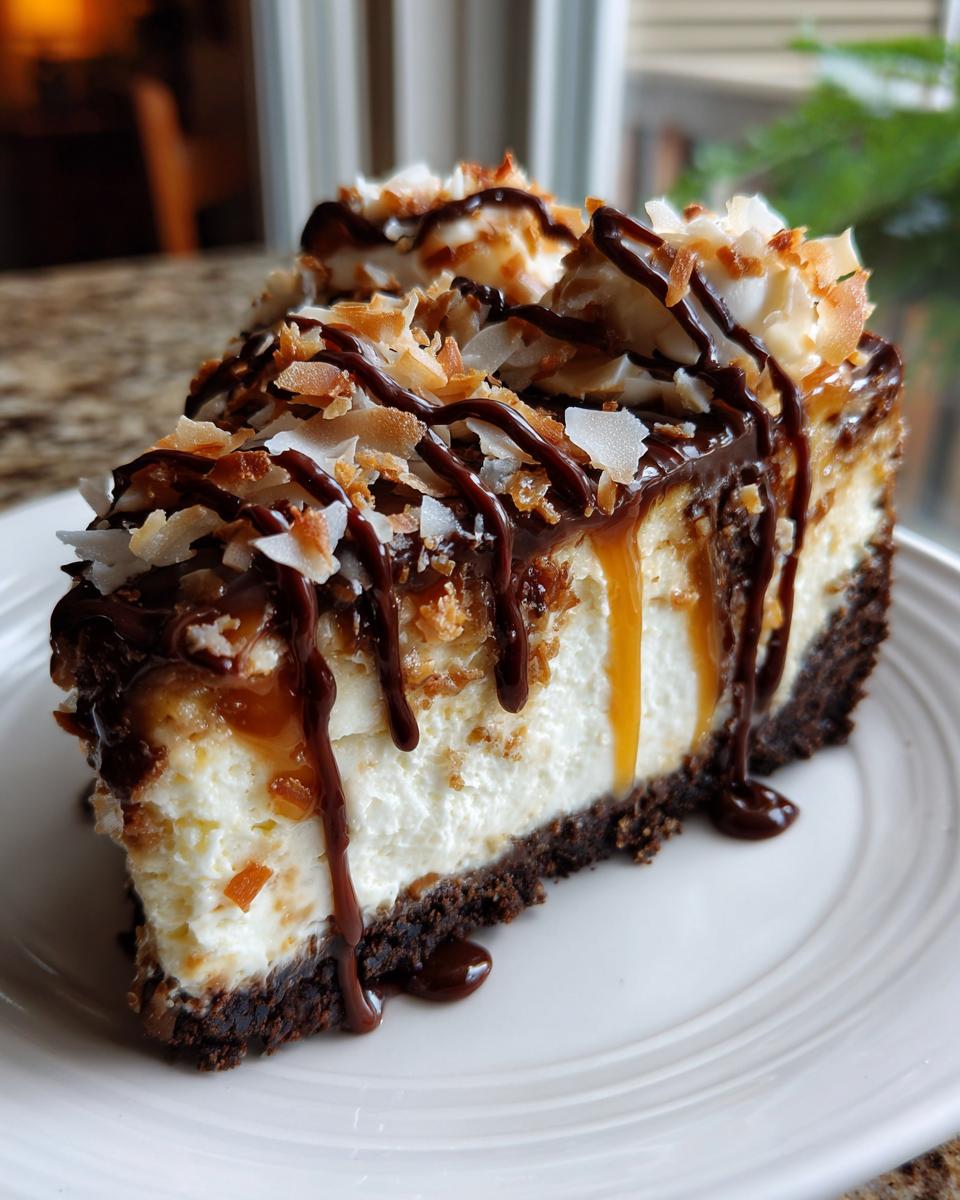
- The base is a beautifully dense, perfectly creamy texture that melts in your mouth.
- We gently fold in homemade caramel so you get those gorgeous, gooey ribbons cutting through the center.
- That topping! We toast the coconut until it’s nutty and crisp, giving the necessary crunch against the smooth filling.
- Finally, that artful chocolate drizzle brings that familiar rich finish.
Honestly, while it looks like it belongs on a professional pastry menu, the steps are straightforward. You have all the elegance without the fuss—that’s how I like to bake!
Gathering Ingredients for Your Samoa Cheesecake Recipe
Before we begin the journey of making this incredible layered treat, we need to gather our treasures. As I always say, great desserts start with trusting your raw materials. I’ve laid out every measurement in the recipe card, but thinking about the components beforehand makes the assembly smooth as silk. This entire Samoa Cookie Cheesecake Recipe hinges on having the three parts ready: the chocolate base, the creamy filling, and that glorious caramel crunch waiting on top.
Remember to check the exact details in the ingredient list, but mentally, visualize the layers—it helps! For a deeper dive into comforting baked goods, you can always browse my pumpkin and spice recipes.
Crust and Filling Components for Samoa Cheesecake
The structure of any great cheesecake relies on the filling ingredients being spot-on. This is where you cannot cut corners! For that signature lusciousness, make absolutely certain your cream cheese blocks are full-fat—none of that low-fat nonsense will give you the right density. They must be perfectly softened; you want them barely yielding to the touch. And please, use large eggs! They play a huge structural role in binding this decadent base together so it bakes up beautifully.
Crafting the Toasted Coconut Caramel Topping for Samoa Cheesecake
This is where the real cookie magic happens in our Samoa Cheesecake! We rely on the caramel sauce listed to do double duty—it goes into the swirl during baking AND it gets spread over the top later. The most important step here, which I detail later, is toasting your flaked coconut slowly and carefully. Taking the time to give the coconut a lovely golden hue elevates the entire dessert from good to unforgettable. Don’t rush the caramel—it’s the flavor glue!
Step-by-Step Instructions for Baked Samoa Cheesecake
Alright, now for the main event! This is where we bring that chocolatey crust, creamy filling, and caramel magic together to create one of those incredibly Creamy Layered Cheesecake experiences. Don’t let the list of steps intimidate you; they are just building blocks for pure deliciousness. Just follow along slowly, and trust that the gentle heat of the oven will do the heavy lifting for us. For another wonderful layered treat, see how I handle the construction of my sopapilla cheesecake bars!
Preparing the Crust and Setting Up the Water Bath for Samoa Cheesecake
First things first, grab that 9-inch springform pan and preheat your oven to 325°F (160°C). Because we are using a water bath—and I insist you use one with this recipe—we need proper protection against any seepage. Wrap the bottom and sides of that springform pan tightly, I mean really tightly, with two layers of heavy-duty aluminum foil. If water gets in, that beautiful cookie crust will turn soggy, and we simply can’t have that!
Next, mix up your chocolate wafer crumbs, that small amount of sugar, and the melted butter until it all looks like wet sand. Press this firmly into the bottom of your protected pan. We are going to give it a little head start in the oven by baking it for exactly 10 minutes. Once that’s done, pull it out, let it cool for just a moment while you start the filling, and then we move onto the batter.
Achieving the Perfect Caramel Swirl in Your Cheesecake
While the crust cools, mix up your cheesecake batter following the instructions—and here is my most important culinary trick for any cheesecake recipe: when combining the eggs, only mix until they are *just* incorporated. Seriously, stop as soon as the yellow streak disappears. Overmixing introduces too much air, and that air expands in the oven, leading to cracks later. We want smooth, dense silk, not light, airy sponge!
Now for the fun part! Pour half the batter over the cooled crust. Take half of that delicious caramel sauce we prepared and drizzle it right over that first layer. Take a knife—or even a skinny skewer if you have one—and gently drag it through the batter just once or twice to create those lovely ribbons. Don’t go crazy swirling! We want the caramel to stay mostly in pockets, not fully mixed in. Then, top with the remaining batter and repeat the gentle swirling with the rest of the caramel.

Cooling and Chilling: The Secret to a Perfect Samoa Cheesecake
This phase is non-negotiable if you want that coveted, crack-free top—a true sign of a masterful Samoa Cheesecake. Place your foil-wrapped springform pan inside a larger roasting pan. Carefully pour very hot water into the roasting pan until it comes about halfway up the sides of your cheesecake pan. This water bath ensures even, gentle baking. Bake for about 60 to 75 minutes. You’ll know it’s done when the edges are firm, but the very center still gives a slight jiggle. If you follow solid baking science like this, you’ll master everything from this cheesecake to my incredible pumpkin cheesecake.
Here’s the key: once the timer goes off, turn the oven completely off. Now, prop the oven door open slightly—a wooden spoon works perfectly—and leave the cheesecake inside for one full hour to acclimate slowly to the cooler room temperature. This slow cooling prevents that sudden temperature shock that causes cracking around the edges. Once it comes out, remove it from the water bath and let it cool fully on a rack. Then, cover it gently and chill it for a minimum of six hours, though overnight is always best for the ultimate texture.

Tips for Success with Your Caramel Coconut Cheesecake
Now that you’ve got the structure down, let’s talk about those little nuances that separate a good cheesecake from a truly spectacular one. Since I put my heart into perfecting this Caramel Coconut Cheesecake, I want to save you any potential heartache! It really all comes down to temperature and patience.
The number one thing you can do for a smooth batter—which avoids that grainy or curdled texture we all dread—is to make sure every single one of your cold ingredients has been sitting out long enough. I mean it! Your cream cheese and your three large eggs need to be fully at room temperature. Cold cream cheese lumps, and cold eggs can make the batter seize. I usually set mine out three hours before I plan to start mixing. If you forget, you can gently microwave the cream cheese in 10-second bursts, but do not let it get greasy or warm!
Let’s also talk about that star topping: the toasted coconut. This is delicate work, much like making wine reductions! You absolutely must toast the shredded coconut in a dry pan over medium-low heat, and you have to stir it constantly. The moment it starts turning a lovely light gold, take it off the heat immediately. Coconut burns faster than anything, and burnt coconut tastes bitter—it will ruin the beautiful caramel flavor we worked so hard to build. Remove it to a clean plate right away so the residual heat doesn’t cook it further while you finish the drizzle.
If you follow these little pointers—room temperature checks and watchful toasting—your final cheesecake will have that melt-in-your-mouth creaminess every time. It’s this attention to small details that makes all the difference when you are creating something truly indulgent. If you enjoy baking rich morning treats, you might also love my recipe for pumpkin coffee cake!
Variations on the Samoa Cheesecake Theme
You know, one of the most rewarding parts of becoming confident in a recipe like this Samoa Cheesecake is realizing you can start coloring outside the lines! My process is built on classic French technique, but that doesn’t mean we have to be rigid. If you adore the flavor profile—caramel, coconut, chocolate—you can really play around while still hitting those required notes for Girl Scout Cookie Inspired Desserts. It keeps the baking fun and fresh, even when you’re making a showstopper for the third time this year!
We started with a chocolate wafer crust, which is divine, but why stop there? You could swap those out entirely for a graham cracker crust mixed with just a tablespoon of finely chopped pecans before baking—it adds a lovely, slightly earthy crunch that plays beautifully against the sweetness. Or, if you want to lean harder into the chocolate, try finely grinding up about a quarter cup of those crisp chocolate wafers and adding them directly into the cheesecake filling batter right before the eggs go in. It gives the whole thing a deeper mahogany hue and a subtle, fudgy background note.
For an unexpected twist, try adding just a tiny pinch of cardamom—maybe a quarter teaspoon—to your dry ingredients before mixing. It’s a warm, almost citrusy spice that really elevates the coconut flavor without making it taste overtly spiced. It’s a secret only you and I will know!
If you are looking for other fun recipe twists along those lines, make sure you check out my post on how to make stunning candy apples!
Exploring No Bake Samoa Cheesecake Ideas
Now, I truly believe baking this version gives you the superior, creamy texture that makes a baked cheesecake so wonderful, but I totally get it—sometimes you need something fast, or maybe you just don’t want to mess with the water bath. That’s where the No Bake version comes in!
The structure changes completely, of course. Instead of that dense, tart filling, a no bake version relies on whipped cream or whipped topping folded into cream cheese and stabilized with gelatin or shortening. It’s lighter, almost mousse-like, and it sets up beautifully in the fridge. The advantage here is speed; you skip the 75 minutes of baking time and the slow cooling process completely.
For a No Bake Samoa Cheesecake Ideas application, you’d use the same chocolate crust, but you’d mix your caramel swirl right into the whipped filling, rather than layering it. Then, you top it with the toasted coconut and chocolate drizzle after it’s fully set. It’s a fantastic, slightly less rich alternative for those hot summer holiday gatherings!
Serving Suggestions for This Decadent Cheesecake Creations
Creating something as utterly gorgeous as this Samoa Cheesecake feels like an accomplishment, so you deserve to serve it with the same level of intention! This is certainly one of those show-stopping, Indulgent Sweet Treats Baking experiences meant for sharing at parties or special celebrations. Because the flavors are so rich—the dark chocolate, the gooey caramel balancing the toasted coconut—we need a pairing that cleanses the palate just a touch without overpowering the masterpiece.
When I’m setting out a dessert this luxurious, I always think in terms of texture and temperature. First, the temperature: This cheesecake must be served cold. If you let it sit out for an hour, the caramel starts to weep, and the drizzle gets too soft. Straight from the fridge, that slight chill keeps the cheesecake firm and lets that creamy base really shine against the crunch of the topping. You want that satisfying snap as you cut into it!

For simple weeknight indulgence, a strong, freshly brewed cup of black coffee is simply perfect. The bitterness of a dark roast slices right through the sweetness of the caramel wonderfully. If you’re hosting an elegant dinner and want a wine pairing, lean toward something that complements the caramel notes. I often suggest a slightly chilled late-harvest Riesling or even a tawny Port. They have that lovely oxidized, almost nutty sweetness that mirrors the toasted coconut and caramel perfectly, without being overly sugary themselves. For more ideas on pairing drinks for your gatherings, don’t forget to check out my recipe for mulled wine, which is fantastic in cooler months!
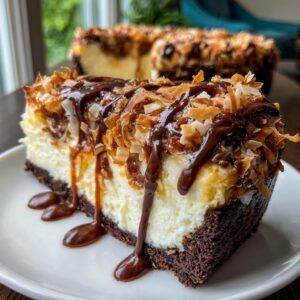
Serving it on a simple white platter really lets those colors pop—the deep chocolate crust, the pale cream, the golden coconut. A clean presentation always makes the first bite taste even better, I promise!
Storage and Reheating for Your Samoa Cheesecake
Even the most enormous, decadent cheesecake rarely lasts long in my house, but when it does, knowing how to store it correctly is crucial. We put so much effort into getting that perfect layer of toasted coconut and a distinct chocolate drizzle, so we need to protect that stunning presentation!
My firm rule for leftover Samoa Cheesecake is that it must be kept cold. Unlike a fruit pie, cheesecake does not benefit from sitting on the counter after it’s been sliced or after the toppings have been added. The texture begins to degrade rapidly once it warms up—the filling gets too soft, and the beautiful caramel layer we spread on top can start to weep or get sticky.
To properly store leftovers, the first thing you must do is slice it, if you haven’t already. Leaving a whole cheesecake whole just traps moisture. Once cut, gently cover any exposed edges of the filling with plastic wrap, making sure the wrap doesn’t touch the exposed topping, especially the chocolate.
For the best results, especially if you have a lot of topping, I recommend transferring the slices to an airtight container. If you stacked your slices, use a piece of wax or parchment paper between each layer of cheesecake to prevent the chocolate drizzle and sticky caramel from smearing onto the coconut or blending into the next slice. This minor step saves the aesthetic integrity of your beautiful dessert!
This cheesecake keeps beautifully in the refrigerator for up to four or five days. Honestly, it tastes almost better the day after, as the flavors have time to really marry. If, by some miracle, you have leftovers extending past five days, you can freeze it! Wrap individual slices very tightly in plastic wrap, followed by a layer of foil, and freeze flat. When you want to enjoy it, thaw it overnight in the refrigerator—no reheating is necessary or recommended for cheesecake! We want that cool, creamy mouthfeel every time. If you’re looking for other delicious make-ahead treats, check out my no-bake cookie recipe; those are perfect for emergency sweet fixes!
Frequently Asked Questions About Samoa Cheesecake
I always love hearing what questions pop up when you dive into a recipe like this—especially one that has so many distinct layers! Cheesecake making, while rewarding, can introduce a few hurdles, so let’s chat through some of the things I hear most often regarding this glorious Samoa Cheesecake. If you have more specific questions I haven’t covered here, please feel free to reach out on my contact page!
Can I skip the water bath when making this Samoa Cheesecake?
Oh, I wish I could tell you ‘yes’ because I know that water bath setup can feel like an annoying extra step! But honestly, for this particular recipe and for achieving that luxurious, ultra-smooth texture that lands it in the category of the Best Cheesecake Recipes for Parties flavor-wise, you really shouldn’t skip it. Think of the water bath as insurance. It creates a steamy, humid environment around the pan, which cooks the eggs in the filling very gently and evenly. If you bake it dry, the outside edges cook much faster than the center, leading to dry, grainy edges or an inevitable crack across the top when it cools. If you skip it, you risk getting weeping or just a less creamy final product. It’s worth the extra foil wrapping, I promise!
What is the best way to make the chocolate drizzle for the Samoa Cheesecake?
The magic behind a professional-looking drizzle that sets up nicely when cold, rather than staying gooey and messy, is all about adding a little fat. If you just melt your chocolate chips straight, they can seize up or be far too thick to drizzle elegantly. For the best possible Chocolate Drizzle Cheesecake finish, you need to mix your melted chips with a little bit of coconut oil—I use two tablespoons as noted in the recipe. The coconut oil does two wonderful things: it makes the chocolate wonderfully glossy, and it lowers the melting point just enough so that when it hits the cold cheesecake, it firms up beautifully but remains slightly fudgy, not rock hard. Melt it gently in short bursts so you don’t burn the chocolate!
Appreciating the Story Behind This Samoa Cheesecake
As we finish this incredible recipe, I hope you feel that familiar warmth I always get when I pull a dessert like this from my oven. Creating this Samoa Cheesecake is more than just following measurements; it’s about gathering those textures and flavors that instantly transport you to a happy memory—maybe it’s a childhood gathering or just the simple joy of treating yourself after a long week. That’s the whole heart of Unfold Recipes: turning ingredients into moments.
This dessert is truly a testament to how inspiration, whether from a classic cookie or a family tradition, can evolve into something truly special and elegant. I’ve poured hours into testing the perfect water bath technique and finding that ideal caramel swirl so you don’t have to guess!
I truly hope this creation finds its way onto your table for a special occasion, or maybe just a Tuesday night when you deserve something magnificent. If you whip this up, please come back and leave a note in the comments below so I know how it went! Your feedback helps our community grow and helps me continue developing recipes I know you’ll trust. I’m so glad we got to share this baking journey together. To learn more about my culinary philosophy, you can always read more on my About page.
PrintDecadent Baked Samoa Cheesecake with Caramel Swirls
Create a showstopper dessert that captures the essence of the classic Girl Scout Samoa cookie. This recipe features a buttery crust, creamy cheesecake filling, homemade caramel swirls, toasted coconut, and a rich chocolate drizzle.
- Prep Time: 30 min
- Cook Time: 75 min
- Total Time: 9 hours 45 min
- Yield: 12 servings 1x
- Category: Dessert
- Method: Baking
- Cuisine: American
- Diet: Vegetarian
Ingredients
- 1 3/4 cups chocolate wafer cookie crumbs (about 30 cookies)
- 1/4 cup granulated sugar
- 6 tablespoons unsalted butter, melted
- 3 (8 ounce) packages cream cheese, softened
- 1 1/2 cups granulated sugar
- 1 teaspoon vanilla extract
- 1/4 teaspoon salt
- 3 large eggs
- 1 cup sweetened condensed milk
- 1/2 cup caramel sauce, plus extra for topping
- 1 cup sweetened flaked coconut, toasted
- 1/2 cup semi-sweet chocolate chips
- 2 tablespoons coconut oil
Instructions
- Preheat your oven to 325°F (160°C). Wrap the outside of a 9-inch springform pan tightly with heavy-duty aluminum foil.
- Prepare the crust: Mix the chocolate wafer crumbs, 1/4 cup sugar, and melted butter until evenly moistened. Press the mixture firmly into the bottom of the prepared springform pan. Bake for 10 minutes. Let cool slightly.
- Prepare the cheesecake batter: In a large bowl, beat the softened cream cheese with 1 1/2 cups sugar, vanilla extract, and salt until smooth. Beat in the eggs one at a time, mixing just until combined after each addition. Do not overmix.
- Pour half of the cheesecake batter over the cooled crust. Drizzle half of the 1/2 cup caramel sauce over the batter. Gently swirl the caramel into the batter using a knife or skewer.
- Pour the remaining cheesecake batter over the first layer. Drizzle the remaining caramel sauce on top and swirl gently.
- Bake the cheesecake in a water bath: Place the foil-wrapped springform pan into a larger roasting pan. Carefully pour hot water into the roasting pan until it reaches halfway up the sides of the springform pan.
- Bake for 60 to 75 minutes, or until the edges are set and the center has a slight jiggle.
- Turn off the oven and let the cheesecake cool in the oven with the door ajar for 1 hour. Remove from the water bath and cool completely on a wire rack. Chill in the refrigerator for at least 6 hours, or preferably overnight.
- Prepare the topping: Toast the coconut in a dry skillet over medium heat until golden brown, watching carefully to prevent burning. Set aside.
- Make the chocolate drizzle: Melt the chocolate chips and coconut oil together in a microwave-safe bowl in 30-second intervals, stirring until smooth.
- To serve, carefully remove the cheesecake from the springform pan. Spread the remaining caramel sauce over the top. Sprinkle generously with toasted coconut. Drizzle the melted chocolate mixture over the top in a decorative pattern. Slice and serve cold.
Notes
- Toasting coconut evenly requires constant stirring over medium-low heat. Remove it from the heat immediately once it reaches your desired color.
- For the creamiest texture, bring your cream cheese and eggs to room temperature before starting the recipe.
- If you prefer a simpler topping, you can use store-bought caramel sauce instead of making a homemade swirl.
Nutrition
- Serving Size: 1 slice
- Calories: 550
- Sugar: 55g
- Sodium: 350mg
- Fat: 35g
- Saturated Fat: 20g
- Unsaturated Fat: 15g
- Trans Fat: 0.5g
- Carbohydrates: 58g
- Fiber: 2g
- Protein: 9g
- Cholesterol: 95mg