

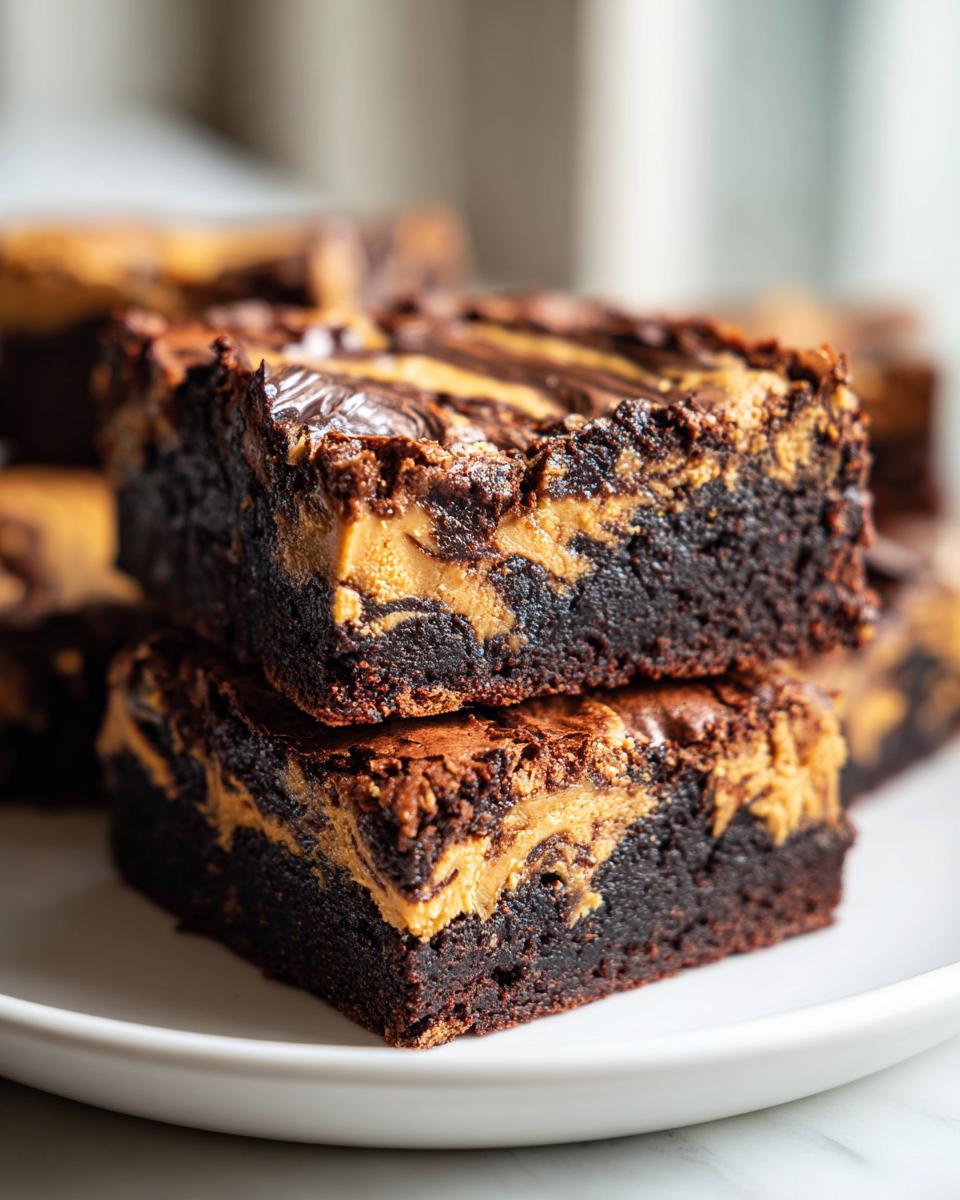
When you really need that perfect, indulgent comfort food moment, nothing quite hits the spot like the pairing of deep, dark chocolate and creamy peanut butter. I’m Catherine, and here in my kitchen, we believe every dish should tell a story—and these peanut butter swirl brownies are shouting a tale of decadent satisfaction right now! This recipe, my Ultra Fudgy Peanut Butter Swirl Brownies with Perfect Glossy Crust, delivers that dreamy, bakery-style slice you thought only professionals could achieve. Forget dry, cakey squares; we are aiming for gooey and rich, using ingredients you likely already have in your pantry. I spent weeks testing the ratios so you don’t have to fuss, making sure these come together beautifully for your next sweet craving. For more beautiful baked items, feel free to browse my collection of dessert recipes.
- Why This Recipe for peanut butter swirl brownies is Your New Favorite
- Gathering Ingredients for Decadent Chocolate Peanut Butter Swirl Bars
- Step-by-Step Instructions for Perfect peanut butter swirl brownies
- Tips for Success with your homemade brownies recipe
- Variations for peanut butter swirl brownies
- Storage and Reheating peanut butter swirl brownies
- Frequently Asked Questions about peanut butter swirl brownies
- Nutritional Estimates for these Decadent Chocolate Peanut Butter Swirl Bars
- Share Your Story of Making peanut butter swirl brownies
Why This Recipe for peanut butter swirl brownies is Your New Favorite
I know you’ve made brownies before, but I promise you, these are different. This recipe is all about hitting every single desirable texture note people look for in a homemade treat. I tested this batch after batch, specifically tweaking the fat and sugar until I got those results I was chasing.
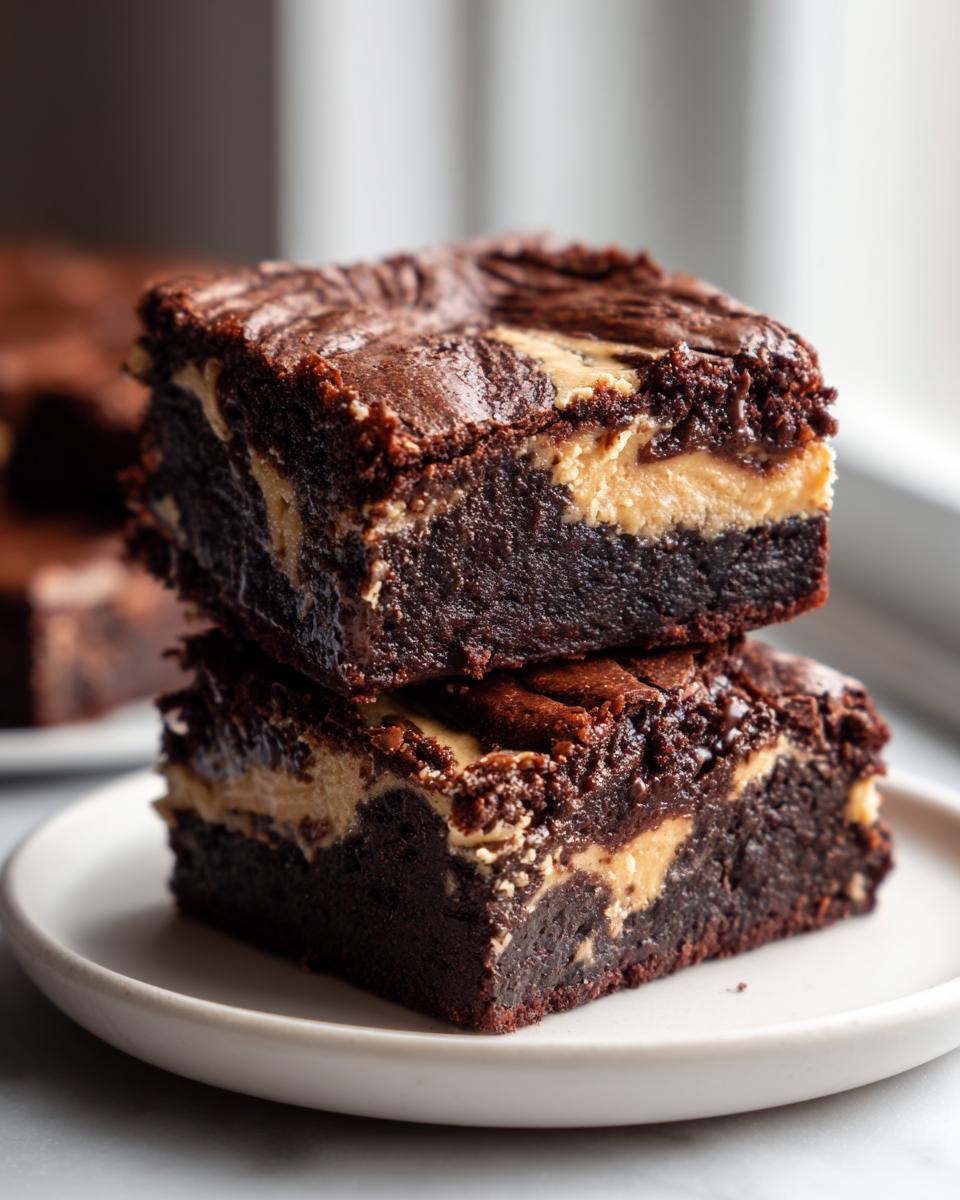
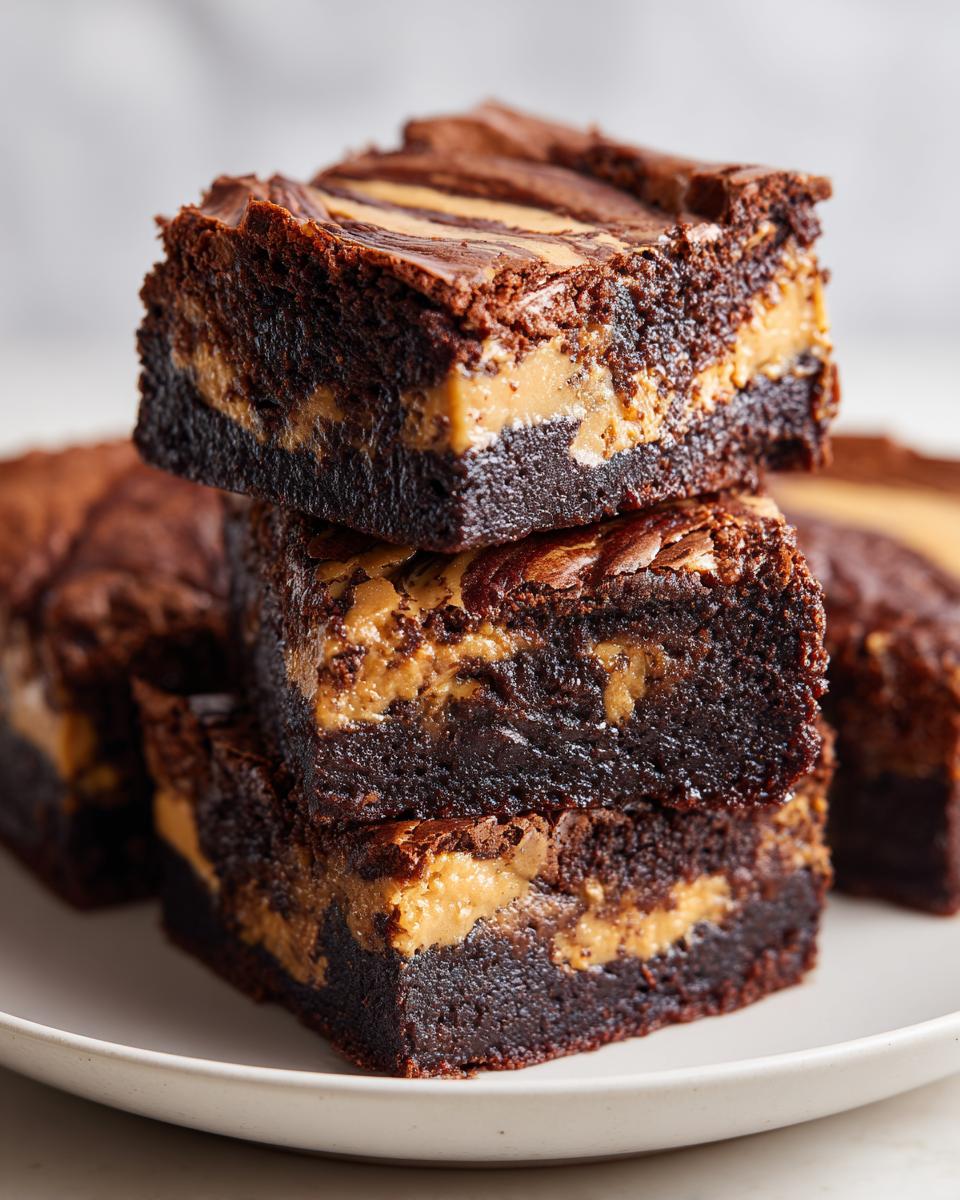
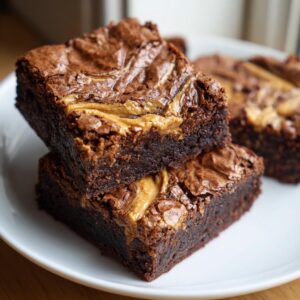
- They have that coveted thick, decadent chocolate base.
- The preparation honestly comes together so quickly—you’ll be slicing them before you realize it’s only been about 45 minutes total!
- The swirls are prominent, creamy, and perfectly cut through the richness.
Achieving the Ultimate Fudgy Texture
The fudgy magic happens because we keep the flour content low and resist the urge to whip air into the batter after adding the cocoa. That means minimal gluten development! If you want those truly incredible, rich, and gooey chocolate treats, you have to stop mixing as soon as the streaks disappear. Trust me on this one!
The Perfect Glossy Crust on Your peanut butter swirl brownies
That shiny, crinkly top? That’s not luck; that’s science! It comes directly from how we handle the sugar and the melted butter right at the start. By whisking the sugar into that warm butter properly, you create the perfect surface layer as the brownies bake. It’s beautiful, slightly crackled, and the sign of a truly bakery style brownie.
Gathering Ingredients for Decadent Chocolate Peanut Butter Swirl Bars
When I set out to develop this recipe, I wanted to prove that the best desserts don’t require specialty trips to the store. These peanut butter swirl brownies use ingredients I always keep tucked away. Getting the right balance of that deep chocolate flavor and the creamy peanut butter ribbons depends entirely on using clear measurements, so always measure your flour and cocoa precisely. We’re aiming for rich, foolproof results here!
Ingredients for the Fudgy Brownie Base
For the dark, fudgy bottom layer—the main event, really—we rely on simple pantry workhorses. You’ll need about half a cup of unsalted butter, which we’ll melt down first. We use a full cup of granulated sugar to help create that glossy top later on. Make sure you have two large eggs ready, as they are crucial for structure and richness. Then, grab your 1/3 cup (40g) unsweetened cocoa powder to hit that deep chocolate flavor, paired with just 1/2 cup (65g) of all-purpose flour, salt, and baking powder.
Ingredients for the Creamy Peanut Butter Swirl
This part is blissfully easy! You only need about 1/2 cup (120g) of creamy peanut butter. I specifically call for creamy because we want those smooth, luscious ribbons once we swirl it in. If you use crunchy, the pockets won’t mix as cleanly through the thick batter. That’s all there is to creating that beautiful contrast!
Step-by-Step Instructions for Perfect peanut butter swirl brownies
Now for the fun part! Creating these chocolate peanut butter swirl bars is so straightforward, but we need to respect the ingredients to guarantee that fudgy outcome. Remember, we are building dense, decadent layers here, not a light cake. We want rich textures that melt in your mouth. I’ve found that once you get the mixing timing down, these come together in a flash, especially since they come together quickly like many of my other favorite bars.
Preparing the Pan and Chocolate Batter
First thing first: Preheat your oven to 350°F (175°C). To make clean-up a dream, line an 8×8 inch pan with parchment paper, making sure you leave an overhang on two sides. That overhang is your handle later! Melt the butter gently, then whisk in the sugar until it looks smooth. Add your eggs one by one, followed by the vanilla. In a separate dish, whisk your flour, cocoa, salt, and baking powder. Now, here’s my crucial tip: Add the dry stuff gradually, mixing only until you see no white streaks left. Stop stirring immediately! Overmixing is the enemy of the fudgy brownie.
Creating the Creamy Peanut Butter Swirl and Baking
Pour half of that thick chocolate batter into your ready pan and spread it flat. Next, we drop spoonfuls of the 1/2 cup peanut butter over that first layer. Then, carefully pour the remaining chocolate batter right on top of the peanut butter layer. Don’t panic about covering it completely—the magic happens when you take a knife or a skewer and use sweeping motions to gently pull the peanut butter through the chocolate. Don’t agitate it too much; we want ribbons, not a muddy mess! Bake for 25 to 30 minutes. When you test it, you want moist crumbs clinging to the toothpick, not wet batter. You can check out the original instructions I followed when developing the swirl over at Flavourific for more confirmation.
Tips for Success with your homemade brownies recipe
Baking these fudgy brownies is nearly foolproof, but a few small habits can take them from great to absolutely unforgettable. My biggest piece of advice, which took me years to truly accept, is patience with the cooling process. Yes, that warm, gooey chocolate treat looks irresistible when it comes out of the oven, but you absolutely must let them cool!
Cutting them warm is guaranteed to result in a sticky, uneven mess. When they cool completely in the pan, those fats firm up just enough to let the structure set, giving you those clean, sharp edges of a phenomenal homemade brownies recipe. If you’re struggling with that glossy top, remember that crisping happens as they cool down, slowly achieving that gorgeous, crackled look we love. If you found these tips helpful for achieving rich results, you might enjoy my methods for perfect chocolate cupcakes too!
Variations for peanut butter swirl brownies
Once you master the core recipe for these peanut butter swirl brownies, you can absolutely start playing around. That fudgy chocolate base is so sturdy, it handles mix-ins beautifully! If you want a little extra texture in every bite of your swirled dessert bars, I highly recommend folding in about a half cup of semi-sweet chocolate chips into the batter right before layering. That just amps up the decadence, naturally.

Also, consider swapping the creamy peanut butter for crunchy peanut butter if you prefer something less smooth, though you might need to swirl it a bit more gently to maintain those distinct ribbons. We are really elevating the concept of standard brownies with mix ins here!
If you needed more inspiration for adding fun touches to your baking, check out my guide on how to make spider web brownies for a beautiful presentation.
Storage and Reheating peanut butter swirl brownies
These fudgy brownies actually get even better the next day once the chocolate has fully set up around those peanut butter pockets. It’s tough to wait, I know, but it’s worth it for the ultimate texture!
To keep them tasting bakery-fresh, just wrap the squares tightly in plastic wrap or place them in an airtight container right on the counter. They keep beautifully at room temperature for about four days. If you really must reheat one (maybe for a molten moment?), just pop it in the microwave for about 10 seconds. It brings that gooey texture right back. For other long-lasting favorites, take a peek at my no-bake cookies recipe!
Frequently Asked Questions about peanut butter swirl brownies
It’s lovely that so many of you are diving into this recipe! Sometimes questions pop up when you’re working with contrasting textures like the fudge and the swirl. I’ve gathered the most common things I hear after people bake these incredible peanut butter swirl brownies. I always try to bake with everyone in mind, so asking these questions just shows you’re aiming for that perfect result. Head over to my main blog page if you want to see what else I’ve been working on lately!
Can I make these peanut butter swirl brownies gluten-free?
Yes, you absolutely can! During my testing phase, I successfully made these with a high-quality 1:1 gluten-free baking blend. Since the chocolate structure relies so much on the fat ratio, swapping the flour works perfectly, giving you stellar fudgy brownies every time.
How do I get the thick chocolate batter described in this recipe?
That thickness is key to achieving those beautiful, defined ribbons in your creamy peanut butter dessert! You get it by keeping the flour content lower than average and ensuring you don’t add too much liquid. Also, don’t try to smooth out the batter completely—it should be dense and almost scoopable before you layer the peanut butter on top for those bakery style brownies.
Nutritional Estimates for these Decadent Chocolate Peanut Butter Swirl Bars
Now, let’s talk numbers, though honestly, these are best enjoyed without thinking too hard about them! Because these are so incredibly rich, they are definitely a treat. Based on the ingredients listed, each square of these decadent chocolate peanut butter bars comes out to roughly 350 calories. You’re looking at about 22g of fat and 35g of carbohydrates per serving.
Just remember, since this recipe is rigorously tested in my kitchen and not in a clinical lab, these figures are just an estimate to guide you. I always prefer to focus on the joy these homemade chocolate swirl treats bring to the table!
Share Your Story of Making peanut butter swirl brownies
I truly hope you loved creating these incredible peanut butter swirl brownies as much as I love sharing them with you. Food is about connection, and your own experience matters to me! If you made these luscious swirled dessert bars, please take a moment to leave a rating right below the recipe card.
And tell me—did you get that perfect glossy crust? Did the chocolate and peanut butter balance exactly how you hoped? I’d genuinely love to hear your thoughts in the comments, or you can always drop me a line directly through my contact page. Happy baking!
PrintUltra Fudgy Peanut Butter Swirl Brownies with Perfect Glossy Crust
Make rich, fudgy brownies with creamy peanut butter ribbons. This recipe uses simple pantry ingredients to create decadent, bakery-style chocolate peanut butter swirl bars.
- Prep Time: 15 min
- Cook Time: 30 min
- Total Time: 45 min
- Yield: 9 servings 1x
- Category: Dessert
- Method: Baking
- Cuisine: American
- Diet: Vegetarian
Ingredients
- 1/2 cup (115g) unsalted butter
- 1 cup (200g) granulated sugar
- 2 large eggs
- 1 teaspoon vanilla extract
- 1/3 cup (40g) unsweetened cocoa powder
- 1/2 cup (65g) all-purpose flour
- 1/4 teaspoon salt
- 1/4 teaspoon baking powder
- 1/2 cup (120g) creamy peanut butter
Instructions
- Preheat your oven to 350°F (175°C). Line an 8×8 inch baking pan with parchment paper, leaving an overhang for easy removal.
- Melt the butter in a saucepan over low heat. Remove from heat and whisk in the granulated sugar until combined.
- Whisk in the eggs one at a time until the mixture is smooth. Stir in the vanilla extract.
- In a separate bowl, whisk together the cocoa powder, flour, salt, and baking powder.
- Gradually add the dry ingredients to the wet ingredients, mixing only until just combined. Do not overmix to keep the brownies fudgy.
- Pour half of the thick chocolate batter into the prepared pan and spread evenly.
- Drop spoonfuls of the creamy peanut butter over the batter.
- Pour the remaining chocolate batter over the peanut butter layer.
- Use a knife or skewer to gently swirl the peanut butter into the chocolate batter to create ribbons. Do not over-swirl.
- Bake for 25 to 30 minutes. The edges should look set, and a toothpick inserted near the center should come out with moist crumbs attached, not wet batter.
- Let the brownies cool completely in the pan before lifting them out using the parchment overhang. Cut into squares.
Notes
- For an ultra-fudgy texture, slightly underbake the brownies. They will firm up as they cool.
- If you want a more pronounced swirl, use slightly softened peanut butter.
- This recipe creates a naturally glossy, crackled top when you mix the sugar and melted butter correctly.
Nutrition
- Serving Size: 1 brownie square
- Calories: 350
- Sugar: 30
- Sodium: 150
- Fat: 22
- Saturated Fat: 9
- Unsaturated Fat: 13
- Trans Fat: 0
- Carbohydrates: 35
- Fiber: 2
- Protein: 6
- Cholesterol: 60